
1. Introduction
This manual provides essential information for the safe operation, assembly, maintenance, and troubleshooting of your PowerSmart 24-inch 80V Self-Propelled 2-Stage Cordless Snow Blower, Model HB2805. Please read and understand all instructions before operating the machine to ensure safe and efficient use.
This product is designed for clearing snow from paved and unpaved surfaces. It is a bare tool and requires a compatible PowerSmart 80V 6.0AH battery and charger, which are sold separately.
2. Safety Information
WARNING: Always exercise extreme caution when operating heavy machinery. Failure to follow safety instructions can result in serious injury or property damage.
- Keep hands and feet clear of all moving parts, especially the auger. Never touch the auger during operation or while the machine is powered on.
- Wear appropriate personal protective equipment (PPE), including safety glasses, hearing protection, and sturdy footwear.
- Ensure the work area is clear of debris, rocks, and other objects that could be thrown by the snow blower.
- Operate the snow blower only in daylight or good artificial light. The integrated LED headlights are for improved visibility during low-light conditions.
- Never allow children or untrained individuals to operate the snow blower.
- Before performing any maintenance, adjustments, or clearing clogs, always remove the battery pack from the snow blower.
- Store the battery in a cool, dry place, away from direct sunlight and extreme temperatures.
- Do not operate the snow blower on steep slopes. Exercise caution on moderate slopes.
3. Product Overview
Familiarize yourself with the components of your PowerSmart snow blower before operation.

Figure 3.1: Control Panel Layout
This image displays the top view of the snow blower's control panel, highlighting key operational components such as the Battery Indicator, Fault Indication, Speed Control Lever, Start Switch, LED Light Switch, Chute Steering Control Lever, Chute Deflector Control Lever, Auger Control Trigger, and Drive Control Trigger.
- Battery Indicator: Shows the current charge level of the installed battery.
- Fault Indication: Illuminates to indicate a system error or malfunction.
- Speed Control Lever: Adjusts the self-propelled speed of the snow blower.
- Start Switch: Engages the motor to begin operation.
- LED Light Switch: Turns the integrated LED headlights on or off.
- Chute Steering Control Lever: Adjusts the direction of snow discharge (180-degree rotation).
- Chute Deflector Control Lever: Adjusts the height and distance of snow discharge.
- Auger Control Trigger: Engages the auger to clear snow.
- Drive Control Trigger: Engages the self-propelled drive system.
4. Specifications
| Feature | Specification |
|---|---|
| Brand | PowerSmart |
| Model Number | HB2805 |
| Power Source | Battery Powered (80V) |
| Clearing Width | 24 Inches |
| Ideal Snow Depth | Up to 12 Inches |
| Max Snow Throwing Distance | 45 Feet |
| Engine Type | Brushless Motor |
| Wheel Size | 13 Inches |
| Features | Self-Propelled, 2-Stage Anti-Clogging System, LED Headlights, Variable Speed |

Figure 4.1: Product Dimensions
This image illustrates the key dimensions of the PowerSmart HB2805 snow blower, including height (43.7 inches), length (42.1 inches), and clearing width (24.2 inches).
5. Setup
5.1 Unpacking and Initial Assembly
Your PowerSmart snow blower is designed for quick assembly. Carefully remove all components from the packaging. Refer to the included assembly guide for detailed steps. Ensure all fasteners are securely tightened before use.
5.2 Battery Installation
This snow blower is sold as a bare tool. An 80V 6.0AH PowerSmart battery and charger are required and sold separately. Ensure the battery is fully charged before first use.
- Open the battery compartment cover, typically located on the top or side of the main housing.
- Align the fully charged 80V PowerSmart battery with the battery slot.
- Push the battery firmly into the slot until it clicks into place. Ensure it is seated securely.
- Close the battery compartment cover.

Figure 5.1: Snow Blower (Machine Only)
This image shows the PowerSmart HB2805 snow blower as a standalone unit, emphasizing that batteries and chargers are not included and must be acquired separately.
6. Operating Instructions
6.1 Starting the Snow Blower
- Ensure the battery is fully charged and correctly installed.
- Press the main Start Switch on the control panel. The battery indicator lights should illuminate.
- To engage the auger, squeeze and hold the Auger Control Trigger.
- To engage the self-propelled drive, squeeze and hold the Drive Control Trigger.
6.2 Clearing Snow
The snow blower has a 24-inch clearing width and can handle ideal snow depths of up to 12 inches. It can throw snow up to 45 feet.

Figure 6.1: Clearing Width and Depth
This image shows the snow blower in operation, illustrating its 24-inch clearing width and ability to handle up to 10 inches of snow depth effectively.

Figure 6.2: Maximum Throwing Distance
This image demonstrates the snow blower's capability to throw snow a maximum distance of 45 feet, clearing paths efficiently.
6.3 Self-Propelled Drive
The self-propelled feature allows for easy maneuvering. Use the Speed Control Lever to adjust the forward or reverse speed. The drive control trigger engages the wheels, reducing physical effort during operation.
6.4 Chute Adjustment
The snow discharge chute can rotate 180 degrees. Use the Chute Steering Control Lever to direct the snow away from cleared areas or obstacles. The Chute Deflector Control Lever adjusts the angle of the deflector, controlling the height and distance of the snow throw.

Figure 6.3: 180-Degree Rotating Chute
This image highlights the snow blower's chute, capable of rotating 180 degrees to allow precise control over snow discharge direction.
6.5 LED Headlights
For early morning or nighttime operation, activate the integrated LED headlights using the LED Light Switch on the control panel. This improves visibility and safety in low-light conditions.

Figure 6.4: LED Headlight Feature
A close-up image showing the bright LED headlight integrated into the snow blower's control panel, designed for improved visibility during operation in low-light conditions.
7. Maintenance
Regular maintenance ensures the longevity and optimal performance of your snow blower. Always disconnect the battery before performing any maintenance.
- Cleaning: After each use, clear any snow, ice, or debris from the auger housing, chute, and exterior surfaces. Use a non-abrasive cloth.
- Auger Inspection: Periodically inspect the heavy-duty steel auger and composite construction for wear or damage. The 2-stage anti-clogging system is designed for durability, but regular checks are recommended.
- Fasteners: Check all nuts, bolts, and screws for tightness. Tighten as necessary.
- Storage: When not in use, store the snow blower in a clean, dry area. Remove the battery pack for long-term storage and store it separately in a cool, dry place.
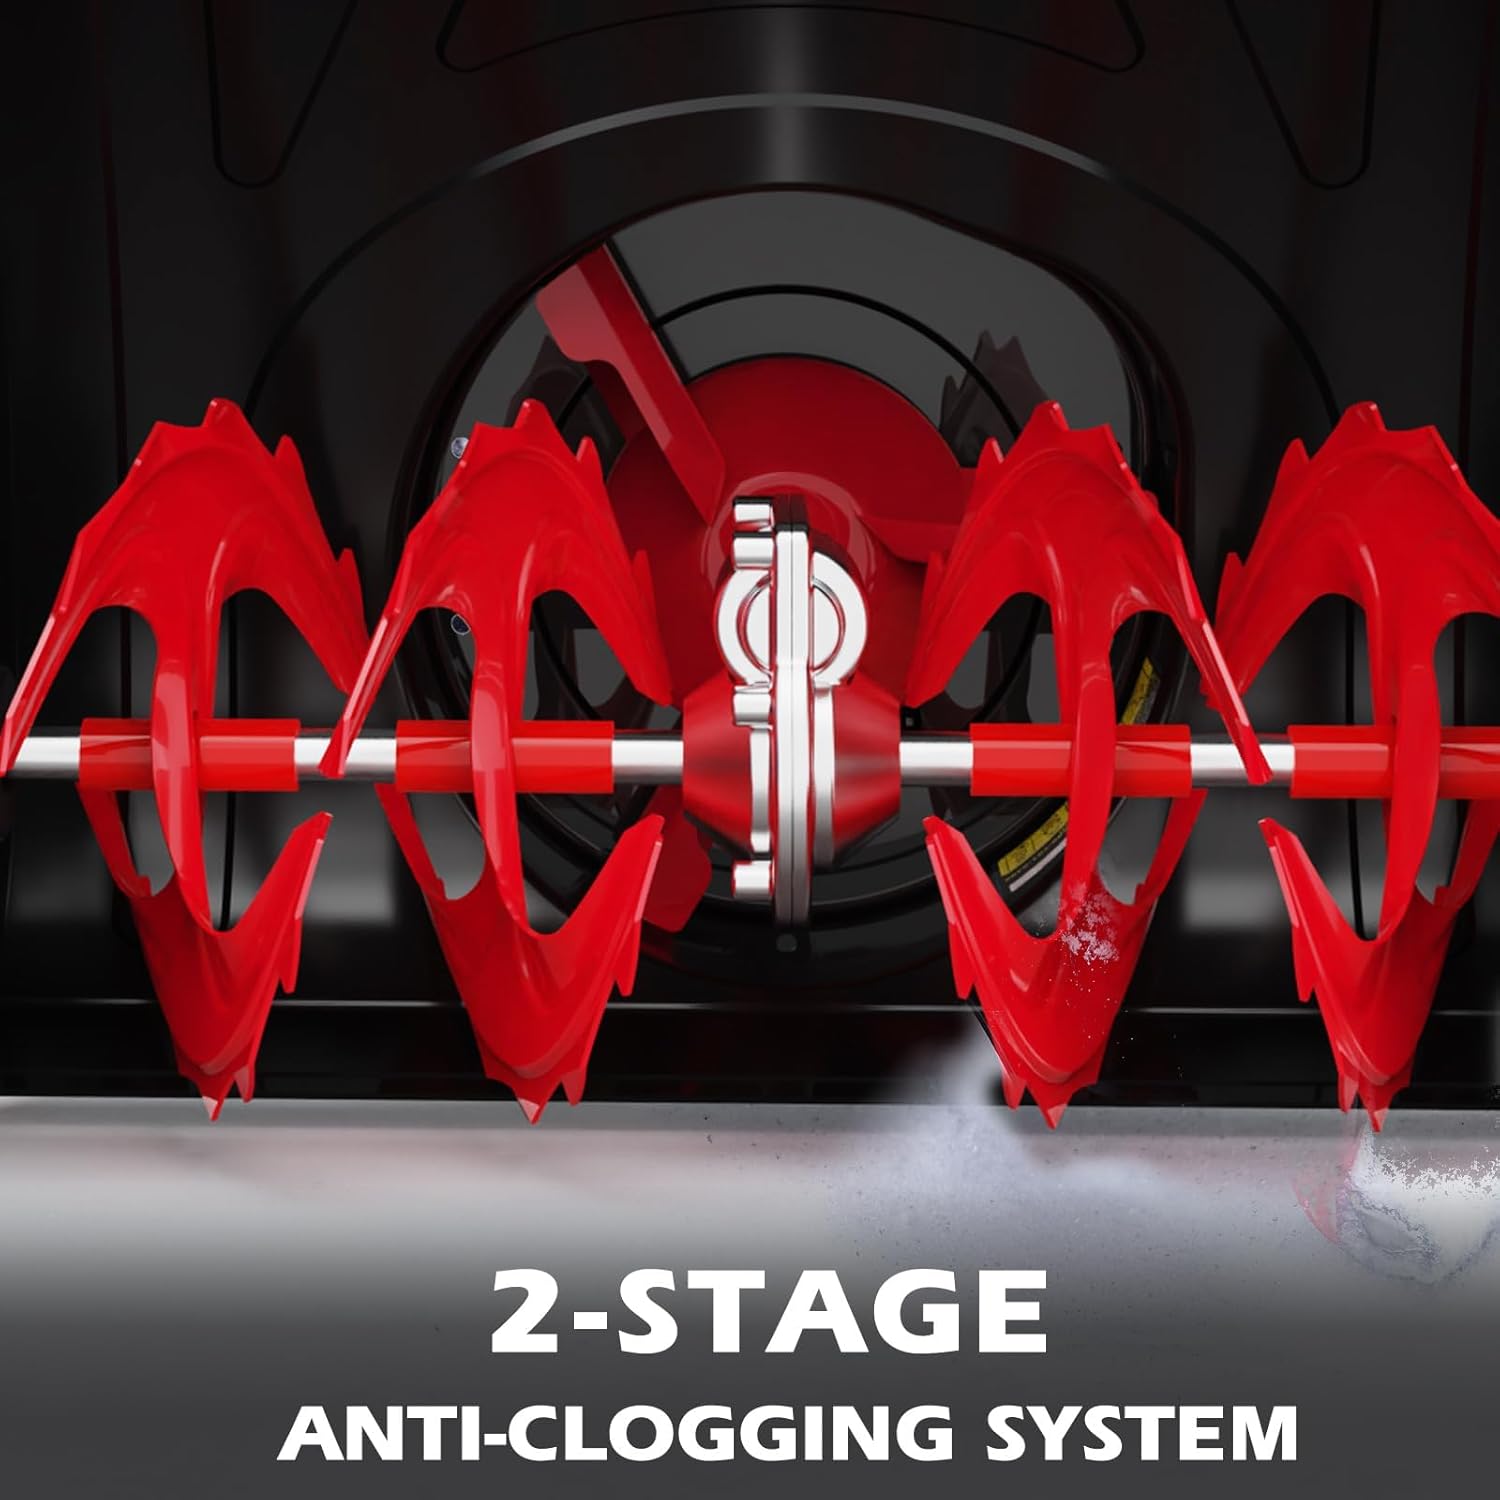
Figure 7.1: 2-Stage Anti-Clogging System
A detailed view of the heavy-duty steel auger and composite construction, which forms the 2-stage anti-clogging system designed to efficiently cut through tough icy snow.
8. Troubleshooting
If you encounter issues with your snow blower, refer to the following common problems and solutions. Always ensure the battery is removed before inspecting the machine.
| Problem | Possible Cause | Solution |
|---|---|---|
| Snow blower does not start. | Battery not installed correctly or discharged. Fault indication light is on. | Ensure battery is fully charged and properly seated. Check for any fault codes or consult the full manual for specific fault indications. |
| Auger does not rotate. | Auger control trigger not engaged. Obstruction in auger housing. | Ensure the auger control trigger is fully squeezed. Remove battery, then carefully inspect and clear any obstructions from the auger. |
| Snow discharge is weak or clogged. | Wet, heavy snow. Obstruction in the chute. | Clear snow at a slower pace. Remove battery, then clear any clogs from the chute or auger housing using a clearing tool (never hands). |
| Self-propelled drive not working. | Drive control trigger not engaged. Speed control lever set to neutral or minimum. | Ensure the drive control trigger is fully squeezed. Adjust the speed control lever to a desired speed setting. |
9. Warranty and Support
For warranty information, technical support, or to order replacement parts, please refer to the warranty card included with your product or visit the official PowerSmart website. Keep your purchase receipt as proof of purchase for warranty claims.
Manufacturer: Amerisun Inc.


