1. Important Safety Information
Please read all instructions carefully before using the appliance. Retain this manual for future reference.
- This appliance is for indoor use only.
- Do not operate the dispenser with a damaged cord or plug.
- Ensure the dispenser is placed on a level, stable surface.
- Keep the dispenser away from direct sunlight and heat sources.
- Do not immerse the dispenser, cord, or plug in water or other liquids.
- Unplug the dispenser before cleaning or performing any maintenance.
- Children should be supervised to ensure they do not play with the appliance.
- Hot Water Safety: The hot water temperature exceeds 90℃ (194℉). Exercise extreme caution when dispensing hot water to prevent burns.
- The dispenser is equipped with over-temperature protection, overload protection, and anti-dry burn protection. The thermostat will automatically disconnect if water temperature is too high or too low.

Image: Safety features of the water dispenser, including dry burning, overload, over-temperature protection, and automatic disconnection.
2. Product Features
The KWCWB Bottom Loading Water Cooler Dispenser is designed for convenient access to hot and cold water.
- Durable Construction: Features a PP shell and 304 stainless steel inner liner with electrostatic spraying to resist rusting, deformation, and corrosion.
- Efficient Heating & Cooling: 450W heating power provides hot water above 90℃ (194℉). 70W cooling power provides cold water between 13-15℃ (55.4-59℉).
- Bottom Loading Design: Accommodates 5-gallon (20L/5.28Gal) water bottles in a spacious interior (21.26×11.02×11.81 inches), eliminating heavy lifting.
- User-Friendly Operation: One-touch water outlet design for ease of use.
- Indicator Lights: Clearly display power, heating, cooling, and water shortage status.
- Removable Drip Tray: For easy cleaning and maintenance.

Image: Illustration of the dispenser's efficient heating and cooling capabilities, showing temperature ranges and power consumption.

Image: Detailed view of the dispenser's design elements, including heat emission holes, the detachable drip tray, and the drain plug.
3. Setup Instructions
- Unpacking: Carefully remove the dispenser from its packaging. Inspect for any damage.
- Placement: Place the dispenser on a firm, level surface. Ensure there is adequate space around the unit for ventilation (at least 4 inches from walls). Avoid placing it near direct sunlight or heat sources.
- Initial Cleaning: Before first use, clean the water reservoir and lines. Dispense several cups of water from both hot and cold taps to flush the system.
- Install Water Bottle: Open the lower cabinet door. Place a 5-gallon water bottle into the cabinet. Insert the water pump tube into the bottle opening. Close the cabinet door securely.

Image: Demonstrates the bottom-loading feature, showing a 5-gallon water bottle being placed into the dispenser's lower compartment.
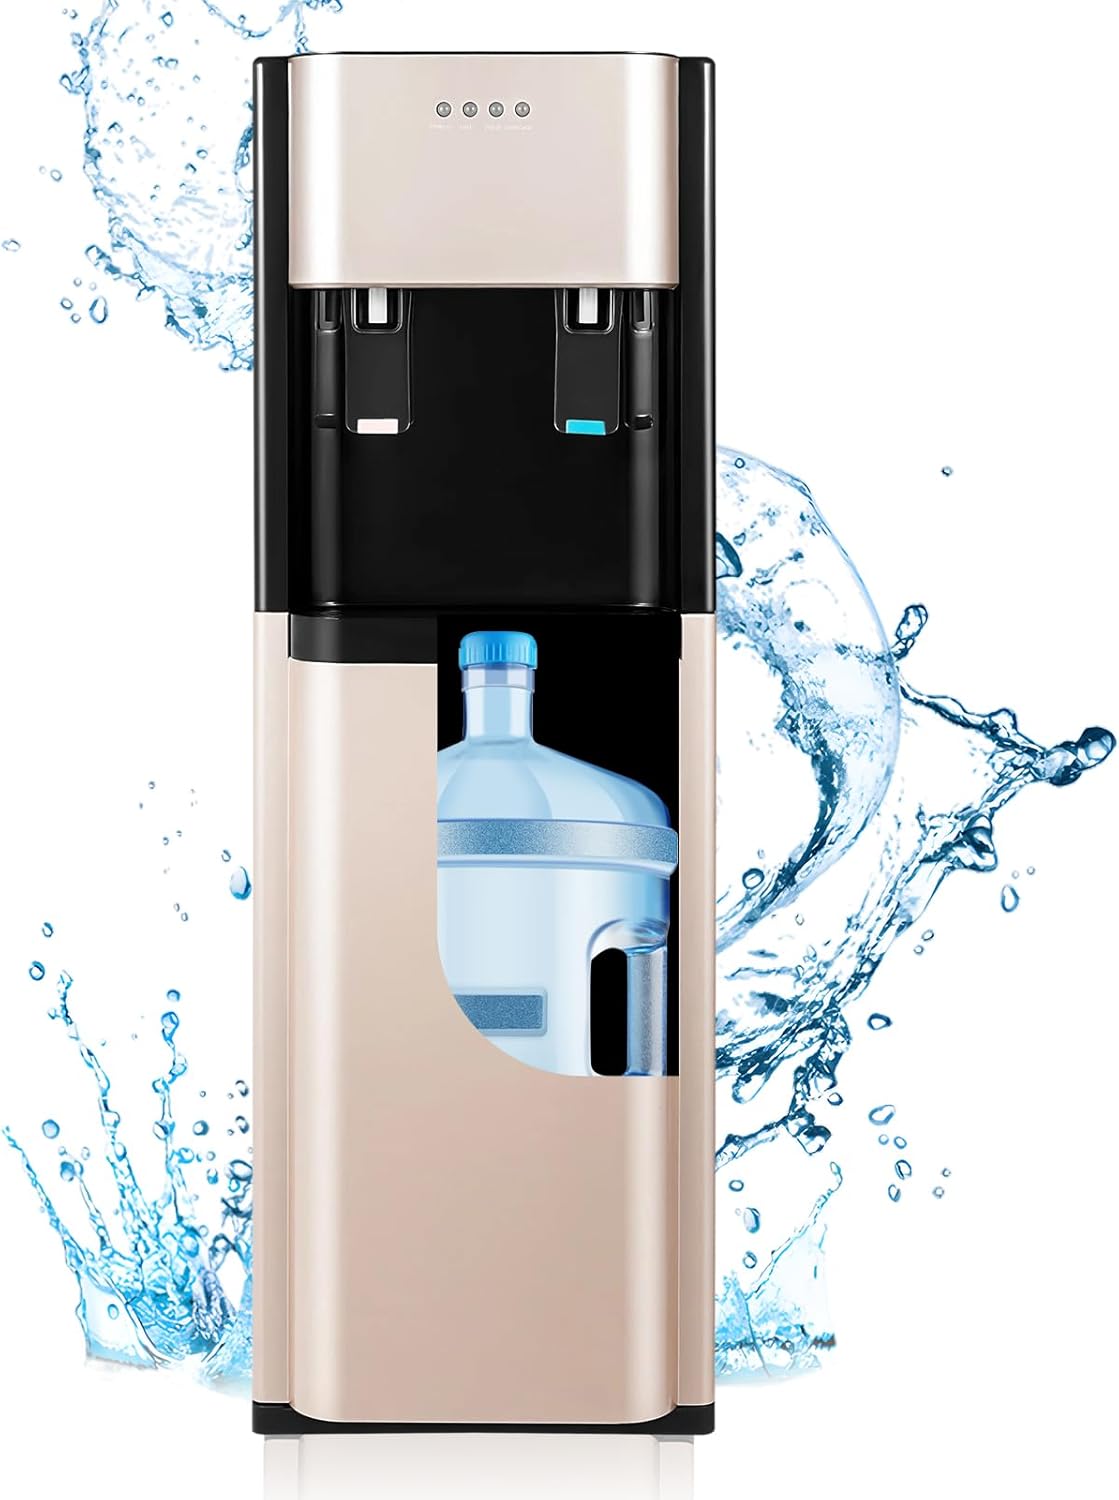
Image: Internal view of the dispenser, illustrating how the water bottle is housed in the bottom compartment and connected to the internal pump system.
- Power Connection: Plug the power cord into a grounded electrical outlet.
- Activate Heating/Cooling: Locate the heating and cooling switches on the back of the unit. Turn them ON. The corresponding indicator lights on the front panel will illuminate.
- Wait for Temperature: Allow approximately 15-30 minutes for the water to reach optimal hot and cold temperatures before first use.
4. Operating Instructions
The dispenser features simple one-touch operation for both hot and cold water.

Image: Front panel details, highlighting indicator lights and water dispensing levers for hot and cold water.
- Dispensing Cold Water: Place a cup under the cold water spout (typically blue). Press the cold water lever. Release the lever to stop the flow.
- Dispensing Hot Water: Place a cup under the hot water spout (typically red). Press the hot water safety lock (if present) and then the hot water lever. Release the lever to stop the flow. Always exercise caution with hot water.
- Water Shortage Alert: If the water shortage indicator light illuminates, it means the 5-gallon bottle is empty or nearly empty. Replace the bottle promptly.
5. Maintenance
Regular maintenance ensures optimal performance and hygiene of your water dispenser.
- Cleaning the Exterior: Wipe the exterior surfaces with a soft, damp cloth. Do not use abrasive cleaners or solvents.
- Cleaning the Drip Tray: The drip tray is detachable for easy cleaning. Remove it, empty any collected water, wash with mild soap and water, rinse thoroughly, and replace.
- Descaling (Every 3-6 Months):
- Unplug the dispenser and remove the water bottle.
- Drain all water from the hot and cold tanks using the drain plugs located at the back/bottom of the unit.
- Prepare a descaling solution (e.g., a mixture of water and white vinegar, or a commercial descaling agent).
- Pour the solution into the water reservoir.
- Allow it to sit for 30 minutes to an hour.
- Drain the solution completely.
- Rinse the system thoroughly by filling with clean water and draining several times until no odor or taste of the descaling solution remains.
- Air Filter Cleaning (If applicable): Some models may have an air filter on the back. Clean it periodically according to manufacturer instructions.
6. Troubleshooting
Review these common issues and solutions before contacting support.
| Problem | Possible Cause | Solution |
|---|---|---|
| No water flows from the tap. | Empty water bottle, air trapped in the system, pump malfunction. | Replace the water bottle. Open the tap to release trapped air or gently shake the dispenser. Ensure the pump tube is correctly inserted. |
| Cold water is not cold enough (room temperature). | Cooling switch is off, insufficient cooling time, high ambient temperature, cooling system issue. | Ensure the cooling switch on the back is ON. Allow 15-30 minutes for cooling. Optimal performance is at 25℃ (77℉) room temperature; performance may decrease at 40℃-45℃ (104℉-113℉). If the cooling light is on, the fan runs, and warm air blows out, cooling is active. |
| Hot water is not hot. | Heating switch is off, insufficient heating time, heating element issue. | Ensure the heating switch on the back is ON. Allow 15-30 minutes for heating. Ensure the water reservoir is filled before heating. |
| Water tastes like plastic. | New unit odor, residual manufacturing taste, plastic components. | Thoroughly flush the system with several gallons of fresh water before initial use. Repeat flushing if taste persists. Ensure the water bottle itself is clean and free of odors. |
| Dispenser is leaking. | Improperly seated water bottle, damaged water bottle, internal leak. | Check if the water bottle is correctly installed and not cracked. Ensure the pump tube is properly sealed. If leaking persists, discontinue use and contact customer support. |
7. Specifications
| Feature | Detail |
|---|---|
| Brand | KWCWB |
| Model Number | F880 |
| Material | Polypropylene (PP), Stainless Steel |
| Color | Gold |
| Product Dimensions (D x W x H) | 12.99" x 11.81" x 35.43" (33cm x 30cm x 90cm) |
| Water Bottle Capacity | Up to 5.28 Gallons (20L) |
| Heating Power | 450W |
| Hot Water Temperature | >90℃ (194℉) |
| Cooling Power | 70W |
| Cold Water Temperature | 13-15℃ (55.4-59℉) |
| Total Wattage | 620 watts |
| Installation Type | Freestanding |
| Access Location | Bottom |
| Item Weight | 13.45 pounds |

Image: Dimensional drawing of the KWCWB water dispenser, indicating height, width, and depth measurements.
8. Warranty and Support
KWCWB is committed to product quality and customer satisfaction.
- Quality Assurance: Products undergo strict quality inspection to ensure performance.
- After-Sales Service: For any questions or support needs, please contact KWCWB customer service via email. You can expect a response and support within 24 hours.
- Please refer to your purchase documentation for specific warranty terms and conditions.


