
1. Introduction
Thank you for choosing the Camcamp SC14 Solar Security Camera System. This system provides a comprehensive wireless surveillance solution for your home or business, featuring 2.5K (4MP) video resolution, solar power, night vision, motion detection, and two-way audio communication. This manual will guide you through the installation, operation, and maintenance of your new security system.
2. Package Contents
Please verify that all components are present in your package:
- 3 x Solar Wireless Security Cameras
- 1 x WiFi Base Station
- 3 x Screw Sets for mounting
- 1 x USB Cable
- 1 x HDMI Cable
- 1 x Network Cable
- 1 x User Manual (this document)
3. Product Overview
The Camcamp SC14 system is designed for reliable outdoor surveillance with minimal wiring. Key features include:
- 2.5K (4MP) Video Resolution: Captures clear and detailed images.
- Solar Power Supply: Integrated solar panel and 6400mAh battery for continuous operation without frequent recharging.
- Wireless Base Station: Enhances signal stability and provides local storage options. Supports connection for up to 4 cameras.
- PIR Motion Detection: Intelligent detection reduces false alarms and triggers recording.
- Night Vision: Automatic infrared night vision for clear monitoring in low-light conditions up to 33 feet.
- Two-Way Audio: Built-in microphone and speaker for remote communication.
- IP65 Weatherproof: Designed to withstand various outdoor weather conditions, including rain and snow.
- Multiple Storage Options: Supports Micro SD card (up to 128GB, not included) and cloud storage.

Image 3.1: Smart PIR Motion Detection and App Alerts. This image illustrates the camera's 120-degree detection angle and its ability to send instant alerts to your phone upon detecting motion within a 23-foot range.
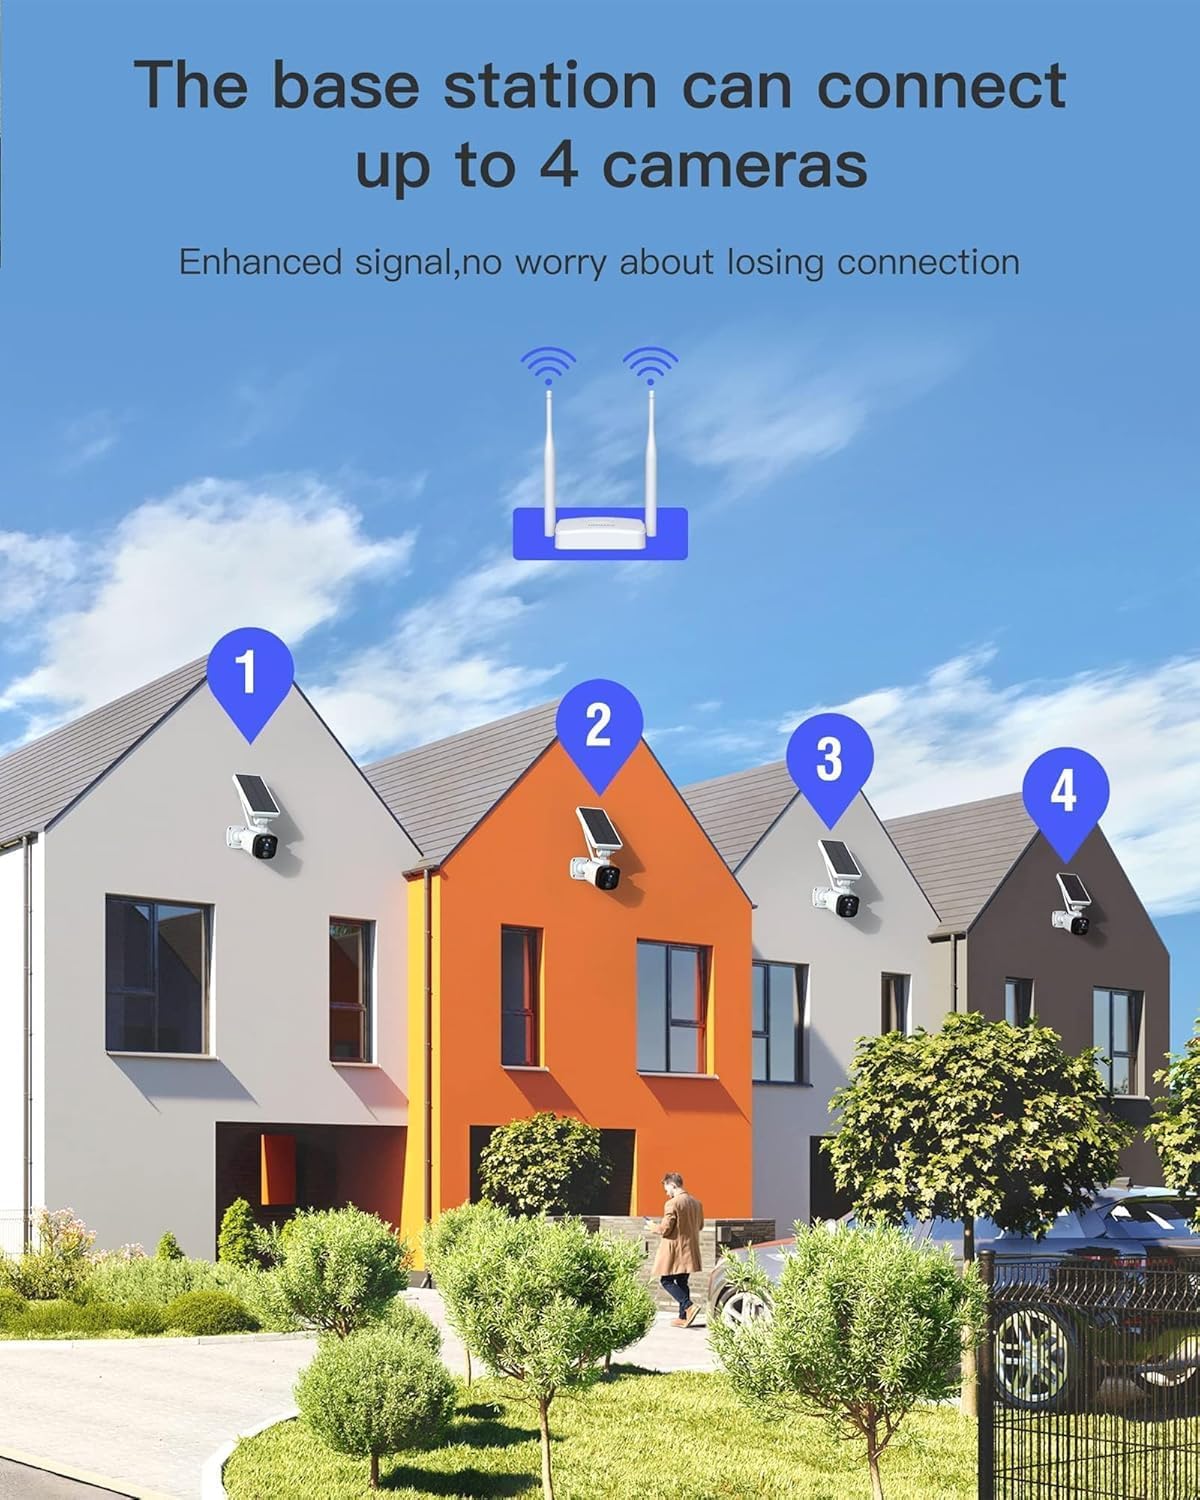
Image 3.2: Base Station Connectivity. This image demonstrates how the base station can connect and manage up to four cameras, ensuring enhanced signal stability across multiple locations.
4. Setup
4.1 Initial Charging
Before initial use, it is recommended to fully charge the camera batteries using the provided USB cable. Although equipped with solar panels, a full initial charge ensures optimal performance from the start.
4.2 Base Station Connection
- Connect the WiFi Base Station to your router using the provided network cable.
- Plug the power adapter into the base station and an electrical outlet.
- Wait for the indicator lights on the base station to show a stable connection.

Image 4.1: Base Station Setup. This image illustrates the connection of the base station to your home router and its wireless link to the security camera.
4.3 Camera Pairing
The cameras are designed to automatically connect to the base station when powered on. Ensure the base station is active before powering on the cameras.
4.4 App Installation and Configuration
- Download the "CloudEye" app from your smartphone's app store (iOS or Android).
- Register for an account and log in.
- Follow the in-app instructions to add your base station and cameras. This typically involves scanning a QR code or selecting the device from a list.
4.5 Camera Mounting
Select a mounting location that provides a clear view of the area you wish to monitor and receives adequate sunlight for the solar panel. Use the provided screw sets to securely mount the cameras.

Image 4.2: Camera Mounting Example. This image shows a camera mounted outdoors, illustrating the solar panel's position for optimal sunlight exposure.
5. Operating Instructions
5.1 Real-time Viewing
Open the "CloudEye" app on your smartphone. Select the desired camera to view its live feed. You can digitally zoom up to 5x within the app.

Image 5.1: Digital Zoom Function. This image demonstrates the 5x digital zoom capability available through the mobile application.
5.2 Motion Detection and Alerts
The camera utilizes PIR (Passive Infrared) motion detection to identify human or animal movement. When motion is detected, the camera will:
- Start recording video.
- Send an instant alert notification to your "CloudEye" app.
You can adjust motion detection sensitivity and alert settings within the app.

Image 5.2: Real-time PIR Motion Detection Alerts. This image shows how the camera detects motion and sends immediate alerts to your smartphone.
5.3 Two-Way Audio
To use the two-way audio feature, access the live view of the camera in the "CloudEye" app. Tap the microphone icon to speak, and the sound will be transmitted through the camera's speaker. You will hear audio from the camera's microphone through your phone's speaker.

Image 5.3: Premium Two-Way Audio. This image illustrates the convenience of using two-way audio to communicate with visitors or delivery personnel.
5.4 Video Recording and Storage
The system supports two primary storage methods:
- Micro SD Card: Insert a Micro SD card (up to 128GB, not included) into the designated slot on the base station. Recorded videos will be stored locally.
- Cloud Storage: The system offers free 30-day cloud storage. Additional cloud storage plans may be available through the app.
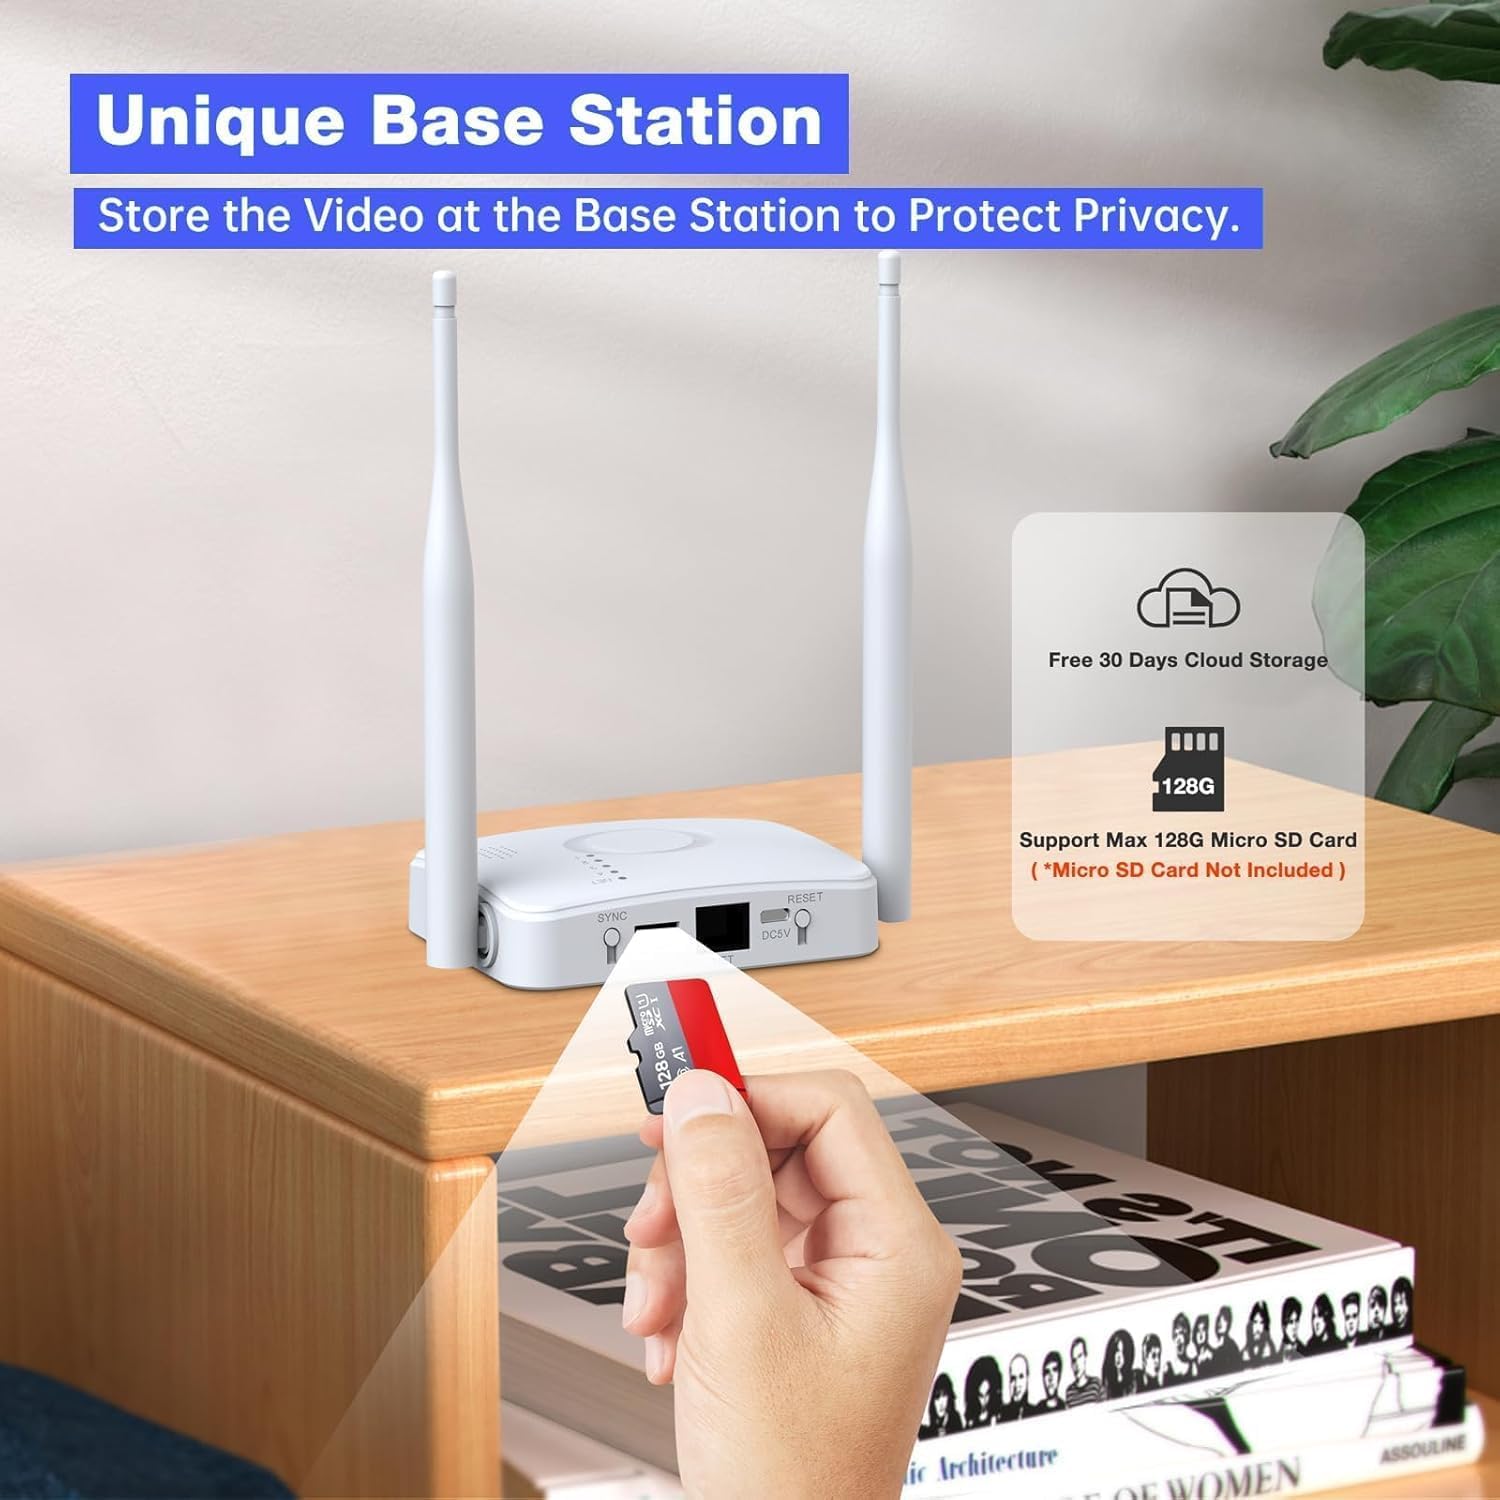
Image 5.4: Base Station Storage Options. This image highlights the Micro SD card slot on the base station for local storage and mentions the availability of cloud storage.

Image 5.5: Two Storage Modes. This image visually represents the choice between cloud storage and local SD card storage for recorded footage.
5.5 Night Vision
The cameras automatically switch to infrared night vision mode when ambient light is low, providing clear black-and-white video up to 33 feet. No manual intervention is required.

Image 5.6: Night Vision Capability. This image demonstrates the camera's ability to capture clear details even at night using infrared technology.
6. Maintenance
6.1 Solar Panel Cleaning
To ensure optimal charging efficiency, periodically clean the solar panel surface with a soft, damp cloth to remove dust, dirt, or debris. Avoid using abrasive cleaners.
6.2 General Care
The cameras are IP65 weatherproof, designed to withstand typical outdoor conditions. However, avoid directing high-pressure water jets directly at the camera. Ensure all covers and seals are properly closed after any access to internal components (if applicable).

Image 6.1: IP65 Weatherproof Design. This image highlights the camera's robust design, capable of operating in various weather conditions from -20°C to 50°C.
7. Troubleshooting
If you encounter issues with your Camcamp SC14 system, please refer to the following common solutions:
| Problem | Possible Solution |
|---|---|
| Camera not connecting to Base Station | Ensure the Base Station is powered on and connected to your router. Check the distance between the camera and base station; reduce obstacles if possible. Power cycle both devices. |
| No video feed in app | Verify internet connection on your phone and the base station. Check camera battery level. Restart the app. |
| Motion detection not working | Check motion detection settings in the "CloudEye" app. Ensure the camera's view is clear and not obstructed. Adjust sensitivity if needed. |
| Poor night vision quality | Ensure the camera lens is clean. Check for any obstructions blocking the infrared lights. |
| Battery not charging via solar panel | Clean the solar panel surface. Ensure the panel is positioned to receive direct sunlight for several hours daily. |
For any further questions or issues, please refer to the manual or contact Camcamp customer service.
8. Specifications
| Feature | Detail |
|---|---|
| Model Number | SC14 |
| Video Resolution | 2560 x 1440 (4MP/2.5K) |
| Field of View | 120° |
| Night Vision Range | Up to 33 feet (Infrared) |
| Power Source | Battery Powered (6400mAh Lithium Ion) with Solar Panel |
| Connectivity | Wireless (via Base Station) |
| Weatherproof Rating | IP65 |
| Storage Options | Micro SD Card (up to 128GB, not included), Cloud Storage |
| Motion Detection | PIR (Motion Only) |
| Control Method | App (CloudEye) |
| Operating Temperature | -20°C to 50°C (4°F to 122°F) |
| Included Components | 3 Cameras, 1 WiFi Base Station, 3 Screw Sets, USB Cable, HDMI Cable, Network Cable, User Manual |
9. Warranty and Support
Camcamp provides a 1-year warranty for this product and offers lifetime technical support. If you have any questions regarding the use of the app, camera connection, or any other aspect of your security system, please do not hesitate to contact Camcamp customer service. We are committed to assisting you.
