
Introduction
This manual provides essential information for the installation, operation, and maintenance of your camicinta MC1648DLS 406077 Treadmill Control Board. This 110V motor controller is designed for compatibility with various Nordic Track, FreeMotion, and Proform treadmill models. Please read these instructions carefully before proceeding with installation or use to ensure proper function and safety.
Important Safety Information
Always prioritize safety when working with electrical components. Improper installation or handling can lead to electric shock, injury, or damage to the treadmill. This control board includes safety mechanisms such as overcurrent protection and thermal shutdown for enhanced safety during operation.
- Disconnect Power: Always unplug the treadmill from the power source before attempting any inspection, installation, or maintenance.
- Professional Installation Recommended: If you are not comfortable working with electrical components, seek assistance from a qualified technician.
- Motor Condition Check: Before installing the new control board, verify that the treadmill motor is not damaged. A damaged motor can cause the new control board to fail prematurely. Signs of a damaged motor include a burning smell or the circuit breaker tripping during treadmill operation. If the motor is damaged, replace both the motor and the control board simultaneously.
- Component Compatibility: Ensure all other machine components are working properly to avoid misdiagnosis or further issues.

Image: An attention graphic emphasizing the importance of verifying the original part and ensuring other components are functional before purchase.
Product Features
- Advanced Motor Control: Equipped with a sophisticated motor control system for smooth and efficient treadmill operation.
- Durable Construction: Built with high-quality components for long-lasting performance and reliability.
- Energy Efficiency: Designed to minimize power consumption and running costs.
- Safety Mechanisms: Features overcurrent protection and thermal shutdown for user safety.
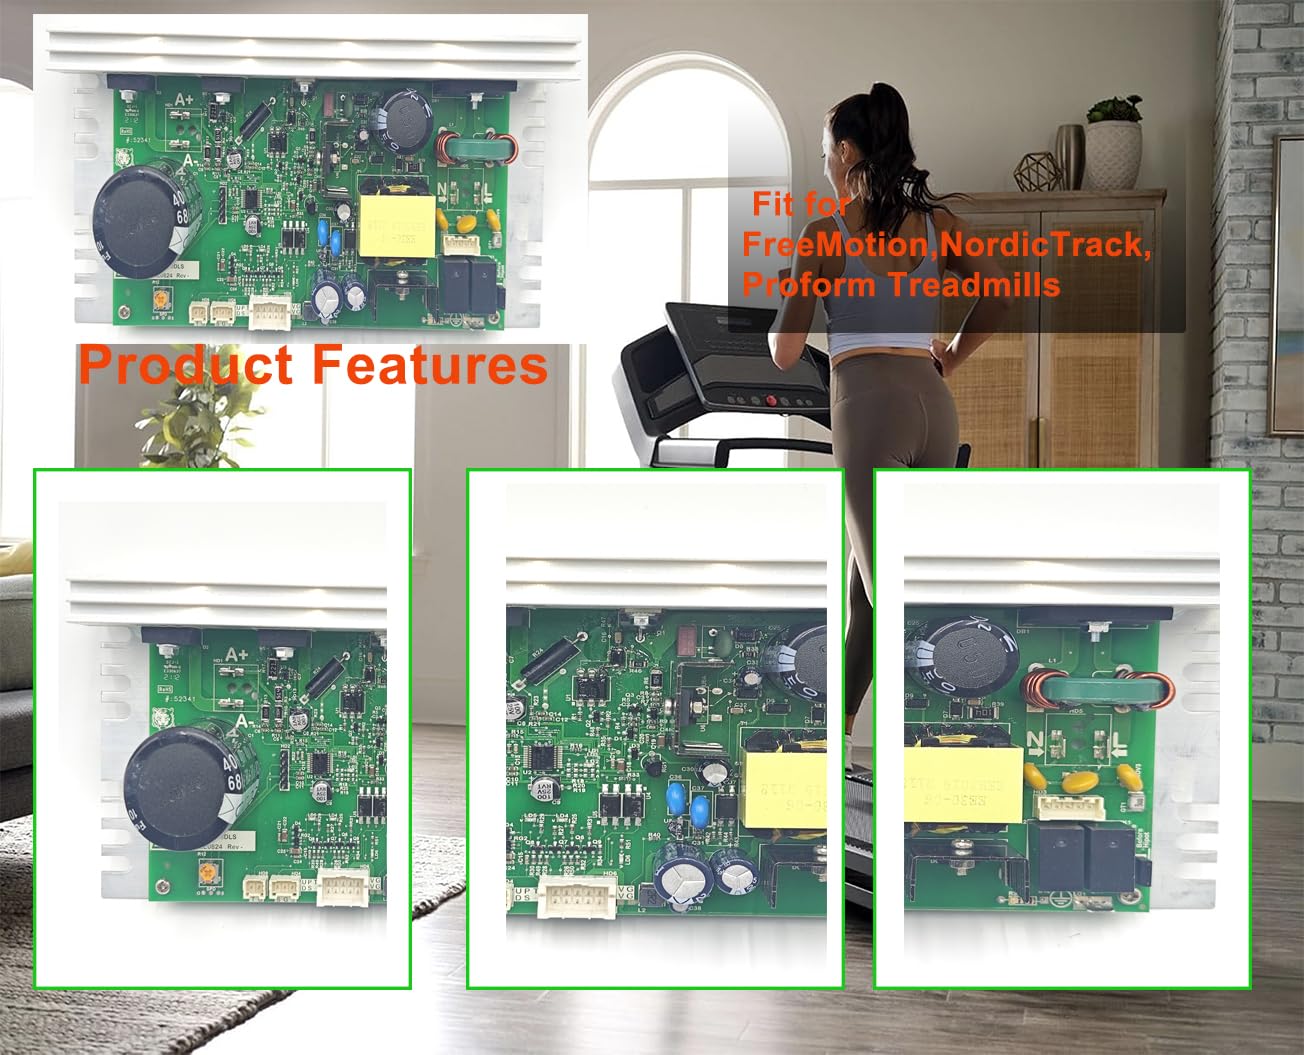
Image: A detailed view of the MC1648DLS control board, showcasing its robust design.
Pre-Purchase and Compatibility Check
To ensure correct compatibility and avoid issues, it is crucial to perform the following checks before purchasing and installing the control board:
- Verify Model Number: Carefully check the model number of your existing control board. This product is MC1648DLS or 406077.
- Inspect Socket Type: Treadmill control boards can have different socket configurations. This specific board is available in a 10-pin (new style, ZE0824) or 8-pin (early model, ZC0549) version. You must confirm the color and number of pins on your original control board's socket. Using the wrong socket type may cause compatibility issues or damage.
- Check Motor Condition: As mentioned in safety, confirm your treadmill motor is in good working order. If there is a burning smell or the circuit breaker trips during use, the motor may be damaged and should be replaced along with the control board.

Image: Visual comparison of the 10-pin (new style, white socket) and 8-pin (old style, black socket) versions of the MC1648DLS control board. It is essential to match your existing board's pin configuration.

Image: Close-up of the 10-pin white socket, labeled MC1648DLS ZE0824, indicating a newer style board.
This control board is compatible with various Nordic Track, FreeMotion, and ProForm treadmill models. Please refer to your treadmill's manual or the product listing for a comprehensive list of compatible models. Always verify your treadmill model number before purchasing to ensure compatibility.

Image: A treadmill in a home gym, representing the type of equipment this control board is designed for.
Setup and Installation
Replacing a treadmill control board requires careful attention to detail. Follow these general steps:
- Power Disconnection: Ensure the treadmill is unplugged from the wall outlet.
- Access the Control Board: Locate and remove the motor cover or protective casing of your treadmill to access the existing control board.
- Document Connections: Before disconnecting any wires, take clear photos or make a diagram of all wire connections to the old control board. Pay close attention to the color and position of each wire.
- Disconnect Old Board: Carefully disconnect all wires and mounting screws from the old control board.
- Install New Board: Mount the new camicinta MC1648DLS control board in the same position as the old one.
- Reconnect Wires: Using your photos or diagram, reconnect all wires to the new control board. Double-check each connection to ensure it is secure and correctly placed.
- Secure Cover: Replace the motor cover or protective casing.
- Test Functionality: Plug the treadmill back into the power outlet and perform a test run at low speeds to ensure proper operation.
Video: An exterior view of the control board, demonstrating its physical appearance and connections, which can be helpful during installation.
Operation
Once correctly installed, the camicinta MC1648DLS 406077 Treadmill Control Board will enable the full functionality of your treadmill's motor. Operate your treadmill according to its original manufacturer's instructions. The control board manages motor speed and power delivery, ensuring a consistent and responsive workout experience.
Maintenance
The control board itself requires minimal maintenance. However, to ensure its longevity and optimal performance, consider the following:
- Keep Clean: Periodically inspect the area around the control board for dust and debris. Use compressed air to gently clean the board if necessary, ensuring the treadmill is unplugged.
- Ventilation: Ensure the treadmill's motor compartment has adequate ventilation to prevent overheating of the control board and motor.
- Regular Treadmill Maintenance: Adhere to your treadmill's overall maintenance schedule, including belt lubrication and deck cleaning, as these factors can affect the load on the motor and, consequently, the control board.
Troubleshooting
If you encounter issues after installing the control board, consider these troubleshooting steps:
- No Power/Treadmill Not Starting:
- Check if the treadmill is properly plugged into a working outlet.
- Verify the safety key is correctly inserted.
- Inspect all wire connections to the control board for looseness or incorrect placement.
- Check the treadmill's circuit breaker.
- Motor Runs Erratically or Not at Correct Speed:
- Ensure the motor itself is not faulty. A damaged motor can cause inconsistent performance.
- Re-check all connections to the control board and motor.
- Confirm the correct control board model (10-pin vs. 8-pin) was installed for your treadmill.
- Burning Smell or Tripping Breaker:
- Immediately unplug the treadmill. This often indicates a severely overloaded or damaged motor. Both the motor and control board may need replacement.
If issues persist, please contact customer support with a detailed description of the problem. Providing photos of your original part and the new installation can assist in diagnosis.
Specifications
| Brand | camicinta |
| Model Number | MC1648DLS |
| Part Numbers | MC1648DLS, 406077, ZE0824 |
| Voltage | 110V |
| Socket Type | 10 Pins (White Socket) or 8 Pins (Black Socket) |
| Manufacturer | camicinta |
| UPC | 753456027472 |
What's in the Box
The package includes:
- 1 x camicinta MC1648DLS Treadmill Motor Controller

Image: The camicinta MC1648DLS treadmill motor controller, representing the item included in the box.
Warranty and Support
camicinta replacement parts are manufactured to OEM standards, ensuring compatibility and reliable performance. For any questions or support, please contact our customer service team. We can assist with diagnosing issues and providing practical maintenance and repair advice.
Frequently Asked Questions (FAQs)
- Why choose camicinta parts?
- We manufacture strictly to OEM standards, ensuring full compatibility, reliable performance, and a perfect fit—no risk of malfunctions from poor-quality substitutes.
- How do I avoid ordering the wrong part?
- Simply message our support team before purchase with a clear photo of your original part. We'll verify it for you and confirm the correct match, so you order right the first time.
- What about after-sales support?
- With years of repair expertise, we can diagnose your issue from your description and give you practical maintenance and repair advice.