1. Product Overview
The ACTIVLIFE Carburetor Assembly is a replacement component designed to ensure optimal fuel-air mixture delivery to compatible Briggs & Stratton engines. This assembly is crucial for the proper functioning and performance of your engine, facilitating efficient combustion and reliable starting.
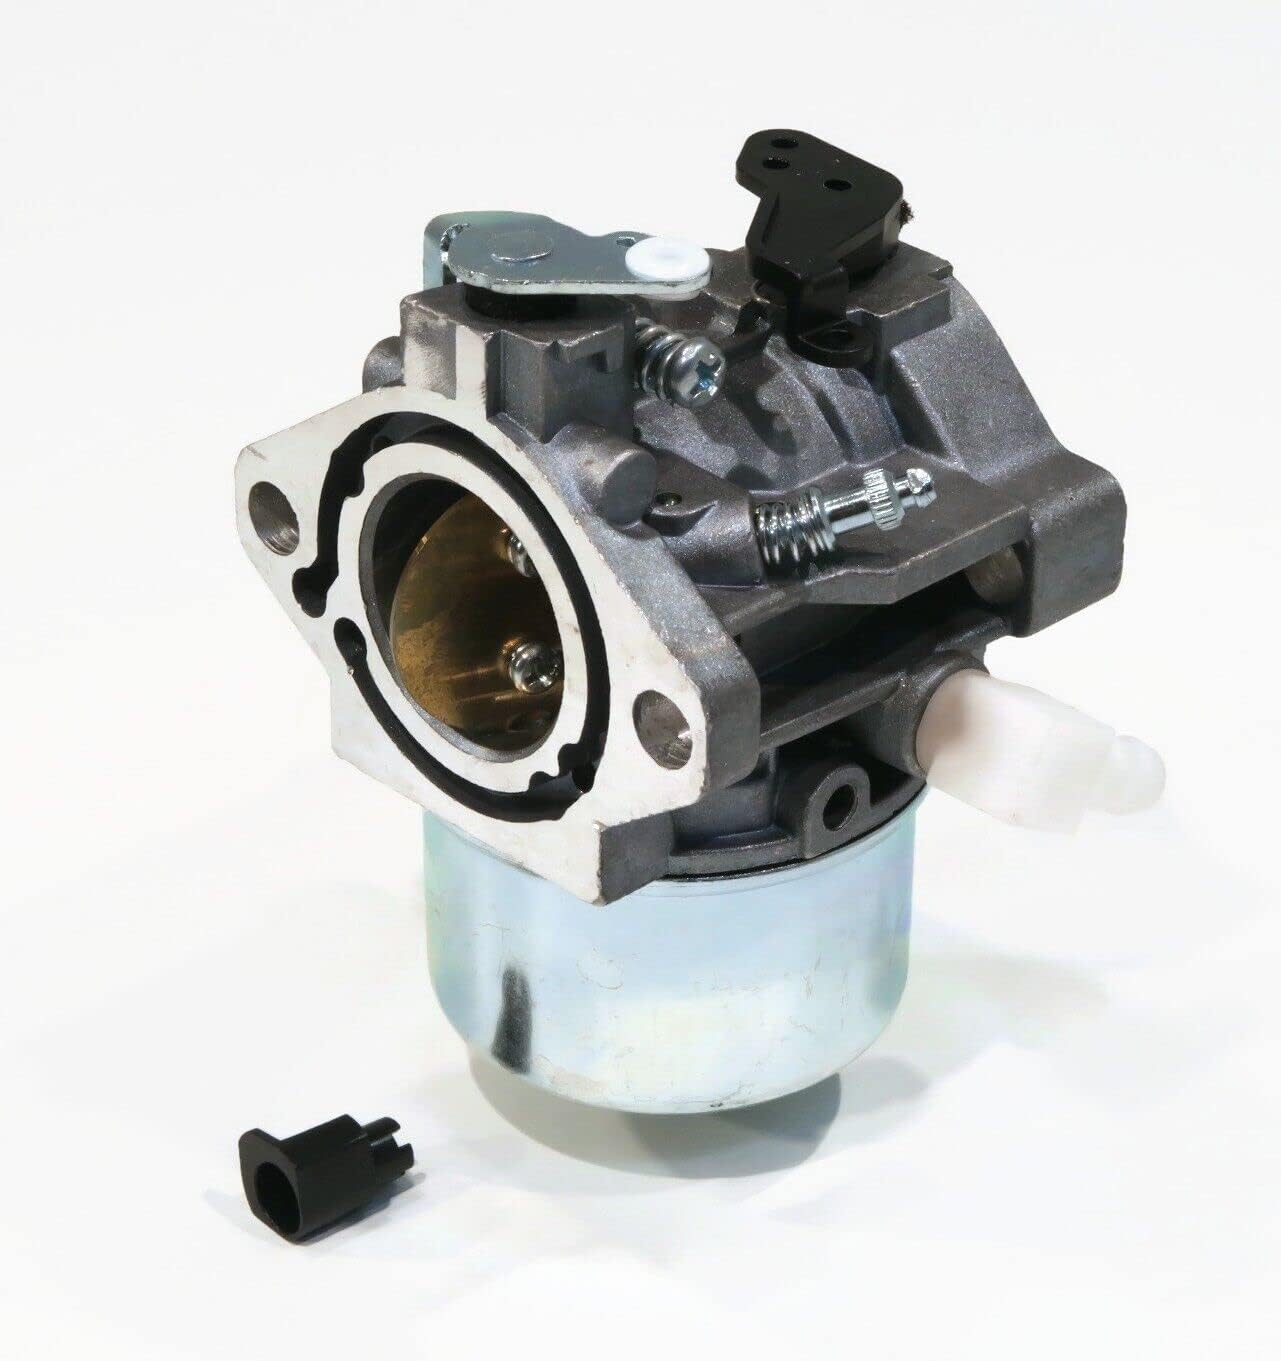
Figure 1: ACTIVLIFE Carburetor Assembly. This image displays the complete carburetor unit, including the main body, fuel bowl, and various linkages and adjustment screws. A small black plastic cap is shown detached at the bottom left.
2. Compatibility
This carburetor assembly is specifically designed for use with Briggs & Stratton engine models:
- 289707-1199-E1
- 289707-1200-E1
Before installation, it is essential to visually inspect the new part and compare it with your existing carburetor to ensure proper alignment and fit. Verify that the dimensions and connection points match your engine's requirements.
3. Safety Information
Always prioritize safety when working with engine components. Failure to follow safety precautions can result in injury or damage to equipment.
- Ensure the engine is turned off and cooled down before beginning any work.
- Disconnect the spark plug wire to prevent accidental starting.
- Wear appropriate personal protective equipment, including safety glasses and gloves.
- Work in a well-ventilated area.
- Handle fuel with extreme care; it is highly flammable.
4. Setup and Installation
This section outlines the general steps for replacing a carburetor. Specific procedures may vary slightly depending on your engine model. Refer to your engine's service manual for detailed instructions.
4.1 Tools Required
- Socket wrench set
- Screwdriver set
- Pliers
- Fuel line clamps
- Clean rags
4.2 Pre-Installation Steps
- Ensure the engine is cool and the spark plug wire is disconnected.
- Turn off the fuel supply valve, if present.
- Place a suitable container under the carburetor to catch any residual fuel.
- Carefully disconnect the fuel line from the carburetor. Use fuel line clamps to prevent fuel leakage.
- Disconnect any linkages, springs, or electrical connections attached to the carburetor. Take photos or make notes to aid reassembly.
4.3 Removal of Old Carburetor
- Remove the mounting bolts or nuts that secure the carburetor to the engine.
- Carefully detach the old carburetor, ensuring not to damage any gaskets or mating surfaces.
- Remove and discard old gaskets. Clean the mounting surfaces thoroughly.
4.4 Installation of New Carburetor
- Install new gaskets on the engine and air filter housing side, ensuring they are correctly oriented.
- Position the new ACTIVLIFE carburetor assembly onto the mounting studs.
- Secure the carburetor with the mounting bolts or nuts. Tighten them evenly to the manufacturer's specifications (refer to your engine manual). Do not overtighten.
- Reconnect all linkages, springs, and electrical connections to their original positions.
- Reconnect the fuel line to the carburetor. Ensure a secure, leak-free connection.
5. Operation (Post-Installation)
After installation, perform the following checks before starting the engine:
- Ensure all connections are secure and there are no fuel leaks.
- Reconnect the spark plug wire.
- Open the fuel supply valve.
- Prime the carburetor if your engine requires it (consult your engine manual).
- Start the engine according to the manufacturer's instructions. Allow it to run for a few minutes to check for proper operation and any unusual noises or leaks.
6. Maintenance
Regular maintenance helps prolong the life of your carburetor and ensures consistent engine performance.
- Fuel Quality: Always use fresh, clean fuel. Stale or contaminated fuel is a primary cause of carburetor issues.
- Fuel Filter: Regularly check and replace the fuel filter to prevent debris from reaching the carburetor.
- Air Filter: Ensure the air filter is clean and properly installed to prevent dirt from entering the carburetor and engine.
- Storage: If storing the engine for an extended period, drain the fuel system or use a fuel stabilizer to prevent gum and varnish buildup in the carburetor.
7. Troubleshooting
If you experience issues after installing the new carburetor, consider the following common problems:
- Engine Not Starting:
- Check fuel supply and ensure the fuel valve is open.
- Verify spark plug connection and condition.
- Ensure all linkages are correctly connected and moving freely.
- Rough Idling or Stalling:
- Inspect for air leaks around the carburetor gaskets.
- Check for proper adjustment of idle speed (if adjustable on your model).
- Fuel Leaks:
- Ensure fuel lines are securely clamped and not cracked.
- Verify carburetor bowl gasket is properly seated and not damaged.
- Check float level (if applicable and adjustable).
If problems persist, consult a qualified service technician or your engine's service manual.
8. Specifications
| Attribute | Detail |
|---|---|
| Brand | ACTIVLIFE |
| Compatible Engine Models | Briggs & Stratton 289707-1199-E1, 289707-1200-E1 |
| Manufacturer | ACTIVLIFE |
| UPC | 669994042115 |
9. Warranty and Support
For warranty information or technical support regarding your ACTIVLIFE Carburetor Assembly, please refer to the product packaging or contact the retailer from whom the product was purchased. Keep your proof of purchase for warranty claims.


