
OMTech Pronto 130W
OMTech Pronto 130W CO2 Laser Engraver User Manual
Model: Pronto 130W
1. Introduction
This manual provides essential information for the safe and efficient operation of your OMTech Pronto 130W CO2 Laser Engraver. Please read this manual thoroughly before operating the machine to ensure proper usage and to prevent damage or injury. This laser engraver is designed for precision engraving and cutting on various non-metallic materials.
2. Safety Information
Operating a laser engraver requires strict adherence to safety protocols. Failure to follow these guidelines can result in serious injury or damage to the equipment.
- Laser Class: This device is a Class 2 laser product with an output power of 0.827 mW. Avoid direct exposure to the laser beam.
- Eye Protection: Always wear appropriate laser safety glasses when operating the machine, even with the protective cover closed.
- Ventilation: Ensure adequate ventilation to remove fumes and smoke generated during engraving and cutting. Use the integrated high-speed fan and air pump system.
- Material Compatibility: Only engrave or cut materials specified as safe for CO2 lasers. Avoid materials that produce toxic fumes or are highly flammable. Refer to the 'Materials Suitable for Engraving/Cutting' section.
- Fire Safety: Keep a fire extinguisher nearby. The machine features a flame-retardant PC board to reduce fire risk. Never leave the machine unattended during operation.
- Overheating Alert: The Pronto system monitors temperature and will automatically stop, reset, and alert you if it overheats (above 131°F).
- Low-Pressure Alarm: Built-in pressure sensors trigger an alarm if air pressure drops, preventing potential risks during operation.
- Safe Observation: The flame-resistant window allows for safe observation of the engraving process.
- Emergency Stop: Familiarize yourself with the location and operation of the emergency stop button.
3. Product Features
The OMTech Pronto 130W CO2 Laser Engraver is equipped with advanced features for precision and efficiency.
- High Power Laser: 130W CO2 laser tube for deep engraving (up to 0.4" / 10 mm) and efficient cutting on various non-metallic materials.
- Large Work Area: A spacious 51" x 35" (1300 x 900 mm) work area accommodates large projects.
- Autofocus System: Pre-installed autofocus automatically finds the correct focal distance, simplifying setup and ensuring precise results.
- Adjustable Workbed: Workbeds adjust up and down with a button press, supporting workpiece heights up to 8.7" (220 mm).
- Two-Way Pass-Through: Front and back pass-through doors allow for processing larger and longer materials.
- High Engraving Speed: Achieves speeds up to 1000 mm/s for increased productivity.
- Air Assist: Integrated 125 L/min air assist system helps keep the work area clean and improves cut quality.
- Red Dot Pointer: Built-in red dot laser pointer for precise material alignment and job preview.
- Advanced Transmission System: Features an X-Axis V-Wheel guidance for smooth movement, a Y-Axis high-precision belt for accuracy, and Z-Axis ball screws for stable and quiet lifting.
- Upgraded Workbed: Includes both honeycomb and aluminum blade beds with stainless steel corners and anchor pins for enhanced stability.
- Software Compatibility: Compatible with popular laser software such as LightBurn, RDworks, and CorelLaser.

Image: OMTech Pronto 130W CO2 Laser Engraver with its protective lid open, showcasing the internal components and a piece of material ready for processing.

Image: Close-up view of the OMTech Pronto 130W laser engraver's working area, highlighting its 35" x 51" dimensions.

Image: Illustration of the automatic focusing feature of the OMTech Pronto 130W laser engraver, showing the laser head adjusting to the material surface.

Image: The OMTech Pronto 130W laser engraver with both front and rear pass-through doors open, demonstrating its capability to handle oversized materials.
4. Setup
Proper setup is crucial for the performance and safety of your laser engraver.
- Unpacking and Placement: Carefully unpack the machine. Place it on a stable, level surface in a well-ventilated area, away from flammable materials. Ensure sufficient space around the machine for operation and maintenance.
- Ventilation System Connection: Connect the exhaust fan and air ducting to ensure proper removal of smoke and fumes.
- Power Connection: Connect the power cable to a grounded electrical outlet with the correct voltage and amperage as specified in the machine's electrical requirements.
- Water Cooling System (Chiller) Setup: If your model requires an external water chiller (not explicitly stated as built-in for this model, but common for 130W CO2 lasers), connect it according to its separate instructions. Ensure the chiller is filled with distilled water and operating correctly to cool the laser tube.
- Software Installation: Install the necessary laser control software (e.g., LightBurn, RDworks) on your computer. Follow the software's installation guide.
- Computer Connection: Connect the laser engraver to your computer via USB or network connection (Wi-Fi is supported).
- Initial Power-On: Power on the machine and perform initial checks as outlined in the quick start guide.
5. Operating Instructions
Follow these steps for safe and effective operation of your OMTech Pronto 130W Laser Engraver.
- Prepare Your Design: Create or import your design in the laser control software. Adjust settings such as power, speed, and resolution according to your material and desired outcome.
- Place Material: Open the machine lid and carefully place your material on the workbed. Ensure it is flat and securely positioned.
- Focus the Laser: Use the autofocus function by pressing the designated button on the control panel. The laser head will automatically adjust to the correct focal distance for your material.
- Set Origin Point: Use the red dot pointer to set the origin point for your job on the material.
- Start Ventilation and Cooling: Ensure the exhaust fan and water cooling system (if external) are active before starting any job.
- Start Job: Send the job to the laser engraver from your software and press the 'Start' button on the machine's control panel.
- Monitor Operation: Observe the engraving/cutting process through the flame-resistant window. Do not leave the machine unattended. Be prepared to use the emergency stop button if necessary.
- Post-Processing: Once the job is complete, wait for the exhaust system to clear any remaining fumes. Carefully remove the finished material.
6. Maintenance
Regular maintenance ensures the longevity and optimal performance of your laser engraver.
- Cleaning the Lens and Mirrors: Regularly clean the laser lens and mirrors with specialized lens cleaning solution and wipes to maintain laser beam quality.
- Cleaning the Workbed: Remove debris and residue from the honeycomb and blade workbeds after each use.
- Lubrication: Periodically lubricate the guide rails and moving parts of the X and Y axes to ensure smooth operation.
- Water Cooling System: For external chillers, regularly check and replace the distilled water to prevent algae buildup and ensure efficient cooling. Clean the chiller's filter as needed.
- Exhaust System: Clean the exhaust fan and ducting to prevent buildup that can reduce efficiency.
- Laser Tube Care: Handle the laser tube with extreme care. Avoid physical shocks and ensure it is always properly cooled during operation.
7. Troubleshooting
This section addresses common issues you might encounter.
| Problem | Possible Cause | Solution |
|---|---|---|
| No laser output | Laser tube not powered, water flow issue, software settings. | Check power supply to laser tube, ensure water chiller is running and water is flowing, verify laser power settings in software. |
| Poor engraving/cutting quality | Incorrect focus, dirty lens/mirrors, incorrect power/speed settings, material issues. | Re-focus the laser, clean optical components, adjust power/speed settings, ensure material is suitable and flat. |
| Machine not responding | Loose cable connection, software communication error, emergency stop engaged. | Check USB/network cable, restart software and machine, disengage emergency stop button. |
| Overheating alert | Insufficient cooling, prolonged high-power operation. | Check water chiller function, ensure ambient temperature is within limits, allow machine to cool down. |
| Low-pressure alarm | Air assist pump malfunction, blocked air line. | Check air assist pump operation, inspect air lines for blockages. |
8. Specifications
Key technical specifications for the OMTech Pronto 130W CO2 Laser Engraver.
- Laser Power: 130W
- Max. Engraving Speed: 1000 mm/s
- Processing Area: 51.2" × 35.4" (1300 × 900 mm)
- Max. Workpiece Height: 8.7" (220 mm)
- Air Assist Flow Rate: 125 L/min
- Laser Tube Lifespan: Up to 8,000 hours (when consistently used at lower settings)
- Data Transmission: USB Cable, WiFi
- Machine Dimensions: 74.8" × 55.9" × 40.2" (Length × Width × Height)
- Machine Weight: 793.7 lb.
- Front/Back Pass Size: 55.1" × 1.5"
- Laser Class: 2
- Output Power: 0.827 mW
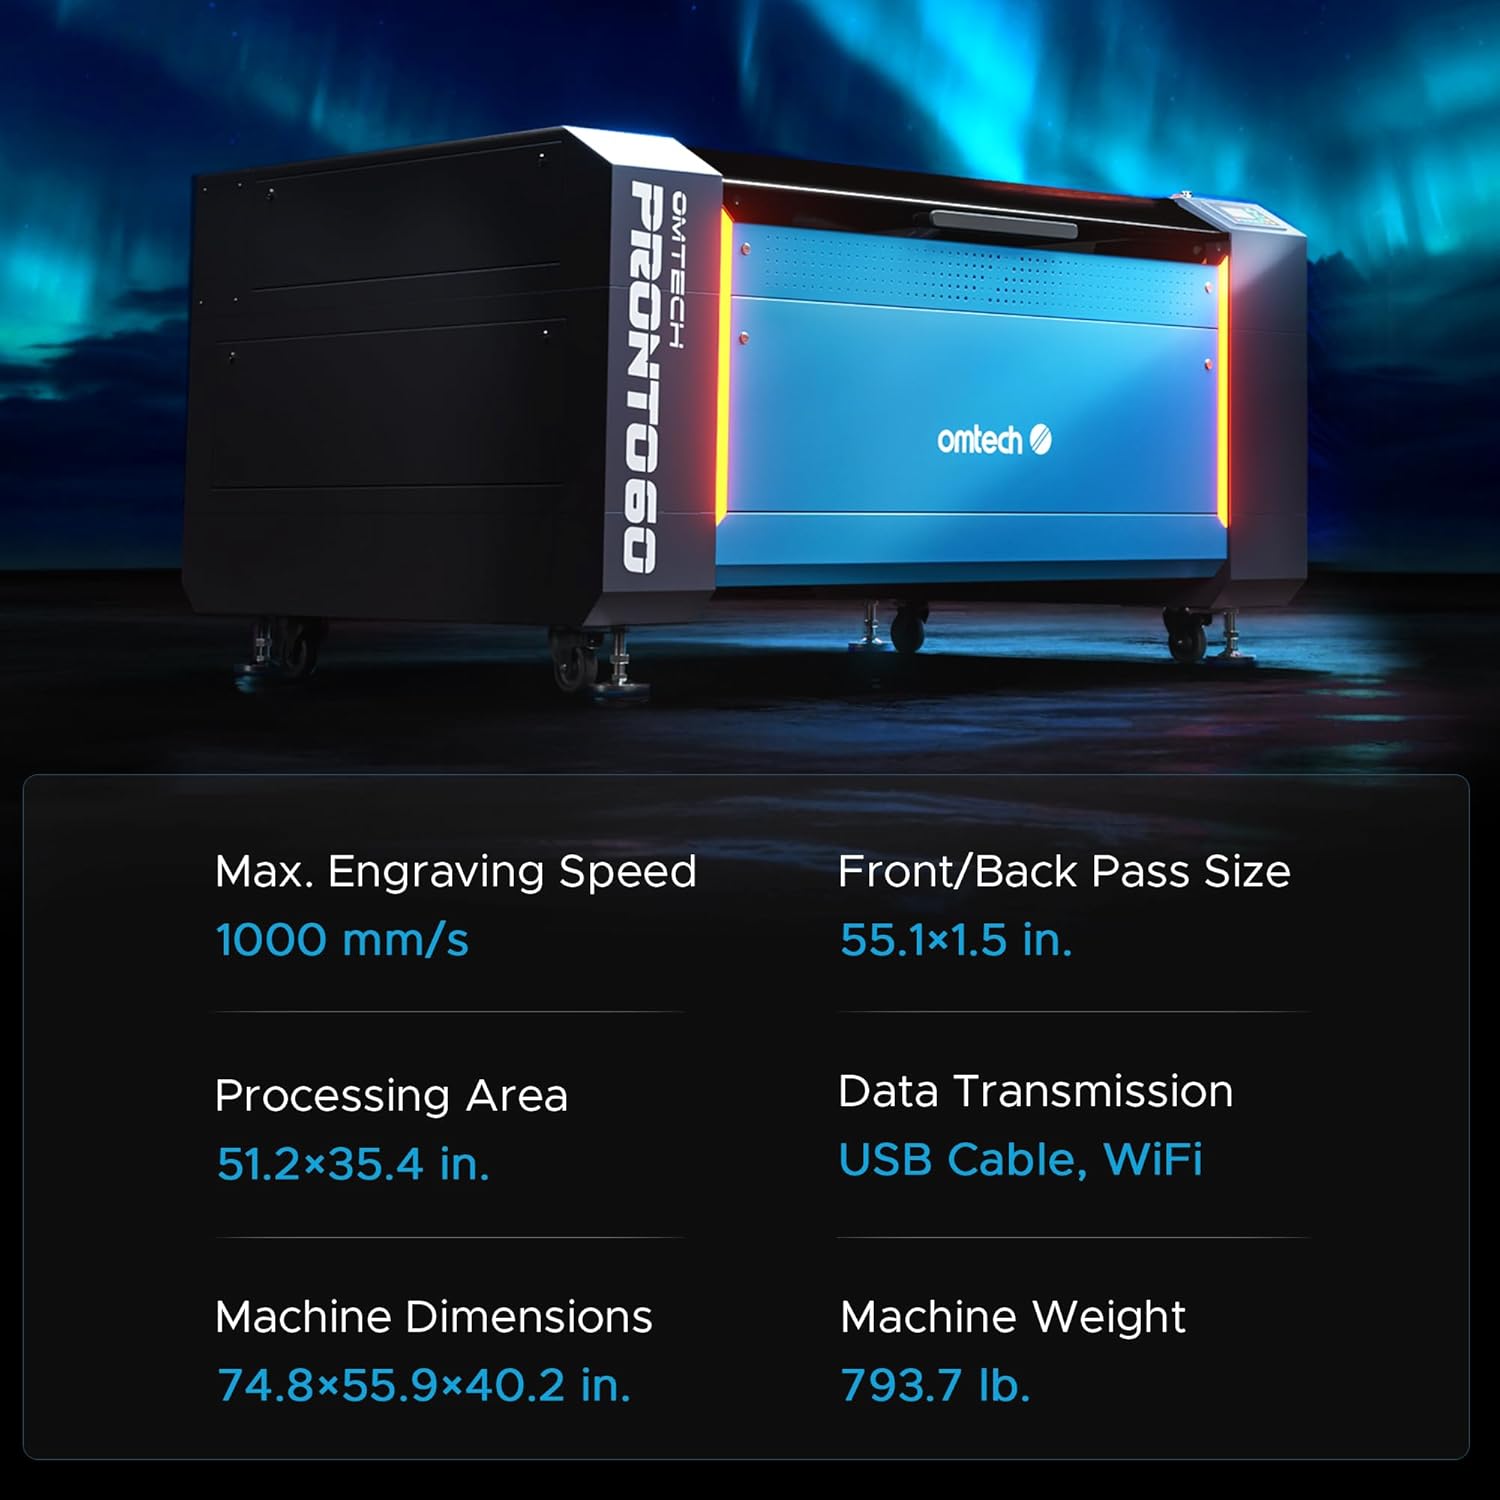
Image: A table summarizing the key specifications of the OMTech Pronto 130W laser engraver, including speed, processing area, dimensions, and weight.
9. Materials Suitable for Engraving and Cutting
The OMTech Pronto 130W CO2 Laser Engraver is versatile for a range of non-metallic materials.
Materials Suitable for Engraving
- Acrylic
- Wood
- Leather
- Rubber
- Paper
- Plastic
- Fabric
- MDF
- Cardboard
- Marble
- Foam
- Fiber Glass
Materials Suitable for Cutting
- Acrylic
- Wood
- Leather
- Rubber
- Paper
- Plastic
- Fabric
- MDF
- Cardboard
- Foam

Image: A visual guide listing various materials compatible with the laser engraver for both engraving and cutting applications.
10. Warranty and Support
OMTech is committed to providing excellent customer service and support for your laser engraver.
- After-Sale Support: 24/7 support is available for any questions or issues you may encounter.
- Contact Information:
Telephone: +1 (949) 438-4949
Email: SUPPORT@OMTECHLASER.COM
Tech Support: TECHSUPPORT@OMTLASER.COM
For warranty details, please refer to the documentation included with your purchase or contact OMTech customer support directly.

Image: Contact details for OMTech's 24/7 after-sale and technical support.
Related documentsPronto 130W

Ask a question about this manual
Ask about setup, troubleshooting, compatibility, parts, safety, or missing instructions. Manuals+ will review the question and use this page’s manual context to help answer it.