
Introduction and Overview
This manual provides essential information for the safe and efficient operation, assembly, and maintenance of your X-PRO Capri 150cc Moped. Please read it thoroughly before assembly and initial use.
The X-PRO Capri 150cc Moped is equipped with a 149.6cc, air-cooled, 4-stroke engine, ideal for urban commuting and recreational use. It features 14" aluminum wheels for reduced weight and improved handling, and a DC ignition system for higher ignition efficiency.

Figure 1: Front-left view of the X-PRO Capri 150cc Moped.
Setup and Assembly
Your X-PRO Capri 150cc Moped requires some assembly upon arrival. The following components need to be installed: Rear Shock, Handlebar, Wheels, Brakes, Hub Odometer Counter, and Battery. Refer to the detailed assembly video and instructions below for guidance.
Assembly Video Guide
Video 1: Comprehensive assembly guide for the 150cc moped.
Step-by-Step Assembly Instructions
- Unpacking the Moped: Carefully cut the straps and open the cardboard box. Remove the top part of the box to reveal the metal frame protecting the moped. Unscrew the bolts securing the moped to the frame.
- Handlebar Installation: Unpack the handlebar from its protective wrapping. Insert the handlebar into the steering column. Secure it using the provided bolts and nuts, ensuring they are properly aligned and tightened.
- Rear Shock Installation: Locate the rear shock absorber. Align the shock with its mounting points on the moped's frame and the rear wheel assembly. Insert the bolts and tighten them securely.
- Front Wheel and Brake Assembly: Attach the front wheel to the forks, ensuring the brake disc aligns with the caliper. Install the hub odometer counter. Secure the wheel with the axle bolt and tighten the brake caliper bolts.
- Battery Installation: Locate the battery compartment. Connect the positive (+) and negative (-) terminals of the battery to the corresponding wires from the moped. Ensure connections are tight and secure.
- Final Panel Installation: Secure all remaining body panels using the provided screws and clips. Ensure all connections are firm and panels are flush.
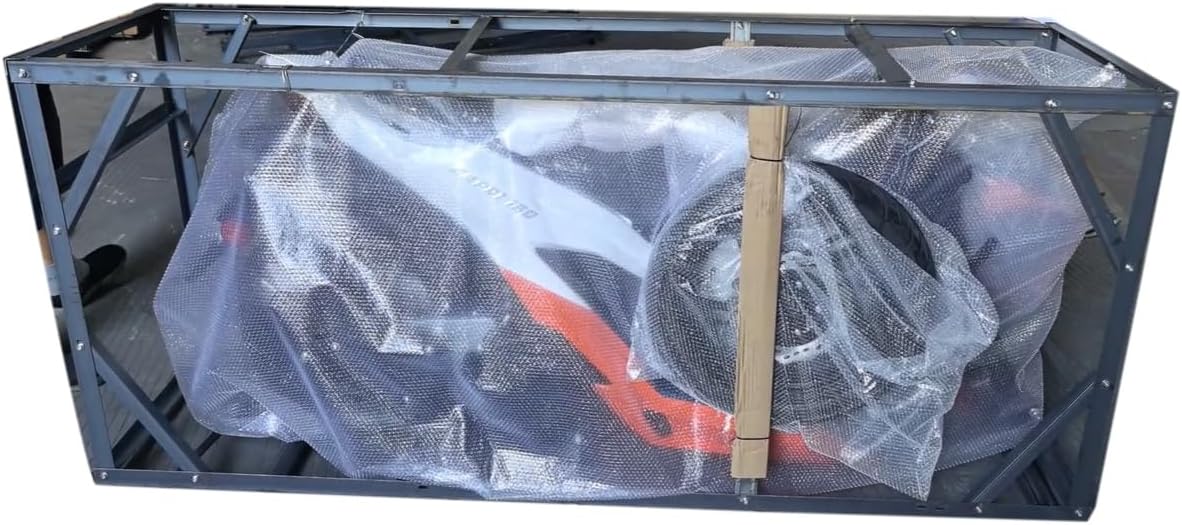
Figure 2: Moped securely packaged within its metal frame and cardboard box.

Figure 3: Handlebar being installed onto the moped's steering column.

Figure 4: Installation of the rear shock absorber, connecting the frame to the rear wheel.

Figure 5: Close-up of the front wheel and brake caliper during assembly.

Figure 6: The X-PRO Capri 150cc Moped fully assembled and ready for use.
Operating Instructions
Before operating the moped, ensure all components are securely fastened and all fluids are at appropriate levels. Always wear a helmet and appropriate safety gear.
- Starting the Engine: Insert the key into the ignition and turn it to the "ON" position. Ensure the kickstand is up. Hold the brake lever and press the electric start button. If using the kick start, firmly press down on the kick start lever while holding the brake.
- Controls: Familiarize yourself with the throttle, brake levers (front and rear), turn signals, horn, and headlight controls.
- Riding: Start slowly and gradually increase speed. Maintain a safe distance from other vehicles and objects. Observe all traffic laws and regulations.
Maintenance
Regular maintenance is crucial for the longevity and safe operation of your moped. Perform the following checks and services regularly:
- Oil Level: Check engine oil level regularly and top up as needed. Refer to the "Gear Oil" label on the engine for specific instructions.
- Tire Pressure: Ensure tires are inflated to the recommended pressure for optimal performance and safety.
- Brakes: Inspect brake pads and fluid levels. Ensure brakes are responsive and free from excessive wear.
- Lights and Signals: Verify all lights (headlight, taillight, turn signals) and the horn are functioning correctly.
- Fasteners: Periodically check all bolts and nuts for tightness, especially after initial assembly and during regular use.
Troubleshooting
This section provides solutions to common issues you might encounter with your moped.
| Problem | Possible Cause | Solution |
|---|---|---|
| Engine does not start | Low fuel, dead battery, loose battery connection, kickstand down, ignition off. | Check fuel level, charge/replace battery, tighten battery terminals, raise kickstand, turn ignition to ON. |
| Loose handlebars | Mounting bolts are loose. | Tighten handlebar mounting bolts securely. |
| Moped randomly shuts off | Fuel supply issue, electrical connection problem. | Check fuel lines and connections. Inspect electrical wiring for loose connections. Consult a qualified technician if the issue persists. |
Specifications
| Feature | Detail |
|---|---|
| Brand | X-PRO |
| Model Name | MC-Y003 |
| Engine | 149.6cc, air-cooled, 4-stroke |
| Wheels | 14" Aluminum Wheels |
| Ignition | DC ignition |
| Color | Black |
| Age Range (Description) | Adult |
| Special Feature | Headlight |
| Weight Limit | 340 Pounds |
| Product Dimensions | 77.2"L x 26.4"W x 42"H |
| Number of Wheels | 2 |
| Wheel Material | Aluminum |
| Frame Material | Alloy Steel |
| Item Weight | 218 Pounds |
| Handlebar Type | Fixed |
| Wheel Type | Caster |
| Suspension Type | Dual Suspension |
| Grip Type | Ergonomic |
| Brake Style | Disc/Drum |
| Maximum Distance Range | 20 Miles |
Warranty and Support
The X-PRO Capri 150cc Moped comes with a Limited Warranty. For detailed information regarding warranty coverage, claims, or technical support, please refer to the warranty card included with your product or contact X-PRO customer service directly.
X-PRO is committed to customer satisfaction and provides reliable support and parts for their vehicles. For any inquiries or assistance, please reach out to the seller, XPROUSA.


