Introduction
This manual provides comprehensive instructions for the installation, operation, and maintenance of your MXT SLP5MP16CHDVR 16-Channel 5MP Hybrid Digital Video Recorder. This DVR supports 16 channels of HD-TVI/CVI/AHD analog cameras up to 5MP Lite resolution and up to 8 channels of IP cameras. It features H.265 video compression, dual SATA drive bays for storage, and is NDAA compliant. Remote surveillance is available via the SuperLive Plus mobile application.
What's in the Box
- 1x MXT SLP5MP16CHDVR Hybrid Digital Video Recorder
- Power Adapter
- USB Mouse
- SATA Cables (for HDD installation)
- Quick Start Guide
Note: Hard Disk Drives (HDD) are not included and must be purchased separately. A PoE switch is required for IP cameras and is also sold separately.
Product Overview
Familiarize yourself with the physical components of your MXT SLP5MP16CHDVR.
Front and Rear Panels
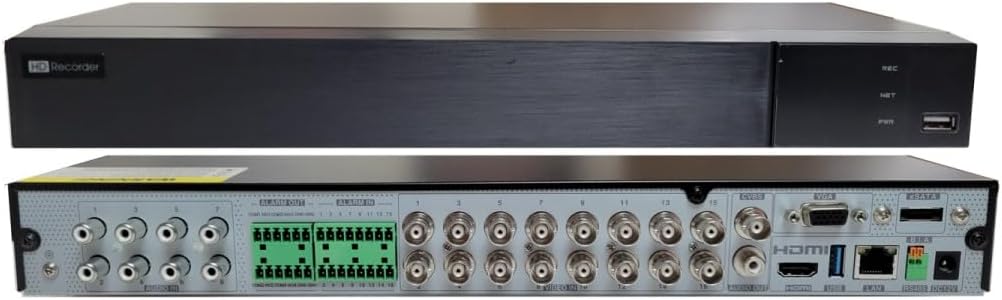
Image Description: This image displays both the front and rear panels of the MXT SLP5MP16CHDVR. The top view shows the sleek black front panel with "HD Recorder" branding, status indicator lights (REC, NET, PWR), and a USB port. The bottom view reveals the rear panel, which is densely populated with various ports including 16 BNC video inputs, alarm input/output terminals, RCA audio inputs/output, VGA, HDMI, Ethernet, USB ports, and power input.

Image Description: This diagram provides a detailed overview. The top left section lists key features such as 16-channel video input, H.265 compression, GUI, multi-mode recording, playback, remote control, and mobile surveillance. The top right section shows the DVR's dimensions (380mm width, 268mm depth, 48.1mm height). The bottom section is a clear, labeled diagram of the rear panel, indicating the position of each port, including video inputs (1-16), alarm I/O, audio I/O, VGA, HDMI, Ethernet, USB, and power.
Setup
1. Hardware Installation
- Hard Drive Installation:
Unscrew and remove the top cover of the DVR. Connect the SATA data and power cables from the DVR to your Hard Disk Drive(s). Secure the HDD(s) inside the DVR chassis using the provided screws. Replace the top cover.
- Camera Connections:
- Analog Cameras: Connect your HD-TVI/CVI/AHD analog cameras to the BNC video input ports (1-16) on the rear panel.
- IP Cameras: Connect IP cameras to a separate PoE switch (not included). Then, connect the PoE switch to the DVR's Ethernet port. The DVR does not have built-in PoE ports.
- Audio Connections: Connect audio input devices to the RCA audio input ports (up to 8 channels). Connect an audio output device to the RCA audio output port.
- Video Output: Connect a monitor to the DVR using either the HDMI, VGA, or BNC (CVBS) output port. HDMI is recommended for optimal resolution.
- Network Connection: Connect an Ethernet cable from your router or network switch to the DVR's LAN port.
- USB Devices: Connect the included USB mouse to a USB port on the front or rear panel. You can also connect a USB flash drive for backup purposes.
- Power Connection: Connect the power adapter to the DVR's power input and then plug it into a power outlet.
2. Initial Configuration
Upon first boot, the DVR will guide you through a setup wizard. Follow the on-screen prompts to set up basic parameters such as language, date/time, network settings, and hard drive initialization.
- Hard Drive Formatting: Ensure your newly installed HDD(s) are formatted by the DVR for proper recording functionality.
- Network Settings: Configure network settings (DHCP or Static IP) to enable remote access and IP camera integration.
- Audio-Over-Coax: For HD-TVI cameras with built-in microphones, this feature requires manual activation in the DVR interface.
Operating Instructions
1. Live View
After initial setup, the DVR will display the live view of connected cameras on the monitor. Use the USB mouse to navigate the Graphical User Interface (GUI).
- Channel Display: Switch between single-channel view, multi-channel grid views (e.g., 4-channel, 9-channel, 16-channel).
- Digital Zoom: Use the mouse scroll wheel or on-screen controls to digitally zoom into live video feeds.
2. Recording
The DVR supports various recording modes. Access the recording settings via the main menu.
- Continuous Recording: Records 24/7.
- Motion Detection Recording: Records only when motion is detected in the camera's view. Configure motion detection zones and sensitivity for each channel.
- Scheduled Recording: Set specific times for recording.
- Alarm Recording: Records when an external alarm input is triggered.
3. Playback
To review recorded footage, navigate to the Playback menu.
- Search Options: Search by date, time, event (motion, alarm), or tag.
- Playback Controls: Standard controls include play, pause, fast forward, rewind, and frame-by-frame.
- Simultaneous Playback: The DVR supports simultaneous playback of up to 16 channels.
4. Remote Access (SuperLive Plus App)
The SuperLive Plus mobile application allows you to view live feeds, play back recordings, and manage your DVR remotely from iOS and Android devices.
- Download the App: Search for "SuperLive Plus" in the Apple App Store or Google Play Store and install it on your smartphone or tablet.
- Add Device: Open the app and follow the instructions to add your DVR. This typically involves scanning a QR code displayed on the DVR's monitor or manually entering the DVR's network details.
- Remote Functions: Once connected, you can access live view, playback, PTZ control (if applicable), and configure certain DVR settings.
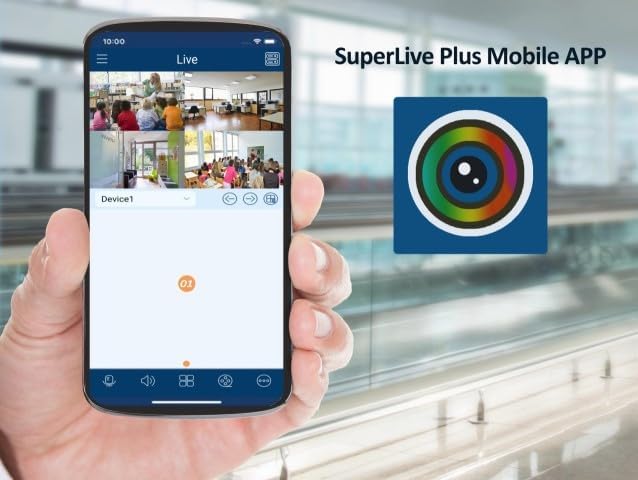
Image Description: This image shows a smartphone screen displaying the SuperLive Plus mobile application. The app interface is visible, showing a grid of four live camera feeds from a surveillance system. The app's branding and navigation elements are also present, indicating remote monitoring capabilities.

Image Description: This image displays the splash screen of the SuperLive Plus mobile application on a smartphone. The app's logo, featuring a camera lens icon, is prominently displayed against a blue background with a landscape silhouette. Below the logo, the text "SuperLive Plus" is visible, followed by the motto "Secure the world with you."
5. PTZ Control
If you have Pan-Tilt-Zoom (PTZ) cameras connected, you can control their movement and zoom functions directly from the DVR interface or through the SuperLive Plus app. The DVR supports PTZ preset and auto-cruise functions, with up to 255 presets and 8 cruises.
Maintenance
- Hard Drive Management: Regularly check the status of your hard drives. The DVR can be configured to overwrite old footage automatically when the HDD is full. Consider backing up critical footage periodically.
- Firmware Updates: Check the manufacturer's website for available firmware updates. Keeping your DVR's firmware up-to-date ensures optimal performance and security.
- Cleaning: Ensure the DVR is kept in a clean, dust-free environment. Periodically clean the exterior with a soft, dry cloth. Do not use liquid cleaners directly on the unit.
Troubleshooting
| Problem | Possible Cause | Solution |
|---|---|---|
| No video output on monitor. | Loose video cable, incorrect monitor input, DVR not powered on. | Check HDMI/VGA/BNC cable connections. Ensure monitor is set to correct input source. Verify DVR power. |
| No camera image. | Camera not powered, loose BNC/network cable, incompatible camera type. | Check camera power supply and cable connections. Ensure camera type (TVI/CVI/AHD/IP) is supported and configured correctly. |
| Cannot access DVR remotely via app. | No network connection, incorrect network settings, firewall issues, app configuration error. | Verify DVR has internet access. Check network settings (DHCP/Static IP). Ensure port forwarding (if required) is configured on your router. Re-add device in SuperLive Plus app. |
| No recording. | No HDD installed, HDD not formatted, recording schedule not set, HDD full. | Install and format HDD. Configure recording schedule. Check HDD status and capacity. |
Specifications
| Feature | Detail |
|---|---|
| Model Number | SLP5MP16CHDVR |
| Video Input | 16-Channel HD-TVI/CVI/AHD (5MP/4MP/1080p/720p/WD1) + up to 8-Channel IP (5MP/4MP/3MP/1080p/960p/720p) |
| Video Compression | H.265 |
| Playback Capability | 16 Channels simultaneously |
| Audio Input/Output | 8x RCA Input, 1x RCA Output |
| Alarm Input/Output | 16x Input, 4x Output |
| Recording Resolution | 5MP Lite/4MP Lite/1080p/1080p Lite/720p/WD1/D1 |
| Bandwidth | Incoming: 32Mbps, Outgoing: 96Mbps |
| HDD Capacity | 2x SATA (up to 10TB each), 1x E-SATA |
| Video Output | 1x HDMI, 1x VGA, 1x BNC (CVBS) |
| Remote Access | Web Client, CMS, SuperLive Plus Mobile App (iOS/Android) |
| Compliance | NDAA Compliant |
| Dimensions (L x W x H) | Approx. 18 x 14 x 5 inches (Package) |
| Weight | 4 pounds |
Warranty and Support
Warranty information and professional technical support for this MXT product are provided exclusively by the seller. Please refer to your purchase documentation or contact the seller directly for assistance with warranty claims or technical inquiries.
For the latest software, firmware, and additional resources, please visit the official MXT support website or contact their customer service.


