1. Product Overview
The MXT SuperLive Plus 16CH Hybrid DVR is a robust surveillance solution designed for comprehensive video recording and monitoring. This system supports 16 channels of HD-TVI/CVI/AHD analog cameras up to 5MP Lite 1080p resolution, and additionally accommodates up to 8 channels of IP cameras. Equipped with a 4TB HDD, it utilizes H.265 compression for efficient storage and is NDAA compliant. Remote surveillance is facilitated through the SuperLive Plus mobile application for iOS and Android devices.

Image 1.1: Front and rear view of the MXT 16CH Hybrid DVR, alongside a 4TB hard disk drive, illustrating the device's compact design and extensive connectivity options.
2. What's in the Box
Upon unboxing, verify that all components are present and in good condition:
- 1x MXT 16CH Hybrid DVR (with pre-installed 4TB HDD)
- Power Adapter
- USB Mouse
- Quick Start Guide
- Screws for additional HDD installation (if applicable)
3. Product Features
The MXT 16CH Hybrid DVR offers a comprehensive set of features for advanced surveillance:
- Hybrid Video Input: Supports 16 channels of HD Analog (TVI/AHD/CVI) video input up to 5MP Lite 1080p, and up to 8 channels of IP video input.
- Storage Capacity: Equipped with a 4TB HDD, expandable with 2x SATA ports (up to 10TB each) and 1x E-SATA port.
- Video Compression: Utilizes H.265 compression for efficient storage and high-quality video.
- NDAA Compliant: Adheres to the National Defense Authorization Act standards.
- Remote Surveillance: Free remote monitoring via the SuperLive Plus APP for iOS and Android devices.
- Video Outputs: Multiple video outputs including 1x HDMI, 1x VGA, and 1x BNC for versatile display options.
- Audio Support: 8x RCA audio inputs and 1x RCA audio output. Supports Audio-Over-Coax for HD-TVI cameras with built-in mics (requires manual activation).
- Playback: Simultaneous 16-channel playback.
- Alarm: 16-channel alarm input and 4-channel alarm output.

Image 3.1: Front view of the MXT 16CH Hybrid DVR, highlighting its sleek design and the NDAA Compliant certification.
4. Physical Components and Connections
Familiarize yourself with the DVR's front and rear panels to ensure proper setup and operation.
4.1 Front Panel
The front panel typically includes status indicators (REC, NET, PWR) and a USB port for mouse or backup devices.
4.2 Rear Panel Connections
The rear panel provides all necessary ports for video input, audio, network, and display outputs.

Image 4.1: Detailed diagram of the MXT 16CH Hybrid DVR's rear panel, showing BNC video inputs, audio inputs/outputs, alarm terminals, network port, USB ports, VGA, HDMI, and power input.
- Video Inputs (BNC): 16 channels for analog HD-TVI/CVI/AHD cameras.
- Audio Inputs (RCA): 8 channels for external microphones.
- Audio Output (RCA): 1 channel for external speakers.
- Alarm Input/Output: Terminals for connecting external alarm devices.
- VGA Output: Connect to a VGA monitor.
- HDMI Output: Connect to an HDMI monitor or TV for high-definition display.
- BNC-CVBS Output: Composite video output (can be used as main or spot output).
- LAN Port (RJ45): Connect to your network router for remote access.
- USB Ports: For connecting a mouse, USB flash drive for backup, or external HDD.
- Power Input: Connect the provided DC12V power adapter.
5. Setup Guide
Follow these steps to set up your MXT 16CH Hybrid DVR:
- Connect Cameras: Connect your analog HD-TVI/CVI/AHD cameras to the BNC video input ports on the rear panel. For IP cameras, connect them to your network via a PoE switch (not included) and ensure they are on the same network as the DVR.
- Connect Monitor: Connect a monitor to the DVR using either the HDMI or VGA port.
- Connect Mouse: Plug the USB mouse into one of the USB ports on the front or rear panel.
- Connect Network: Connect an Ethernet cable from the DVR's LAN port to your router or network switch.
- Connect Power: Connect the provided DC12V power adapter to the DVR's power input port, then plug the adapter into a power outlet. The DVR will power on automatically.
- Initial Setup Wizard: Upon first boot, the DVR will guide you through an initial setup wizard. Follow the on-screen prompts to configure basic settings such as language, date/time, network settings, and password.
- HDD Initialization: If the pre-installed 4TB HDD is not recognized or if you install additional HDDs, you may need to format them through the DVR's menu system (System > Storage > HDD Management).
- Audio-Over-Coax Activation: If using HD-TVI cameras with built-in microphones, navigate to the DVR's menu to manually activate the Audio-Over-Coax feature for the respective channels.
6. Operating Instructions: SuperLive Plus Mobile APP
The SuperLive Plus mobile application allows you to remotely view live feeds, play back recordings, and manage your DVR from your smartphone or tablet.
6.1 Downloading and Installing the APP
- Download: Search for "SuperLive Plus" in the Apple App Store (for iOS devices) or Google Play Store (for Android devices).
- Install: Download and install the application on your mobile device.
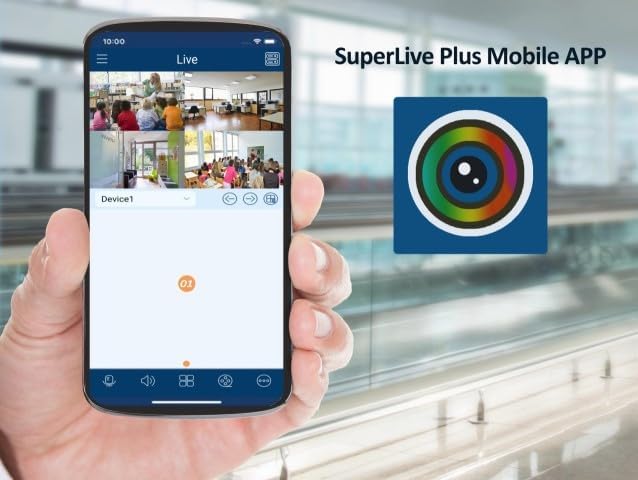
Image 6.1: A smartphone displaying the SuperLive Plus Mobile APP interface, showing multiple camera feeds, alongside the app's distinctive icon.
6.2 Adding Your DVR to the APP
- Open APP: Launch the SuperLive Plus application.
- Add Device: Tap on the "Add Device" or "+" icon.
- Scan QR Code: On your DVR, navigate to the network settings or P2P/Cloud menu to find the device's QR code. Use the app's scan function to scan this QR code. Alternatively, you can manually enter the device's serial number or IP address.
- Enter Information: Provide a device name, username, and password for your DVR (the same credentials you set during the DVR's initial setup).
- Save: Save the device configuration. Your DVR should now be listed in the app.

Image 6.2: The SuperLive Plus application's splash screen, featuring its logo and the motto "Secure the world with you," indicating the app is ready for use.
6.3 Basic APP Functions
- Live View: Tap on the added device to view live feeds from your connected cameras. You can switch between single and multi-channel views.
- Playback: Access recorded footage by selecting the playback option and choosing the desired date and time.
- Snapshot/Record: Capture still images or record video clips directly to your mobile device.
- PTZ Control: If you have PTZ (Pan-Tilt-Zoom) cameras, use the app to control their movement and zoom.
- Audio: Listen to audio from cameras with microphones and use two-way audio if supported.
7. Maintenance
Regular maintenance ensures optimal performance and longevity of your DVR system.
- Clean Regularly: Dust can accumulate and cause overheating. Gently clean the DVR's exterior and ventilation openings with a soft, dry cloth. Do not use liquid cleaners.
- Firmware Updates: Periodically check the manufacturer's website for firmware updates. Updating firmware can improve performance, add new features, and fix bugs.
- HDD Health Check: Monitor the health of your hard disk drives through the DVR's system menu. Replace failing HDDs promptly to avoid data loss.
- Backup Important Footage: Regularly back up critical video footage to an external USB drive or network storage.
- Power Cycle: If the DVR experiences minor issues, a simple power cycle (unplugging and replugging after a minute) can often resolve them.
8. Troubleshooting
This section addresses common issues you might encounter and provides potential solutions.
| Problem | Possible Cause | Solution |
|---|---|---|
| No video output on monitor. | Loose cable connection, incorrect input source on monitor, DVR not powered on. | Check HDMI/VGA cable connections. Ensure monitor is set to correct input. Verify DVR power indicator is on. |
| Cameras not displaying video. | Loose BNC connection, camera power issue, incorrect video format, IP camera not configured. | Check BNC connections. Ensure cameras are powered. Verify camera video format matches DVR settings. For IP cameras, ensure they are added and configured correctly in the DVR's IP camera management. |
| Cannot access DVR remotely via SuperLive Plus APP. | DVR not connected to network, network firewall blocking, incorrect APP settings, P2P service disabled. | Verify DVR's network cable is connected and network status is "Online". Check router settings for port forwarding if not using P2P. Ensure P2P/Cloud service is enabled on the DVR. Double-check device credentials in the APP. |
| No recording or HDD error. | HDD not initialized, HDD full, HDD failure, recording schedule not set. | Initialize/format HDD in DVR settings. Check HDD health. Configure recording schedule. Delete old footage or install larger HDD if full. |
9. Specifications
Detailed technical specifications for the MXT 16CH Hybrid DVR.

Image 9.1: Diagram illustrating key features and physical dimensions of the MXT 16CH Hybrid DVR.
Image 9.2: Comprehensive table detailing the technical specifications of the MXT 16CH Hybrid DVR, including video, audio, record, playback, network, and general parameters.
| Category | Specification |
|---|---|
| Model Number | SPL5MP16CHDVR4TB |
| Video Input | 16CH HD Analog (TVI/AHD/CVI 5MP/4MP/1080p/720p/WD1) + up to 8CH IP (5MP/4MP/3MP/1080p/960p/720p) |
| Record Resolution | 5MP Lite/4MP Lite/1080p/1080p Lite/720p/WD1/D1 |
| Video Compression | H.265 |
| Audio Input/Output | 8x RCA Input, 1x RCA Output |
| HDD Capacity | 2x SATA (up to 10TB each), 1x E-SATA (4TB HDD pre-installed) |
| Video Output | 1x HDMI (1920x1080), 1x VGA (1920x1080), 1x BNC-CVBS |
| Network Interface | 1x RJ45 1000Mbps |
| USB Interface | 2x USB 2.0, 1x USB 3.0 |
| Power Supply | DC12V/4A |
| Dimensions (W x D x H) | 380 x 268 x 45 mm (approx. 15 x 10.5 x 1.8 inches) |
| Operating Temperature | -10°C to 50°C (14°F to 122°F) |
10. Warranty and Support
This product comes with a manufacturer's warranty. For specific warranty terms and duration, please refer to the documentation included with your purchase or contact the seller directly.
Technical Support: US-based professional and experienced technical support is provided exclusively by the seller, Beyond Quantum Tech. For assistance with setup, configuration, or troubleshooting, please contact their support team.
For the most up-to-date support information, please visit the seller's page on Amazon or their official website.


