1. Product Overview
The Kmise USB Audio Interface MI8423-KUS is a versatile 2-channel audio interface designed for musicians, vocalists, podcasters, and content creators seeking studio-quality sound. It offers high-fidelity 24-bit/192kHz recording resolution, ensuring crystal-clear audio capture with minimal noise.

Key Features:
- Crystal-clear sound quality: High-quality converters and preamps filter noise and enhance spatial awareness, achieving 24-bit/192kHz recording resolution for subtle vocal and instrument nuances.
- Low-Latency Driver: Professional drivers and hardware design enable ultra-low audio latency for real-time monitoring during recording, suitable for podcast production, cover recordings, and instrumental arrangements.
- Plug and Play: Connects effortlessly to Mac/PC or mobile devices without complex driver installation. Its compact size and simple operation make it beginner-friendly.
- 48V Phantom Power: Features a 48V phantom power switch to power professional condenser microphones, capturing crystal-clear vocals with broadcast-quality clarity.
- All-in-One USB Audio Interface: Integrates microphone input, instrument input, headphone output, and speaker output for centralized management of audio devices and a cleaner workspace.
2. Setup Guide
Follow these steps to set up your Kmise USB Audio Interface MI8423-KUS.
2.1 Connecting to Your Computer/Device
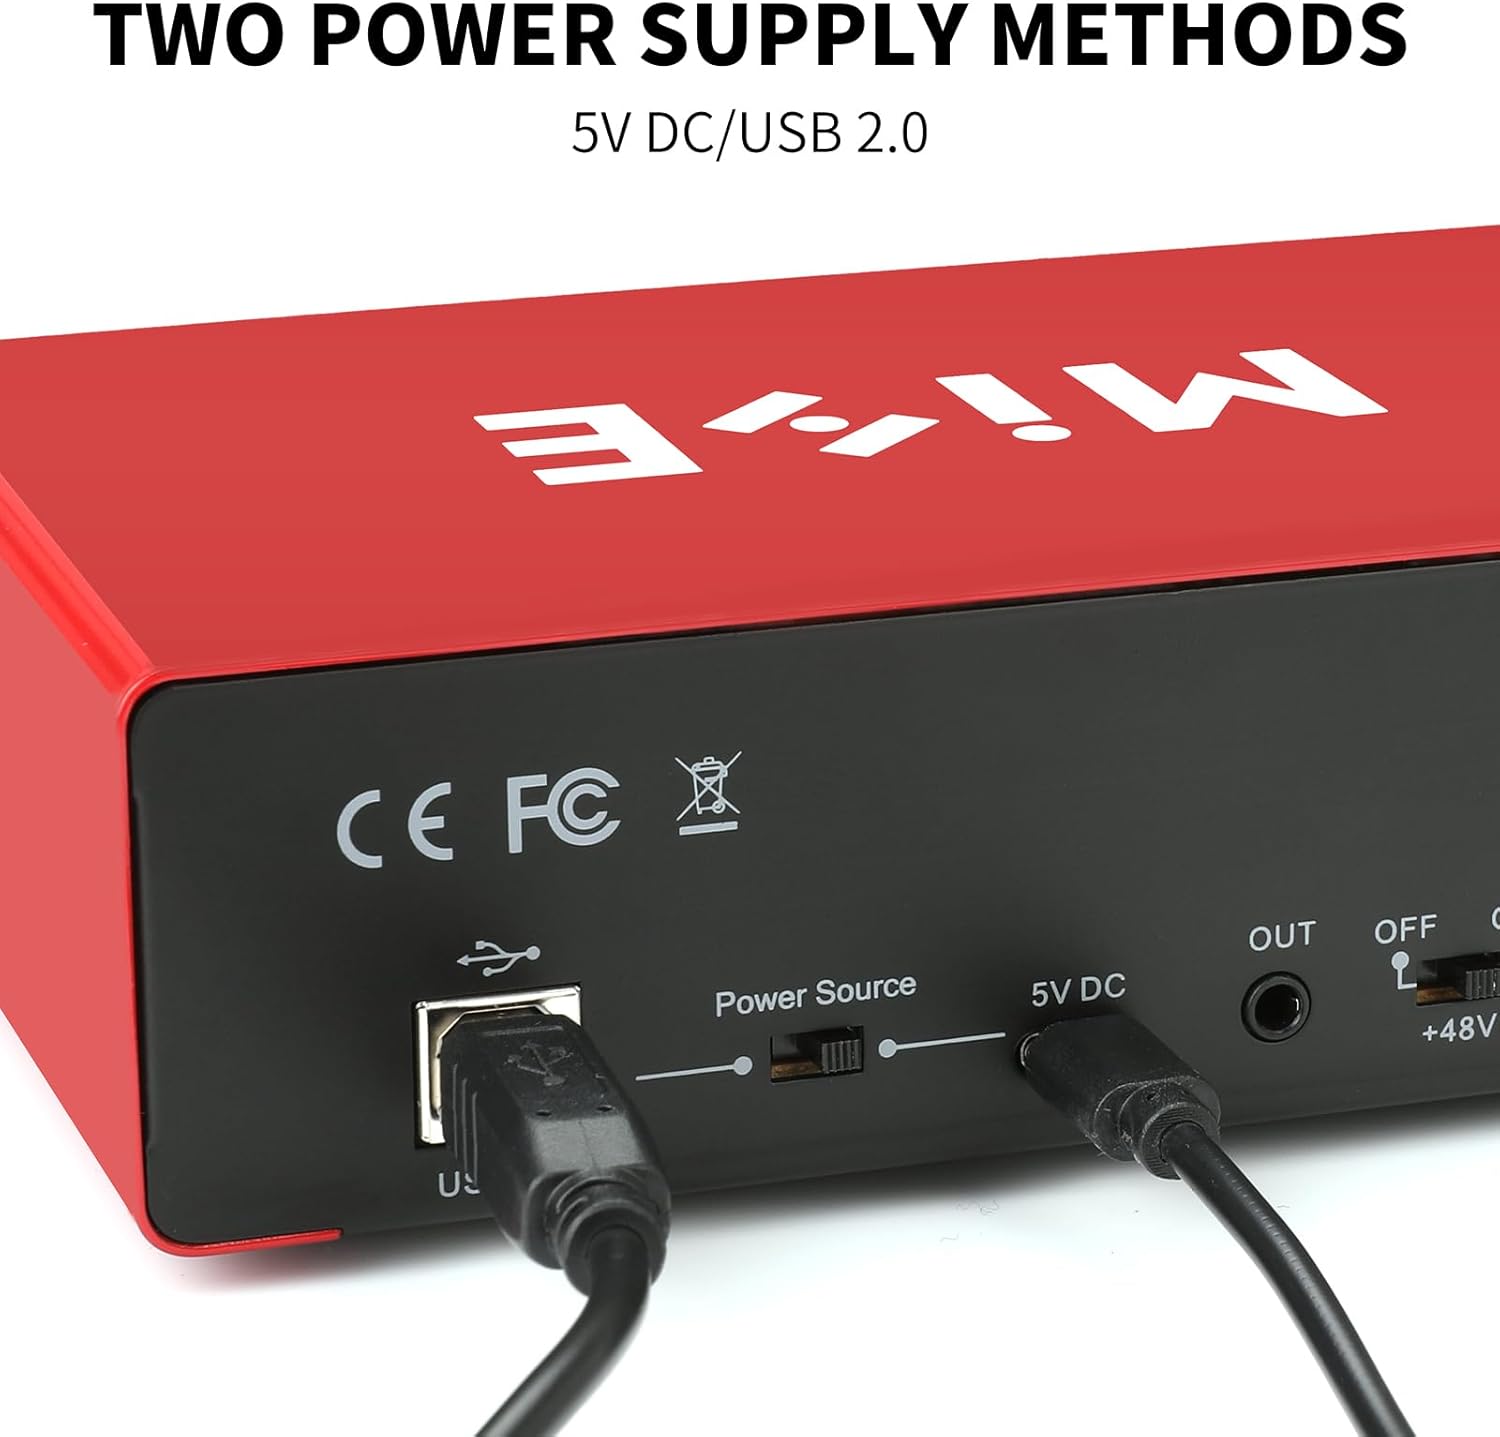
- Power Connection: Connect the provided USB cable from the interface's USB 3.0 port to an available USB port on your computer (Mac/PC) or mobile device. The interface is bus-powered, meaning it draws power directly from the USB connection. An optional 5V DC power source can be connected for additional power if needed, especially when using phantom power with certain devices.
- Driver Installation: The Kmise USB Audio Interface is plug-and-play and typically does not require additional driver installation for most operating systems (Mac OS, Windows XP or later). Your system should automatically recognize the device.
- Audio Output: Connect your studio monitors or speakers to the "LINE OUTPUTS" (Left/Right) on the rear of the interface using appropriate cables. For headphones, plug them into the "PHONE" jack on the front panel.

2.2 Input Connections
- Microphone Input: Use an XLR cable to connect your microphone to INPUT 1 or INPUT 2.
- Instrument Input: For guitars or other instruments, use a 1/4-inch TS cable to connect to INPUT 1 or INPUT 2. Ensure the "Hi-Z" button is engaged for instruments.
- Phantom Power (48V): If using a condenser microphone, press the "+48V" button to supply phantom power. The indicator light will illuminate.
3. Operating Instructions
Understand the controls and functions of your audio interface for optimal performance.
3.1 Front Panel Controls
- GAIN 1/2: Adjusts the input level for Microphone/Line/Instrument inputs. Turn clockwise to increase gain. Monitor the "SIG" (signal) and "PK" (peak) indicators to avoid clipping.
- Hi-Z: Engages high-impedance mode for direct instrument connection (e.g., electric guitar).
- +48V: Activates phantom power for condenser microphones.
- Low Cut: Filters out low-frequency rumble or noise from the input signal.
- INPUT/MON: Mix knob to balance the direct input signal with the playback from your computer (DAW).
- LoopBack: Enables the loopback function, allowing you to record audio playing from your computer along with your live input.
- OUTPUT: Main output level control for your studio monitors.
- PHONE: Headphone output level control.
- POWER: Power indicator light.

3.2 Recording and Monitoring
- Real-time Monitoring: Use the "INPUT/MON" knob to adjust the blend between your live input and the audio playback from your computer. This allows for zero-latency monitoring of your performance.
- Loopback Function: Activate the "LoopBack" button to capture both your live microphone/instrument input and any audio playing from your computer simultaneously. This is useful for podcasts, live streams, or recording computer audio.
- High-Fidelity Recording: The interface supports up to 24-bit/192kHz resolution, ensuring professional-grade audio capture.

4. Maintenance
To ensure the longevity and optimal performance of your Kmise USB Audio Interface MI8423-KUS, follow these maintenance guidelines:
- Cleaning: Use a soft, dry cloth to clean the exterior of the device. Avoid using liquid cleaners or solvents, as they may damage the finish or internal components.
- Storage: Store the interface in a cool, dry place away from direct sunlight, extreme temperatures, and high humidity. When not in use, disconnect all cables to prevent strain on the ports.
- Cable Management: Ensure cables are not excessively bent or tangled, which can lead to damage over time.
- Firmware Updates: Periodically check the official Kmise website for any available firmware updates. Follow the instructions provided with the update carefully.
5. Troubleshooting
If you encounter issues with your Kmise USB Audio Interface MI8423-KUS, refer to the following common problems and solutions:
- No Sound Output:
- Check all cable connections (USB, speakers, headphones).
- Ensure the interface is selected as the default audio input/output device in your computer's sound settings.
- Verify that the "OUTPUT" and "PHONE" volume knobs are turned up.
- Confirm that your DAW or audio software is configured to use the Kmise interface.
- No Input Signal:
- Check microphone/instrument cable connections.
- Ensure the "GAIN" knob for the respective input is turned up.
- If using a condenser microphone, verify that "+48V" phantom power is enabled.
- For instruments, ensure "Hi-Z" is engaged if applicable.
- Check your DAW or audio software for correct input selection and arming of tracks.
- Distortion or Clipping:
- Reduce the "GAIN" knob for the input channel until the "PK" (peak) indicator no longer lights up consistently.
- Ensure the input source (microphone, instrument) is not too loud.
- Latency Issues:
- Adjust the buffer size in your DAW's audio settings (lower buffer size reduces latency but requires more CPU).
- Use the direct monitoring function via the "INPUT/MON" knob to hear your input directly from the interface with zero latency.
- Device Not Recognized:
- Try connecting the interface to a different USB port on your computer.
- Restart your computer.
- Ensure your operating system is up to date.
- If using a USB hub, try connecting directly to the computer.
6. Specifications
| Feature | Detail |
|---|---|
| Product Dimensions | 3.5"D x 6.5"W x 1.5"H (8.89 x 16.51 x 3.81 cm) |
| Item Weight | 1.5 pounds (0.68 kg) |
| Item Model Number | MI8423-KUS |
| Brand | Kmise |
| Compatible Devices | Guitar, Laptop, Personal Computer, Smartphone, Tablet |
| Connectivity Technology | USB |
| Number of Channels | 2 |
| Recording Resolution | 24-bit/192kHz |
| Phantom Power | +48V (switchable) |
| Manufacturer | Kmise |
| Date First Available | September 10, 2024 |
7. Warranty Information
For detailed warranty information regarding your Kmise USB Audio Interface MI8423-KUS, please refer to the documentation included in your product packaging or visit the official Kmise website. Standard warranty terms typically cover manufacturing defects for a specified period from the date of purchase.
Optional protection plans may be available for extended coverage. Please check with your retailer or the manufacturer for details on purchasing additional protection.
8. Customer Support
Should you require further assistance or have questions not covered in this manual, please contact Kmise customer support:
- Online Support: Visit the official Kmise website for FAQs, support articles, and contact forms.
- Email Support: Refer to your product packaging or the Kmise website for the appropriate support email address.
When contacting support, please have your product model number (MI8423-KUS) and purchase information readily available.


