
ENJOYWOOD WB0301-Plus
ENJOYWOOD WB0301-Plus 60-Inch Adjustable Workbench User Manual
Model: WB0301-Plus
1. Introduction
Thank you for choosing the ENJOYWOOD WB0301-Plus 60-inch Adjustable Workbench. This manual provides essential information for the safe assembly, operation, and maintenance of your workbench. Please read these instructions thoroughly before use and retain them for future reference.
This workbench features a durable 1.2-inch rubberwood tabletop, robust steel construction, integrated storage solutions including drawers and pegboards, and convenient ETL certified power outlets. Its adjustable height and mobility options make it suitable for various workshop, garage, home, or office environments.
2. Safety Information
WARNING: Failure to follow these safety instructions may result in serious injury or property damage.
- Always read and understand all instructions before assembly and use.
- Ensure all components are securely fastened before placing items on the workbench.
- Do not exceed the maximum load capacity of 2000 lbs (907 kg) for the workbench.
- Use appropriate lifting techniques when moving heavy components during assembly.
- Keep children and pets away from the assembly area.
- Ensure the workbench is placed on a stable, level surface. Use adjustable feet to compensate for uneven floors.
- When using the power outlets, ensure they are properly grounded and do not overload the circuit. Disconnect power before cleaning or maintenance.
- Regularly inspect the workbench for loose fasteners, damage, or wear. Tighten or replace components as needed.
3. Package Contents
Please verify that all parts are present before beginning assembly. If any parts are missing or damaged, contact customer support.
- Rubberwood Tabletop
- Steel Leg Frames (H-shaped)
- Crossbar Supports
- Drawers with Slides
- Integrated Pegboard (Main and Side Sections)
- Power Outlet Strip with LED Light and Cord Organizer
- Heavy-Duty Swivel Casters with Brakes
- Adjustable Metal Feet
- Assembly Hardware (bolts, nuts, washers, etc.)
- Assembly Tools (e.g., wrench, hex key - may be included or required)
4. Assembly Instructions (Setup)
Assembly is required and involves simple to moderate complexity. It is recommended to have two people for certain steps due to the size and weight of components.
4.1 Attaching Legs and Crossbars
- Carefully unbox all components and lay them out on a clean, flat surface.
- Attach the H-shaped steel leg frames to the underside of the rubberwood tabletop using the provided bolts and washers. Ensure all connections are finger-tight initially.
- Connect the upper and lower crossbar supports between the leg frames. These supports enhance stability and load-bearing capacity. Secure with hardware.
- Once all leg and crossbar components are in place, fully tighten all bolts with the provided tools.

Figure 1: Workbench legs and frame assembly details, highlighting the stable H-shaped legs and 1.2mm thick steel construction.
4.2 Installing Drawers
- Assemble the drawer boxes according to the instructions provided with the drawer components.
- Attach the drawer slides to the workbench frame and the assembled drawers. Ensure smooth operation.
- Insert the drawers into their designated slots under the tabletop.
4.3 Attaching Pegboard and Power Strip
- Mount the main integrated pegboard section to the rear of the workbench frame using the specified hardware.
- Attach any side pegboard sections if included.
- Secure the power outlet strip, which includes the LED light, to the designated area on the pegboard or workbench frame. Connect the power cord to a suitable outlet.
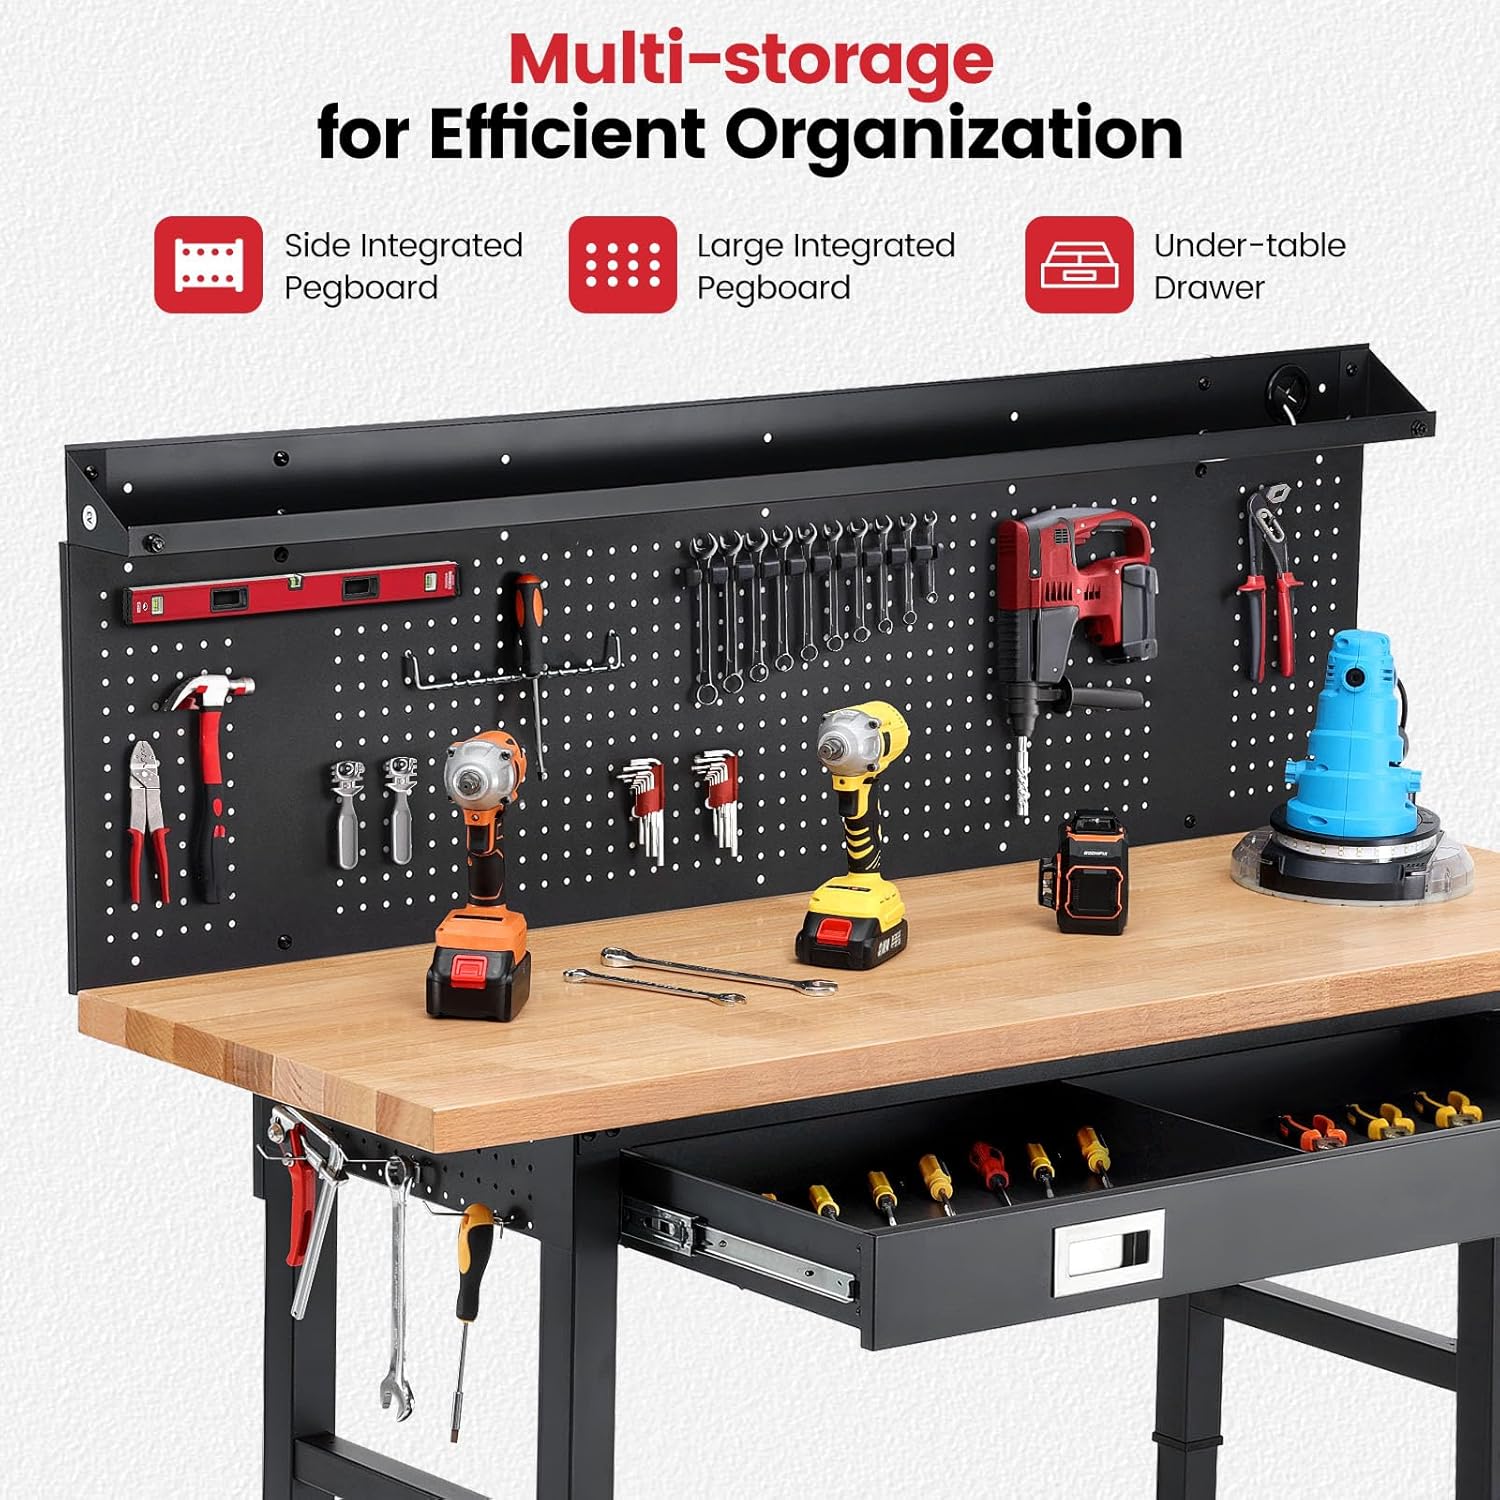
Figure 2: Multi-storage features including the large integrated pegboard, side pegboards, and under-table drawers for efficient organization.
4.4 Installing Wheels or Adjustable Feet
- Decide whether to use the heavy-duty swivel casters for mobility or the adjustable metal feet for stationary use.
- Screw the chosen components into the bottom of the workbench legs.
- If using adjustable feet, ensure they are tightened to provide maximum stability. If using casters, ensure the foot brakes are engaged when the workbench needs to remain stationary.

Figure 3: Overview of the workbench highlighting its rugged construction and superior load-bearing capabilities, including the 1.2-inch rubberwood top and heavy-duty steel legs.
5. Operating Instructions
5.1 Adjusting Workbench Height
The workbench height can be adjusted from 28 inches to 40 inches to suit various tasks and user preferences.
- Ensure the workbench is clear of heavy items before adjustment.
- Locate the height adjustment pins or mechanisms on each leg.
- Carefully lift or lower the tabletop to the desired height, ensuring that both sides are adjusted evenly.
- Secure the legs at the chosen height using the adjustment pins or tightening mechanisms. Verify stability before use.

Figure 4: Adjustable workbench dimensions, illustrating the height range and tabletop size.
5.2 Using Casters and Adjustable Feet
- Swivel Casters: For mobility, unlock the foot brakes on the casters. To keep the workbench stationary, engage the foot brakes firmly.
- Adjustable Feet: If using adjustable feet, rotate them to level the workbench on uneven surfaces. The anti-slip rubber pads provide increased friction and stability.
5.3 Utilizing Storage and Power Features
- Drawers: Use the integrated drawers for storing tools, hardware, and other small items, keeping your workspace organized.
- Pegboard: The main and side pegboards provide convenient access to frequently used tools. Use appropriate pegboard hooks (not included) to hang tools.
- Power Outlets: The ETL certified power outlets provide easy access to power for your tools. Use the integrated switch button to control power.
- LED Light Strip: The built-in LED light strip illuminates your workspace, improving visibility in poorly lit areas.
- Cord Organizer: Use the cord organizer to manage power cords, keeping the workspace tidy and reducing trip hazards.

Figure 5: Features for easy access to power tools and safe operation, including the ETL certified power outlets, LED light strip, and cord organizer.
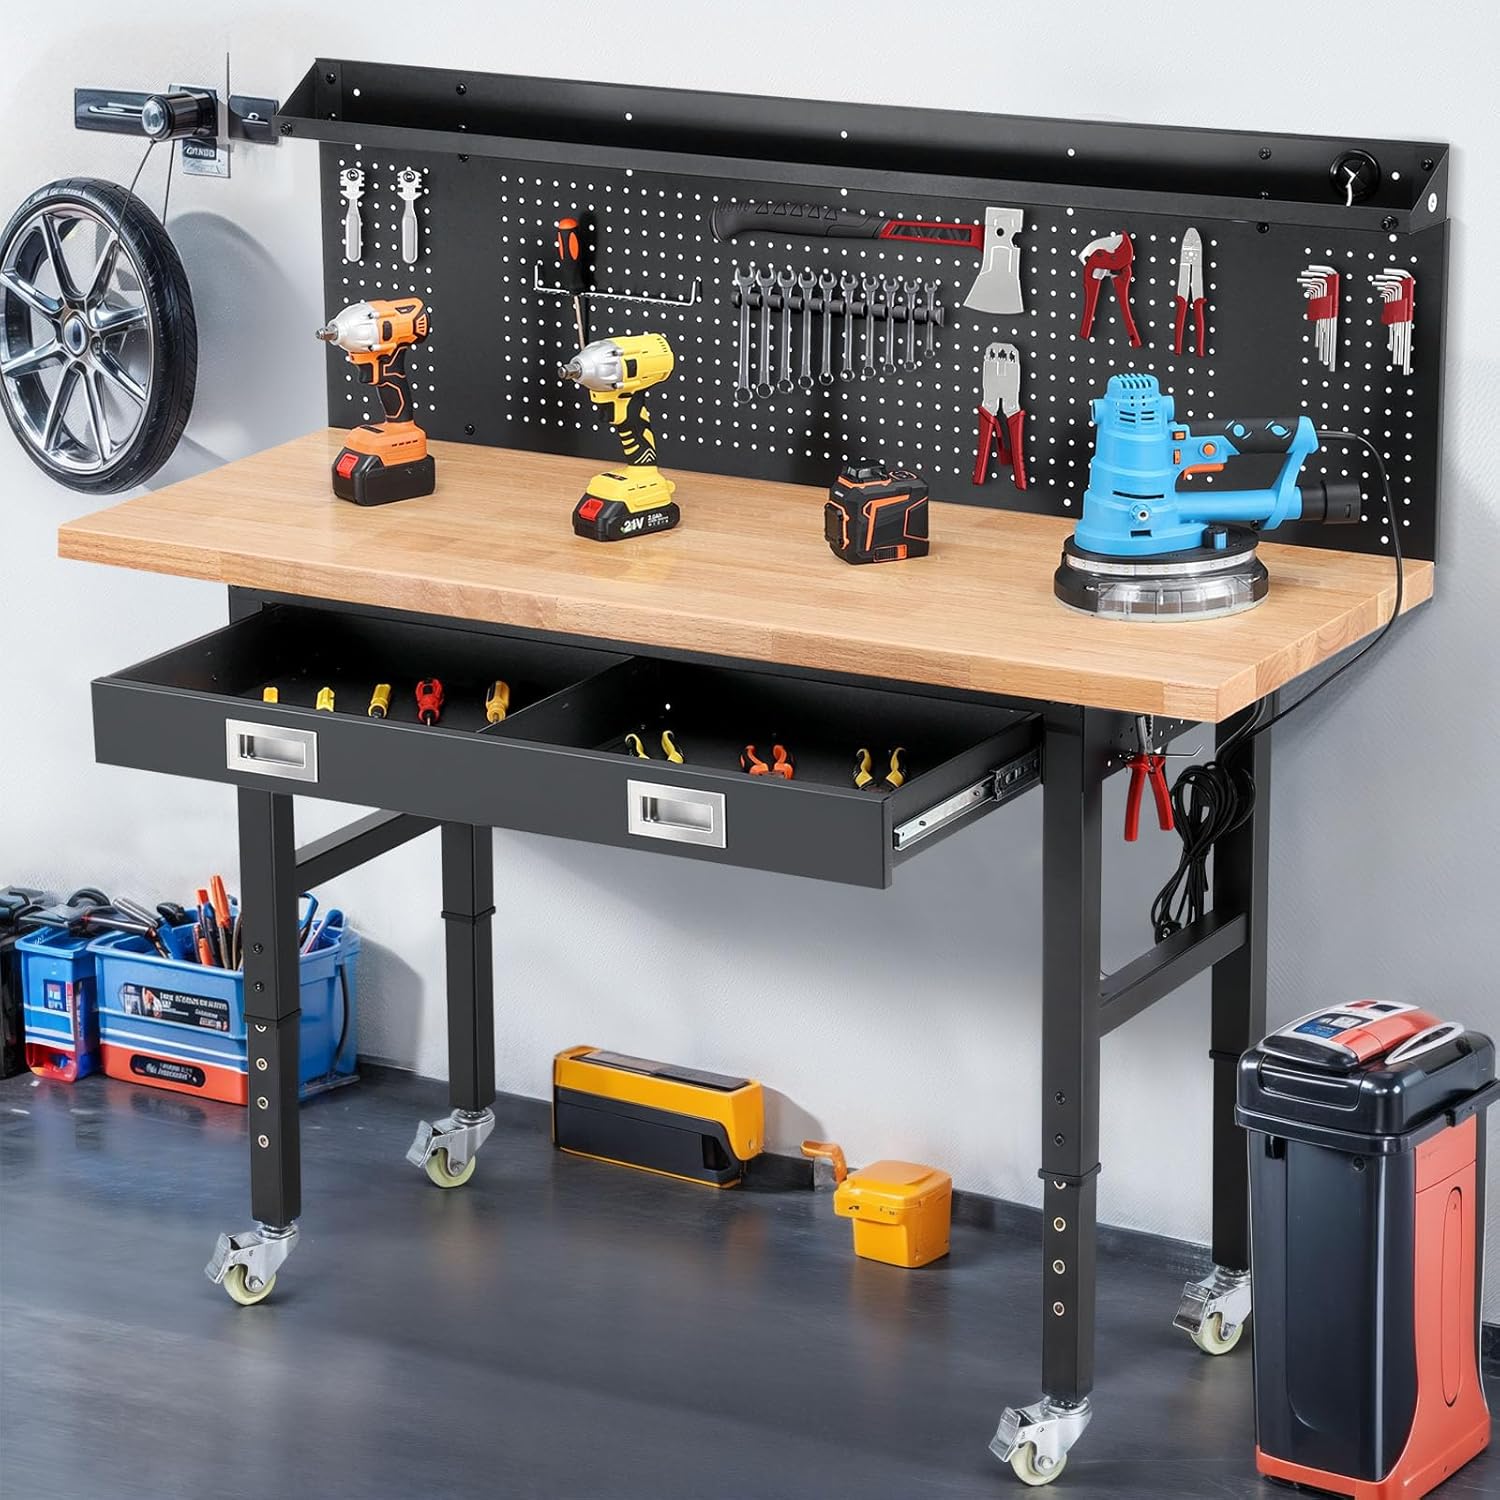
Figure 6: The ENJOYWOOD workbench in a typical workshop environment, demonstrating its practical application for organizing tools and supporting various projects.
6. Maintenance
- Tabletop Cleaning: Wipe the rubberwood tabletop with a damp cloth and mild detergent. Avoid abrasive cleaners or harsh chemicals that could damage the transparent coating.
- Frame Cleaning: Clean the steel frame with a damp cloth. Dry thoroughly to prevent rust.
- Fastener Check: Periodically check all bolts and screws to ensure they remain tight. Re-tighten as necessary to maintain structural integrity.
- Drawer Slides: If drawer operation becomes stiff, apply a small amount of silicone lubricant to the drawer slides.
- Electrical Components: Inspect the power cord, outlets, and LED light strip for any signs of damage or wear. If damage is found, discontinue use and replace the component if possible, or contact customer support.
- Casters/Feet: Keep casters free of debris. If using casters, ensure brakes are functioning correctly. If using adjustable feet, ensure rubber pads are intact.

Figure 7: Detail of the long-lasting rubberwood tabletop, featuring a transparent coating for durability.
7. Troubleshooting
| Problem | Possible Cause | Solution |
|---|---|---|
| Workbench is wobbly or unstable. | Loose fasteners; uneven ground; casters not locked. | Tighten all assembly bolts. Adjust metal feet to level the workbench. Engage caster foot brakes. Consider securing the workbench to a wall for added stability if frequently used at higher heights or with heavy loads. |
| Drawer does not slide smoothly. | Drawer slides are dirty or damaged; improper installation. | Clean drawer slides and apply silicone lubricant. Re-check drawer slide installation to ensure proper alignment. |
| Power outlets or LED light not working. | Power cord not plugged in; circuit breaker tripped; internal wiring issue; component failure. | Ensure the power cord is securely plugged into a functional wall outlet. Check the switch button on the power strip. Reset any tripped circuit breakers. If issues persist, contact customer support. |
| Difficulty adjusting height. | Adjustment pins stuck; heavy load on workbench. | Ensure the workbench is clear of heavy items. Check for any obstructions in the adjustment mechanism. Apply a small amount of lubricant if pins are stiff. |
8. Specifications
| Feature | Detail |
|---|---|
| Model Number | WB0301-Plus |
| Brand | ENJOYWOOD |
| Tabletop Material | 1.2-inch Premium Rubberwood with Transparent Coating |
| Frame Material | Alloy Steel (50x50mm, 1.2mm thickness) |
| Overall Dimensions (Tabletop) | 60 inches (L) x 22 inches (W) |
| Adjustable Height Range | 28 inches to 40 inches |
| Maximum Load Capacity | 2000 lbs (907 kg) |
| Mobility Options | Heavy-Duty Swivel Casters with Brakes / Adjustable Metal Feet |
| Storage Features | Integrated Drawers, Main Pegboard, Side Pegboards |
| Electrical Features | ETL Certified Power Outlets, Built-in LED Light Strip, Cord Organizer |
| Assembly Required | Yes (Simple to Moderate Complexity) |
| UPC | 085353576044 |
9. Warranty and Support
For warranty information, please refer to the documentation included with your purchase or contact the retailer where the product was acquired. ENJOYWOOD is committed to providing quality products and customer satisfaction.
If you have any questions, require assistance with assembly, or need troubleshooting support, please contact ENJOYWOOD customer service through their official website or the contact information provided with your purchase.
Related documentsWB0301-Plus

Ask a question about this manual
Ask about setup, troubleshooting, compatibility, parts, safety, or missing instructions. Manuals+ will review the question and use this page’s manual context to help answer it.