
1. Introduction
This manual provides detailed instructions for the setup, operation, and maintenance of your DIGITEN Wireless Thermostat WTC100 Pro. This device is designed to control heating and cooling appliances by maintaining a desired temperature range, offering convenience and energy efficiency.
Please read this manual thoroughly before using the product to ensure proper function and safety.
2. Package Contents
Verify that all components are present in the package:
- Wireless Thermostat Remote Controller
- Wireless Receiver Outlet
- User Manual
- Mounting Accessories (screws, anchors)

Image: The DIGITEN WTC100 Pro package contents, showing the remote controller, receiver outlet, and small accessories like screws and anchors.
3. Product Overview
The DIGITEN WTC100 Pro consists of two main components: a remote controller with a built-in temperature sensor and an outlet receiver. The remote controller allows you to set the desired temperature and operating mode, while the receiver plugs into a standard wall outlet and controls the connected appliance.

Image: The DIGITEN WTC100 Pro remote controller and its accompanying receiver outlet, displayed side-by-side.
Key Features:
- Easy-to-Use and Programmable
- Remote Control with Built-in Temperature Sensor
- Heating & Cooling Modes
- Large LCD Screen with Backlight
- Switchable between Celsius (℃) and Fahrenheit (℉)
- Plug and Play Operation

Image: Icons illustrating the key features: temperature unit switch, remote control functionality, heating or cooling mode, and plug-and-play setup.
4. Setup Instructions
4.1 Powering the Remote Controller
The remote controller requires batteries (not specified in input, typically 2x AAA or AA). Insert batteries according to the polarity markings in the battery compartment.
4.2 Pairing the Remote Controller and Receiver
The remote controller and receiver are typically pre-paired at the factory. If re-pairing is necessary:
- Plug the receiver into a standard wall outlet. The indicator light on the receiver may flash.
- On the remote controller, press and hold the pairing button (refer to the device for exact button location, usually marked with a wireless symbol or 'Pair').
- The indicator light on the receiver should become solid, indicating successful pairing.
4.3 Initial Placement
Place the remote controller in the area where you want to monitor and control the temperature. Ensure it is not exposed to direct sunlight, drafts, or heat sources, which could affect temperature readings. The receiver should be plugged into an accessible outlet near the appliance it will control.
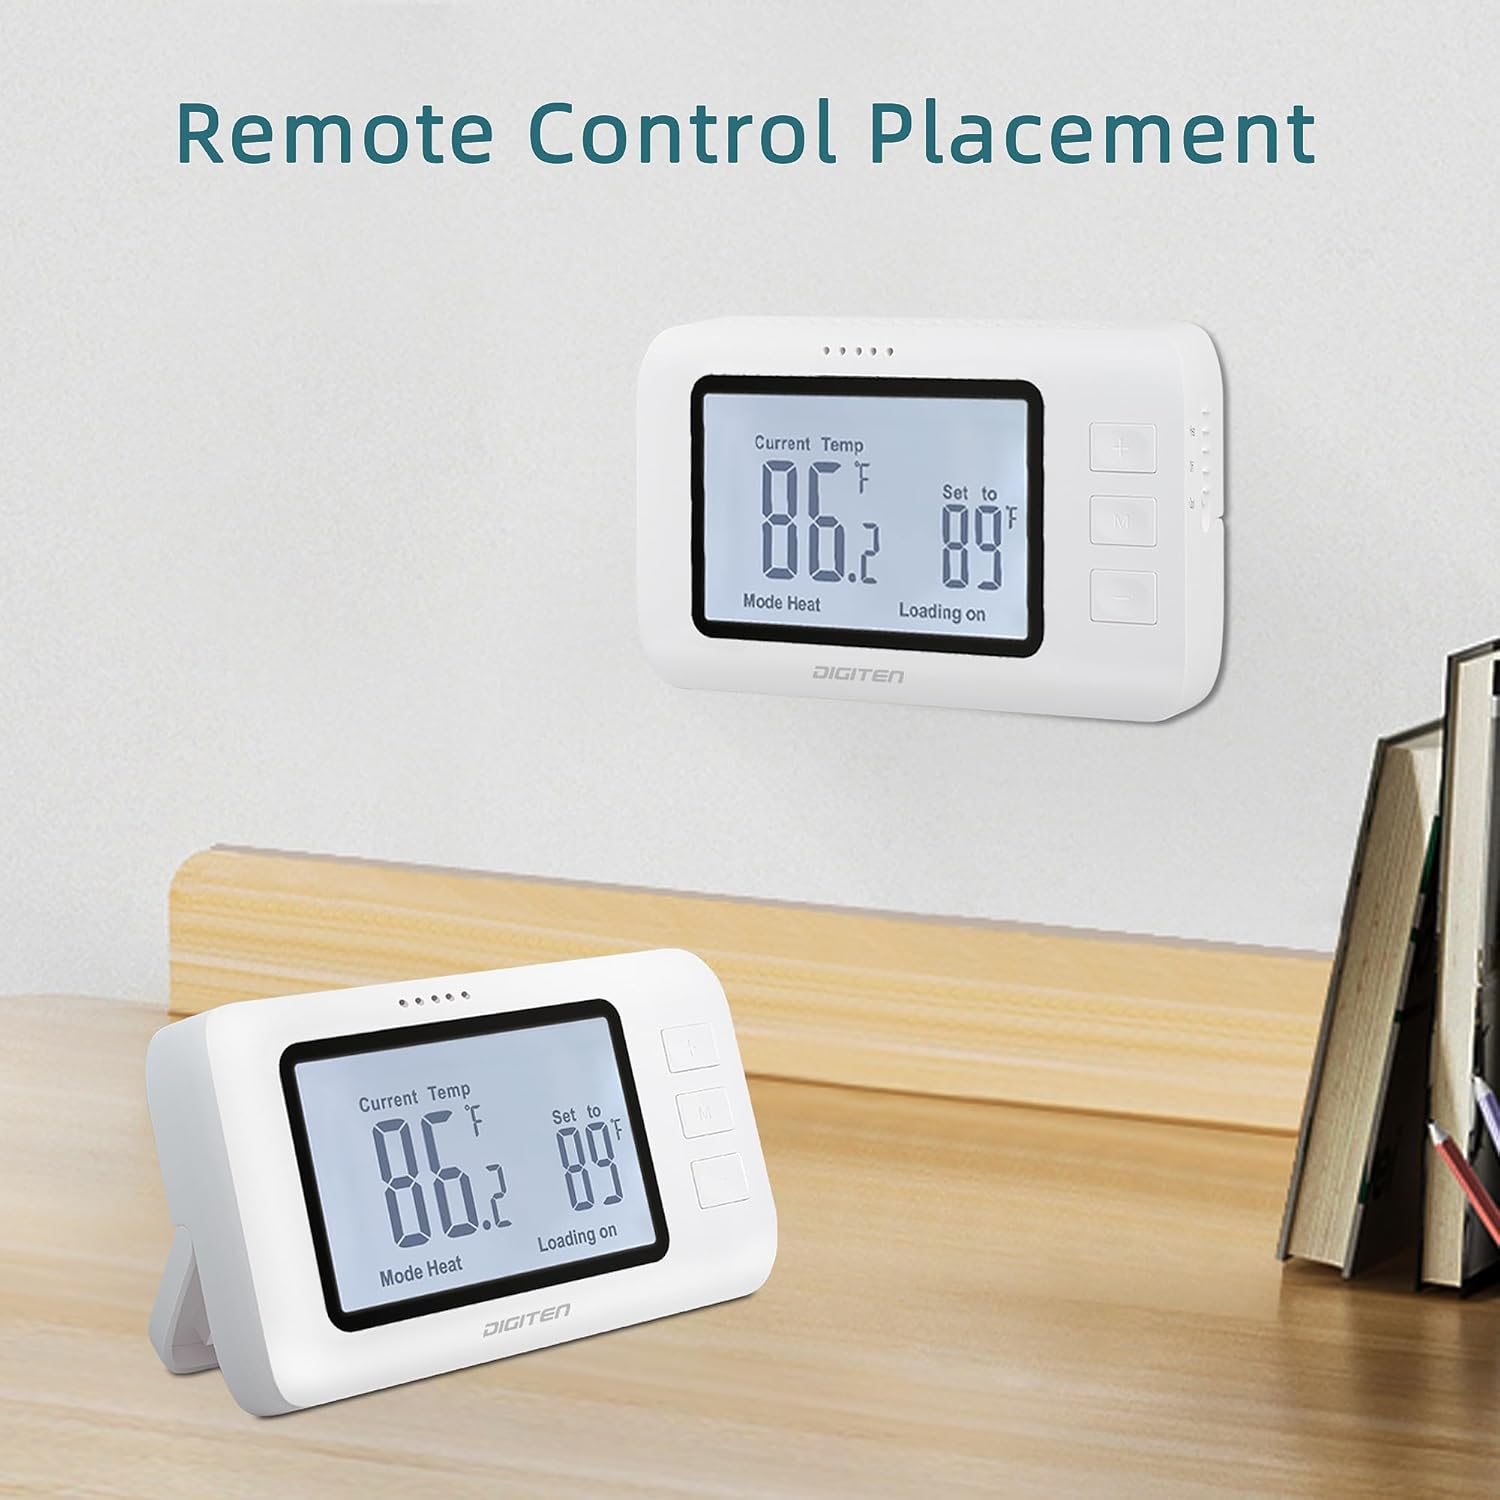
Image: Two examples of remote controller placement, one on a desk and another mounted on a wall, demonstrating flexibility in installation.
5. Operating Instructions
5.1 Connecting an Appliance
Plug your heating or cooling appliance directly into the outlet on the receiver.

Image: A close-up of the receiver outlet with an electrical appliance plug inserted, demonstrating the connection.
5.2 Setting Temperature Units (℃/℉)
On the remote controller, locate the button or switch to toggle between Celsius (℃) and Fahrenheit (℉). Press or slide it to select your preferred unit.

Image: The remote controller's display showing both Celsius and Fahrenheit temperature readings, indicating the unit switching capability.
5.3 Selecting Operating Mode (Heating/Cooling)
Use the mode switch or button on the remote controller to select either "Heat" or "Cool" mode. This determines whether the thermostat will activate the appliance to raise or lower the temperature.

Image: A close-up of the remote controller showing a physical switch with options for "Heat," "Off," and "Cool" modes.
5.4 Setting the Target Temperature
Use the "+" and "-" buttons on the remote controller to adjust the desired target temperature. The display will show both the current temperature and the set target temperature.

Image: A three-panel image demonstrating the ease of use: 1. Sliding the heat/cool switch, 2. Adjusting the set temperature with plus/minus buttons, and 3. Plugging an appliance into the receiver.
5.5 Automatic Operation
Once the mode and target temperature are set, the thermostat will automatically activate or deactivate the connected appliance to maintain the desired temperature. The remote controller's built-in sensor continuously monitors the ambient temperature.
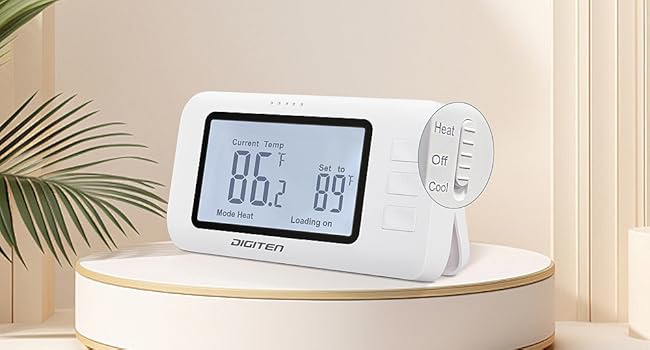
Image: An illustration showing the remote controller wirelessly detecting temperature, with the receiver plugged into a wall outlet in the background.
6. Maintenance
6.1 Cleaning
Wipe the thermostat and receiver with a soft, dry cloth. Do not use abrasive cleaners or solvents.
6.2 Battery Replacement
Replace batteries in the remote controller annually or when the low battery indicator appears on the display. Use the specified battery type (e.g., 2x AAA, check product for details).
7. Troubleshooting
| Problem | Possible Cause | Solution |
|---|---|---|
| Thermostat not responding | Low batteries in remote controller; remote and receiver not paired; out of range. | Replace batteries; re-pair the devices; move remote closer to receiver. |
| Appliance not turning on/off | Incorrect mode selected (Heat/Cool); target temperature not set correctly; appliance not plugged in or powered on. | Verify mode selection; adjust target temperature; ensure appliance is properly connected and powered. |
| Inaccurate temperature reading | Remote controller placed in an unsuitable location (direct sun, draft). | Relocate the remote controller to a more stable environment. |
8. Specifications
| Feature | Detail |
|---|---|
| Brand | DIGITEN |
| Model Number | WTC100PRO-A |
| Controller Type | Push Button |
| Special Feature | Remote Control Built-in Temp Sensor |
| Specific Uses | Air Conditioner, Heating Appliances (e.g., for greenhouse, pet feeding, wine cellar, plant cultivation) |
| Temperature Control Type | Automatic |
| Connectivity Technology | IR (Infrared) |
| Power Source | Corded Electric (Receiver) |
| Display Type | LCD with Backlight |
| Mounting Type | Wall mount or surface mount |
| Item Weight | 9.6 ounces |
| Package Dimensions | 4.72 x 3.82 x 2.83 inches |
9. Warranty and Support
DIGITEN provides a one-year warranty for any product quality problems. For technical support, troubleshooting assistance, or warranty claims, please contact DIGITEN customer service through the retailer or the official DIGITEN website.
For more information, visit: DIGITEN Store on Amazon


