1. Introduction
This manual provides detailed instructions for the installation, operation, and maintenance of your Hodozzy 7-inch Android Car Radio. This unit is designed for Volkswagen Touareg (2004-2011) and Volkswagen Transporter T5 Multivan (2004-2009) models. It features a 7-inch full-capacity touchscreen with 1280x720 resolution, 4GB RAM, 64GB ROM, and supports various advanced functionalities.

Image: Hodozzy Android Car Radio installed in a Volkswagen dashboard.
2. What's in the Box
Please ensure all the following components are present in your package:
- 1 x Android Player
- Power cables (various types)
- 1 x RCA Cable
- 1 x Rear Camera Input Cable
- 1 x Radio Antenna
- 1 x Canbus
- 1 x GPS Antenna
- 2 x USB Cables
- 1 x User Manual
- 1 x Rear View Camera
- 1 x Microphone
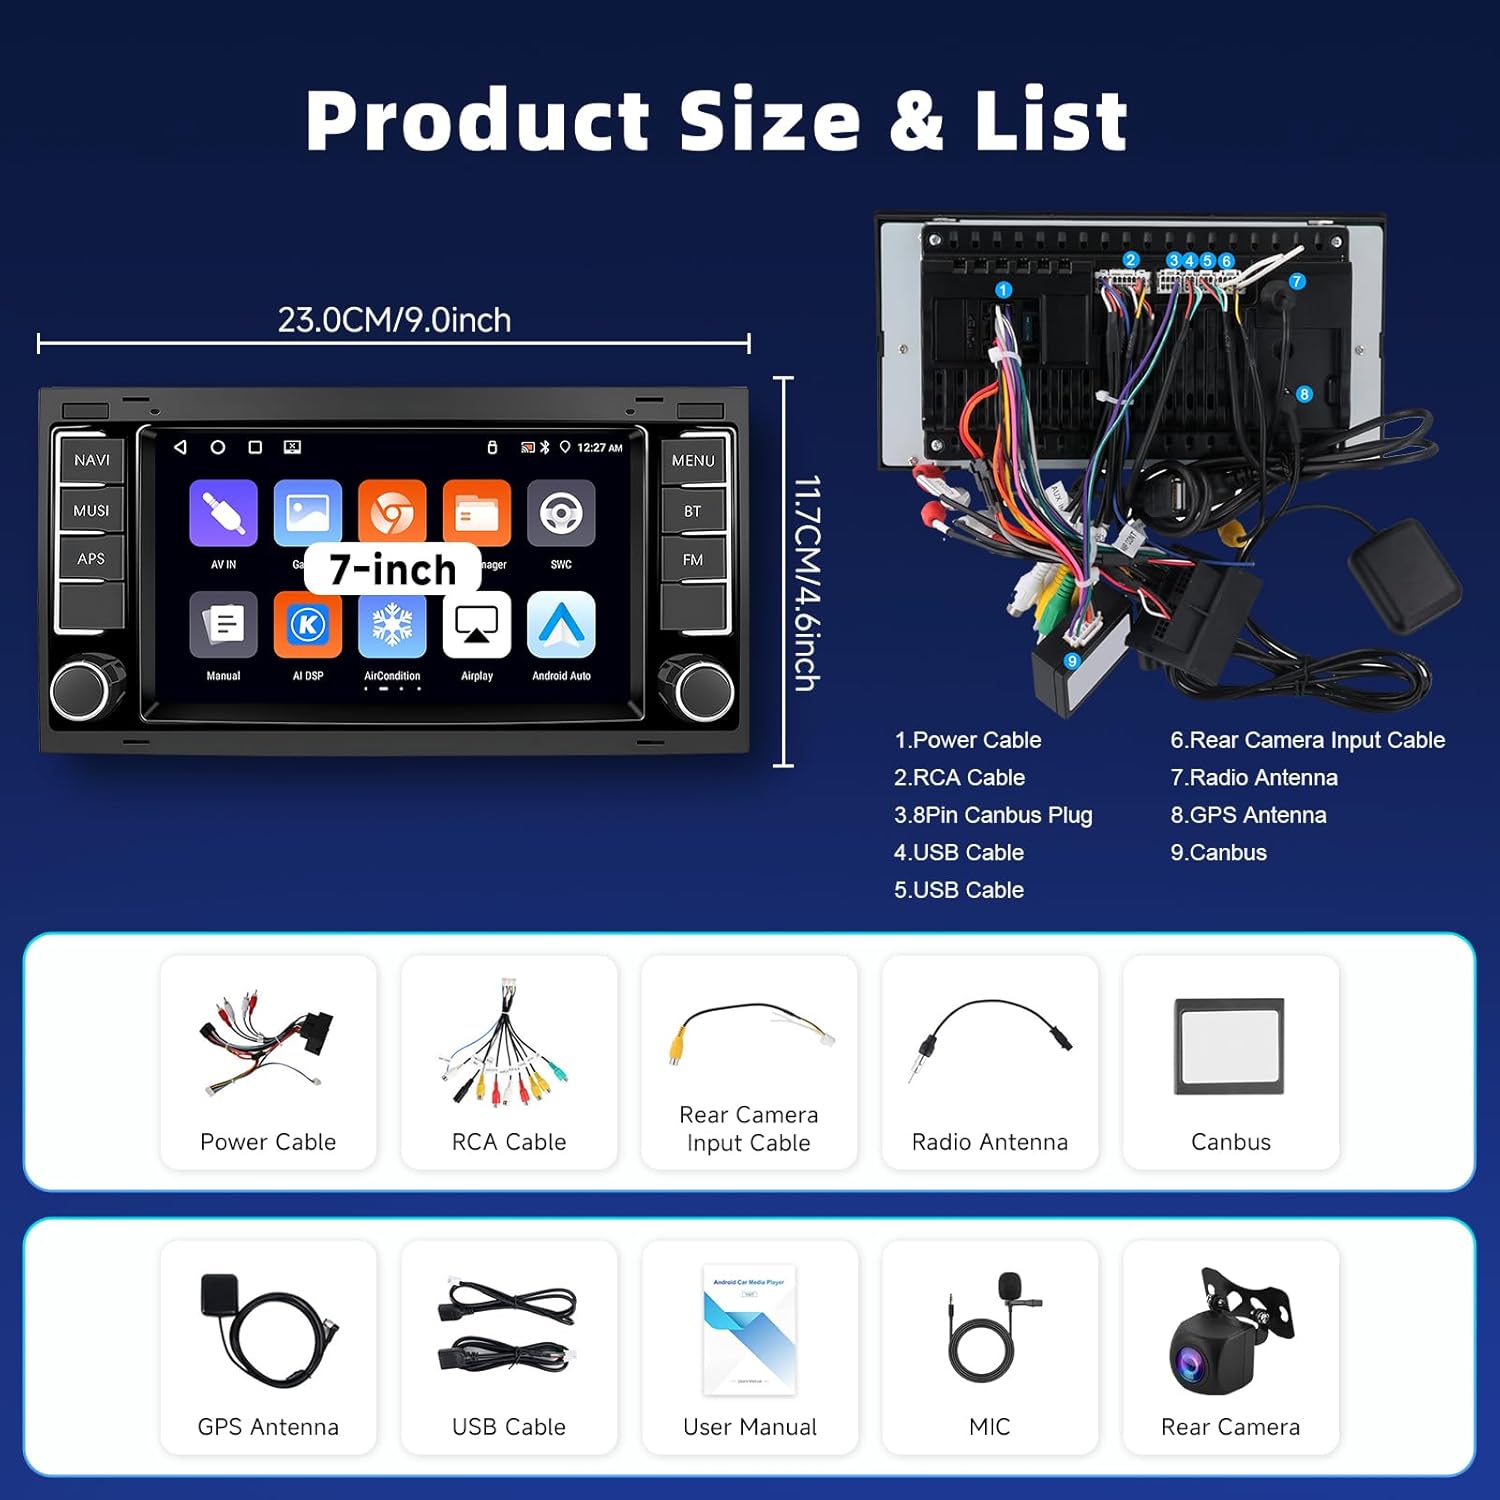
Image: Diagram showing the product size and list of included accessories.
3. Setup and Installation
Follow these steps for proper installation of your Hodozzy car radio. It is recommended to consult a professional for installation if you are unsure.
3.1. Removing the Original Car Radio
Carefully remove the trim around your original car radio using appropriate tools. Unscrew and detach the original unit, then disconnect all cables.
Video: Demonstration of removing the original car radio and disconnecting its cables.
3.2. Power-On Test and Wiring
Before full installation, perform a power-on test. Connect the compatible power cord and, if your vehicle model requires a Canbus, connect it. Ensure ACC wiring is correctly done. Connect the protocol serial cable when using Canbus. If the device powers on normally, proceed with the next wiring steps. If it fails, contact the after-sales team.
- Select the compatible power cord for your vehicle model.
- Connect the Canbus as per your vehicle model. If the vehicle requires a Canbus but it's not connected, the device may fail to power on.
- Complete ACC wiring based on the Canbus connection. Disconnect the ACC port if using a Canbus.
- Connect the protocol serial cable when using Canbus.
- Connect the RCA cable, USB cables, Rear Camera Input Cable, Radio Antenna, and GPS Antenna to the corresponding ports on the new unit.
Video: Detailed steps for connecting power, Canbus, and other essential cables for the initial power-on test.
3.3. Rearview Camera Wiring
Connect the rearview camera as follows:
- Connect the rearview camera's video output to the