
1. Introduction
The XHDATA E100 Walkie Talkie is a versatile two-way radio designed for reliable communication across multiple frequency bands. It features a 6W output power, a large 1.44-inch color display, and a robust 3000mAh battery. This manual provides detailed instructions for setting up, operating, and maintaining your E100 radio to ensure optimal performance and longevity.
Important Safety Information: Please read all safety warnings and instructions carefully before operating the device. Ensure proper handling of the battery and avoid exposing the radio to extreme temperatures or moisture. This device is FCC certified; users are responsible for holding a valid radio compliance certificate for transmitting functions.
2. Product Components
The XHDATA E100 package includes the following items:
- 1 x E100 Walkie Talkie Unit
- 1 x 3000mAh Rechargeable Lithium-Ion Battery
- 1 x Antenna
- 1 x USB-C Charging Cable
- 1 x Belt Clip
- 1 x Wrist Strap
- 1 x English User Manual

Figure 2.1: XHDATA E100 Product Accessories.
3. Setup
3.1 Battery Installation and Charging
Before initial use, ensure the battery is fully charged. The 3000mAh rechargeable battery can be charged via the included USB-C cable.
- Align the battery with the compartment on the back of the radio and press firmly until it clicks into place.
- Connect the USB-C charging cable to the radio's Type-C port and plug the other end into a compatible USB power source.
- The charging indicator light will show the charging status. It typically turns green when fully charged.

Figure 3.1: Type-C Charging for the E100 Radio.
3.2 Antenna Attachment
Screw the antenna clockwise into the antenna connector on the top of the radio until it is firmly seated. Do not overtighten.
4. Operating Instructions
4.1 General Controls and Display
Familiarize yourself with the main controls and the 1.44-inch color display for effective operation.

Figure 4.1: XHDATA E100 Control Layout.

Figure 4.2: 1.44-inch Color Large Screen Display and A/B Button Functionality.
4.2 Power On/Off and Volume
To power on the radio, rotate the Power/Volume knob clockwise. To power off, rotate it counter-clockwise until it clicks. Adjust the volume by rotating the same knob.
4.3 Frequency and Channel Selection
The E100 supports both frequency mode (VFO) and channel mode (MR). You can switch between these modes using the V/M button.
- Entering Frequency: In VFO mode, use the keypad to manually enter precise frequencies. Alternatively, use the Up/Down arrow keys to select frequencies according to the preset step frequency.
- Selecting Channels: In MR mode, use the Up/Down arrow keys to manually select channels. Long-pressing these keys will automatically scroll through channels.
For a visual guide on frequency and channel selection, please refer to the video below:
Video 4.1: Detailed instructions on how to enter frequencies and select channels on the XHDATA E100 radio.
4.4 Push-to-Talk (PTT)
Press and hold the PTT key on the side of the radio to transmit. Release the PTT key to receive.
5. Advanced Features
5.1 One Key Frequency Copy & Reverse
The E100 allows for quick frequency copying between two radios and a one-key reverse repeater frequency feature. This enables rapid group calling and efficient communication setup.
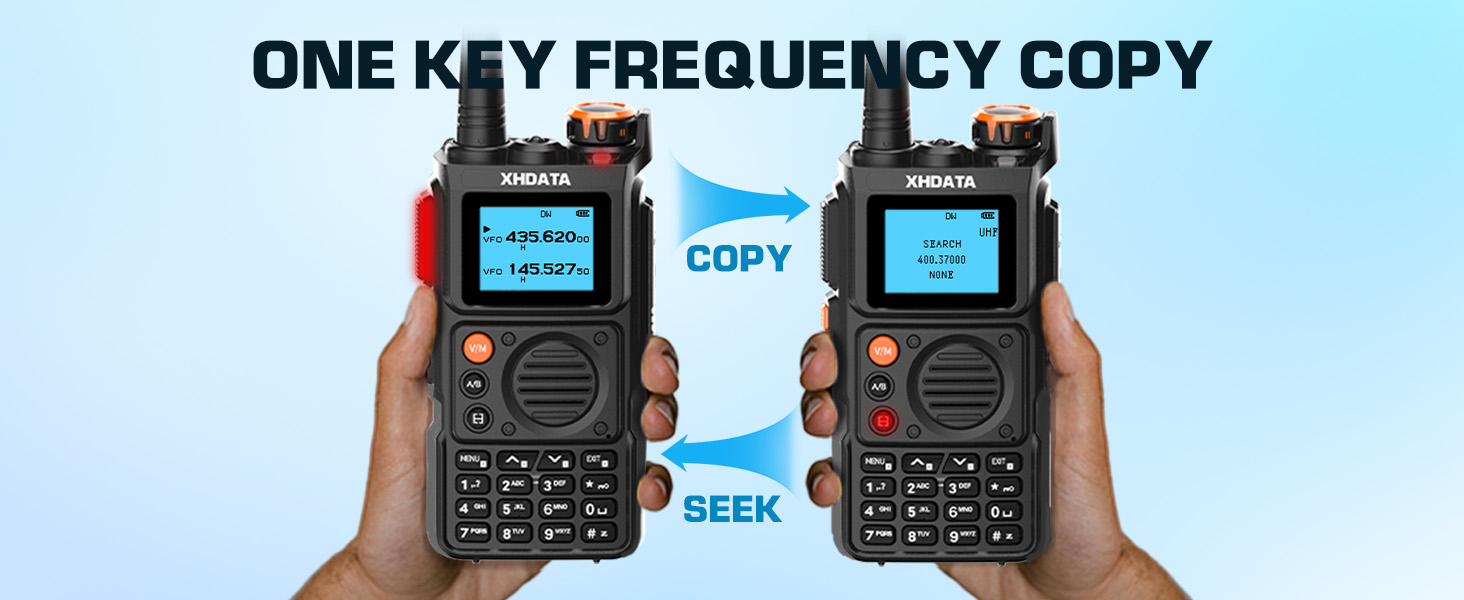
Figure 5.1: One Key Frequency Copy Feature.
To achieve frequency reversal, navigate to Menu 12 to set the offset. Then, switch to Menu 11 and select the desired shift direction (+, -, or off). Confirm your selection by pressing the Menu button again. To reverse the TX and RX frequencies, press the '*' key and the PTT button simultaneously. Pressing them again will synchronize the RX frequency with the TX frequency, and a third press will reset to the original settings.
5.2 NOAA Weather Scanning and Alerts
Stay informed about severe weather conditions with the E100's NOAA weather scanning feature. Long-press the [0] key to automatically scan 10 available weather band channels. The radio also offers 3 alarm modes (loud alert sound, flashing light) for emergencies.
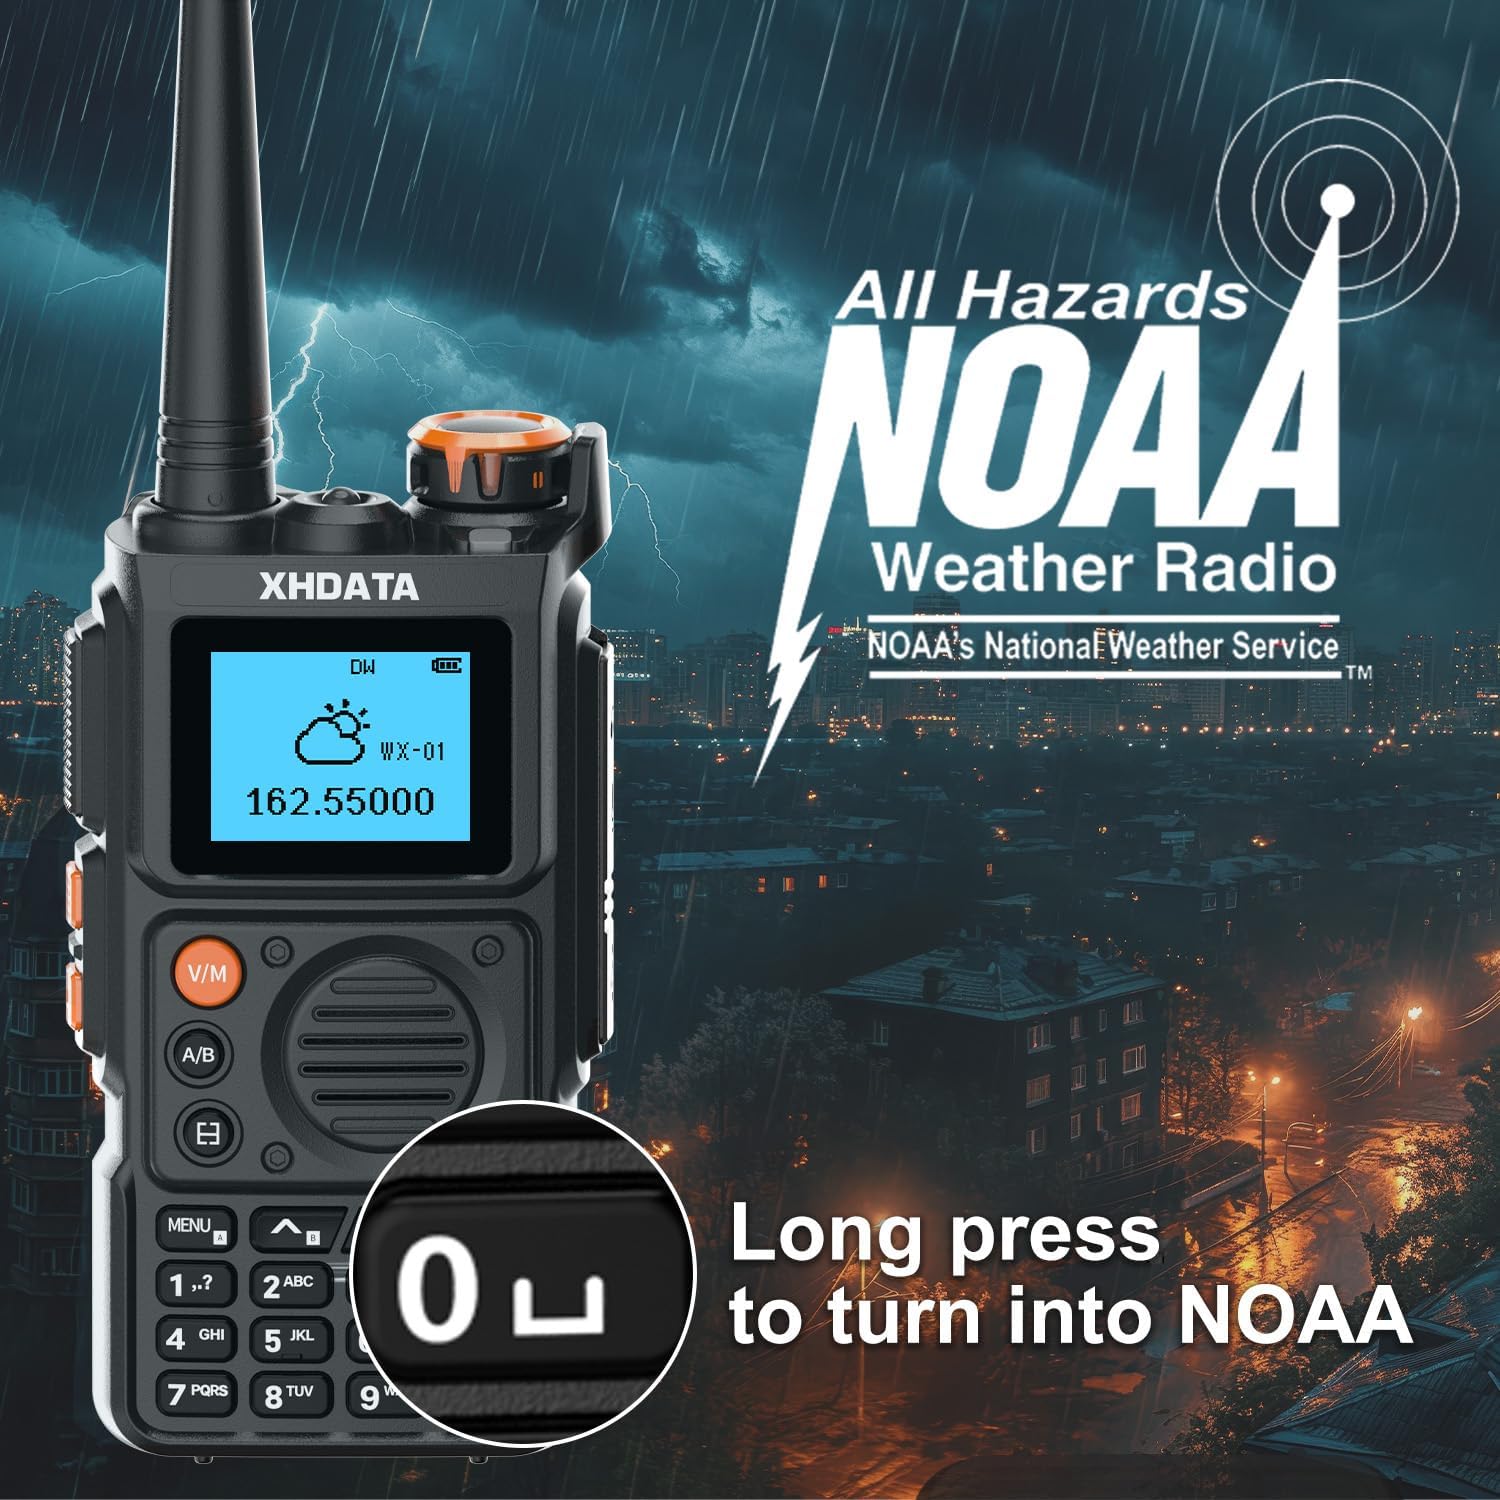
Figure 5.2: NOAA Weather Radio Feature.
5.3 Scanning Functions (Frequency & Channel)
The E100 supports both frequency scanning and channel scanning. To initiate frequency scanning, ensure the radio is in frequency mode (VFO) by short-pressing the V/M key. Then, long-press the '#' key to enter the frequency scanning state. The radio will automatically stop on an active frequency. Short-press the '#' key again to exit scanning. For channel scanning, switch to channel mode (MR) by short-pressing the V/M key, then long-press the '#' key to enter the channel scanning state. The radio will automatically stop on an active channel. Short-press the '#' key again to exit scanning.
5.4 CTCSS/DCS Scanning
The E100 supports CTCSS (Continuous Tone-Coded Squelch System) and DCS (Digitally Coded Squelch) scanning for private communication. To scan for CTCSS, ensure the radio is in frequency mode. Press Menu 38 to cancel the dual-band waiting function (if active) by selecting OFF. Then, press Menu 16 to enter CTCSS scanning. Press Menu again to start scanning. To scan for DCS, choose Menu 17 to enter DCS scanning. Press Menu to start scanning. Press Menu again to stop scanning for both CTCSS and DCS.

Figure 5.3: CTCSS/DCS Functionality.
5.5 Other Features
The E100 also includes a built-in flashlight, hands-free operation, stopwatch, and DTMF dialing capabilities. Long-press the '*' key to lock or unlock the keyboard. Short-press the '#' key to enter DTMF dialing.

Figure 5.4: Shortcut Function Keys.
6. Maintenance
Proper maintenance ensures the longevity and optimal performance of your XHDATA E100 Walkie Talkie.
- Cleaning: Use a soft, damp cloth to clean the radio's exterior. Do not use harsh chemicals or abrasive cleaners.
- Storage: Store the radio in a cool, dry place away from direct sunlight and extreme temperatures. If storing for extended periods, remove the battery.
- Battery Care: Avoid overcharging or completely draining the battery. Recharge the battery regularly, even if the radio is not in frequent use, to maintain battery health.
- Antenna Care: Handle the antenna carefully to prevent bending or breaking. A damaged antenna can affect signal quality.
7. Troubleshooting
If you encounter issues with your E100 radio, refer to the following common problems and solutions:
| Problem | Possible Cause | Solution |
|---|---|---|
| Radio does not power on | Low or dead battery; improperly installed battery. | Charge the battery; ensure battery is correctly installed. |
| No reception or poor signal | Antenna loose or damaged; out of range; incorrect frequency/channel. | Check antenna connection; move closer to other radios; verify frequency/channel settings. |
| Cannot transmit | Low battery; PTT button malfunction; incorrect frequency/channel. | Charge battery; ensure PTT button is fully pressed; verify frequency/channel settings. |
| Difficulty programming channels | Incorrect menu navigation; software required for advanced programming. | Refer to the manual's programming section; consider using programming software (not included). |
8. Specifications
- Item Weight: 8.8 ounces
- Package Dimensions: 4.84 x 4.69 x 4.65 inches
- Item Model Number: E100
- Batteries: 1 Lithium Ion battery required (included)
- Number of Channels: 999
- Special Features: Emergency Alarm, Rechargeable, Weather Alert
- Frequency Range: 87.5-174 MHz, 450-470 MHz (UHF/VHF/FM/Aviation/Weather Band)
- Talking Range Maximum: 5 Kilometer
- Tuner Technology: UHF
- Voltage: 7.4 Volts
- Water Resistance Level: Not Water Resistant

Figure 8.1: XHDATA E100 Frequency Range Details.
9. Warranty and Support
The XHDATA E100 Walkie Talkie comes with a 1-year warranty. For any product-related inquiries, technical assistance, or warranty claims, please contact XHDATA customer support. They offer 24/7 customer support to assist you.
For more information, you may visit the official XHDATA Store on Amazon: XHDATA Store.
