
1. Introduction and Safety Information
This manual provides essential instructions for the safe installation, operation, and maintenance of your ZLPOWER UL1741 8000W 48V Hybrid Solar Inverter. Please read this manual thoroughly before installation and operation. Retain this manual for future reference.
1.1 General Safety Precautions
- Installation must be performed by qualified personnel.
- Ensure all power sources (AC, DC, battery) are disconnected before installation or maintenance.
- Do not attempt to repair the inverter yourself. Contact qualified service personnel.
- The inverter generates high voltage. Exercise extreme caution.
- Ensure proper grounding of the inverter.
- Do not block the ventilation openings of the inverter.
2. Product Features
- 8KW pure sine wave inverter with 24,000W peak power for 20 seconds.
- Low-frequency 48V split-phase inverter with pure copper transformer.
- Converts 48V DC to 120V/240V AC with selectable 50Hz/60Hz frequency via LCD.
- Supports AGM, GEL, lead acid, lithium-ion, and LiFePO4 batteries with lithium battery communication.
- Built-in dual 80A MPPT solar charge controllers (optional).
- Automatic Generator Start (AGS) for low battery voltage.
- Maximum charging current of 200A, adjustable via LCD (0%-100%).
- Selectable AC priority, DC priority, or smart mode for energy management.
- Equipped with an external WiFi-module for monitoring.
- Multiple protections: overload, short circuits, overheating, and voltage fluctuations.
- UL 1741 standard ETL certification for reliability.
3. Specifications
| Feature | Detail |
|---|---|
| Product Dimensions | 27.95 x 19.69 x 11.81 inches |
| Item Weight | 99 pounds |
| Model Name | GS-III-8000W-48V |
| Power Source | Solar and Battery Powered |
| Wattage | 8000 watts (12000 watts listed in some specifications, clarify with product label if needed, using 8000W from title) |
| Recommended Uses | Home, Office, Vehicle |
4. What's in the Box
- ZLPOWER UL1741 8000W 48V Hybrid Solar Inverter
- User Manual (this document)
- Mounting bracket and screws
- Communication cables (RS232, RS485, CAN, USB)
- External WiFi-module
5. Setup and Installation
5.1 Unboxing and Initial Inspection
Carefully remove the inverter from its packaging. Inspect for any signs of damage during transit. Ensure all components listed in the 'What's in the Box' section are present.
Video: Inverter Unboxing. This video demonstrates the unboxing process of the ZLPOWER Hybrid Solar Inverter, showing how to safely remove it from its packaging and prepare it for installation.
5.2 Mounting the Inverter
Choose a suitable location for mounting the inverter, ensuring adequate ventilation and protection from direct sunlight, moisture, and extreme temperatures. Use the provided mounting bracket and hardware to securely attach the inverter to a sturdy surface.

Image: ZLPOWER Hybrid Solar Inverter. This image shows the inverter in an outdoor setting with solar panels and a wind turbine, illustrating a typical application environment.
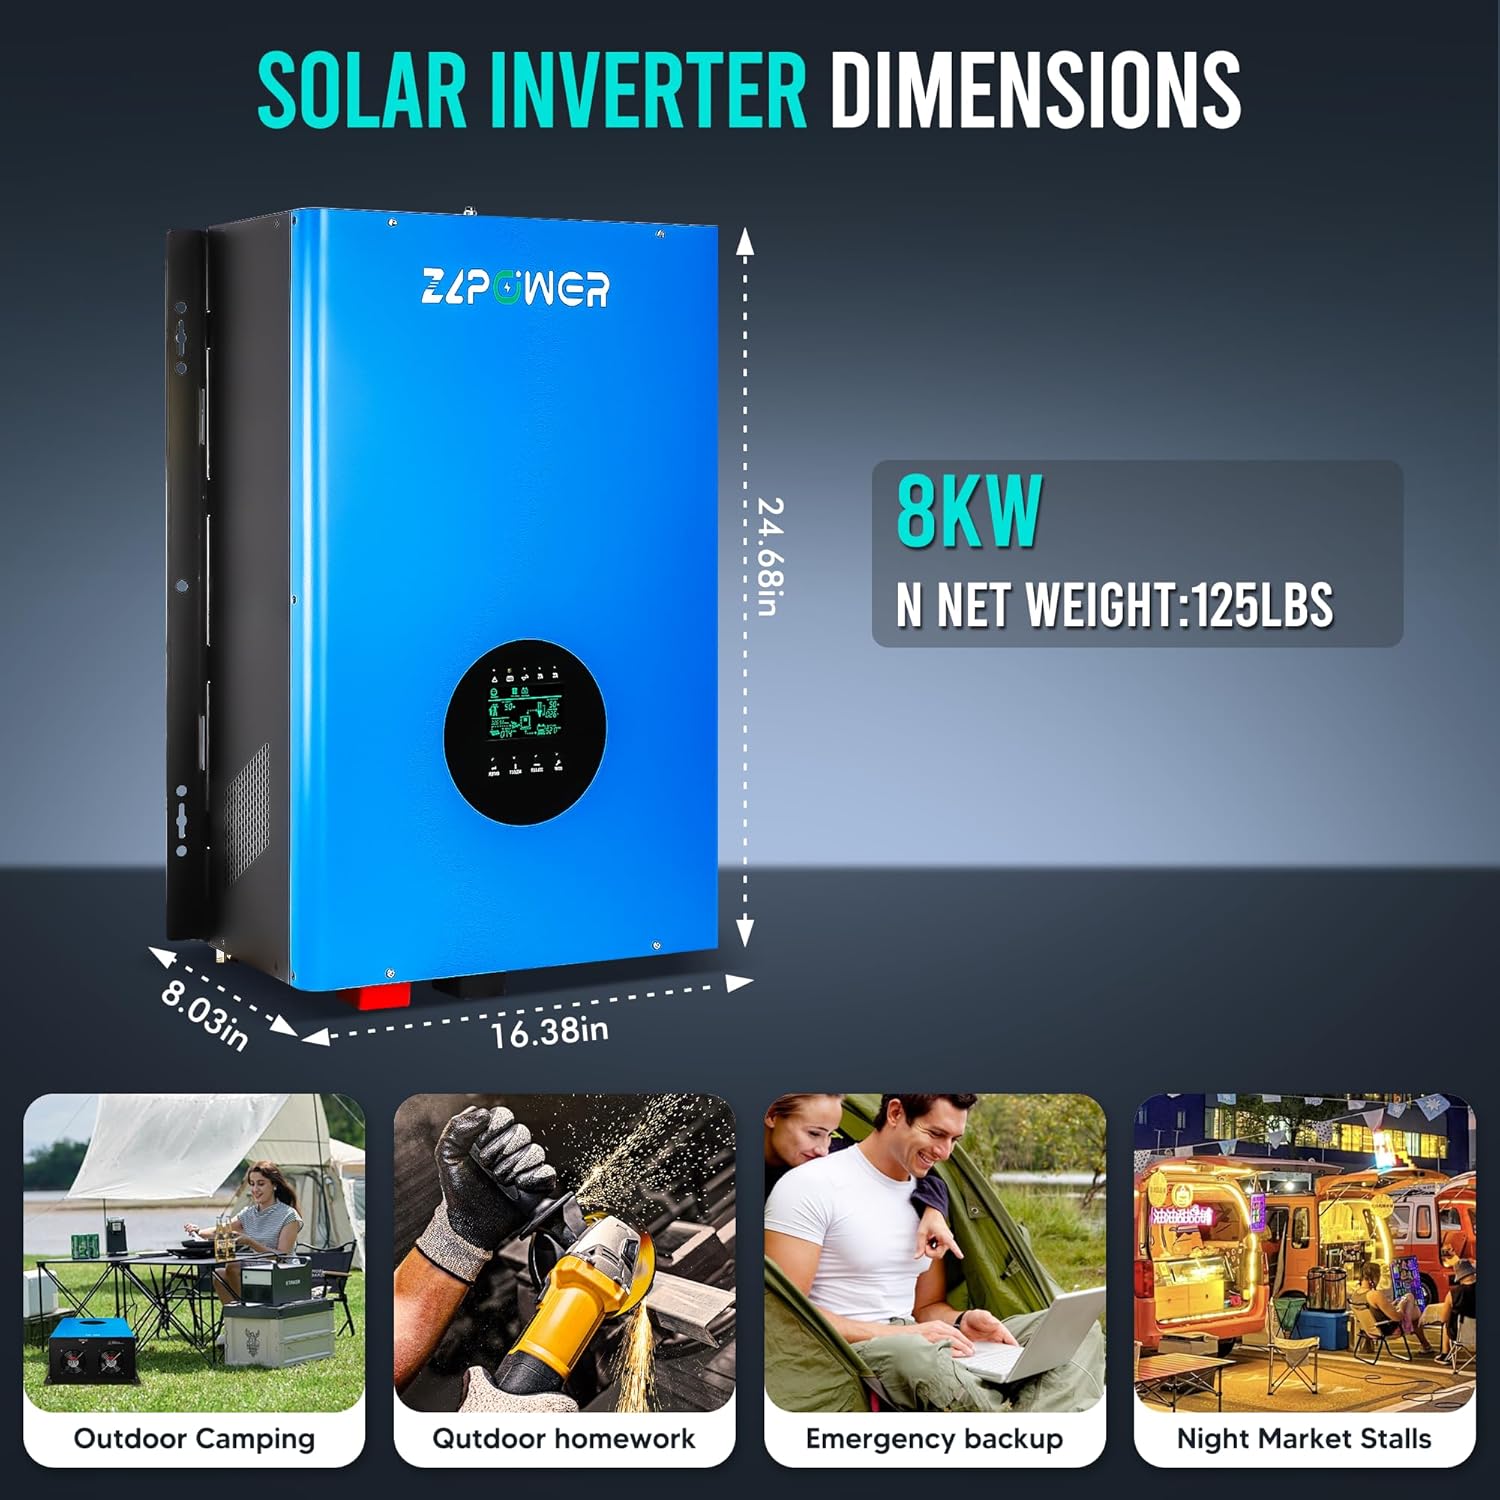
Image: Solar Inverter Dimensions. This image provides the physical dimensions of the inverter, useful for planning installation space.
5.3 Wiring Connections
Before wiring, ensure the inverter and battery power are powered off to ensure your safety. Follow the steps below for secure and correct wiring:
- Battery Connection: Connect the battery to the inverter's battery terminal. Ensure the positive terminal is connected to the positive and the negative to the negative.
- Grounding: Connect the ground wire to the ground terminal on the inverter.
- AC Input: Connect the AC power cable to the AC input terminal of the inverter. Ensure the connection is secure and the wiring is correct.
- AC Output: Connect the AC power cable to the AC output terminal of the inverter. Pay attention to the connection between the live wire and the neutral wire. Confirm the colors of the live and neutral cables. Connect the live cable to the live terminal of the inverter. Connect the neutral cable to the neutral terminal of the inverter. Be careful not to connect them in reverse.
- Communication Cables: Locate the communication ports on the inverter and lithium battery. Typically, the inverter will have either an RS485 or CAN communication port. Make sure you are using the correct communication cables. Connect one end of the communication cable to the inverter's communication port and the other end to the lithium battery's communication port. Ensure that the connections are secure and the polarity matches.
- Circuit Breaker: For safety, we recommend installing a breaker on the positive line. This helps prevent overcurrent and makes future maintenance easier.
Video: Inverter Wiring. This video provides a step-by-step guide on how to correctly wire the ZLPOWER Hybrid Solar Inverter, including battery, ground, AC input, and AC output connections.

Image: Wiring Terminal Diagram. This diagram labels all the wiring terminals on the inverter, including Battery Positive/Negative, Terminal Block, AC Input/Output, PV Input, RS-232, CAN/RS485/USB, Remote Switch, DC Fan, Generator Start Signal, and AC Fan.
5.4 Wireless Router Connection
The inverter is equipped with an external WiFi-module for mobile monitoring. To connect, download the SmartESS app from your app store and follow the in-app instructions for network setting, account creation, and datalogger addition.
- Download SmartESS for iOS: SmartESS (iOS)
- Download SmartESS for Android: SmartESS (Android)

Image: Wireless Router Connection. This image illustrates the steps for connecting the inverter to a wireless router and setting up the SmartESS mobile application for monitoring.
6. Operating Instructions
6.1 Powering On and Initial Check
After completing all wiring and verifying connections, turn on the battery power switch, then the circuit breaker, and finally the inverter power switch. The LCD screen will illuminate, displaying operational status.
Video: 48V Solar Hybrid Inverter Operation. This video demonstrates the power-on sequence and initial checks of the inverter, including voltage testing and load connection.
6.2 LCD Screen Display
The LCD screen provides real-time information about the inverter's status, including AC input/output, battery voltage, solar energy generation, and load consumption. Use the 'CONF', 'SELECT', and 'ENTER' buttons to navigate menus and adjust settings.

Image: LCD Screen Display. This image shows the inverter's LCD screen, highlighting its ability to display solar capacity and the built-in WiFi for mobile monitoring.
Video: Solar Hybrid Inverter Display Overview. This video provides a detailed look at the inverter's LCD display, explaining the various indicators and readings for system status.
6.3 Operating Modes
The inverter supports various operating modes for optimal energy management:
- AC Priority: Prioritizes AC utility power to supply the load and charge batteries.
- DC Priority: Prioritizes battery power (charged by solar) to supply the load.
- Smart Mode: Automatically switches between AC and DC sources based on load and battery status for maximum efficiency.
These modes can be selected and configured via the LCD screen settings.
7. Maintenance
Regular maintenance ensures the longevity and optimal performance of your inverter:
- Cleaning: Keep the inverter clean and free from dust. Use a dry cloth to wipe the exterior. Do not use liquid cleaners.
- Ventilation: Ensure the ventilation openings are clear and unobstructed to prevent overheating.
- Connections: Periodically check all wiring connections for tightness and signs of corrosion. Tighten any loose connections.
- Battery Health: Monitor battery voltage and charge cycles through the LCD display or mobile app. Follow battery manufacturer guidelines for maintenance.
- Environmental Conditions: Ensure the inverter operates within its specified temperature and humidity ranges.
8. Troubleshooting
If you encounter issues with your inverter, refer to the following common troubleshooting tips:
- No Power Output: Check all circuit breakers and switches (battery, AC input, AC output, inverter ON/OFF). Verify battery connections and voltage.
- Overload Warning: Reduce the connected load. Ensure the total wattage of connected appliances does not exceed the inverter's rated capacity.
- Overheating: Check for blocked ventilation. Ensure the inverter is installed in a well-ventilated area. Reduce load if ambient temperature is high.
- Battery Not Charging: Verify solar panel connections and output. Check MPPT controller settings. Ensure AC input is present if charging from utility.
- Communication Error: Check communication cable connections between the inverter and battery. Ensure correct cable type (RS485, CAN).
For persistent issues or error codes not listed, please contact customer support.
9. Warranty and Support
ZLPOWER offers a 60-month (5-year) warranty for this hybrid solar inverter, reflecting over 10 years of expertise in solar hybrid inverter solutions. We integrate advanced DSP digital control technology for reliable performance.
For any quality-related issues, machine installation, usage guidance, or technical support, please feel free to contact us. We are committed to providing timely answers and replacement services where applicable.
Contact Information: Refer to your product packaging or the official RDYMONKEY website for the most current support details.