
1. Introduction
This manual provides detailed instructions for the setup, operation, maintenance, and troubleshooting of your Deli ET521 Digital Safe Box. Please read this manual thoroughly before using the safe to ensure proper function and security. Keep this manual for future reference.
2. Safety Information
- Do not store the emergency override keys inside the safe. Keep them in a secure location outside the safe.
- Keep your personal access code confidential and do not share it with unauthorized individuals.
- Ensure the safe is securely mounted or placed to prevent unauthorized removal.
- Replace batteries promptly when the 'LO-BAT' indicator appears to avoid being locked out.
- This safe is designed for security and fire resistance. However, it is not completely fireproof or waterproof.
3. Package Contents
Verify that all items are present in the package:
- 1 x Deli ET521 Digital Safe Box
- 2 x Emergency Override Keys
- 1 x User Manual
- Mounting Hardware (bolts)
4. Product Overview
The Deli ET521 Digital Safe Box offers secure storage with a digital keypad and emergency key access. It features a reinforced solid steel body, felt interior, and LED lighting for convenience.

Figure 4.1: Front view of the Deli ET521 Digital Safe Box, showcasing the keypad and overall design.
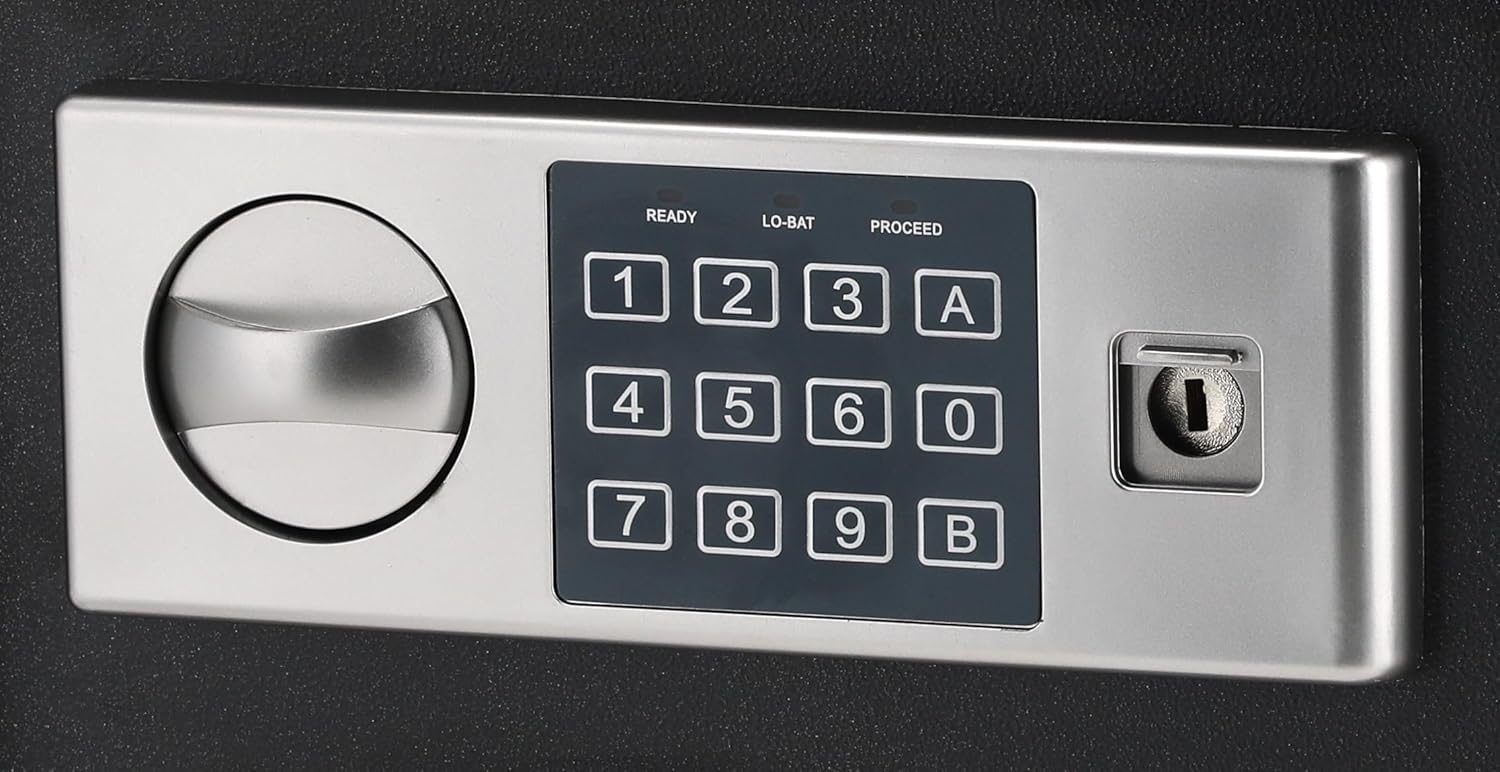
Figure 4.2: Close-up of the digital keypad with number buttons, 'A' and 'B' buttons, and the emergency keyhole.

Figure 4.3: Interior view of the safe, showing the felt lining and internal space.
5. Setup
5.1 Battery Installation
The digital keypad requires 4 AA batteries (not included) for operation. The battery compartment is typically located on the inside of the safe door.
- Open the safe using the emergency override key (refer to Section 6.3 if needed).
- Locate the battery compartment cover on the inside of the door.
- Remove the cover and insert 4 new AA batteries, ensuring correct polarity (+/-).
- Replace the battery compartment cover.
5.2 Initial Code Setting
Upon first use, you will need to set your personal access code.
- With the safe door open, press the red reset button located on the inside of the door (usually near the hinge). You will hear a beep.
- Within 5 seconds, enter a new 3-8 digit code on the keypad.
- Press the 'A' or 'B' button to confirm. The safe will beep twice, indicating the code is set.
- Test the new code with the door open before closing it.
5.3 Mounting the Safe
The Deli ET521 is designed for floor-standing mounting. Securely mounting the safe is recommended to prevent theft.
- Choose a suitable location, preferably on a solid surface.
- Mark the drilling points through the pre-drilled holes at the bottom or back of the safe.
- Drill pilot holes into the floor or wall using an appropriate drill bit.
- Position the safe and secure it using the provided mounting bolts.
6. Operating Instructions
6.1 Opening the Safe with Your Code
- Enter your 3-8 digit personal access code on the keypad.
- Press the 'A' or 'B' button.
- If the code is correct, the 'PROCEED' light will illuminate, and you will hear a beep.
- Within 5 seconds, turn the knob clockwise to open the door.
6.2 Locking the Safe
To lock the safe, simply close the door and turn the knob counter-clockwise. The safe will automatically lock.
6.3 Using the Emergency Override Key
In case of forgotten code or dead batteries, the emergency override key can be used.
- Locate the keyhole cover on the keypad panel.
- Remove the cover.
- Insert the emergency override key and turn it clockwise while simultaneously turning the knob clockwise to open the door.
- Once open, you can replace batteries or reset the code.
6.4 Changing Your Access Code
You can change your access code at any time with the door open.
- Open the safe door.
- Press the red reset button on the inside of the door. You will hear a beep.
- Within 5 seconds, enter your new 3-8 digit code.
- Press the 'A' or 'B' button to confirm. The safe will beep twice.
- Test the new code with the door open before closing it.
7. Maintenance
7.1 Cleaning
Wipe the exterior of the safe with a soft, damp cloth. Avoid using abrasive cleaners or solvents that could damage the finish or keypad.
7.2 Battery Replacement
When the 'LO-BAT' indicator light illuminates on the keypad, it is time to replace the batteries. Follow the steps in Section 5.1 to replace the 4 AA batteries.
8. Troubleshooting
- Safe does not open with code:
- Ensure batteries are not low (check 'LO-BAT' indicator). Replace if necessary.
- Re-enter the code carefully.
- Use the emergency override key to open the safe and reset the code.
- Keypad is unresponsive:
- Check battery installation and replace batteries.
- Door does not lock:
- Ensure the door is fully closed before turning the knob.
- Check for any obstructions preventing the door from closing completely.
9. Specifications

Figure 9.1: Diagram illustrating the approximate dimensions of the Deli ET521 Digital Safe Box.
| Feature | Detail |
|---|---|
| Model Number | ET521 |
| External Dimensions (D x W x H) | 25 cm x 35 cm x 25 cm |
| Item Weight | 5.7 Kilograms |
| Lock Type | Electronic Combination Lock, Key Lock |
| Material | Alloy Steel |
| Color | Black |
| Special Features | Fire Resistant, Digital Lock, LED Lighting |
| Mounting Type | Floor-standing |
| Batteries Required | 4 x AA (for keypad, not included) |
10. Warranty and Support
For warranty information or technical support, please contact Deli customer service through their official website or the retailer where the product was purchased. Keep your purchase receipt as proof of purchase.