1. Introduction
Thank you for choosing the Generic Digital Mirror Alarm Clock. This multifunctional device combines a clear LED display with alarm, temperature, and humidity monitoring capabilities, designed for indoor use in bedrooms, offices, and other living spaces. Please read this manual carefully to ensure proper setup and operation.
2. Product Features
- Multifunctional Display: Shows time, temperature, and humidity simultaneously.
- Mirror Finish LED Screen: Provides a clear digital display and doubles as a mirror.
- Silent Operation: Designed to operate without disruptive ticking sounds.
- Adjustable Brightness: LED display brightness can be adjusted to suit different lighting conditions.
- Alarm Function: Includes a customizable alarm with snooze.
3. Package Contents
- Digital Mirror Alarm Clock
- USB Power Cable
- User Manual (this document)

Image: The Digital Mirror Alarm Clock shown with its included USB power cable.
4. Product Overview
4.1 Front Display

Image: Front view of the clock displaying the current time (12:00), temperature (27°C), and humidity (20%).
The front of the clock features a large LED display with a mirror finish, showing the time, temperature, and humidity. The brightness of this display is adjustable.
4.2 Rear Controls and Ports
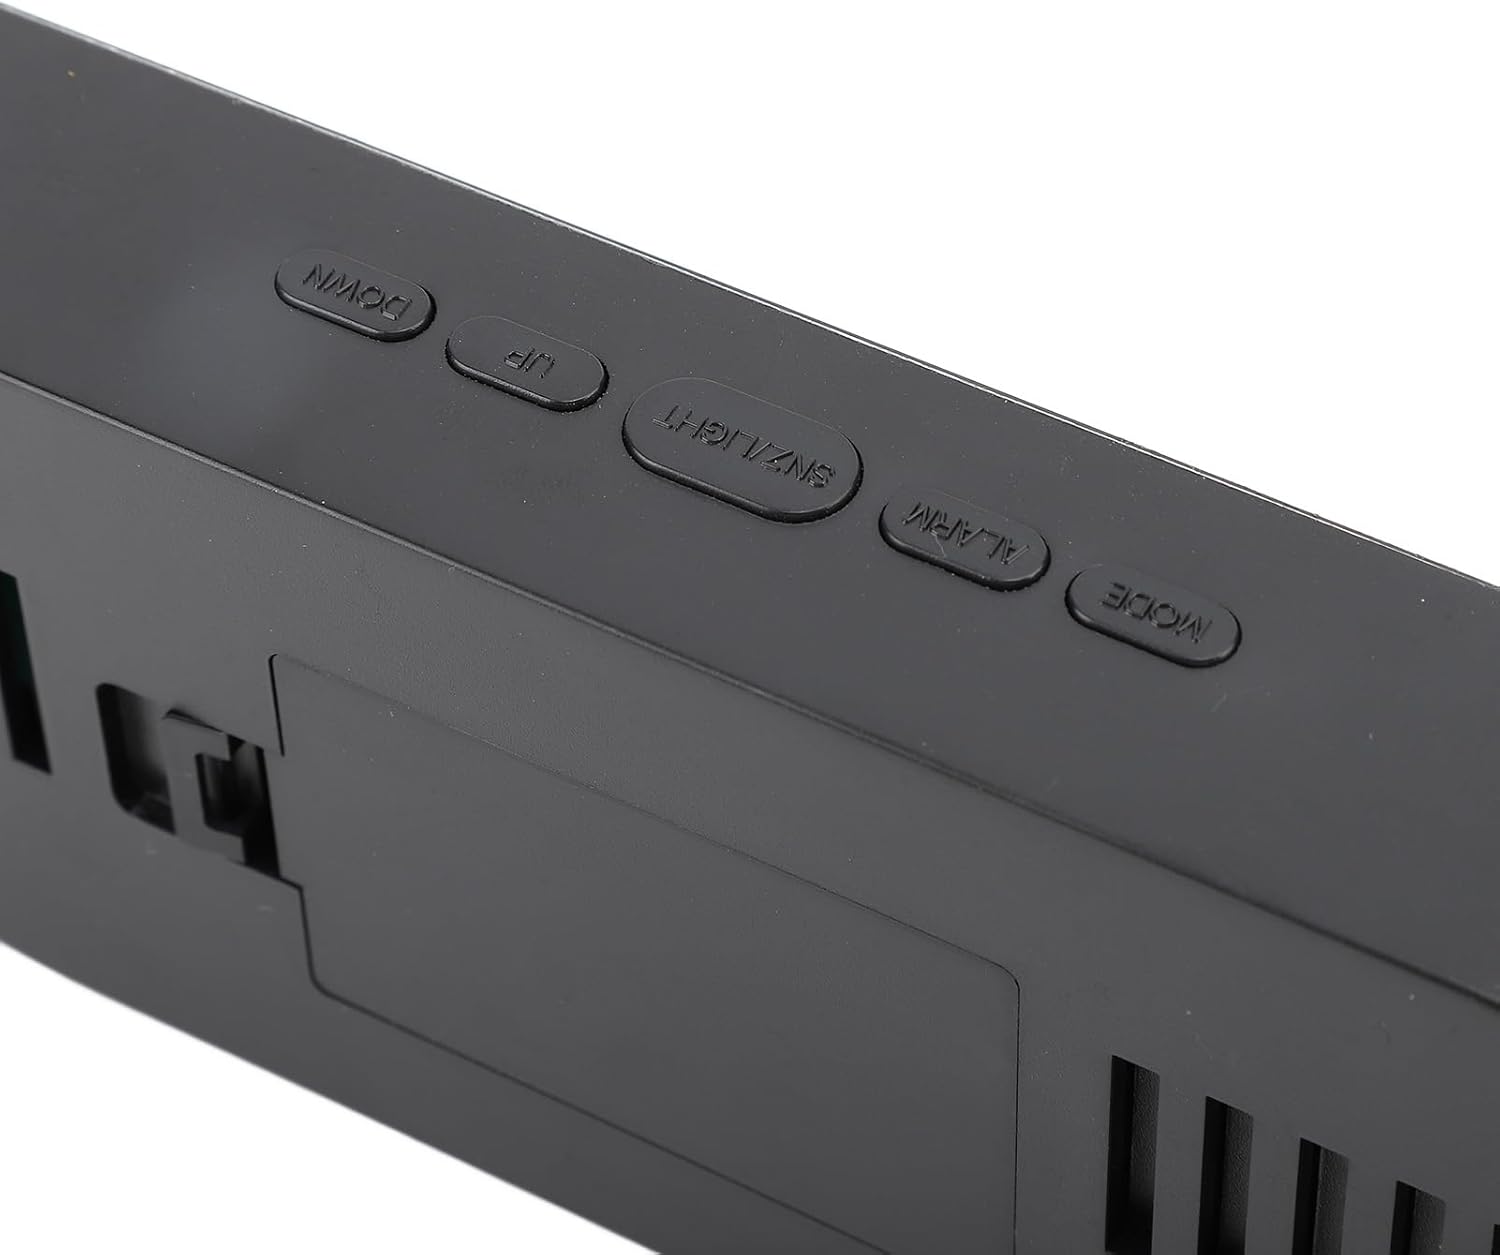
Image: Rear view of the clock, highlighting the control buttons and the DC 5V power input port.
The rear of the clock houses the control buttons and the power input port:
- MODE Button: Used to switch between time, alarm, and timer modes, and to confirm settings.
- ALARM Button: Used to enter alarm setting mode and activate/deactivate the alarm.
- SNZ/LIGHT Button: Activates snooze function during an alarm, and adjusts display brightness.
- UP Button: Increases values during setting, or cycles through options.
- DOWN Button: Decreases values during setting, or cycles through options.
- DC 5V Port: Power input for the clock using the provided USB cable.
5. Setup
- Connect Power: Insert the small end of the USB power cable into the DC 5V port on the back of the clock. Connect the other end of the USB cable to a standard USB power adapter (not included) or a powered USB port.
- Initial Display: The clock display will illuminate, typically showing a default time (e.g., 12:00) and current temperature/humidity readings.
6. Operating Instructions
6.1 Setting the Time
- In normal time display mode, press and hold the MODE button for approximately 3 seconds. The hour digits will begin to flash.
- Use the UP or DOWN buttons to adjust the hour.
- Press the MODE button again. The minute digits will flash.
- Use the UP or DOWN buttons to adjust the minutes.
- Press the MODE button a third time to select 12-hour or 24-hour format. Use UP or DOWN to toggle.
- Press the MODE button one last time to confirm and exit time setting mode.
6.2 Setting the Alarm
- In normal time display mode, press the ALARM button once. The alarm time will be displayed, and the hour digits will flash.
- Use the UP or DOWN buttons to adjust the alarm hour.
- Press the ALARM button again. The minute digits will flash.
- Use the UP or DOWN buttons to adjust the alarm minutes.
- Press the ALARM button a third time to confirm the alarm time.
- To activate or deactivate the alarm, press the ALARM button briefly while in normal time display mode. An alarm icon will appear on the display when activated.
- When the alarm sounds, press the SNZ/LIGHT button to activate snooze (alarm will sound again after a few minutes). Press any other button to turn off the alarm for the day.
6.3 Adjusting Display Brightness
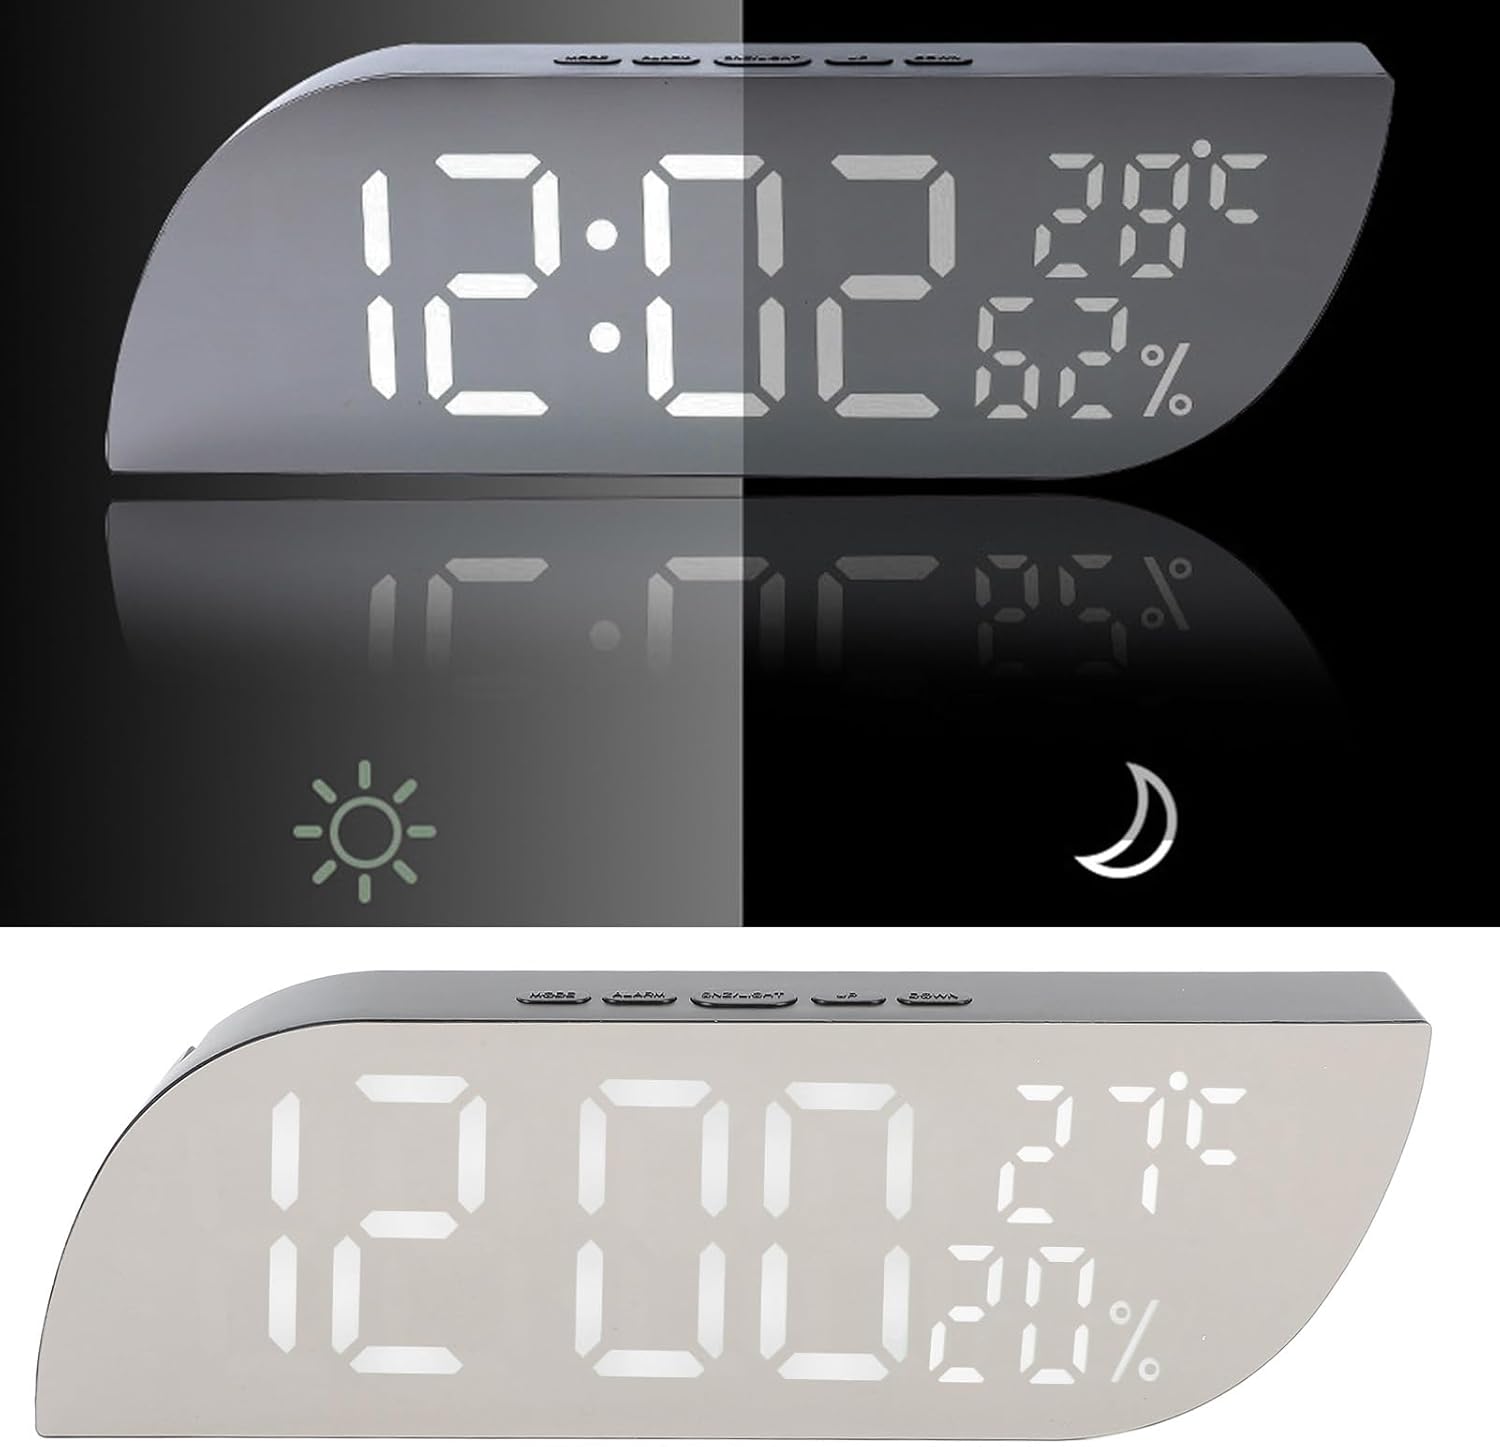
Image: Comparison of the clock's display brightness in a bright setting (top) and a dim setting (bottom), illustrating the adjustable feature.
The clock features multiple brightness levels. In normal time display mode, press the SNZ/LIGHT button repeatedly to cycle through the available brightness settings (e.g., Bright, Medium, Dim, Off).
6.4 Temperature and Humidity Display
The clock automatically detects and displays the ambient temperature and humidity. These readings are shown alongside the time. No manual adjustment is required for these functions.

Image: A detailed view of the clock's display, clearly showing the time, temperature in Celsius, and humidity percentage.
7. Maintenance
- Cleaning: Use a soft, dry cloth to clean the clock's surface. Avoid abrasive cleaners or solvents, which may damage the mirror finish or electronic components.
- Placement: Place the clock on a stable, flat surface away from direct sunlight, extreme temperatures, or high humidity to ensure accurate readings and longevity.
8. Troubleshooting
| Problem | Possible Cause | Solution |
|---|---|---|
| Display is blank or not turning on. | No power connection. | Ensure the USB cable is securely connected to the clock and a working power source. |
| Alarm does not sound. | Alarm is not activated. | Press the ALARM button to ensure the alarm icon is displayed. Re-set the alarm time if necessary. |
| Incorrect time displayed. | Time was not set correctly or power interruption. | Follow the instructions in Section 6.1 to re-set the time. |
| Temperature/Humidity readings seem inaccurate. | Clock placed in an unsuitable environment. | Move the clock away from direct heat sources, vents, or areas of high moisture. Allow time for readings to stabilize. |
9. Specifications
- Model Number: Genericdku4n7qhxw-12
- Product Dimensions: 3.15 x 1.5 x 1.57 inches (8 x 3.8 x 4 cm)
- Item Weight: 6.3 ounces (178.6 grams)
- Power Input: DC 5V (via USB cable)
- Display Type: LED Mirror Display
- Functions: Time, Alarm, Temperature, Humidity, Brightness Adjustment
- Display Color: White Light
10. Warranty and Support
For warranty information or technical support, please refer to the retailer where you purchased this product. Keep your purchase receipt as proof of purchase.


