1. Introduction
Thank you for choosing the FL FASHION LEADER Dressing Table FL-1326-SZT. This manual provides essential information for the safe assembly, operation, and maintenance of your new dressing table. Please read these instructions carefully before assembly and retain them for future reference.
This dressing table features a modern design with a 3-mode adjustable lighted mirror, a space-saving folding side panel, ample storage, and a comfortable stool with hidden storage, making it ideal for various bedroom sizes.
2. Safety Information
- Always follow assembly instructions carefully. Incorrect assembly can lead to instability and injury.
- Ensure all screws and fasteners are securely tightened before use. Periodically check and re-tighten as necessary.
- Do not overload drawers or shelves. Distribute weight evenly.
- Keep small parts and packaging materials away from children to prevent choking hazards.
- Place the dressing table on a flat, stable surface.
- The stool has a maximum load capacity of 200 lbs (90 kg). Do not exceed this limit.
- For electrical components (lighted mirror), ensure the power source matches the product's requirements. Unplug when not in use or during cleaning.
3. Package Contents
Before beginning assembly, verify that all parts listed below are present and undamaged. If any parts are missing or damaged, please contact customer support.
- 1 x Dressing Table Unit
- 1 x Adjustable Lighted Mirror
- 1 x Stool with Storage
- 1 x Hardware Kit (screws, connectors, tools if applicable)

Image 3.1: Overview of the dressing table components and their approximate dimensions. This includes the main table, mirror, stool, and a drawer insert.
4. Assembly Instructions
Assembly is required for this product. It is recommended that two adults assemble this unit to ensure safety and ease of construction. Please refer to the detailed assembly diagrams provided in the separate assembly guide included with your product. The general steps are as follows:
- Unpack and Identify Parts: Carefully remove all components from the packaging. Lay them out on a soft, clean surface to prevent scratches. Identify each part using the provided parts list.
- Assemble the Main Frame: Follow the diagrams to connect the main structural pieces of the dressing table.
- Install Drawers and Shelves: Insert drawer slides and assemble the drawers. Place shelves into their designated positions.
- Attach the Mirror Unit: Securely fasten the lighted mirror unit to the main dressing table frame.
- Assemble the Stool: Construct the stool and ensure the hidden storage compartment functions correctly.
- Final Checks: Ensure all connections are tight and the unit is stable.

Image 4.1: The fully assembled dressing table with its stool, showcasing its compact design and integrated mirror.
5. Operating Instructions
5.1. Adjustable Lighted Mirror
The integrated mirror features adjustable LED lighting with three color modes to suit various makeup needs and lighting conditions.
- Power On/Off: Locate the touch sensor button on the mirror surface. Tap once to turn the lights on or off.
- Change Light Mode: With the lights on, tap the touch sensor button repeatedly to cycle through the three lighting modes: Natural Light, Warm Light, and Cold Light.
- Adjust Brightness: Press and hold the touch sensor button to adjust the brightness level within the selected mode. Release when the desired brightness is achieved.

Image 5.1: Visual representation of the three adjustable lighting modes: Cold White, Warm White, and Warm Yellow, controlled by a touch sensor.
5.2. Folding Side Panel
The dressing table includes a folding side panel to provide additional workspace when needed, and to save space when not in use.
- To Extend: Gently pull the side panel outwards from the main table until it locks into its extended position. Ensure it is fully extended and stable before placing items on it.
- To Fold: Lift the panel slightly to disengage the locking mechanism (if present) and push it inwards until it is flush with the side of the dressing table.
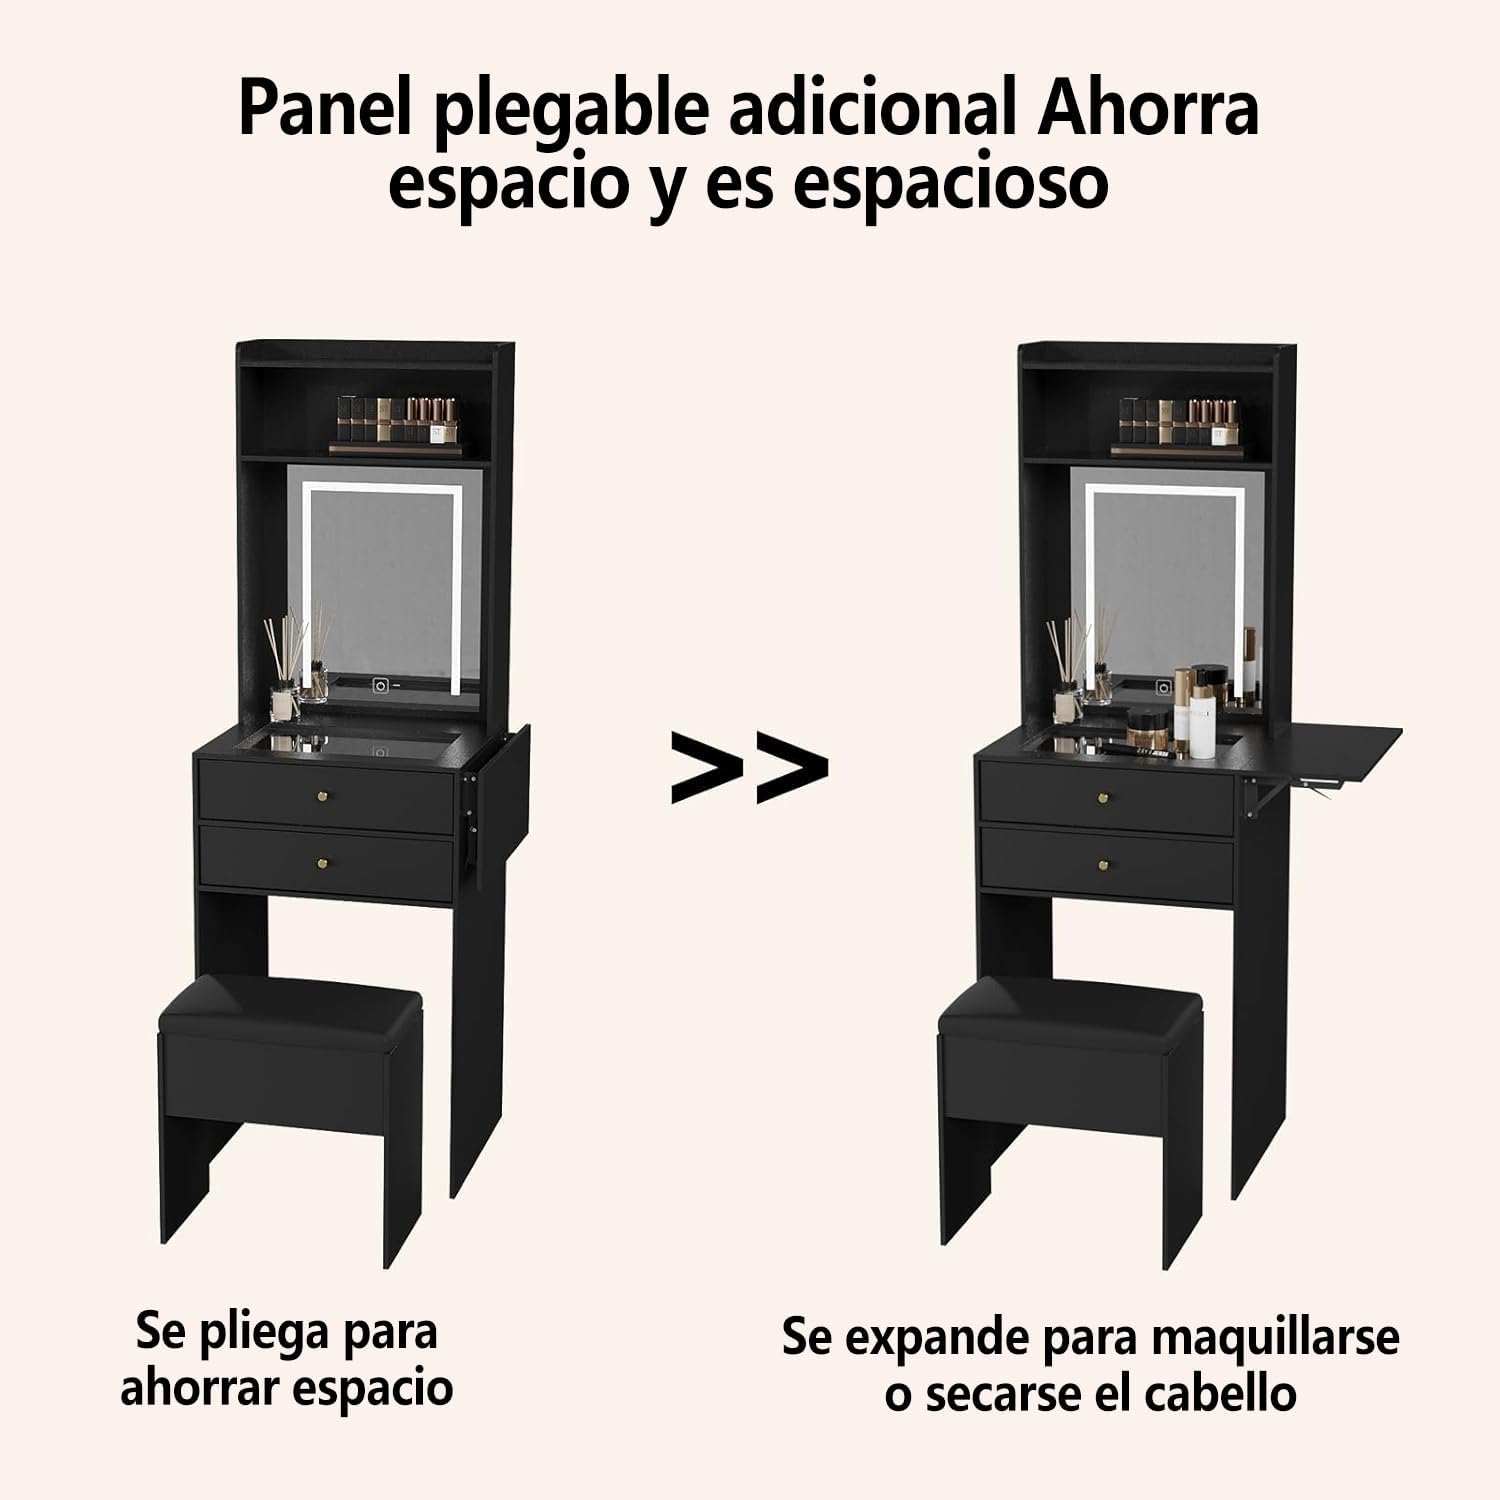
Image 5.2: Illustration demonstrating the folding side panel. The left image shows the panel folded to save space, and the right image shows it extended for additional makeup or hair drying space.
5.3. Storage Features
This dressing table is designed with multiple storage options to keep your cosmetics and accessories organized.
- Drawers: Utilize the two large drawers for storing makeup palettes, skincare products, and other personal items.
- Top Shelves: The open shelves above the mirror are suitable for displaying frequently used items or decorative pieces.
- Stool with Hidden Storage: Lift the seat of the stool to access a hidden compartment, perfect for storing hair dryers, curling irons, or other larger items.

Image 5.3: Detailed view of the storage capabilities, including two shelves for tall bottles, two drawers for cosmetics, and the stool's hidden compartment for larger items.
6. Maintenance and Care
Proper care will extend the life and appearance of your dressing table.
- Cleaning: Wipe the surfaces with a soft, damp cloth. Avoid using abrasive cleaners, harsh chemicals, or solvents, as these can damage the finish.
- Dusting: Regularly dust all surfaces with a dry, soft cloth.
- Spills: Clean up spills immediately to prevent staining or damage to the material.
- Mirror Care: Use a glass cleaner specifically designed for mirrors and a lint-free cloth to clean the mirror surface. Avoid spraying cleaner directly onto the mirror to prevent liquid from seeping into the electrical components.
7. Troubleshooting
If you encounter any issues with your dressing table, refer to the following common problems and solutions:
- Lights Not Working:
- Ensure the power cable is securely plugged into a working outlet.
- Check if the touch sensor is clean and unobstructed.
- Verify that the power outlet itself is functional.
- Drawers Sticking/Not Sliding Smoothly:
- Check for any obstructions in the drawer slides.
- Ensure the drawer slides are properly aligned and securely fastened.
- Do not overload the drawers.
- Table Instability:
- Verify that all assembly screws and fasteners are tightened.
- Ensure the table is placed on a level surface.
If problems persist, please contact FL FASHION LEADER customer support.
8. Specifications
| Feature | Detail |
|---|---|
| Model Number | FL-1326-SZT |
| Brand | FL FASHION LEADER |
| Product Dimensions (D x W x H) | 17.72" x 19.69" x 59.84" (45cm x 50cm x 152cm) |
| Item Weight | 72.6 pounds (32.9 kg) |
| Color | Black |
| Frame Material | Metal |
| Seat Material Type | Faux Leather |
| Seat Height | 44 Centimeters |
| Max Stool Load Capacity | 200 lbs (90 kg) |
| Assembly Required | Yes |
| Product Care Instructions | Wipe with Damp Cloth |
9. Warranty and Support
FL FASHION LEADER is committed to providing quality products. For any questions, concerns, or issues regarding your dressing table, please contact our customer support team. Please have your model number (FL-1326-SZT) and purchase information ready when contacting support.
Specific warranty details may vary by region and retailer. Please refer to your purchase documentation for warranty information.


