
1. Introduction
This manual provides detailed instructions for the assembly, installation, operation, and maintenance of your Casanoov NEVIS 400B160 Aluminium Double Swing Gate. Please read this manual thoroughly before beginning installation to ensure safe and correct usage.
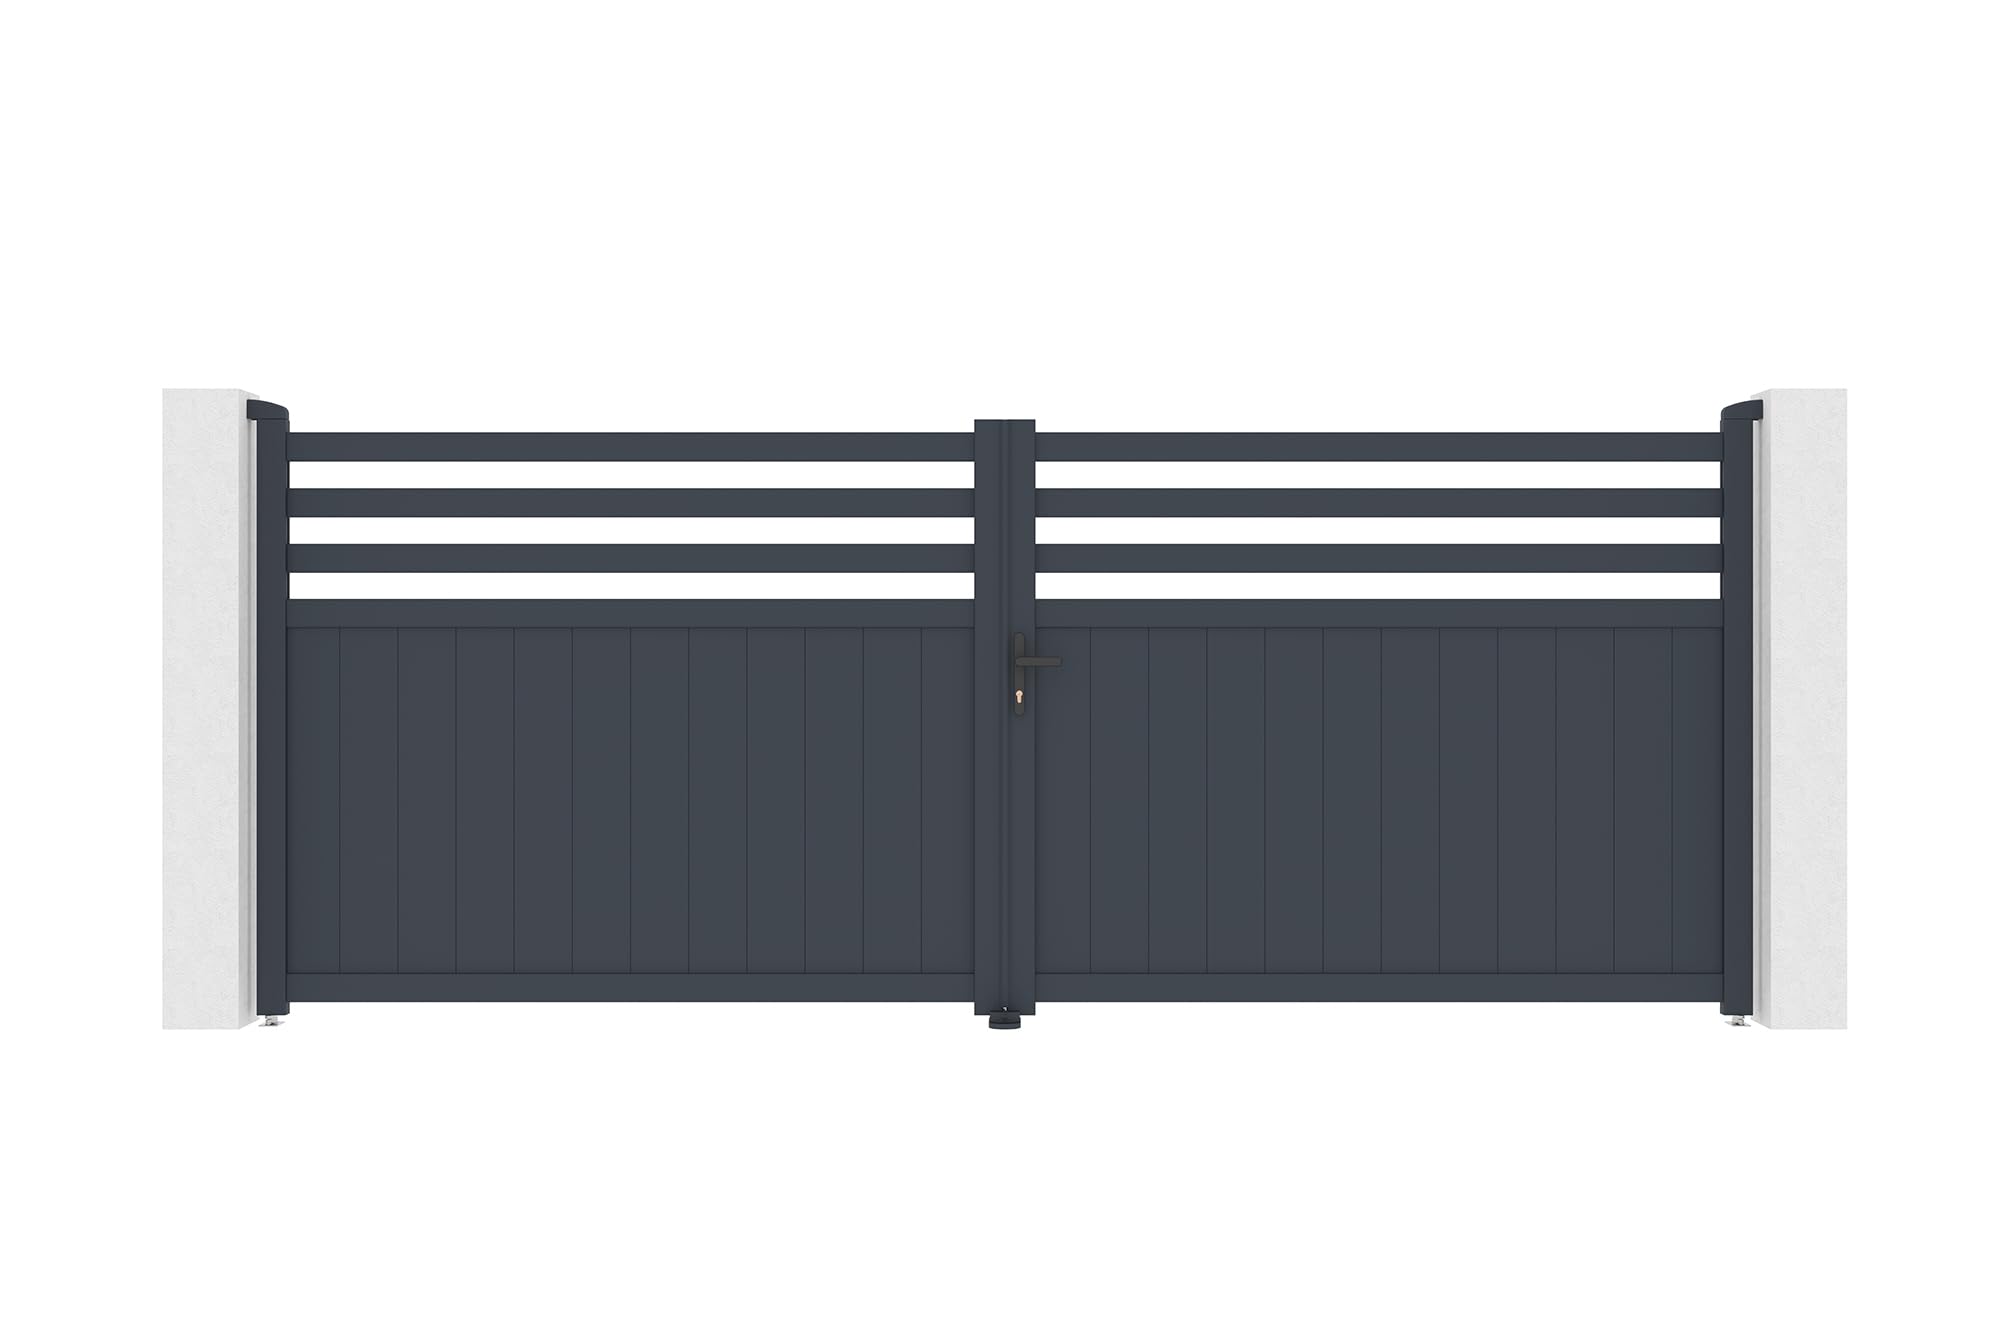
The NEVIS 400B160 is a half-open double swing gate featuring horizontal slats in the upper section and vertical panels in the lower section, offering a balance of visibility and privacy. Constructed from durable aluminum with an anthracite grey (RAL 7016) powder-coated finish, this gate is designed for longevity and aesthetic appeal.
2. Safety Information
Always prioritize safety during installation and operation. Failure to follow these safety guidelines may result in injury or damage to the product.
- Wear appropriate personal protective equipment (PPE) including gloves, safety glasses, and sturdy footwear during assembly and installation.
- Ensure the installation area is clear of obstructions and that the ground is level and stable.
- Verify that the supporting pillars are robust enough to bear the weight and forces of the gate.
- Keep children and pets away from the work area during installation.
- Do not attempt to install the gate in adverse weather conditions (e.g., strong winds).
- Handle all components carefully to avoid scratches or damage.
- Ensure all screws and bolts are tightened securely according to the assembly steps.
3. Package Contents
Before starting assembly, verify that all components listed below are present and undamaged. The gate is delivered in a kit form, typically across multiple packages.
- 4 x Aluminium Uprights (Width 7.8cm)
- 24 x Anthracite Powder-Coated Aluminium Slats (Width 15.5cm)
- 2 x Upper Hinges
- 2 x Lower Hinges
- 2 x Gate Stops
- 1 x Central Stop
- 1 x Cylinder Lock
- 1 x Handle (Black)
- 5 x Keys
- Cover Caps
- Screws and Bolts (various sizes)
Note: The product is shipped in several packages, including DO 400B160 GRIS COLIS 1, DO 400B160 GRIS COLIS 2, DO 400B160 GRIS COLIS 3, and TOP NEVIS 400 GRIS.
4. Specifications
| Feature | Detail |
|---|---|
| Model | NEVIS 400B160 |
| Material | Aluminium |
| Color | Anthracite Grey (RAL 7016) |
| Overall Width | 397 cm |
| Overall Height | 161 cm |
| Required Width Between Pillars | 402 cm |
| Minimum Pillar Height | 175 cm |
| Product Weight | 63.5 kg |
| Design Origin | France |
| Country of Origin | China |
5. Setup and Installation
The Casanoov NEVIS 400B160 gate is supplied as a self-assembly kit. Follow the detailed instructions provided with the product packaging for step-by-step guidance. The general installation process involves:
- Pillar Preparation: Ensure your existing or newly installed pillars meet the minimum height requirement of 175 cm and are spaced 402 cm apart (center to center) for optimal gate function. The pillars must be structurally sound and capable of supporting the gate's weight.
- Gate Frame Assembly: Assemble the aluminum uprights and crossbars to form the two gate leaves. Refer to the technical drawing (Figure 1) for correct orientation and component placement.
- Slat Installation: Insert the horizontal and vertical aluminum slats into the designated channels of the gate frames. Secure them according to the specific instructions.
- Hinge Attachment: Attach the upper and lower hinges to the gate leaves. Ensure they are correctly aligned for smooth operation.
- Gate Mounting: Mount the assembled gate leaves onto the prepared pillars using the hinges. Adjust as necessary to ensure the gates swing freely and meet correctly in the center.
- Lock and Stop Installation: Install the cylinder lock, handle, gate stops, and central stop. Test the locking mechanism and ensure the gates close securely against the stops.
- Final Adjustments: Make any final adjustments to ensure the gate is level, swings smoothly, and locks properly. Tighten all fasteners.
The central crossbars of this gate are reinforced, allowing for future motorization if desired. Consult a professional for motorization installation.

6. Operating the Gate
The NEVIS 400B160 is designed for manual operation, with provisions for future motorization.
- Opening: Unlock the gate using the provided key. Turn the handle to disengage the latch. Gently push one or both gate leaves open. Ensure they swing fully without obstruction.
- Closing: Pull the gate leaves closed until they meet the central stop. Engage the latch by turning the handle. Lock the gate with the key for security.
- Motorization: If you choose to motorize your gate, follow the specific instructions provided with your gate motor system. The reinforced central crossbars are designed to accommodate motorization.
7. Maintenance
Regular maintenance will ensure the longevity and optimal performance of your aluminum gate.
- Cleaning: Clean the aluminum surfaces periodically with mild soap and water. Use a soft cloth or sponge. Avoid abrasive cleaners or harsh chemicals that can damage the powder coating. Rinse thoroughly with clean water.
- Hinges and Moving Parts: Inspect hinges, locks, and other moving parts every six months. Lubricate hinges with a silicone-based spray or light oil to ensure smooth operation and prevent squeaking.
- Fasteners: Check all screws and bolts for tightness annually. Re-tighten any loose fasteners to maintain structural integrity.
- Damage Inspection: Regularly inspect the gate for any signs of damage, corrosion, or wear. Address any issues promptly to prevent further deterioration.
8. Troubleshooting
Here are some common issues and their potential solutions:
- Gate does not close properly:
- Check for obstructions in the gate's path.
- Verify that the gate stops and central stop are correctly positioned and secured.
- Inspect hinges for damage or misalignment. Adjust if necessary.
- Gate is difficult to open/close or squeaks:
- Lubricate hinges and moving parts with a suitable lubricant.
- Check for debris or dirt in the hinge mechanisms.
- Lock mechanism is stiff or not working:
- Apply a graphite-based lubricant to the lock cylinder.
- Ensure the handle and latch components are correctly aligned and not obstructed.
If you encounter persistent issues that cannot be resolved with these steps, please contact Casanoov customer support or your retailer.
9. Warranty and Support
For information regarding warranty coverage, claims, or technical support, please refer to the warranty documentation included with your purchase or visit the official Casanoov website. You may also contact your retailer for assistance.

