
1. Product Overview
The CooSpo Bike Computer Out Front Mount MT5 is engineered to provide a secure and optimal viewing position for your cycling computer. Its robust design ensures durability and stability across various riding conditions. This mount is compatible with a wide range of popular bike computer brands and is designed for straightforward installation on standard bicycle handlebars.

Image: The CooSpo MT5 Bike Computer Out Front Mount, showcasing its sleek design and the included accessories: two rubber rings for different handlebar sizes and an Allen wrench.

Image: A close-up of the CooSpo MT5 mount, emphasizing its construction from glass fiber and synthetic plastic, designed for shock absorption and durability during cycling.
2. What's in the Box
- 1 x MT5 CooSpo Bike Computer Mount
- 1 x Wrench (Allen key)
- 2 x Gasket Rubber Rings (for 25.4mm and 31.8mm handlebars)

Image: The CooSpo MT5 mount, its packaging, and all included components laid out, confirming the contents of the box.
3. Setup and Installation
Follow these steps to properly install your CooSpo Bike Computer Out Front Mount MT5 on your bicycle handlebars.
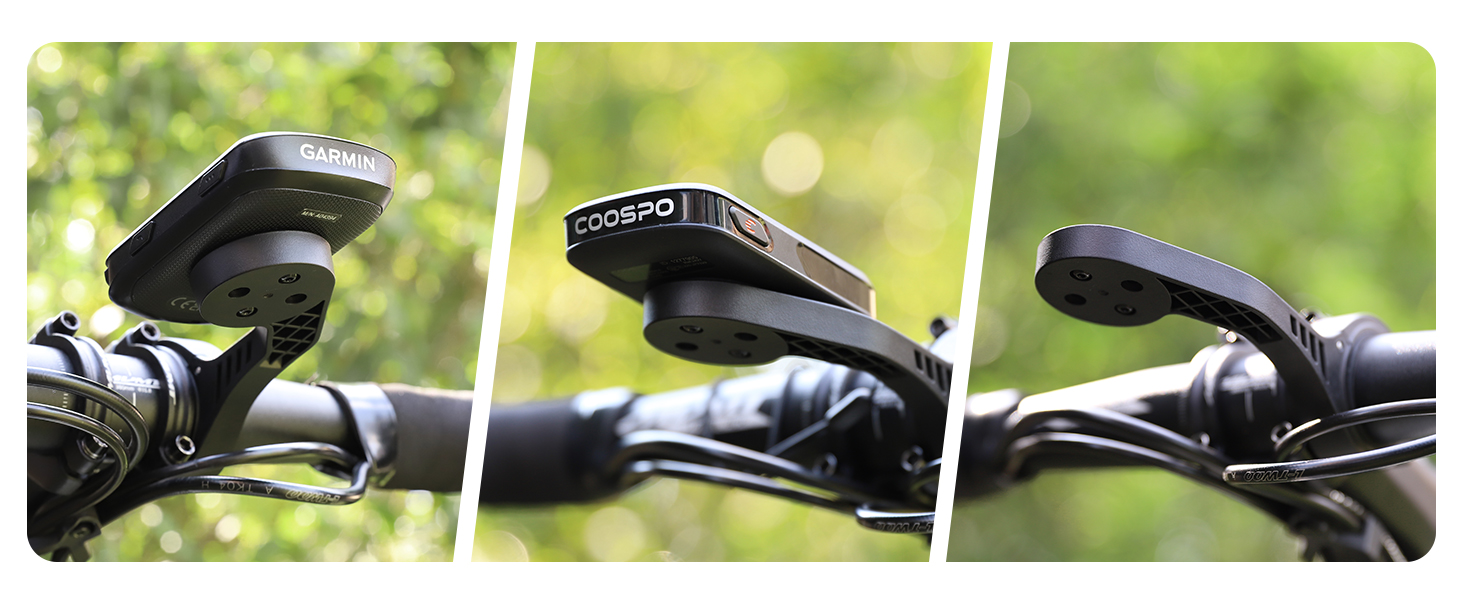
Image: A four-panel illustration demonstrating the installation process: 1. Opening the mount, 2. Placing it on the handlebar and tightening, 3. Attaching the bike computer, 4. Final secure fit.
- Prepare the Mount: Use the provided Allen wrench to loosen the screw on the mount's clamp. This will allow the clamp to open and fit around your handlebar.
- Select the Correct Gasket: Identify the diameter of your bicycle handlebar (either 25.4mm or 31.8mm). Choose the corresponding rubber gasket ring from the package. Insert the selected gasket into the inner curve of the mount's clamp. This ensures a snug fit and prevents slippage.
- Position the Mount: Place the mount around your handlebar at the desired position, ensuring the gasket is properly seated.
- Secure the Mount: Tighten the screw on the mount's clamp using the Allen wrench until it is firmly secured to the handlebar. Do not overtighten.
- Attach Your Bike Computer: Align your compatible Garmin, CooSpo, iGPS, or XOSS bike computer with the mount's interface and twist it clockwise until it clicks securely into place.
Video: An official CooSpo video demonstrating the unboxing and step-by-step installation of the MT5 Bike Computer Mount on a bicycle handlebar, including how to attach a bike computer.
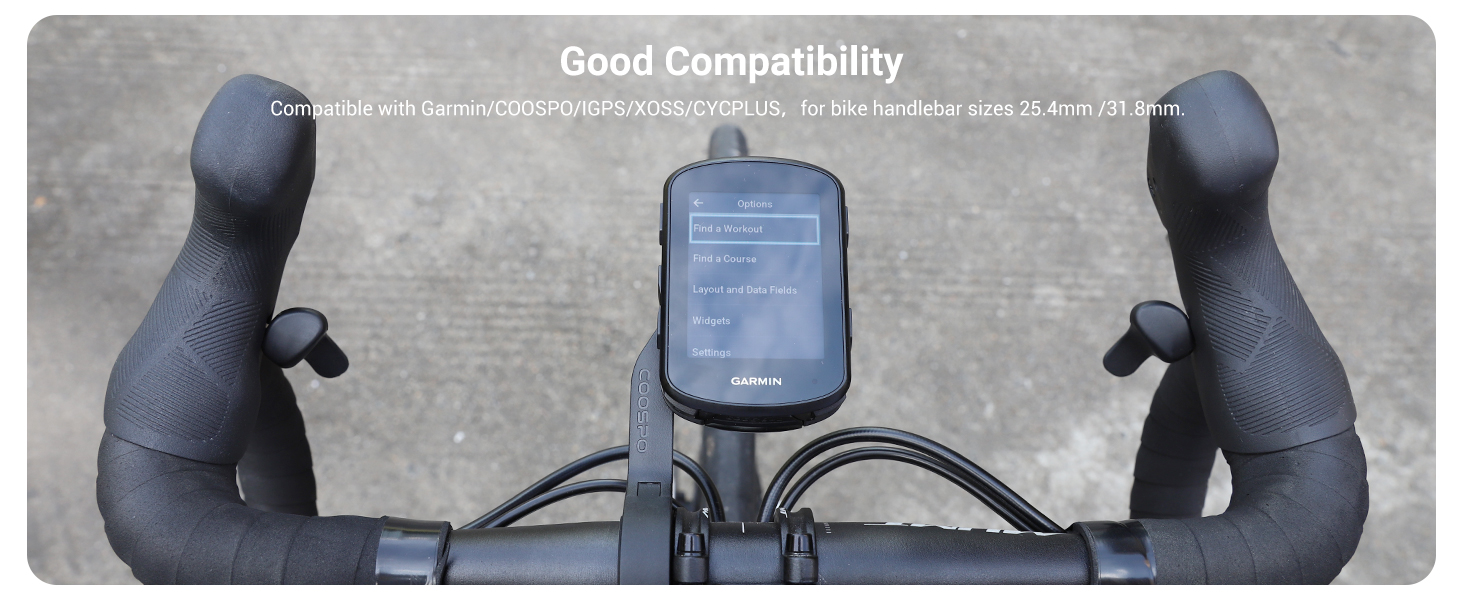
Image: The CooSpo MT5 mount installed on a bicycle handlebar, demonstrating its compatibility with a Garmin bike computer and its stable, forward-facing position.
4. Operating the Mount
Once installed, the CooSpo MT5 mount requires no active operation. It serves as a stable platform for your bike computer. Ensure your bike computer is securely clicked into place before riding. To remove your bike computer, simply twist it counter-clockwise from the mount.
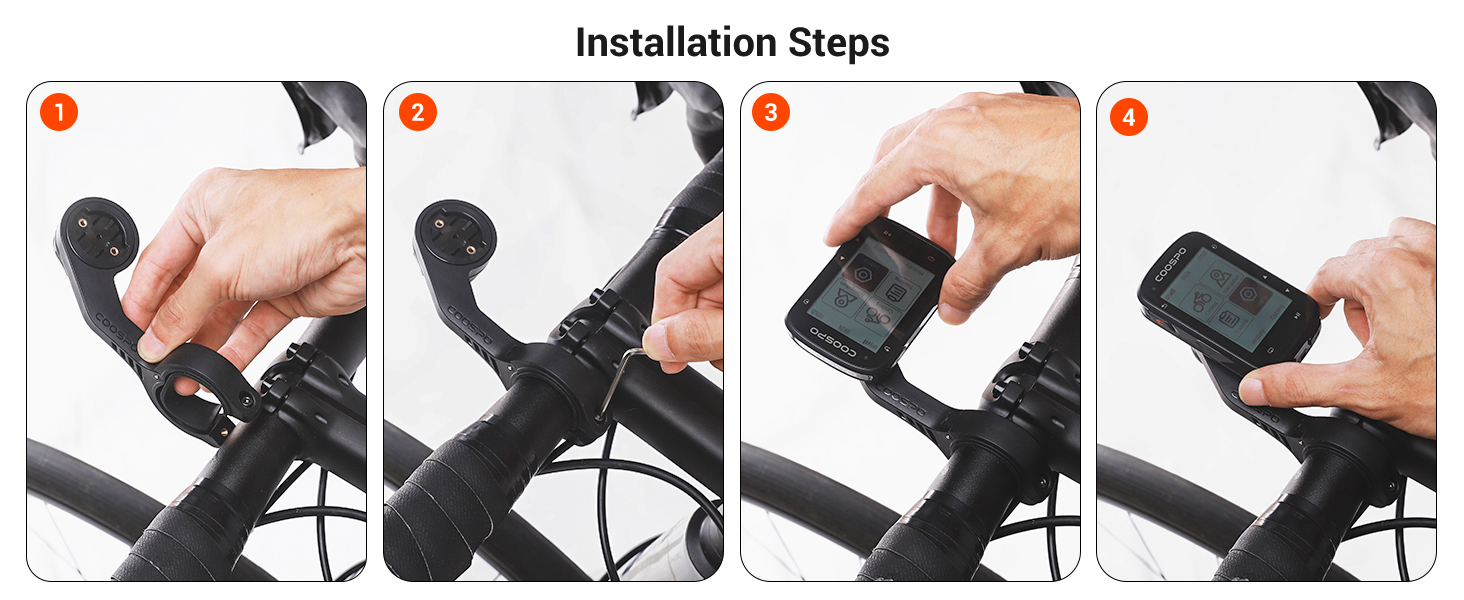
Image: Multiple views of the CooSpo MT5 mount attached to a bicycle, illustrating its low-profile design and how it positions the bike computer for easy viewing during a ride.
5. Maintenance
To ensure the longevity and optimal performance of your CooSpo MT5 mount, follow these simple maintenance guidelines:
- Cleaning: Wipe the mount with a damp cloth to remove dirt and grime. Avoid using harsh chemicals or abrasive materials that could damage the finish.
- Inspection: Periodically check the mounting screw for tightness. Ensure the rubber gaskets are in good condition and not cracked or worn, as they are crucial for a secure fit.
- Storage: If removing the mount for extended periods, store it in a clean, dry place away from direct sunlight and extreme temperatures.
6. Troubleshooting
If you encounter any issues with your CooSpo MT5 mount, consider the following:
- Mount is Loose: Ensure the mounting screw is tightened sufficiently. Verify that the correct rubber gasket for your handlebar diameter is used and properly seated.
- Bike Computer Not Securing: Check for any debris in the mount's interface or on the back of your bike computer. Ensure your bike computer is compatible with the mount.
- Vibration During Ride: Confirm the mount is tightly secured to the handlebar and that the bike computer is fully locked into the mount. Excessive vibration might indicate an improper fit or a need to re-tighten.
7. Specifications
| Feature | Detail |
|---|---|
| Model Number | MT5 |
| Package Dimensions | 5.51 x 1.93 x 1.81 inches |
| Item Weight | 2.46 ounces |
| Material | Glass fiber + synthetic plastic |
| Compatible Handlebar Diameters | 25.4mm / 31.8mm |
| Compatible Devices | Garmin, CooSpo, iGPS, XOSS Bike Computers |
| Mounting Type | Handlebar |
| Special Features | Scratch Resistant, Shockproof Design |

Image: The CooSpo MT5 mount with overlaid text indicating its length (134mm), width (57.5mm), and weight (39g), along with icons representing its features like comfortable viewing, lightweight, waterproof, impact resistance, and compatibility.
8. Warranty and Support
CooSpo stands behind the quality of its products. For warranty information, technical support, or any inquiries regarding your MT5 Bike Computer Mount, please refer to the official CooSpo website or contact their customer service directly. Keep your purchase receipt as proof of purchase for warranty claims.
For further assistance, visit: www.coospo.com