1. Product Overview
This manual provides essential information for the installation, operation, and maintenance of your navycrest Q7 Dash Cam Rear Camera. This product is designed to seamlessly integrate with your existing navycrest Q7 Dash Cam system, offering enhanced surveillance and recording capabilities for the rear of your vehicle.
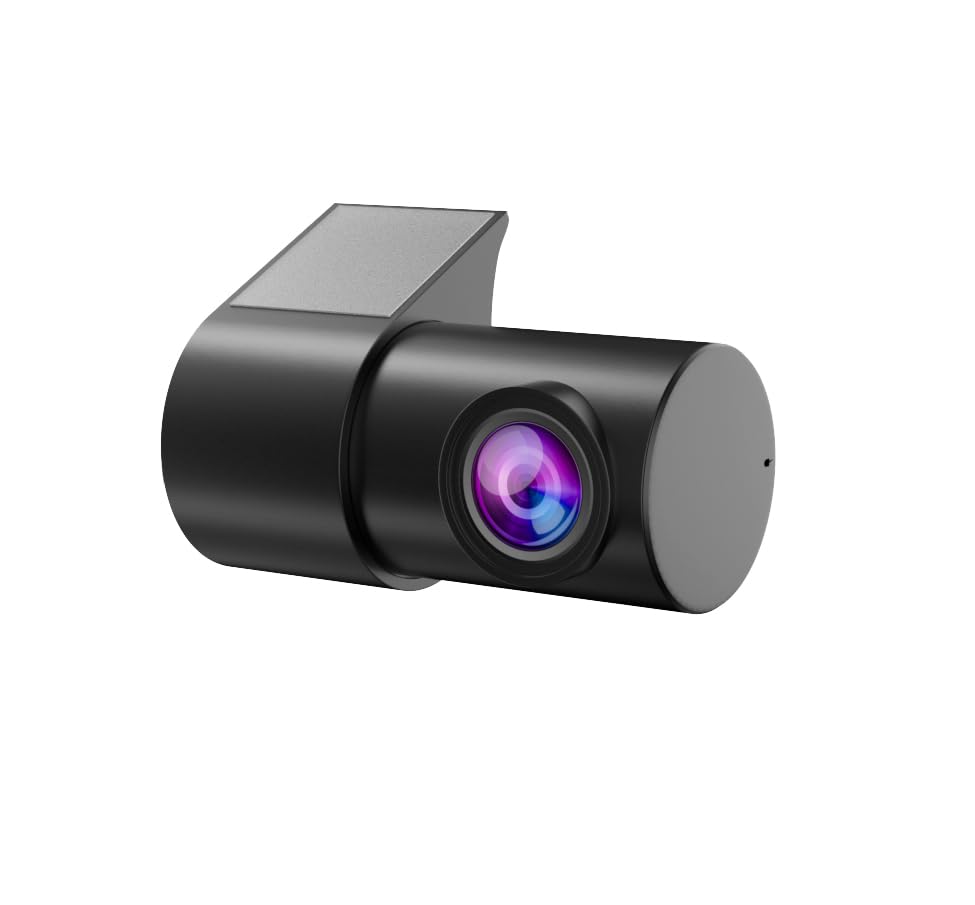
Figure 1: navycrest Q7 Dash Cam Rear Camera. This compact camera is designed for discreet installation and provides a wide-angle view of the rear surroundings.
Key Features:
- Designed specifically for the navycrest Q7 Dash Cam.
- Surface Mount Installation.
- Wide Angle Lens for broad rear coverage.
- RCA Connector for reliable video signal transmission.
2. Setup and Installation
Proper installation of the Rear Camera is crucial for optimal performance. This camera is intended for surface mounting and connects to your main Q7 Dash Cam unit.
2.1 Physical Installation
- Choose a Mounting Location: Select a suitable flat surface at the rear of your vehicle that provides an unobstructed view. Common locations include above the license plate or on the rear window.
- Clean the Surface: Thoroughly clean the chosen mounting area to ensure it is free of dust, dirt, and moisture. Use an alcohol wipe if necessary and allow it to dry completely.
- Apply Electrostatic Film (Optional): If desired, apply the provided electrostatic film to the mounting surface before attaching the camera. This can help protect your vehicle's surface and make removal easier.
- Attach the Camera: Remove the protective backing from the 3M adhesive on the camera's mounting bracket. Carefully position the camera and press firmly onto the cleaned surface for at least 30 seconds to ensure a strong bond.
2.2 Connecting to the Q7 Dash Cam
- Route the Cable: Carefully route the camera's RCA connector cable from the rear mounting location to the main navycrest Q7 Dash Cam unit. Ensure the cable is tucked away neatly and does not interfere with vehicle operations or safety features. Avoid sharp bends or pinching the cable.
- Connect the RCA Plug: Locate the dedicated RCA input port on your navycrest Q7 Dash Cam. This port is typically yellow. Insert the yellow RCA plug from the rear camera cable firmly into this port.
- Power Connection: Ensure your main navycrest Q7 Dash Cam is properly powered (e.g., via the cigarette lighter adapter or hardwire kit). The rear camera draws power directly from the main unit.
2.3 Software Installation (for Android Car Navigation)
If your main Q7 Dash Cam is connected to an Android car navigation system, you may need to install specific software for full functionality. Refer to the video below for a general guide on this process.
Video 1: Installation operation method. This video demonstrates the process of connecting a USB cable, opening the file manager on an Android car navigation system, finding and installing an APK file, allowing necessary permissions, and checking for updates to enable dash cam functions.
3. Operating Instructions
The navycrest Q7 Dash Cam Rear Camera operates in conjunction with your main Q7 Dash Cam unit. All recording, settings, and viewing functions for the rear camera are managed through the main dash cam's interface or its dedicated mobile application.
- Automatic Activation: The rear camera will typically activate automatically when the main Q7 Dash Cam is powered on and begins recording.
- Viewing Footage: Live view and recorded footage from the rear camera can be accessed via the main Q7 Dash Cam's display or its connected mobile application. Consult your Q7 Dash Cam's manual for specific navigation steps.
- Settings: Any settings related to video quality, loop recording duration, time stamps, collision sensing, or automatic screen off time for the rear camera are controlled through the main Q7 Dash Cam's settings menu or mobile app.
4. Maintenance
To ensure clear and reliable footage from your Rear Camera, follow these simple maintenance tips:
- Clean the Lens: Regularly wipe the camera lens with a soft, lint-free cloth to remove dust, dirt, or water spots. Avoid abrasive materials that could scratch the lens.
- Check Connections: Periodically inspect the RCA cable connection to ensure it is secure and free from damage.
- Monitor Mounting: Ensure the camera remains firmly attached to its mounting surface. Reapply adhesive if necessary.
5. Troubleshooting
If you encounter issues with your navycrest Q7 Dash Cam Rear Camera, refer to the following common problems and solutions:
- No Rear Image Displayed:
- Ensure the RCA cable is securely connected to both the rear camera and the main Q7 Dash Cam.
- Verify that the main Q7 Dash Cam is powered on and functioning correctly.
- Check the settings on your main Q7 Dash Cam to ensure the rear camera input is enabled and selected.
- Poor Video Quality:
- Clean the camera lens thoroughly.
- Ensure the camera is securely mounted and not vibrating.
- Check the video resolution settings on your main Q7 Dash Cam.
- Intermittent Connection:
- Inspect the RCA cable for any signs of damage (kinks, cuts, loose connectors). Replace if necessary.
- Ensure the cable routing does not cause stress on the connectors.
6. Specifications
| Feature | Detail |
|---|---|
| Product Dimensions | 1 x 1 x 1 inches |
| Item Weight | 4.8 ounces |
| ASIN | B0DG5JTPXX |
| Connectivity Technologies | Powerline (via main dash cam) |
| Special Features | Loop Recording (controlled by main dash cam) |
| Other Display Features | Wireless (via main dash cam) |
| Color | Black |
| Manufacturer | navycrest |
| Compatible Devices | Monitor (via main dash cam) |
| Installation Type | Surface Mount |
| Optical Sensor Technology | CMOS |
| Lens Type | Wide Angle |
| Real Angle of View | 170 Degrees |
| Connector Type | RCA |
| Optical Sensor Size | 1/2.5 inch |
| Field Of View | 170 Degrees |
7. Warranty and Support
Your navycrest Q7 Dash Cam Rear Camera comes with a 12-month warranty from the date of purchase. Please retain your proof of purchase for warranty claims.
For technical support, troubleshooting assistance, or warranty inquiries, please contact navycrest customer service through the contact information provided with your main Q7 Dash Cam or on the official navycrest website.


