1. Introduction
The OSRAM BATTERYcharge SOLAR 20W is a solar-powered device designed to maintain the charge of 12V automotive batteries. Modern vehicles often have multiple on-board computer systems, such as alarm systems and immobilizers, which consume a low but constant amount of power. This can lead to battery discharge, especially when the vehicle is not in regular use. This solar battery maintenance device provides an environmentally friendly solution to prevent such discharge, ensuring your vehicle's battery remains optimally charged.

Figure 1: OSRAM BATTERYcharge SOLAR 20W Solar Panel and its retail packaging.
2. Package Contents
Before proceeding with installation, please ensure all components are present:
- OSRAM BATTERYcharge SOLAR 20W Solar Panel
- Battery clamp adapter cable
- Cigarette lighter adapter cable

Figure 2: The solar panel shown with its two connection accessories: battery clamps and a cigarette lighter adapter.
3. Setup and Installation
Follow these steps to correctly set up your OSRAM BATTERYcharge SOLAR 20W device:
- Choose a Location: Place the solar panel in a location where it receives maximum direct sunlight. Common placements include the vehicle's dashboard or directly on the battery compartment under the hood.
- Connect to Battery:
- Using Battery Clamps: Connect the red clamp to the positive (+) terminal of the 12V battery and the black clamp to the negative (-) terminal. Ensure a secure connection.
- Using Cigarette Lighter Adapter: Insert the adapter into your vehicle's 12V cigarette lighter socket. This method is suitable if the socket remains powered when the ignition is off.
- Secure the Panel: Ensure the panel and cables are securely positioned to prevent movement or damage, especially if placed under the hood or on the dashboard where it might shift during vehicle operation.

Figure 3: The solar panel positioned on a vehicle's dashboard to capture sunlight.

Figure 4: The solar panel connected to a car battery located under the vehicle's hood.
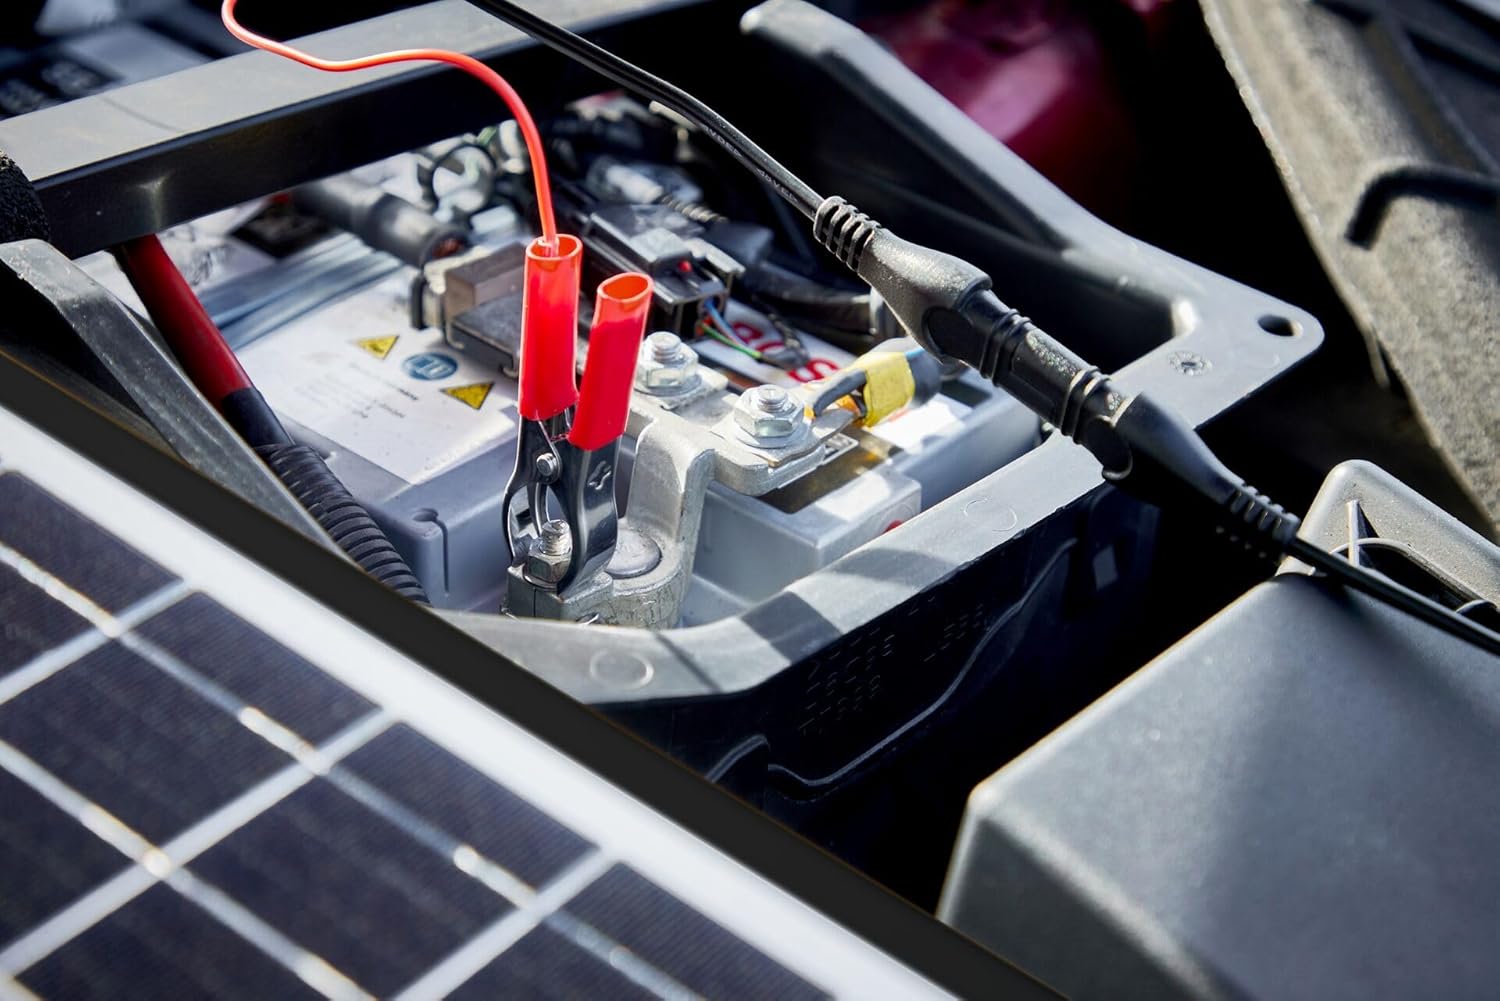
Figure 5: A detailed view of the battery clamps securely attached to the battery terminals.
4. Operating Instructions
The OSRAM BATTERYcharge SOLAR 20W operates automatically once connected and exposed to sunlight. It is designed to provide a trickle charge to your 12V battery, preventing self-discharge and maintaining its optimal charge level. There are no manual controls or settings required for its operation.
- The device will begin charging when sufficient sunlight is available.
- It is equipped with protection features to prevent overcharging and reverse polarity.
- For best results, ensure the solar panel is clean and unobstructed by shadows.
5. Maintenance
To ensure the longevity and optimal performance of your solar battery maintenance device, follow these simple maintenance guidelines:
- Cleaning: Periodically wipe the surface of the solar panel with a soft, damp cloth to remove dust, dirt, or debris that may accumulate and reduce efficiency. Avoid abrasive cleaners.
- Cable Inspection: Regularly check all cables and connections for any signs of wear, damage, or corrosion. Ensure connections to the battery terminals are clean and secure.
- Storage: If storing the device for an extended period, disconnect it from the battery and store it in a cool, dry place away from direct sunlight and extreme temperatures.

Figure 6: Front view of the OSRAM BATTERYcharge SOLAR 20W solar panel.

Figure 7: Back view of the OSRAM BATTERYcharge SOLAR 20W solar panel, showing the cable connection point.
6. Troubleshooting
If you encounter issues with your OSRAM BATTERYcharge SOLAR 20W, consider the following:
- No Charging Indication:
- Ensure the solar panel is receiving direct sunlight and is not shaded.
- Check all connections to the battery terminals or cigarette lighter socket for proper contact.
- Verify that the vehicle's 12V cigarette lighter socket is powered when the ignition is off, if using that connection method.
- Low Charging Performance:
- Clean the surface of the solar panel to remove any dirt or obstructions.
- Reposition the panel to maximize exposure to direct sunlight.
- Ensure the ambient temperature is within the optimal operating range for solar panels.
- Damaged Cables/Connectors: If any cables or connectors appear damaged, discontinue use and contact customer support for assistance.
7. Specifications

Figure 8: Dimensional diagram of the solar panel, showing length, width, and thickness.
| Feature | Specification |
|---|---|
| Brand | OSRAM |
| Model | BATTERYcharge SOLAR 20W (OSP2000) |
| Material | Aluminum |
| Product Dimensions (L x W x H) | 14.02" x 0.79" x 16.3" (356mm x 20mm x 414mm approx.) |
| Item Weight | 4.57 pounds (2.08 Kilograms) |
| Efficiency | A |
| Included Components | OSRAM Charger battery charger OSP2000 (Solar Panel, Battery Clamp Adapter, Cigarette Lighter Adapter) |
| Maximum Voltage | 12 Volts (DC) |
| Maximum Power | 20 Watts |
| Special Feature | Vehicle Solar Battery Maintenance |
8. Warranty and Support
This OSRAM product is designed for reliability and performance. For information regarding warranty coverage, please refer to the documentation included with your purchase or visit the official OSRAM website. EU spare part availability duration is 1 year.
For technical support, troubleshooting assistance, or to inquire about replacement parts, please contact OSRAM customer service through their official channels. Always provide your product model number (OSP2000) when seeking support.