Introduction
This manual provides essential instructions for the safe and effective use, installation, and maintenance of your RDSJ 6800mAh replacement lithium-ion battery. This battery is designed for specific Neabot robot vacuum cleaner models. Please read this manual thoroughly before attempting installation or use to ensure optimal performance and safety.
Important Safety Information
Always adhere to the following safety guidelines to prevent damage to the battery, your vacuum cleaner, and to avoid personal injury.
- Do not disassemble, crush, puncture, or dispose of the battery in fire.
- Do not use if the battery shows signs of serious bulging or damage.
- Avoid exposing the battery to high-temperature environments.
- Do not immerse the battery in water.
- Charge the battery only with a specified charger at temperatures between 0°C and 40°C (32°F and 104°F).
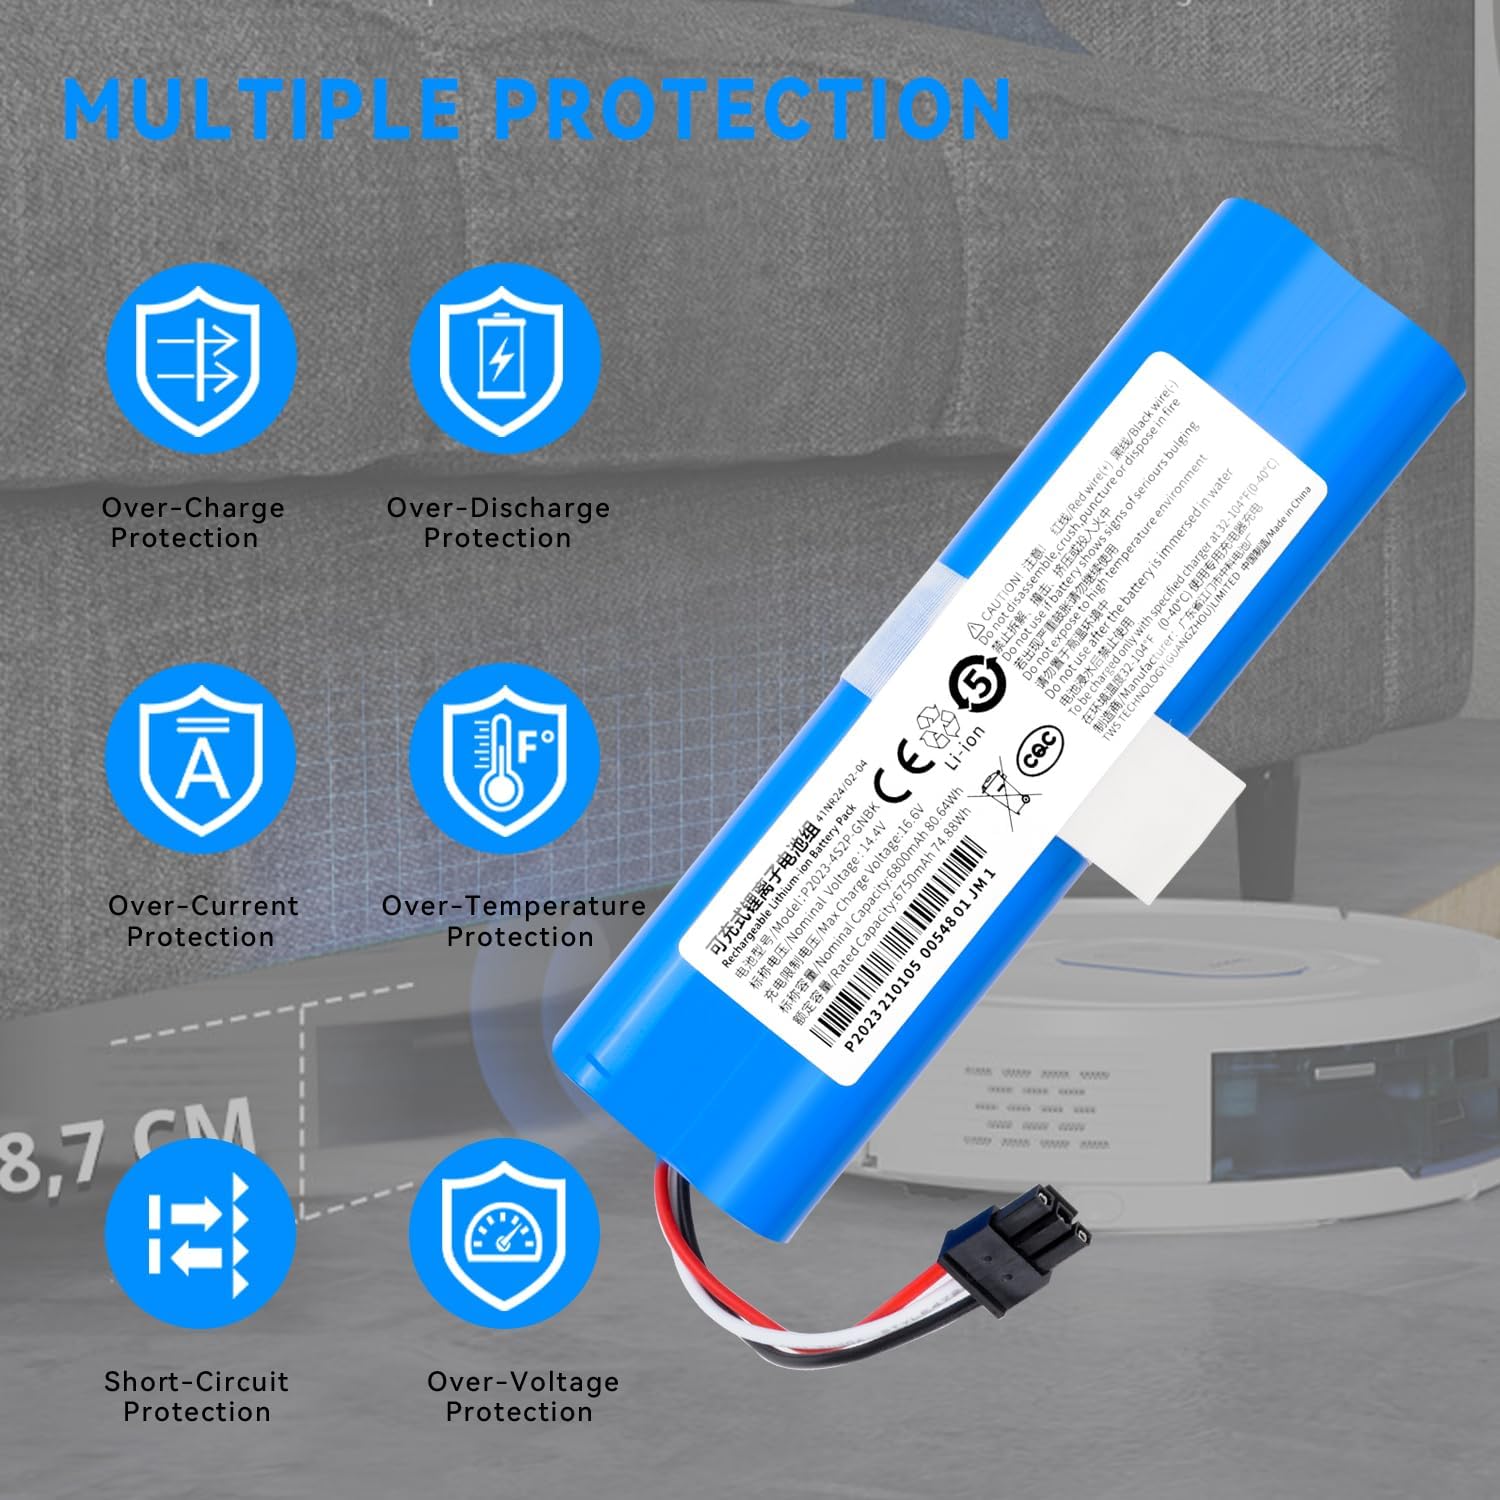
- The battery includes built-in over-temperature, overheating, anti-overcharge, over-discharge, over-current, short-circuit, and over-voltage protection.

The battery incorporates multiple safety features, including protection against over-charging, over-discharging, excessive current, high temperatures, short circuits, and over-voltage conditions.
Product Overview
The RDSJ replacement battery is a high-capacity lithium-ion power source designed to restore the performance of your compatible Neabot robot vacuum cleaner. It comes with necessary tools for a straightforward installation process.

This image displays the RDSJ 6800mAh replacement battery alongside a small screwdriver and a cleaning brush, which are provided to assist with installation.
This image highlights the specific connector type of the RDSJ replacement battery. Ensure this connector matches your original vacuum battery for proper installation.
Specifications
| Feature | Detail |
|---|---|
| Battery Type | Lithium-Ion (Li-ion) |
| Nominal Voltage | 14.4V / 14.8V |
| Max Charge Voltage | 16.6V |
| Nominal Capacity | 6800mAh / 80.64Wh |
| Rated Capacity | 6750mAh / 74.88Wh |
| Number of Cells | 8-cell |
| Item Model Number | C1048A2 |
| Product ID / Batch Number | P2023 210105 00548 01 JM 1 |
| Package Dimensions | 5.9 x 1.9 x 1.9 inches |
| Item Weight | 13.8 ounces |

The battery label clearly indicates a nominal voltage of 14.4V and a nominal capacity of 6800mAh (80.64Wh).
Compatible Robot Vacuum Models
This replacement battery is compatible with the following Neabot robot vacuum cleaner models:
- Neabot NoMo Q11 Robot Vacuum Cleaner
- Neabot C1048A2 Robot Vacuum Cleaner
- Neabot C433-A3-4S2P Robot Vacuum Cleaner

This image shows various Neabot robot vacuum models, including the Neabot NoMo Q11, Neabot C1048A2, and Neabot C433-A3-4S2P, which are compatible with this replacement battery.
Installation Instructions
The battery is designed for easy installation, typically taking around 2 minutes. Always ensure the robot vacuum is powered off and disconnected from its charging base before proceeding.
- Power Off: Turn off your Neabot robot vacuum cleaner and remove it from its charging station.
- Access Battery Compartment: Carefully flip the robot vacuum over. Locate the battery compartment cover, usually secured by screws. Use the provided screwdriver to remove these screws.
- Remove Old Battery: Gently lift the battery compartment cover. Disconnect the old battery's connector from the vacuum's port. Remove the old battery.
- Install New Battery: Connect the new RDSJ battery's connector to the vacuum's port. Ensure the connection is firm and secure.
- Position Battery: Place the new battery into the compartment, ensuring it fits snugly without forcing.
- Close Compartment: Replace the battery compartment cover and secure it with the screws.
- Initial Charge: Place the robot vacuum back on its charging base. Allow it to fully charge before its first use.
Important: Before installation, visually confirm that the connector type on the replacement battery matches the connector on your original battery to ensure proper fit and function.
Operating Your Robot Vacuum with the New Battery
After successful installation and initial charging, your robot vacuum should operate as expected. Lithium-ion batteries offer fast charging capabilities, reducing downtime.
- First Use: For optimal battery life, it is recommended to fully charge the battery before its first cleaning cycle.
- Regular Charging: Always return the robot vacuum to its charging base after each cleaning cycle to ensure it is ready for the next use.
- Charging Time: Lithium batteries can complete the charging process quickly, minimizing waiting time.

Ensure your robot vacuum is properly docked for charging after battery replacement.
Battery Maintenance and Storage
Proper care can extend the lifespan and performance of your battery.
- Regular Use: Use your robot vacuum regularly to keep the battery active.
- Avoid Deep Discharge: Do not allow the battery to completely drain frequently.
- Storage: If storing the battery or vacuum for an extended period, charge the battery to approximately 50-60% capacity and store in a cool, dry place. Recharge every 3-6 months to prevent over-discharge.
- Temperature: Avoid storing or operating the battery in extreme temperatures.

This graph demonstrates the battery's low self-discharge characteristic, indicating that it retains approximately 80% of its capacity even after one year of non-use.
Troubleshooting
If you encounter issues after replacing the battery, consider the following:
- Vacuum Not Powering On: Ensure the battery is correctly installed and its connector is firmly seated. Verify the vacuum is properly placed on the charging base.
- Short Run Time: Allow the battery to undergo several full charge/discharge cycles to optimize its performance. Ensure the charging contacts on both the vacuum and base are clean.
- Charging Issues: Check if the charging base is powered. Inspect the battery connector and vacuum port for any obstructions or damage.
- Error Messages: Refer to your robot vacuum's original user manual for specific error codes and their meanings.
Warranty and Support
For any questions, concerns, or technical support regarding your RDSJ replacement battery, please contact the seller or manufacturer directly through your purchase platform. Keep your purchase receipt or order number handy for faster service.