
FOIFKIN F600
FOIFKIN F600 PC Case User Manual
Model: F600 | Brand: FOIFKIN
Introduction
This manual provides detailed instructions for the installation, operation, and maintenance of your FOIFKIN F600 ATX Mid-Tower Gaming PC Case. Please read this manual thoroughly before beginning assembly to ensure proper setup and optimal performance.
Key Features
- 270° Panoramic Dual Cabin Design: Features a 270° panoramic tempered glass panel for an expansive view of internal components. The hinged design allows for tool-free quick disassembly.
- High Performance Cooling: Pre-installed with 7 ARGB PWM reverse fans. Supports up to 10 x 120mm fans and 360mm radiators on top, side, and bottom for superior airflow and cooling.
- Extra Large Capacity: Compatible with ATX, M-ATX, and ITX motherboards. Supports CPU coolers up to 170mm, GPUs up to 400mm, and ATX power supplies up to 220mm. Includes flexible storage options (1x HDD + 1x SSD or 2x HDD).
- Versatile I/O Ports: Front panel includes 1x Type-C 3.0, 1x USB 3.0, 1x USB 2.0, Microphone & Audio jacks, Power Button, Restart Button, and LED Switch Button.
- Efficient Cable Management: Designed with reserved holes for clean and organized cable routing, enhancing aesthetics and airflow.
- 7-Slot PCIe Configuration: Features 7 independent PCIe brackets, each secured with 7 screws for stable component installation.
- Back-Connect Support: Compatible with back-attached motherboards for a clean, cable-free interior view.
Product Overview and Components
Familiarize yourself with the various parts of your F600 PC case.

Figure 1: Front view of the FOIFKIN F600 PC Case showcasing its panoramic glass and pre-installed ARGB fans.

Figure 2: Dimensions of the FOIFKIN F600 PC Case, showing height, width, and depth.
I/O Port Layout
The front I/O panel provides convenient access to essential ports and controls.
- 1x Type-C 3.0 Port
- 1x USB 3.0 Port
- 1x USB 2.0 Port
- Microphone & Audio Jacks
- Power Button
- Restart Button
- LED Switch Button (for ARGB control)
Setup and Installation
1. Unpacking and Inspection
Carefully remove the PC case from its packaging. Inspect for any signs of damage during transit. Retain the packaging for future transport or storage.
2. Accessing the Interior

Figure 3: The hinged tempered glass side panel opened for easy access to the interior.
The tempered glass side panel features a hinged design for tool-free access. Gently open the panel to begin component installation.
3. Component Installation Guidelines
The F600 case offers generous space for various components. Refer to the following guidelines for compatibility:

Figure 4: Diagram illustrating maximum component dimensions and fan/radiator placements within the F600 case.
- Motherboard: Supports ATX, M-ATX, and ITX form factors.
- CPU Cooler: Maximum height of 170mm.
- GPU: Maximum length of 400mm.
- Power Supply (PSU): ATX type, up to 220mm in length.
- Storage: Accommodates 1x HDD and 1x SSD, or 2x HDDs.
- Expansion Slots: 7+3 PCIe slots.
4. Cable Management

Figure 5: Rear view of the F600 case highlighting the cable management routing options.
Utilize the reserved cable routing holes and ample space behind the motherboard tray to ensure a clean build and optimized airflow. This case also supports back-connected motherboards for an even cleaner aesthetic.

Figure 6: Interior view showing the motherboard tray designed for back-connect motherboards.
Operating the PC Case
ARGB Fan Control
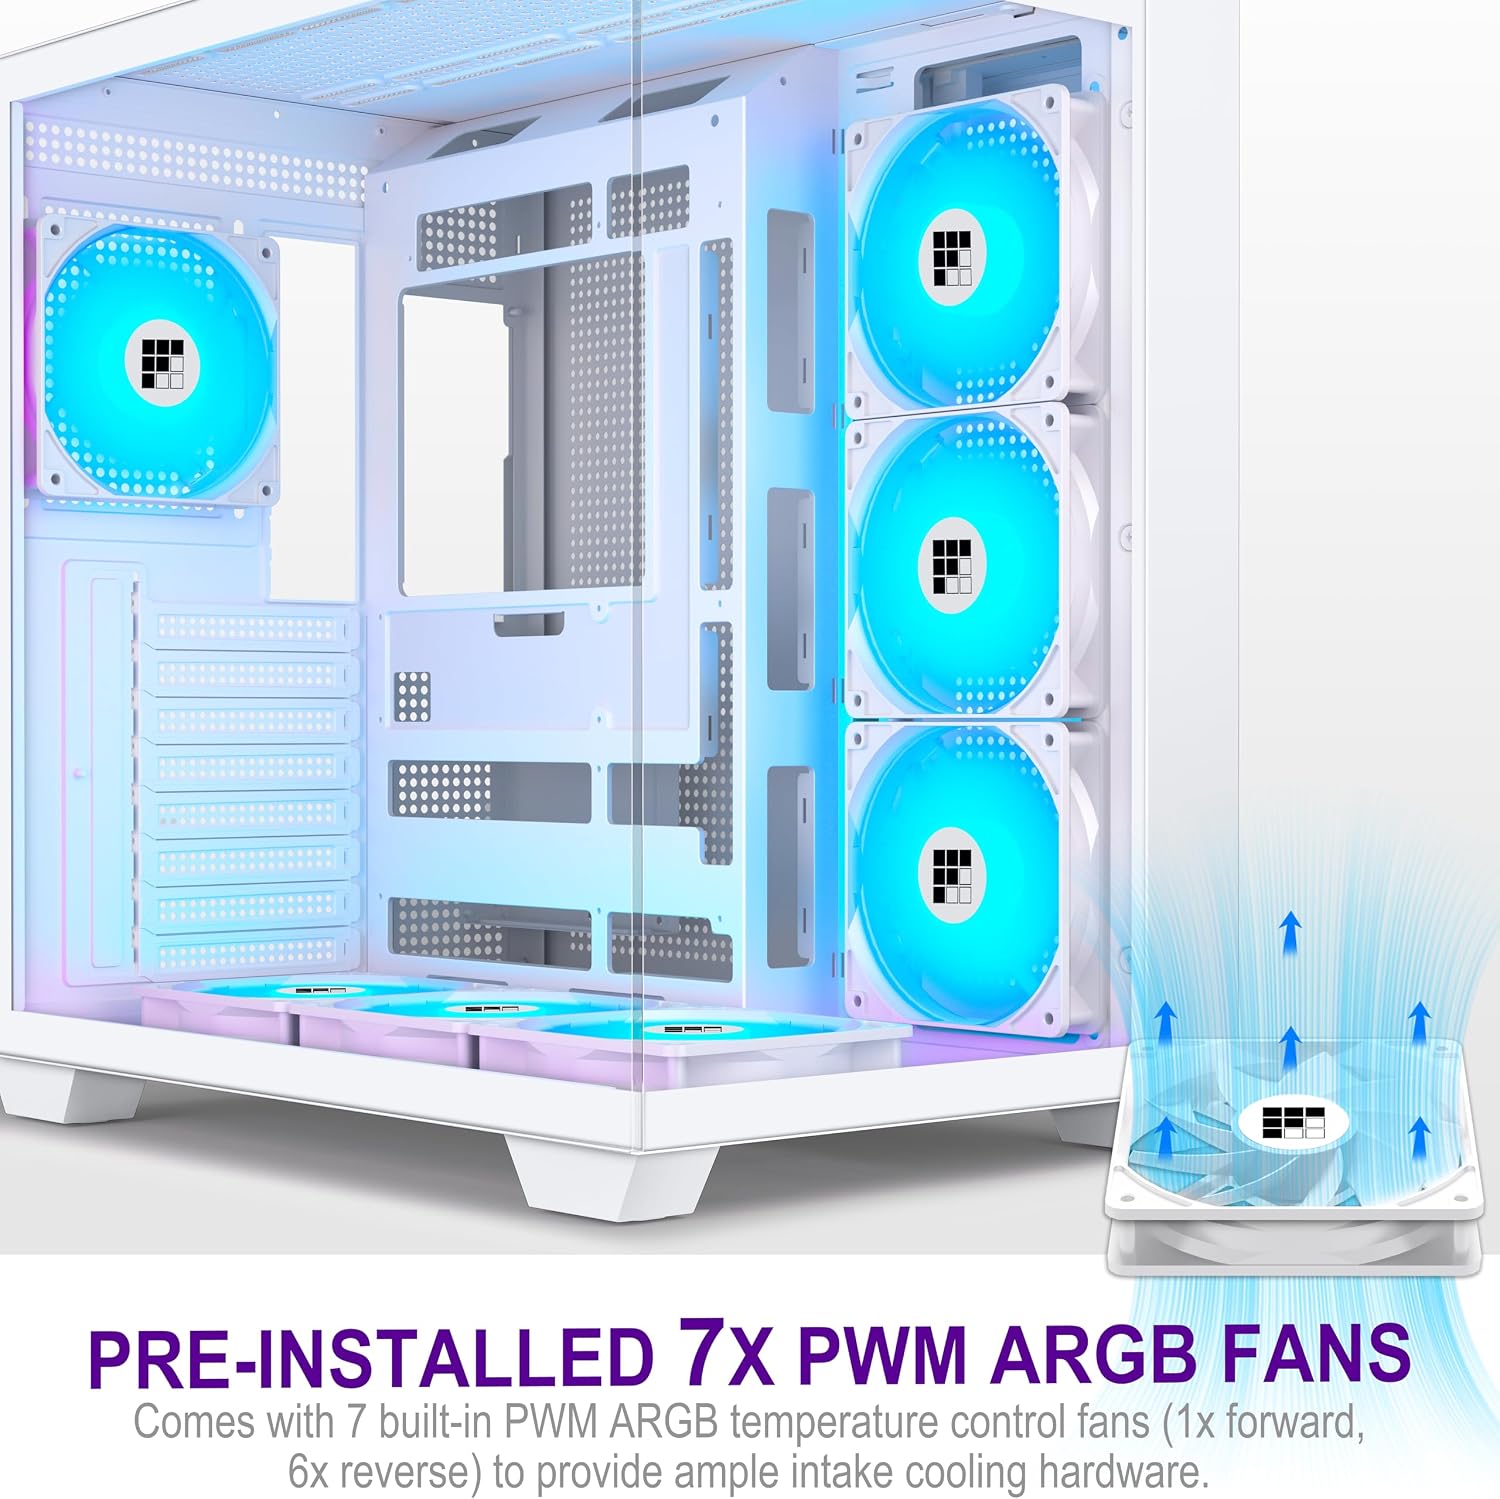
Figure 7: Close-up view of the pre-installed 7 PWM ARGB fans.
The F600 comes with 7 pre-installed ARGB PWM fans. The lighting effects can be controlled via the dedicated LED Switch Button on the front I/O panel. For advanced control and synchronization with other components, connect the fan controller to your motherboard's 5V 3-pin ARGB header (if available) and use the motherboard's software.
Airflow Optimization

Figure 8: Visual representation of the optimized airflow path within the F600 case.
The case is designed for high-performance airflow. Cold air is drawn in from the bottom and front, and hot air is exhausted through the top and rear. Ensure all fan mounting points are utilized for optimal cooling performance, especially when installing high-power components.

Figure 9: Illustration of the dual radiator design, supporting 360mm/280mm/240mm radiators on top, bottom, and side.
The case supports extensive liquid cooling solutions with dedicated mounting points for radiators on the top, bottom, and side panels.
Maintenance
Cleaning
- Exterior: Use a soft, damp cloth to wipe down the exterior surfaces, including the tempered glass panels. Avoid abrasive cleaners.
- Dust Filters: Regularly remove and clean the dust filters located on the top, bottom, and front (if applicable) of the case. This helps maintain optimal airflow and prevents dust buildup inside.
- Interior: Use compressed air to blow out dust from inside the case, especially from fans and heatsinks. Perform this maintenance periodically to ensure efficient cooling.
Fan Care
Ensure fans are free from obstructions. If a fan becomes noisy or stops spinning, check its connections and ensure no cables are interfering with the blades.
Troubleshooting
This section addresses common issues you might encounter.
| Problem | Possible Cause | Solution |
|---|---|---|
| Fans not lighting up or spinning. | Loose power/ARGB connection, incorrect motherboard header, faulty fan. | Check all fan power and ARGB connections. Ensure they are securely plugged into the correct headers on the fan controller or motherboard. Test with another fan if possible. |
| Front I/O ports not working. | Loose internal cable connection to motherboard. | Verify that the USB, audio, and Type-C cables from the front panel are correctly and securely connected to the corresponding headers on your motherboard. |
| Poor airflow or high temperatures. | Dust buildup, incorrect fan orientation, insufficient fans. | Clean dust filters and interior. Ensure fans are oriented correctly for intake/exhaust. Consider adding more fans if temperatures remain high. |
If you encounter issues not listed here or require further assistance, please refer to the Warranty and Support section.
Specifications
| Feature | Detail |
|---|---|
| Brand | FOIFKIN |
| Model Name | F600 |
| Case Type | Mid Tower |
| Color | White |
| Material | Metal, Plastic, Tempered Glass |
| Product Dimensions (LxWxH) | 16.5 x 11.2 x 17.3 inches |
| Item Weight | 17.61 pounds |
| Motherboard Compatibility | ATX, M-ATX, ITX |
| CPU Cooler Height Limit | 170mm |
| GPU Length Limit | 400mm |
| PSU Type/Length Limit | ATX, up to 220mm |
| Expansion Slots | 7+3 |
| Pre-installed Fans | 7x PWM ARGB (1x forward, 6x reverse) |
| Max Fan Support | Up to 10x 120mm fans |
| Radiator Support | Top, Side, Bottom: 240mm/280mm/360mm |
| Front I/O Ports | 1x Type-C 3.0, 1x USB 3.0, 1x USB 2.0, Mic & Audio, Power, Reset, LED Switch |
| Light Color | RGB |
Warranty and Support
FOIFKIN is committed to providing high-quality products and customer satisfaction. The product quality is guaranteed.
If you encounter any problems with your FOIFKIN F600 PC case, please contact FOIFKIN customer support directly. You can typically find contact information on the retailer's website or by searching for "FOIFKIN customer support" online. Please have your product model (F600) and purchase details ready when contacting support.
For the most up-to-date warranty information and support resources, please visit the official FOIFKIN website.
Ask a question about this manual
Ask about setup, troubleshooting, compatibility, parts, safety, or missing instructions. Manuals+ will review the question and use this page’s manual context to help answer it.