
1. Important Safety Instructions
Please read all instructions carefully before using the appliance. Keep this manual for future reference.
- Ensure the appliance is connected to a grounded power outlet.
- Do not immerse the appliance, power cord, or plug in water or other liquids.
- Unplug from outlet when not in use and before cleaning.
- Do not operate any appliance with a damaged cord or plug.
- Keep hands and cords away from hot parts of the appliance during operation.
- This appliance is for household use only.
2. Product Overview
The WantJoin Espresso Machine is a semi-automatic espresso maker with an integrated conical burr grinder and milk frother, designed for home and light commercial use. It features precise PID temperature control and 9-bar extraction pressure for optimal coffee brewing.

Figure 2.1: Main components of the WantJoin Espresso Machine, including the machine body, portafilter, milk frothing pitcher, and various filters.
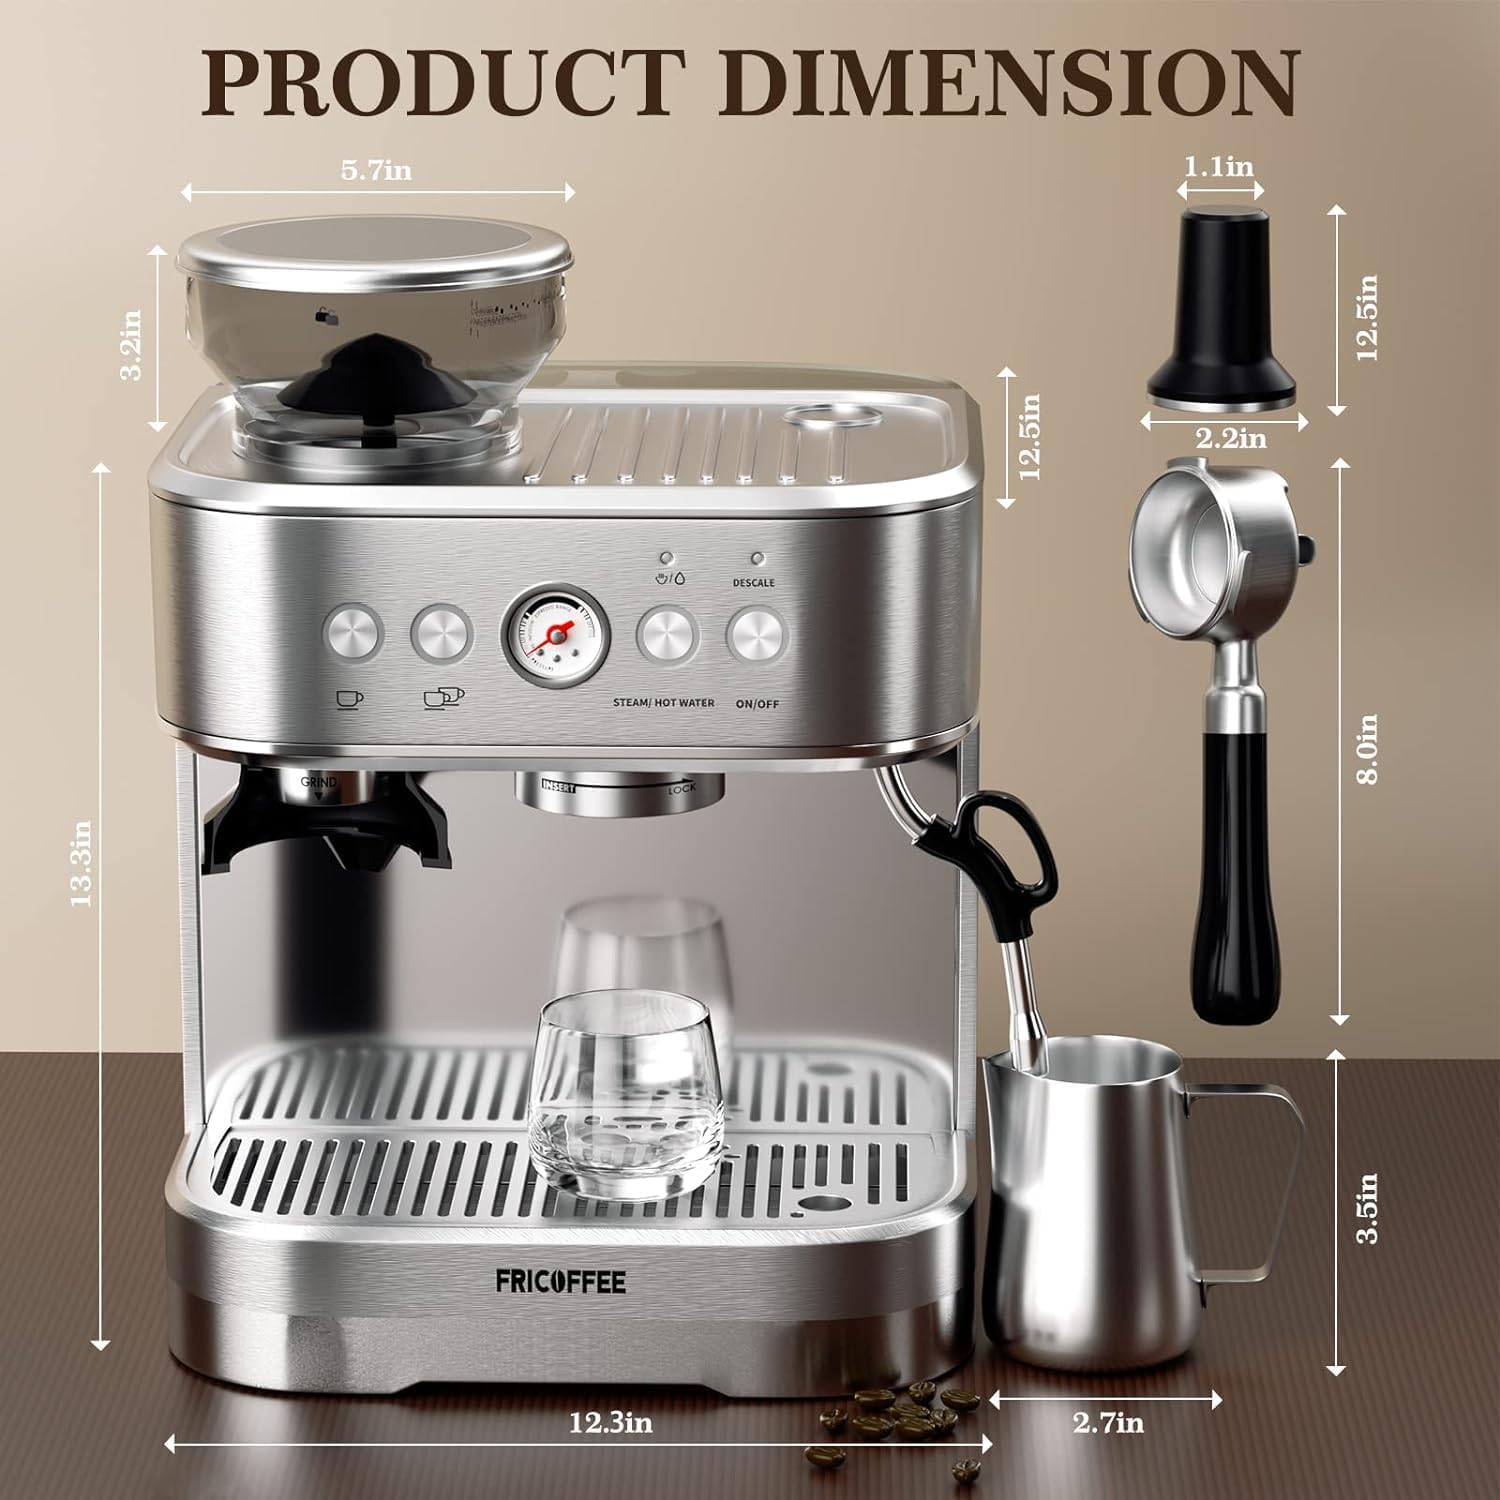
Figure 2.2: Detailed product dimensions, showing the compact footprint and height of the machine and its accessories.
3. Setup
- Unpacking: Carefully remove all components from the packaging. Retain packaging for future transport or storage.
- Placement: Place the machine on a flat, stable, heat-resistant surface, away from direct sunlight and heat sources. Ensure adequate ventilation around the machine.
- Water Tank: Fill the water tank with fresh, cold, filtered water. Do not exceed the MAX fill line. Ensure the tank is properly seated.
- Bean Hopper: Fill the bean hopper with fresh whole coffee beans. The hopper has a 250g capacity.
- Initial Rinse: Before first use, perform an initial rinse cycle without coffee. Fill the water tank, turn on the machine, and run a hot water cycle through the group head and steam wand to clean internal components.
4. Operating Instructions
4.1 Grinding Coffee Beans
The integrated conical burr grinder offers 15 grinding strength levels to suit various brewing methods, from fine espresso to coarse French press.

Figure 4.1: Illustration of the coffee grinder settings and recommended tamping pressure for optimal espresso extraction.
- Select Grind Size: Adjust the grind size dial according to your preference. For espresso, a finer grind (Level 3-5 recommended) is typically required.
- Insert Portafilter: Place the portafilter securely under the grinder chute.
- Start Grinding: Press the grind button to dispense freshly ground coffee into the portafilter.
- Tamp: After grinding, tamp the coffee grounds evenly with 30-40 lbs of pressure. This creates a compact puck for proper extraction.
4.2 Brewing Espresso
The machine features low-pressure pre-infusion and 9-bar extraction pressure for rich, amber crema.

Figure 4.2: Visual guide to espresso extraction, highlighting the optimal pressure range and extraction time (25-35 seconds).
- Preheat: Ensure the machine is preheated. The PID temperature control maintains optimal brewing temperature.
- Insert Portafilter: Lock the portafilter with the tamped coffee grounds into the group head.
- Place Cup: Position your espresso cup(s) under the portafilter spouts.
- Start Extraction: Press the espresso button to begin brewing. Monitor the pressure dial to ensure extraction is within the optimal range.
- Stop Extraction: Press the espresso button again to stop the flow when the desired volume is reached (typically 25-35 seconds for a double shot).
4.3 Milk Frothing
The 360° rotatable steam wand produces powerful, stable steam for creating dense micro-foam for lattes and cappuccinos.

Figure 4.3: Proper angle (45°) for milk frothing to achieve rich, velvety micro-foam.
- Prepare Milk: Fill a stainless steel milk pitcher with cold milk (dairy or non-dairy) to just below the spout.
- Activate Steam: Turn the steam knob to activate the steam wand. Allow a few seconds for any condensed water to purge.
- Position Wand: Submerge the tip of the steam wand just below the surface of the milk, at a slight angle (approx. 45°).
- Froth Milk: Lower the pitcher slightly to introduce air, creating a "hissing" sound. Once the milk volume increases, submerge the wand deeper to heat the milk to desired temperature (approx. 140-150°F / 60-65°C).
- Clean Wand: Immediately after frothing, wipe the steam wand with a damp cloth and purge a small amount of steam to clear any milk residue.
5. Maintenance and Cleaning
Regular cleaning and maintenance ensure the longevity and optimal performance of your espresso machine.
5.1 Daily Cleaning
- Portafilter and Filter Baskets: Rinse immediately after each use. Remove spent coffee grounds.
- Steam Wand: Always wipe and purge after each use to prevent milk residue buildup.
- Drip Tray: Empty and rinse daily.
- Exterior: Wipe down the exterior with a soft, damp cloth. Do not use abrasive cleaners.
5.2 Descaling
The descaling LED light will flash when the number of brewed cups reaches a preset value, indicating that descaling is required. This process removes mineral buildup from the internal components.
- Prepare Descaling Solution: Follow the instructions on a commercial descaling solution suitable for espresso machines, or use a mixture of white vinegar and water (1:1 ratio).
- Fill Water Tank: Pour the descaling solution into the water tank.
- Run Descaling Cycle: Follow the machine's specific descaling procedure (refer to the full manual for detailed steps, typically involves running the solution through the group head and steam wand).
- Rinse: After descaling, rinse the water tank thoroughly and fill with fresh water. Run several cycles of fresh water through the machine to remove any residual descaling solution.
"Love how easy it is to clean and maintain this espresso machine. The self-cleaning feature is a lifesaver, especially after a busy day of brewing. The descaling reminder is thoughtful and keeps my machine running smoothly." - Customer Review
6. Troubleshooting
| Problem | Possible Cause | Solution |
|---|---|---|
| No coffee dispenses / Slow flow | Grind too fine, coffee tamped too hard, water tank empty, machine not primed. | Adjust grind coarser, reduce tamping pressure, refill water tank, prime the pump. |
| Coffee too watery / Fast flow | Grind too coarse, insufficient coffee, tamping too light. | Adjust grind finer, increase coffee dose, tamp with more pressure. |
| No steam from wand | Steam wand clogged, machine not heated to steam temperature. | Clean steam wand hole with a pin, allow machine to fully heat up. |
| Descaling light flashing | Machine requires descaling. | Perform a descaling cycle as per Section 5.2. |
7. Specifications
| Brand | WantJoin |
| Model Name | FCKFCJ-281SRUS |
| Color | Silver |
| Product Dimensions | 17.6"D x 15.3"W x 16"H |
| Item Weight | 23.9 pounds |
| Coffee Maker Type | Espresso Machine |
| Operation Mode | Semi-Automatic |
| Grinder Capacity | 250g (conical burr) |
| Grind Strength Levels | 15 |
| Extraction Pressure | 9 Bar |
| Special Feature | Milk Frother, Integrated Grinder, PID Temperature Control |
| UPC | 763271841733 |
8. Warranty and Support
For warranty information and customer support, please refer to the warranty card included with your product or visit the official WantJoin website. Keep your purchase receipt as proof of purchase.
Contact Information:
- Manufacturer: WantJoin
- Website: Visit the WantJoin Store on Amazon (for general brand information)
- For specific support, please check the product packaging or included documentation for direct contact details.