1. Introduction
This manual provides comprehensive instructions for the safe and efficient operation, maintenance, and troubleshooting of your Caso Espresso Gourmet Latte machine. Please read this manual thoroughly before first use and keep it for future reference.
The Caso Espresso Gourmet Latte is a high-quality espresso machine designed to prepare a variety of coffee specialties, including espresso, cappuccino, latte macchiato, and café crema. It features a powerful 20 bar ULKA pump, an integrated milk container with an automatic one-touch milk frothing system, and a two-circuit thermoblock system for optimal temperature control.

Figure 1.1: The Caso Espresso Gourmet Latte machine, showcasing its sleek design and ability to brew two espressos simultaneously.
2. Important Safety Instructions
When using electrical appliances, basic safety precautions should always be followed to reduce the risk of fire, electric shock, and/or injury to persons, including the following:
- Read all instructions.
- Do not touch hot surfaces. Use handles or knobs.
- To protect against fire, electric shock, and injury to persons, do not immerse cord, plugs, or appliance in water or other liquid.
- Close supervision is necessary when any appliance is used by or near children.
- Unplug from outlet when not in use and before cleaning. Allow to cool before putting on or taking off parts, and before cleaning the appliance.
- Do not operate any appliance with a damaged cord or plug or after the appliance malfunctions, or has been damaged in any manner. Return appliance to the nearest authorized service facility for examination, repair, or adjustment.
- The use of accessory attachments not recommended by the appliance manufacturer may result in fire, electric shock, or injury to persons.
- Do not use outdoors.
- Do not let cord hang over edge of table or counter, or touch hot surfaces.
- Do not place on or near a hot gas or electric burner, or in a heated oven.
- Always attach plug to appliance first, then plug cord into the wall outlet. To disconnect, turn any control to "off", then remove plug from wall outlet.
- Do not use appliance for other than intended use.
- Scalding may occur if the water tank lid is removed during the brewing cycle.
3. Product Components
Familiarize yourself with the various parts of your Caso Espresso Gourmet Latte machine before operation.

Figure 3.1: Overview of the machine's main components.
- Cup Warming Plate: Keeps cups warm before brewing.
- Control Panel / LCD Display: For selecting functions and viewing status.
- Heavy Metal Tamper: Used to compress ground coffee in the filter.
- Drip Tray: Collects excess liquid and spills.
- Compact Design: Slim profile, only 22 cm wide.
- Water Tank (1.3 L): Removable tank for fresh water.
- ULKA Pump (20 bar): High-pressure pump for optimal extraction.
- Milk Container (700 ml): Removable container for milk, suitable for all milk types and alternatives.
Included Accessories:
- Stainless Steel Portioning Spoon
- Heavy Metal Tamper with Wooden Handle
- Stainless Steel Strainer Holder (Portafilter)
- Two double-walled stainless steel filter inserts (for 1 & 2 cups)
- Two single-walled stainless steel filter inserts (for 1 & 2 cups)
- ESE Pad filter insert
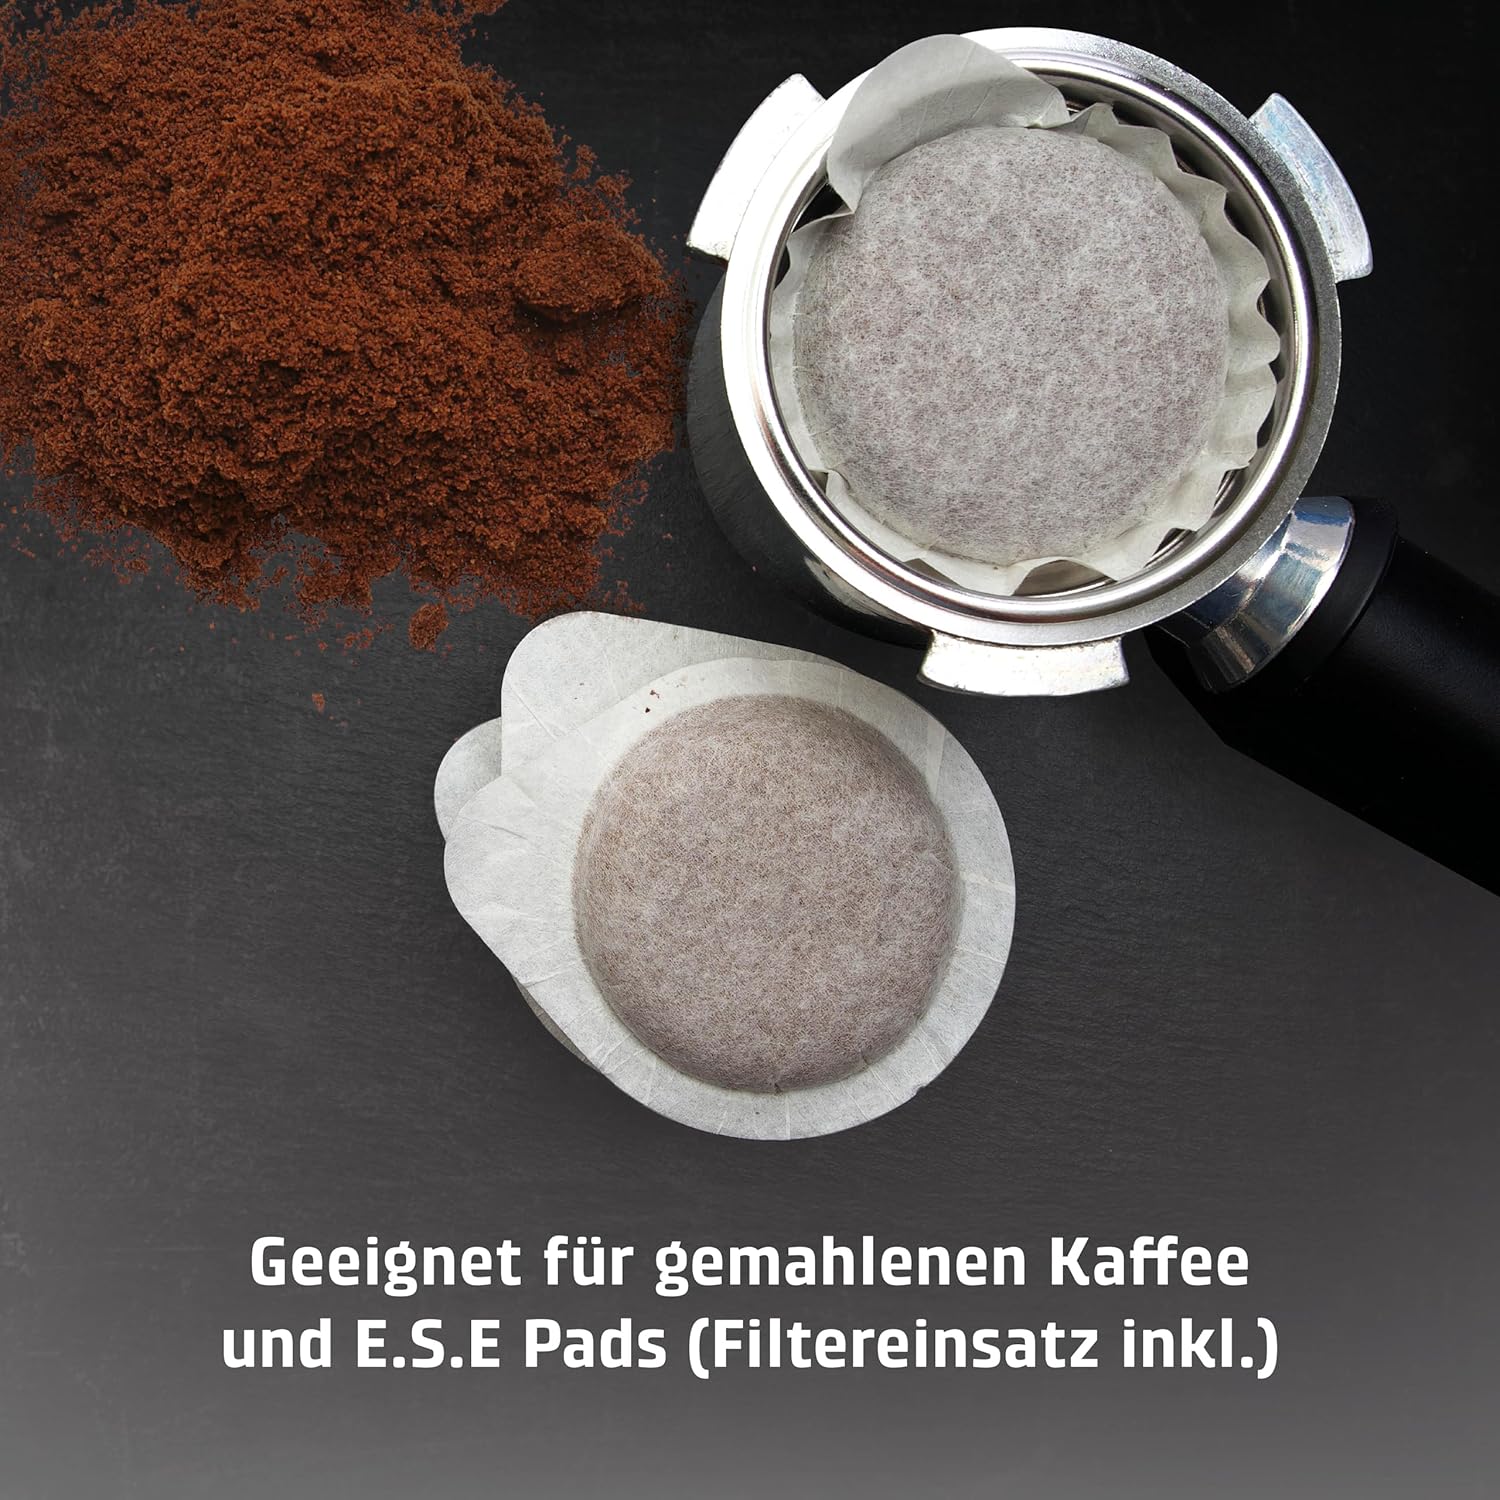
Figure 3.2: The five included coffee filter inserts for ground coffee and E.S.E. pads.
4. Setup and First Use
4.1 Unpacking
Carefully remove all packaging materials from the machine. Retain packaging for future transport or storage. Ensure all listed accessories are present.
4.2 Initial Cleaning
Before first use, clean all removable parts (water tank, milk container, portafilter, filter inserts, drip tray) with warm water and a mild detergent. Rinse thoroughly and dry. Wipe the exterior of the machine with a damp cloth.
4.3 Filling Water Tank
- Remove the water tank from the back of the machine.
- Fill the tank with fresh, cold drinking water up to the MAX mark. Do not exceed the MAX level.
- Place the water tank back into its position, ensuring it is securely seated.
4.4 Attaching Milk Container
The milk container can be easily attached to the side of the machine. Ensure it clicks securely into place. Fill with desired milk type for milk-based beverages.

Figure 4.1: The removable 700 ml milk container, easy to fill and clean.
4.5 Priming the Machine (First Use)
Before brewing coffee for the first time, or if the machine has not been used for a long period, it is necessary to prime the system:
- Ensure the water tank is filled.
- Place a large container under the coffee spout.
- Press the ON/OFF button to power on the machine.
- Allow the machine to heat up until the display indicates it is ready.
- Press the "Espresso" button without any coffee in the portafilter. Let water flow through until the tank is almost empty.
- Repeat this process with the milk frother by pressing the "Latte" button (ensure milk container is attached and filled with water for this step).
- Discard the water. The machine is now primed and ready for use.
5. Operating Instructions
5.1 Powering On/Off and Preheating
Press the ON/OFF button to turn the machine on. The LCD display will show the heating process. Wait until the machine indicates it is ready for brewing. The integrated cup warming plate will also begin to heat up.

Figure 5.1: The integrated cup warming plate helps maintain coffee temperature.
5.2 Preparing Espresso (1 or 2 Cups)
- Select the appropriate filter insert (single-walled for 1 cup, double-walled for 2 cups) and place it into the portafilter.
- Add freshly ground espresso coffee to the filter. For 1 cup, use approximately 7-8g; for 2 cups, use 14-16g.
- Distribute the coffee evenly and tamp it firmly with the included tamper. Ensure the surface is level.
- Wipe any excess coffee grounds from the rim of the portafilter.
- Insert the portafilter into the brewing head and turn it to the right until it is securely locked.
- Place one or two pre-warmed cups under the coffee spouts.
- Press the Espresso button. The machine will automatically brew the selected amount of espresso.
- Once brewing is complete, remove the cups. Carefully remove the portafilter by turning it to the left and discard the used coffee grounds.

Figure 5.2: The machine brewing two perfect espressos.
5.3 Using E.S.E. Pads
The machine is compatible with Easy Serving Espresso (E.S.E.) pads.
- Insert the dedicated E.S.E. pad filter insert into the portafilter.
- Place one E.S.E. pad into the filter, ensuring it lies flat.
- Insert the portafilter into the brewing head and lock it.
- Place a cup under the spout and press the Espresso button.

Figure 5.3: The machine supports E.S.E. pads for convenient single servings.
5.4 Preparing Milk-Based Beverages (Cappuccino, Latte Macchiato)
The integrated milk container and one-touch frothing system simplify the preparation of milk-based drinks.
- Ensure the milk container is filled with cold milk (or milk alternative) and securely attached to the machine.
- Place a tall glass or cup under the milk spout and coffee spout.
- Press the Cappuccino or Latte button.
- The machine will automatically froth the milk and then brew the espresso into your cup.
- After preparation, the machine will prompt for milk system cleaning. Refer to the maintenance section.
6. Maintenance and Cleaning
Regular cleaning and maintenance ensure optimal performance and longevity of your espresso machine.
6.1 Daily Cleaning
- Drip Tray: Empty and rinse the drip tray daily.
- Portafilter and Filter Inserts: After each use, remove the portafilter, discard coffee grounds, and rinse the portafilter and filter inserts under running water.
- Milk Container: After preparing milk-based drinks, the machine will prompt for milk system cleaning. Follow the on-screen instructions to run a quick rinse cycle. For thorough cleaning, remove the milk container and disassemble it. Wash all parts with warm soapy water and rinse thoroughly.
- Exterior: Wipe the exterior of the machine with a soft, damp cloth. Do not use abrasive cleaners or solvents.
6.2 Descaling
The machine has an integrated descaling function. The frequency of descaling depends on the hardness of your water and frequency of use. The LCD display will indicate when descaling is required.
- Refer to the machine's display for descaling instructions.
- Use a descaling solution specifically designed for coffee machines. Follow the descaling solution manufacturer's instructions for dilution.
- Fill the water tank with the descaling solution.
- Place a large container under the coffee spout and milk spout.
- Initiate the descaling program as prompted by the machine.
- After the descaling cycle, rinse the water tank thoroughly and fill it with fresh water. Run several rinse cycles through the machine to remove any descaling solution residue.
7. Troubleshooting
This section addresses common issues you might encounter with your Caso Espresso Gourmet Latte machine. For problems not listed here, please contact customer support.
| Problem | Possible Cause | Solution |
|---|---|---|
| No coffee dispenses. | Water tank empty; machine not primed; clogged filter. | Fill water tank; prime the machine; clean filter and portafilter. |
| Coffee is too weak or watery. | Coffee grounds too coarse; not enough coffee; insufficient tamping. | Use finer grind; increase coffee amount; tamp more firmly. |
| No milk foam or poor foam quality. | Milk container empty; milk system clogged; milk not cold enough. | Fill milk container; clean milk system thoroughly; use cold milk. |
| Machine leaks water. | Water tank not seated correctly; drip tray full; seal issue. | Reseat water tank; empty drip tray; contact support if leak persists. |
| Machine does not turn on. | Not plugged in; power outlet issue. | Check power cord connection; try a different outlet. |
8. Specifications
| Feature | Detail |
|---|---|
| Brand | Caso Design |
| Model Number | 01821 |
| Product Dimensions | 17.32"D x 8.66"W x 12.01"H (44cm D x 22cm W x 30.5cm H) |
| Item Weight | 8.14 pounds (approx. 3.7 kg) |
| Color | Silver, Stainless Steel |
| Pump Pressure | 20 Bar (ULKA Pump) |
| Water Tank Capacity | 1.3 Liters |
| Milk Container Capacity | 700 ml |
| Voltage | 230V |
| Coffee Maker Type | Espresso Machine |
| Filter Type | Reusable (for ground coffee and E.S.E. pads) |
| Special Features | Removable Tank, Cup Warmer, Milk Frother, Programmable, LCD Display |
9. Warranty and Support
For warranty information and customer support, please refer to the warranty card included with your product or visit the official Caso Design website. You can also contact Caso Design customer service directly for assistance with product operation, troubleshooting, or spare parts.
For further assistance, please visit: Caso Design Store on Amazon


