
1. Introduction
This manual provides detailed instructions for the installation, operation, and maintenance of your Wisoqu MH1822D Smart Touch Screen Programmable Floor Heating Thermostat. This device is designed to control electric floor heating systems, offering both manual and automatic temperature control modes for energy efficiency and comfort.

Image 1.1: Front view of the Wisoqu MH1822D Thermostat, displaying current temperature, set temperature, time, and day.
2. Safety Information
- Installation must be performed by a qualified electrician in accordance with local electrical codes.
- Always disconnect power at the circuit breaker before installing or servicing the thermostat.
- Do not install the thermostat in locations exposed to direct sunlight, drafts, or other heat sources, as this can affect temperature readings.
- Ensure the thermostat is kept dry and away from moisture.
- The device operates on AC85 to 250V at 60Hz. Verify your power supply matches these specifications.
3. Package Contents
Please check the package for the following items:
- 1 x Wisoqu MH1822D Programmable Digital Thermostat
- 1 x Temperature Humidity Probe (External Sensor)
- 2 x Mounting Screws
- 1 x English Manual (This document)

Image 3.1: The thermostat, external temperature probe, and mounting screws included in the package.
4. Product Overview
The Wisoqu MH1822D thermostat features a touch screen interface for easy control of your floor heating system. It includes both an internal sensor for ambient room temperature and an external probe for precise floor temperature monitoring, preventing overheating.
Key Features:
- Dual Temperature Sensing: Built-in sensor for room temperature and external probe for floor temperature.
- High Temperature Protection: Monitors floor temperature to prevent damage to heating elements.
- Programmable Modes: Automatic mode allows scheduled temperature control; Manual mode offers flexible, on-demand adjustments.
- Touch Keys: Intuitive touch interface for all settings.
- Low Temperature Function: Automatic heating activation below 5°C to prevent freezing.

Image 4.1: The external temperature probe, which provides accurate floor temperature readings.
5. Installation
Proper installation is crucial for the thermostat's performance and safety. Refer to the diagram below for the general installation steps.
Installation Steps:
- Prepare the Wall Box: Ensure a standard electrical wall box is installed at the desired location.
- Separate the Thermostat: Gently separate the front display unit from the back wiring plate.
- Wiring: Connect the power supply (AC85-250V), heating load, and external temperature probe to the appropriate terminals on the back wiring plate. Refer to the wiring diagram on the back of the unit.
- Mount the Back Plate: Secure the back wiring plate to the wall box using the provided screws.
- Attach the Front Unit: Carefully snap the front display unit onto the mounted back plate.
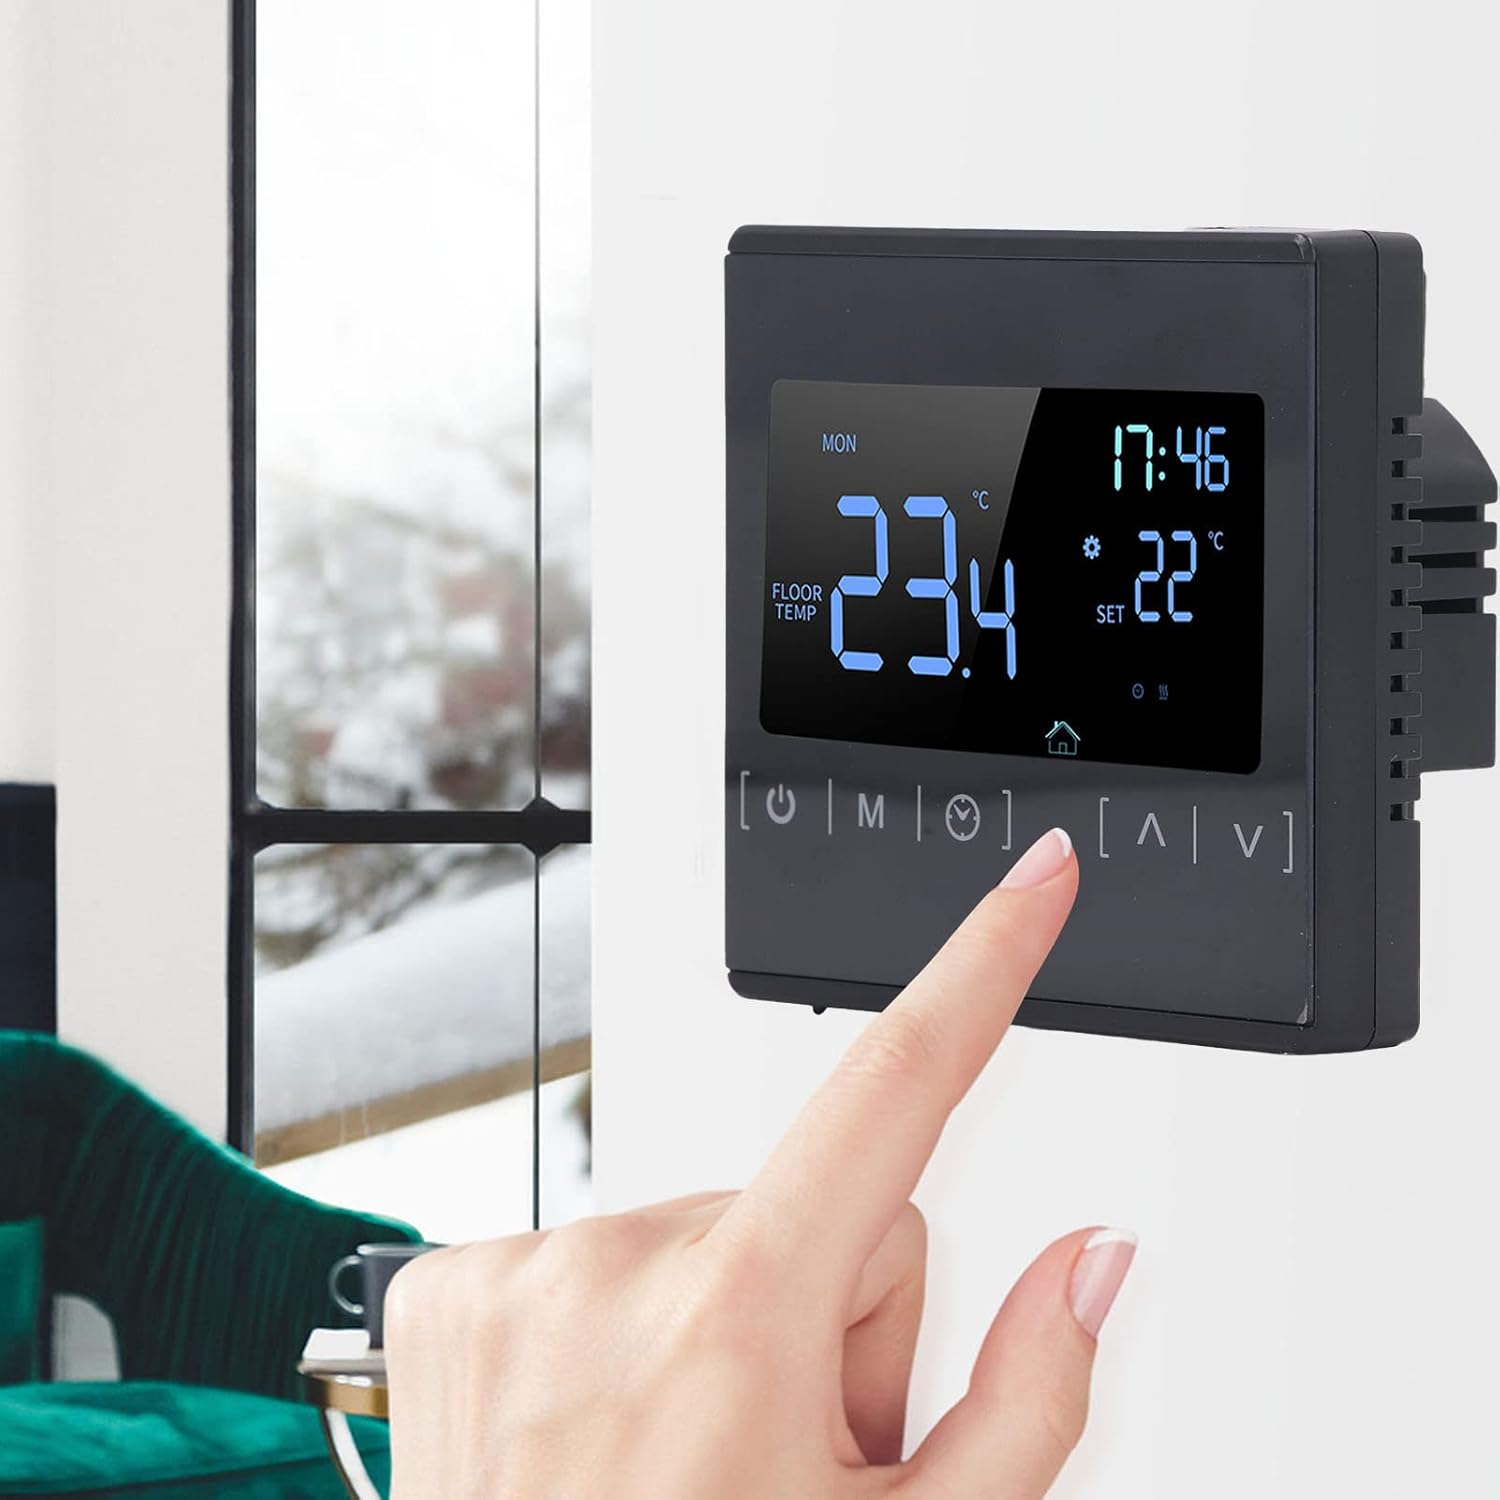
Image 5.1: Visual guide for the installation process of the thermostat.
Wiring Diagram Reference:
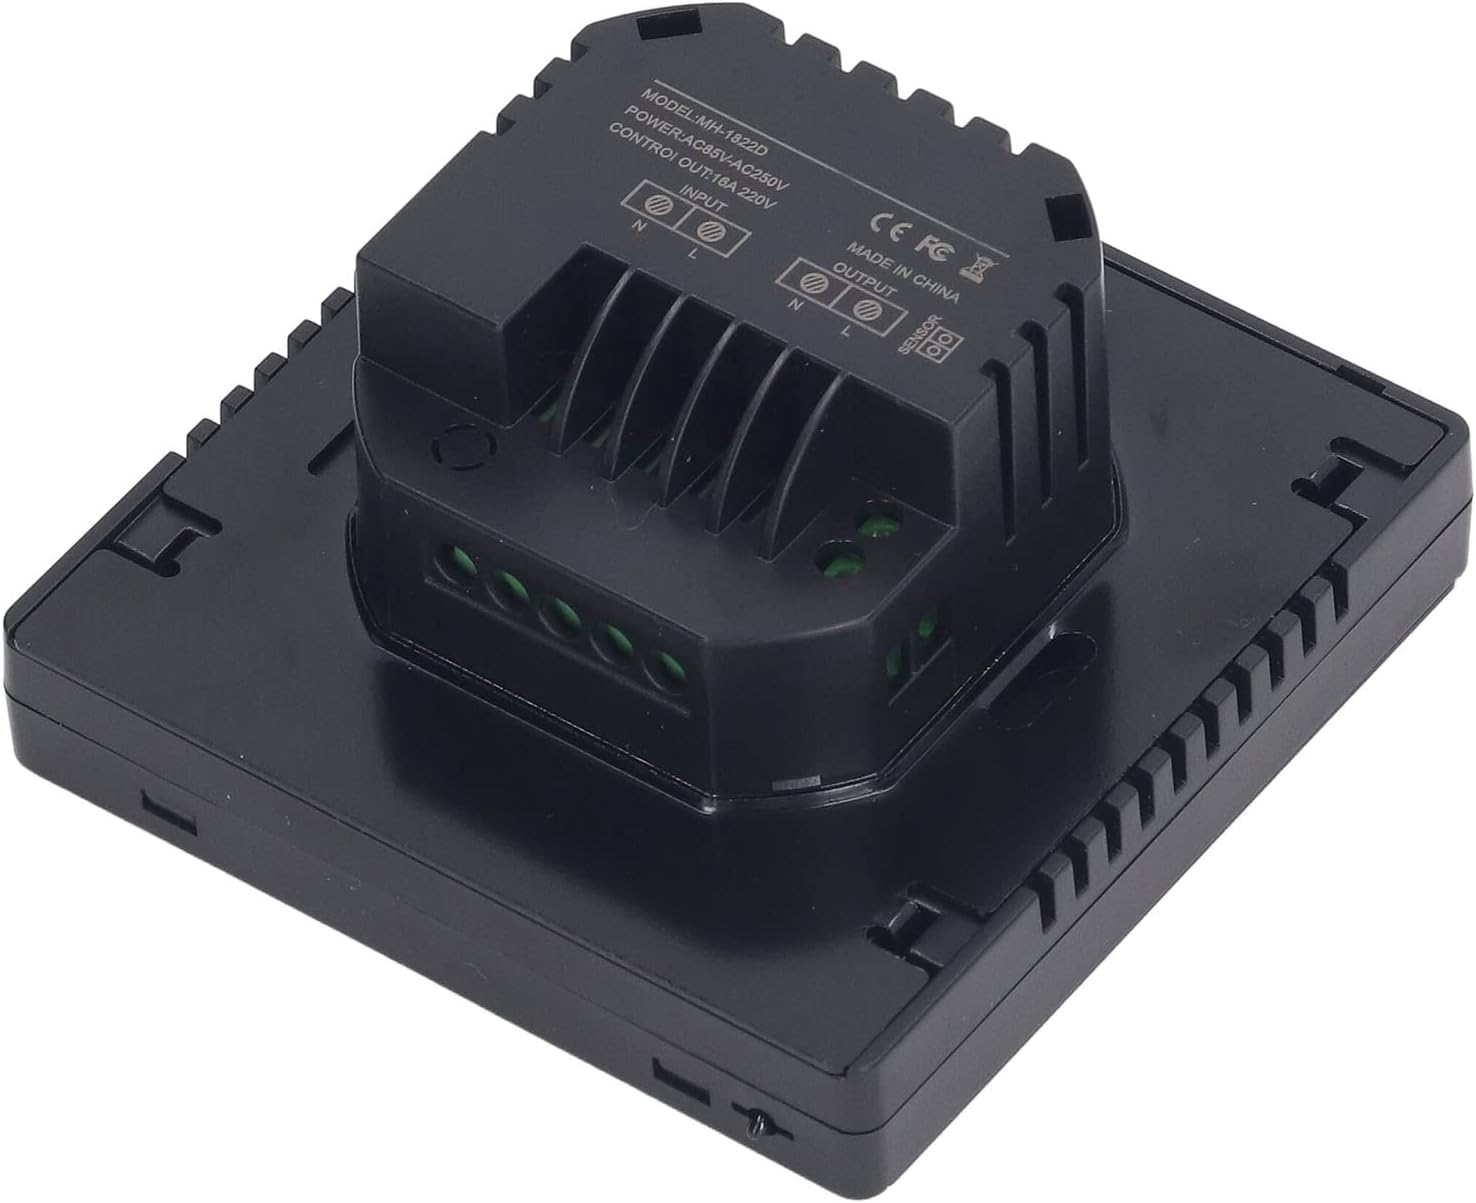
Image 5.2: Rear view of the thermostat, indicating wiring connections for power input, heating output, and sensor.
Installation Position Considerations:
The thermostat should be installed on an interior wall where air flows freely. Avoid locations that are affected by other heat sources such as direct sunlight, drafts from windows or doors, or heat-emitting appliances, as these can lead to inaccurate temperature readings and inefficient operation.
6. Operation
The thermostat features a user-friendly touch interface. Familiarize yourself with the main keys:
- Power Key (⏻): Touch to turn the system ON or OFF. Press and hold for 10 seconds to restore factory settings.
- Mode Key (M): Switches between Automatic Control Mode and Manual Control Mode.
- Up/Down Keys (⌃/⌄): Adjust temperature settings and system parameters. When the thermostat is OFF, press and hold both Up and Down keys simultaneously for 3 seconds to switch between key lock and unlock functions.
- Clock Key (⏰): Used in conjunction with the Up/Down keys to manually adjust the current time and day of the week.
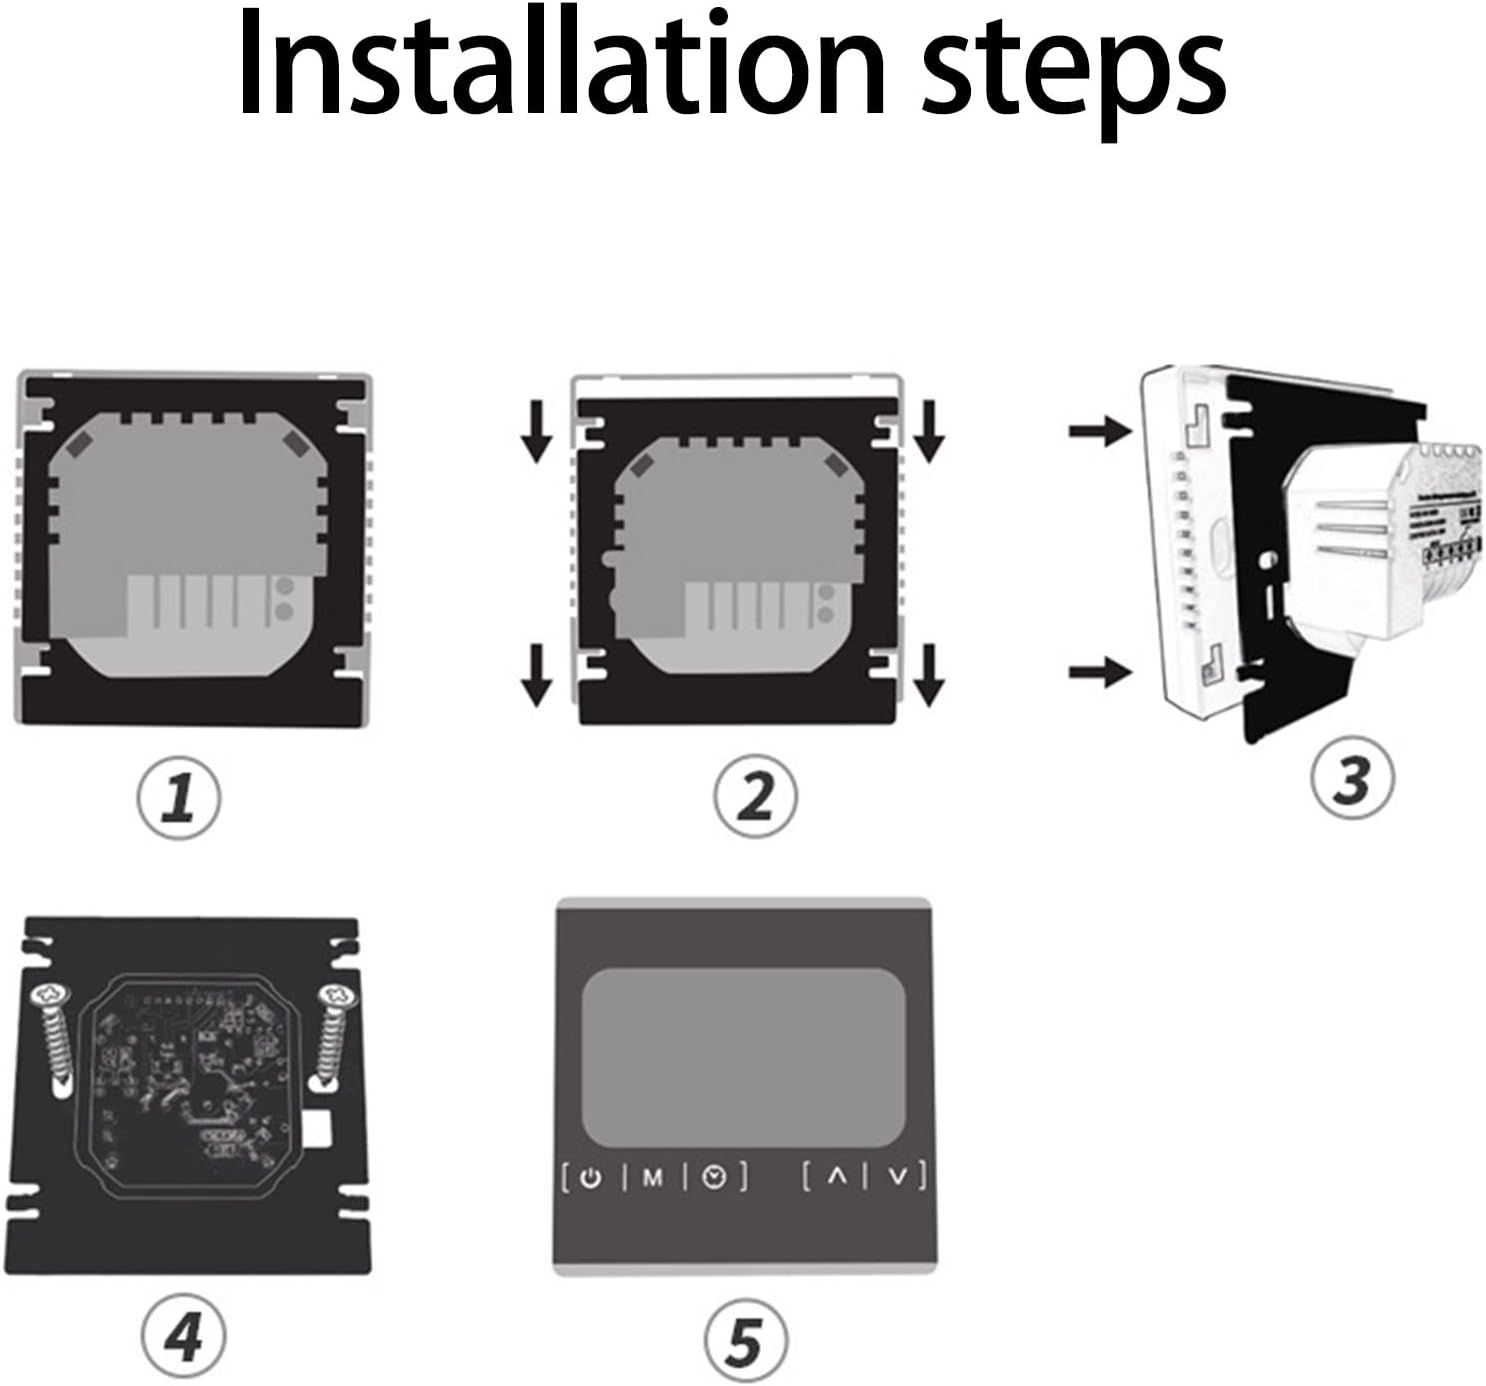
Image 6.1: User interacting with the touch screen interface of the thermostat.
6.1. Manual Mode
In Manual Mode, the thermostat maintains a constant temperature set by the user. Use the Up/Down keys to adjust the desired temperature. This mode is suitable for immediate temperature adjustments without following a schedule.
6.2. Automatic (Programming) Mode
Automatic Mode allows you to set different temperatures for various time periods throughout the day or week, optimizing energy usage. To enter Programming Mode:
- Ensure the thermostat is in the OFF state.
- Press and hold the Mode Key (M) and the Clock Key (⏰) simultaneously for 5 seconds.
- You can then switch between parameters (hour, minute, temperature) using the Mode Key (M).
- Use the Up/Down Keys (⌃/⌄) to adjust the values for each parameter.
- Repeat for all desired programming periods.
6.3. Setting the Clock
To manually adjust the current time and day:
- Press the Clock Key (⏰).
- Use the Up/Down Keys (⌃/⌄) to adjust the hour.
- Press the Clock Key (⏰) again to move to minutes, then adjust with Up/Down keys.
- Continue pressing the Clock Key (⏰) to set the day of the week.
6.4. Key Lock Function
To prevent accidental changes, you can lock the keys. When the thermostat is OFF, press and hold the Up (⌃) and Down (⌄) keys simultaneously for 3 seconds to toggle the key lock function ON or OFF.
6.5. Low Temperature Protection Function
When the thermostat is in the OFF state, it will automatically activate heating if the detected temperature drops below 5°C. Heating will cease once the temperature reaches 7°C, preventing potential freezing damage to pipes or floors.
7. Specifications
| Parameter | Specification |
|---|---|
| Model | MH1822D |
| Item Type | Programmable Digital Thermostat |
| Material | ABS |
| Temperature Sensor | Internal and External Probe |
| Control Temperature Accuracy | ±1℃ |
| Voltage | AC85 to 250V |
| Frequency | 60Hz |
| Load Current | 16A |
| Temperature Setting Range | 5 to 50 ℃ |
| Keys | Touch keys |
| Low Temperature Protection | Heats below 5℃, stops at 7℃ (when OFF) |
8. Troubleshooting
If you encounter issues with your thermostat, please refer to the following common problems and solutions:
- No Power/Display:
- Check the circuit breaker for the heating system.
- Ensure the thermostat is correctly wired and securely connected to the power supply.
- Incorrect Temperature Reading:
- Verify the thermostat's installation location is not affected by drafts, direct sunlight, or other heat sources.
- Ensure the external temperature probe is correctly installed and not damaged.
- Heating Not Activating/Deactivating:
- Check if the thermostat is in Manual Mode or Automatic Mode and if the set temperature is appropriate.
- Ensure the key lock function is not active if you are unable to change settings.
- Confirm the load current (16A) is not exceeded by your heating system.
- Unable to Change Settings:
- Check if the key lock function is enabled (refer to Section 6.4).
If problems persist, contact customer support or a qualified electrician.
9. Maintenance
The Wisoqu MH1822D thermostat requires minimal maintenance.
- Cleaning: Gently wipe the screen and body with a soft, dry cloth. Do not use abrasive cleaners, solvents, or spray liquids directly onto the thermostat.
- Inspection: Periodically check the wiring connections for any signs of wear or looseness.
10. Warranty and Support
For warranty information, please refer to the documentation provided at the time of purchase or contact your retailer. For technical support or further assistance, please reach out to Wisoqu customer service.