1. Introduction
This manual provides detailed instructions for the safe and effective operation of your GOYOJO Digital Tesla Meter, model GT129A. This high-precision handheld device is designed for accurate measurement of magnetic field strength and automatic detection of magnetic pole polarity (N/S poles). It features a wide measurement range, multiple measurement modes, automatic range switching, unit conversion, a backlight display, and an automatic power-off function for extended battery life. Please read this manual thoroughly before use and keep it for future reference.
2. Package Contents
Verify that all items listed below are included in your package. If any items are missing or damaged, please contact customer support.
- Main unit x1
- Magnetic probe x1
- Storage case x1
- Screwdriver x1
- 9V battery x1
- Instruction manual (Japanese compatible) x1

Figure 2.1: Contents of the product package.
3. Parts Description
Familiarize yourself with the different parts of the Tesla Meter:

Figure 3.1: Overview of the Tesla Meter's components.
- Battery Compartment: Located at the top rear of the device.
- Hall Probe Connection Port: Connects the external Hall probe to the main unit.
- LCD Display: Shows measurement values, units, battery status, and mode indicators.
- Hall Sensor: The tip of the probe used to detect magnetic fields.
- PEAK Button: Toggles between Peak mode and Real-time mode.
- ZERO Button: Performs one-touch zero setting.
- ON/OFF Button: Powers the device on or off.
- LIGHT Button: Toggles the display backlight on or off.
- UNIT Button: Switches between mT (millitesla) and Gs (Gauss) units.
4. Setup
4.1 Battery Installation
The device requires one 9V battery (included). To install the battery:
- Locate the battery compartment cover on the back of the device.
- Use the provided screwdriver to open the battery compartment.
- Insert the 9V battery, ensuring correct polarity.
- Close the battery compartment cover and secure it with the screw.
Video 4.1: This video demonstrates the battery installation process for a similar Tesla meter. Note that due to transportation policies, batteries may not be pre-installed in the package.
4.2 Probe Connection
Connect the Hall probe to the main unit before operation.
- Align the connector of the Hall probe with the Hall Probe Connection Port on the main unit.
- Gently push and twist the connector to secure the probe.

Figure 4.2: Connecting the high-precision radial Hall probe.
5. Operating Instructions
5.1 Power ON/OFF
Press and hold the ON/OFF button to turn the device on or off. The device features an automatic power-off function after 5 minutes of inactivity to conserve battery life.
5.2 Backlight Function
Press the LIGHT button to toggle the display backlight on or off. This improves readability in low-light conditions.

Figure 5.1: Backlight function for enhanced visibility.
5.3 Measurement Modes (Peak/Real-time)
The device offers two measurement modes:
- Peak Mode: Captures and displays the maximum magnetic field strength detected. Press the PEAK button once to enter this mode.
- Real-time Mode: Monitors and displays instantaneous changes in magnetic field strength. Press the PEAK button again to switch to this mode.
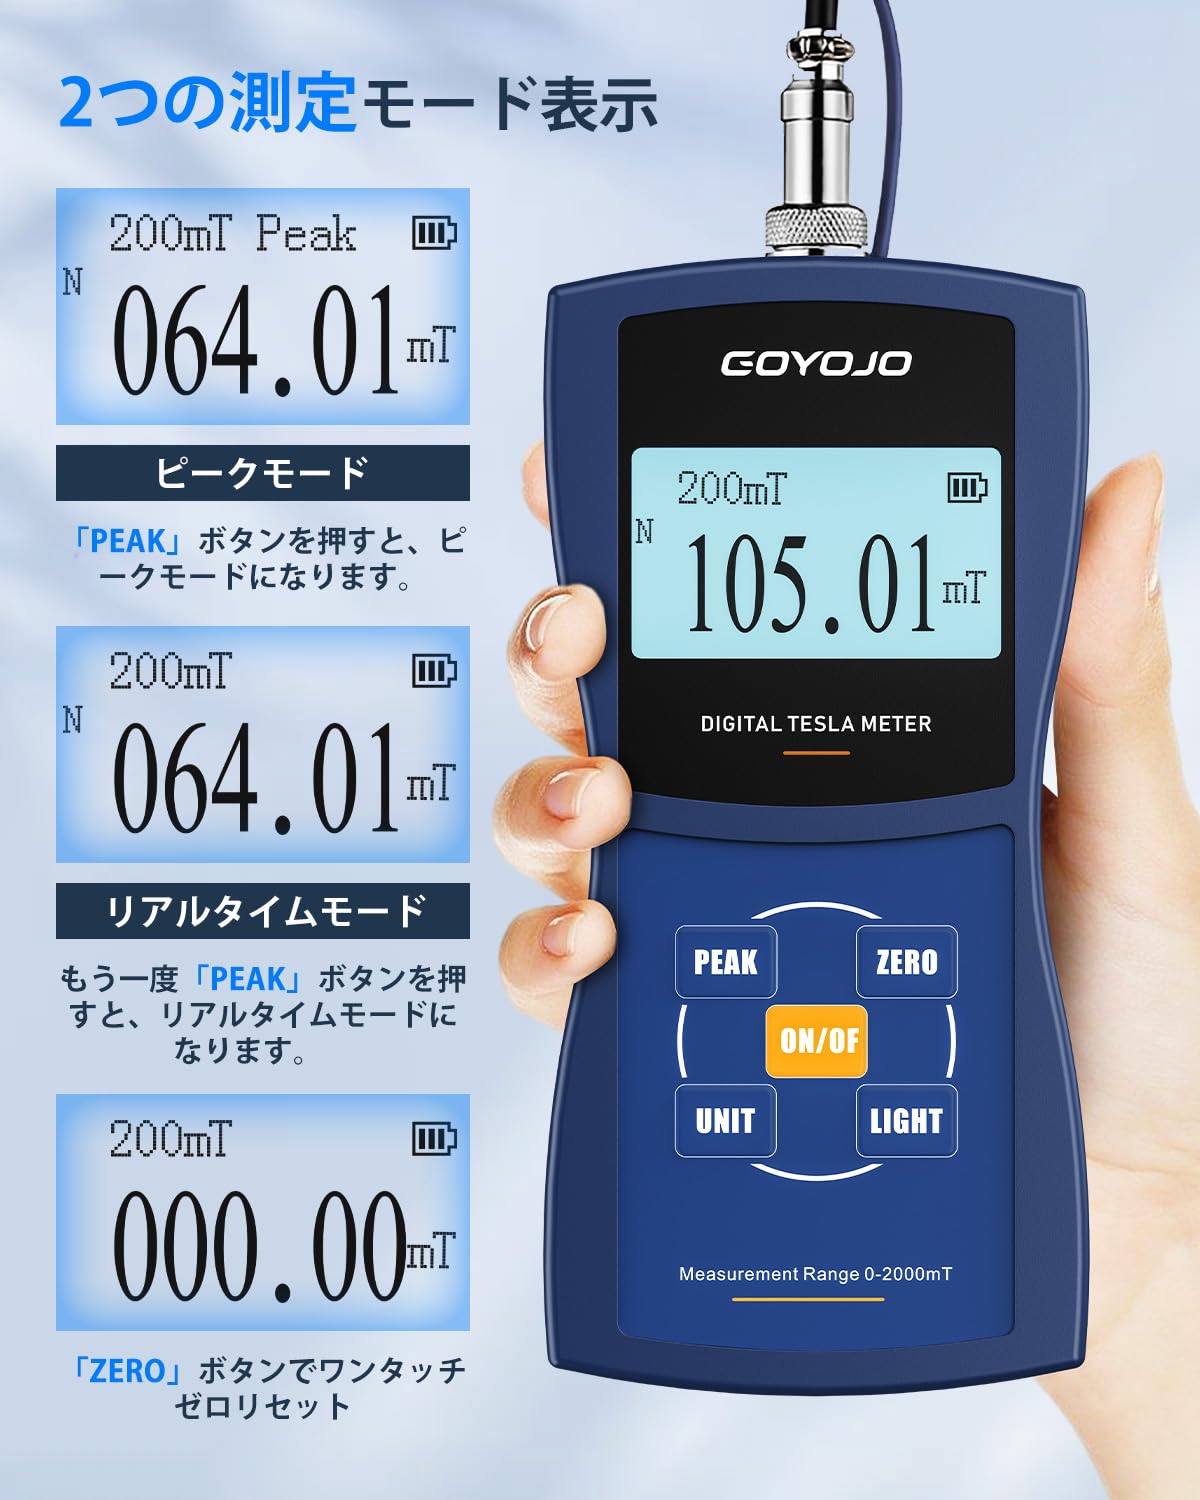
Figure 5.2: Switching between Peak and Real-time measurement modes.
5.4 One-Touch Zero Setting
To ensure accurate measurements, perform a zero setting before use. Simply press the ZERO button to reset the display to 000.00.
5.5 Unit Switching (mT/Gs)
Press the UNIT button to easily switch between millitesla (mT) and Gauss (Gs) units. (1 mT = 10 Gs).
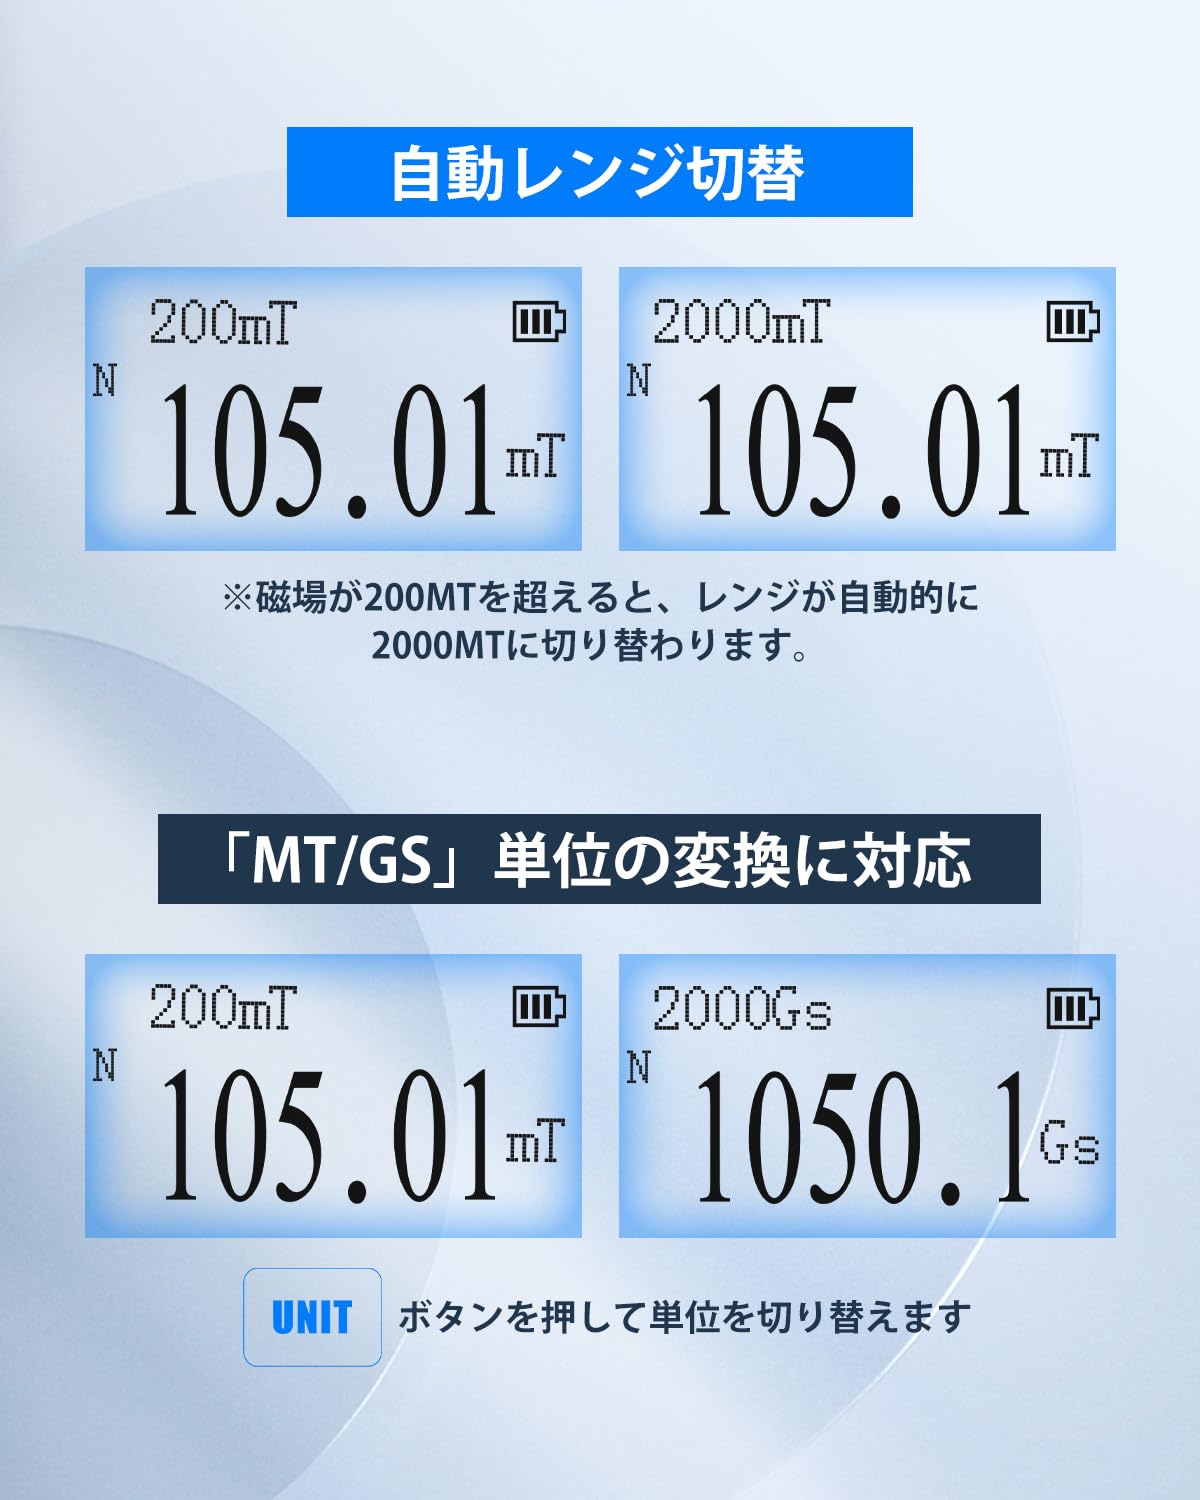
Figure 5.3: Automatic range switching and unit conversion.
5.6 Automatic Range Switching
The device automatically switches its measurement range. If the magnetic field strength exceeds 200mT, the meter will automatically switch to the 2000mT range to provide accurate readings and prevent overflow errors.
5.7 Automatic N-pole/S-pole Detection
The Tesla Meter can automatically detect and display the polarity of the magnetic field. When the magnetic field passes through the front of the Hall sensor, 'N' (North pole) is displayed. When it passes through the back of the sensor, 'S' (South pole) is displayed.

Figure 5.4: Automatic N-pole/S-pole detection.
5.8 Performing a Measurement
To perform a measurement:
- Ensure the Hall probe is securely connected and the device is powered on.
- Perform a one-touch zero setting by pressing the ZERO button.
- Place the Hall sensor (tip of the probe) into the magnetic field you wish to measure.
- Wait for the displayed value to stabilize.
- Read the measurement value from the LCD display. The unit and polarity (N/S) will also be shown.
- You can switch between Peak and Real-time modes using the PEAK button as needed.
- You can switch between mT and Gs units using the UNIT button.

Figure 5.5: Performing a magnetic field measurement.
Video 5.2: This video demonstrates the operation of a digital Tesla meter, including measurement and unit switching. Note that this video is for a similar product, but the core functionality is comparable.
6. Applications
The GOYOJO Digital Tesla Meter is a versatile tool suitable for various applications, including:
- Measuring working magnetic fields in production and engineering.
- Analyzing surface magnetism and residual magnetism in laboratories.
- Testing guitar pickups, permanent magnets, and speakers.
- Inspecting magnetic separators, iron removers, and DC motors.

Figure 6.1: Diverse applications of the Tesla Meter.
7. Specifications
| Feature | GT129A | GT129B | GT129C |
|---|---|---|---|
| Accuracy | ±1.0% | ±2.0% | ±2.0% (0-1000mT), ±5.0% (1000-2000mT) |
| Measurement Range | 0-2000mT (20000Gs) | ||
| Resolution | 200mT resolution: 0.01mT (0.1G) | 200mT resolution: 0.01mT (0.1G) | 200mT resolution: 0.1mT (1G) |
| Range | 200mT (2000Gs) / 2000mT (20000Gs) | ||
| Auto Range Switching | For measurements below 200mT, 200mT is displayed. For measurements above 200mT, it automatically switches to 2000mT. | ||
| Measurement Sensor | High-precision Hall sensor, cable length approx. 1m | ||
| Unit | 2 types (mT and Gs) switchable, 1mT = 10Gs | ||
| Backlight | Included | ||
| Peak Hold | Can hold maximum value in Peak mode | ||
| Auto OFF | 5 minutes | ||
| Power Supply | 9V battery x1 | ||
| Operating Environment | 0°C ~ 50°C, 20% ~ 85% RH, non-condensing | ||
| Storage Environment | -20°C ~ 70°C, <85% RH, non-condensing | ||
| Size | 160mm × 75mm × 34mm | ||
| Weight | Approx. 260g | ||
8. Maintenance
To ensure the longevity and accuracy of your Tesla Meter, follow these maintenance guidelines:
- Cleaning: Use a soft, dry cloth to clean the device. Do not use abrasive cleaners or solvents.
- Storage: When not in use, store the device in its provided storage case in a cool, dry place, away from direct sunlight and extreme temperatures.
- Battery: Remove the battery if the device will not be used for an extended period to prevent leakage.
- Probe Care: Handle the Hall probe with care. Avoid bending or subjecting it to excessive force, as this can damage the sensitive sensor.
9. Troubleshooting
If you encounter issues with your Tesla Meter, refer to the following common problems and solutions:
- Device does not power on:
- Check if the 9V battery is correctly installed and has sufficient charge. Replace if necessary.
- Ensure the ON/OFF button is pressed and held for a few seconds.
- Inaccurate readings:
- Perform a one-touch zero setting by pressing the ZERO button in an area free of magnetic fields.
- Ensure the Hall sensor is positioned correctly relative to the magnetic field (perpendicular for optimal reading).
- Check for any physical damage to the Hall probe.
- Display is dim or unreadable:
- Press the LIGHT button to activate the backlight.
- Check battery level; a low battery can affect display brightness.
- No N/S pole detection:
- Ensure the magnetic field is strong enough for detection.
- Verify the Hall sensor is passing through the magnetic field in the correct orientation.
If the problem persists after trying these steps, please contact customer support for further assistance.
10. Warranty and Support
1-Year Manufacturer Warranty: If a defect occurs in a Gauss meter purchased from our store, we will resend the product or parts free of charge within one year from the order date.
How to Contact Manufacturer: Please contact us from 'Order History' -> 'Seller' -> 'Ask a Question' within your Amazon account service. We provide support 365 days a year and will respond within 10 hours.


