1. Introduction
Thank you for choosing the VEVOR 60L Oil-Free Air Compressor. This manual provides essential information for the safe operation, maintenance, and troubleshooting of your new air compressor. Please read this manual thoroughly before use and retain it for future reference.
This oil-free air compressor is designed for a variety of applications, including tire inflation, automotive repair, spray painting, and woodworking. Its robust design and quiet operation make it suitable for both professional and DIY tasks.
2. Safety Instructions
WARNING: Failure to follow these safety instructions may result in serious injury or property damage.
- Always wear appropriate personal protective equipment, including safety glasses, hearing protection, and gloves.
- Ensure the compressor is placed on a stable, level surface in a well-ventilated area.
- Do not operate the compressor in wet or damp conditions, or near flammable liquids or gases.
- Before performing any maintenance or adjustments, always disconnect the power supply and release all air pressure from the tank.
- Never direct compressed air at yourself or others.
- Regularly inspect the power cord, air hose, and all connections for damage. Replace damaged parts immediately.
- Do not modify the compressor or its components. Use only genuine VEVOR replacement parts.
- Keep children and unauthorized personnel away from the operating area.
3. Package Contents
Upon unpacking, please verify that all items listed below are present and undamaged:
- 1 x VEVOR 60L Oil-Free Air Compressor
- 1 x User Manual
- 2 x G1/2 Air Filters with Plastic Shell
- 2 x Foot Pads
- 2 x 6-inch Wheels
4. Setup
Follow these steps to set up your air compressor before initial use:
- Unpacking: Carefully remove the compressor from its packaging. Inspect for any shipping damage.
- Attach Wheels and Foot Pads: Securely attach the two 6-inch wheels to the designated axle points on one side of the tank. Install the two rubber foot pads on the opposite side to ensure stability.
- Install Air Filters: Screw the two G1/2 air filters into the air intake ports on the motor assembly. Ensure they are hand-tightened.
- Positioning: Place the compressor on a firm, level surface with adequate ventilation around it.
- Electrical Connection: Connect the power cord to a grounded electrical outlet with the correct voltage (220V AC).
- Initial Run (Break-in): Before connecting any air tools, open the tank drain valve (usually located at the bottom of the tank) and run the compressor for approximately 15-20 minutes. This helps to break in the motor and piston rings. Close the drain valve after this initial run.
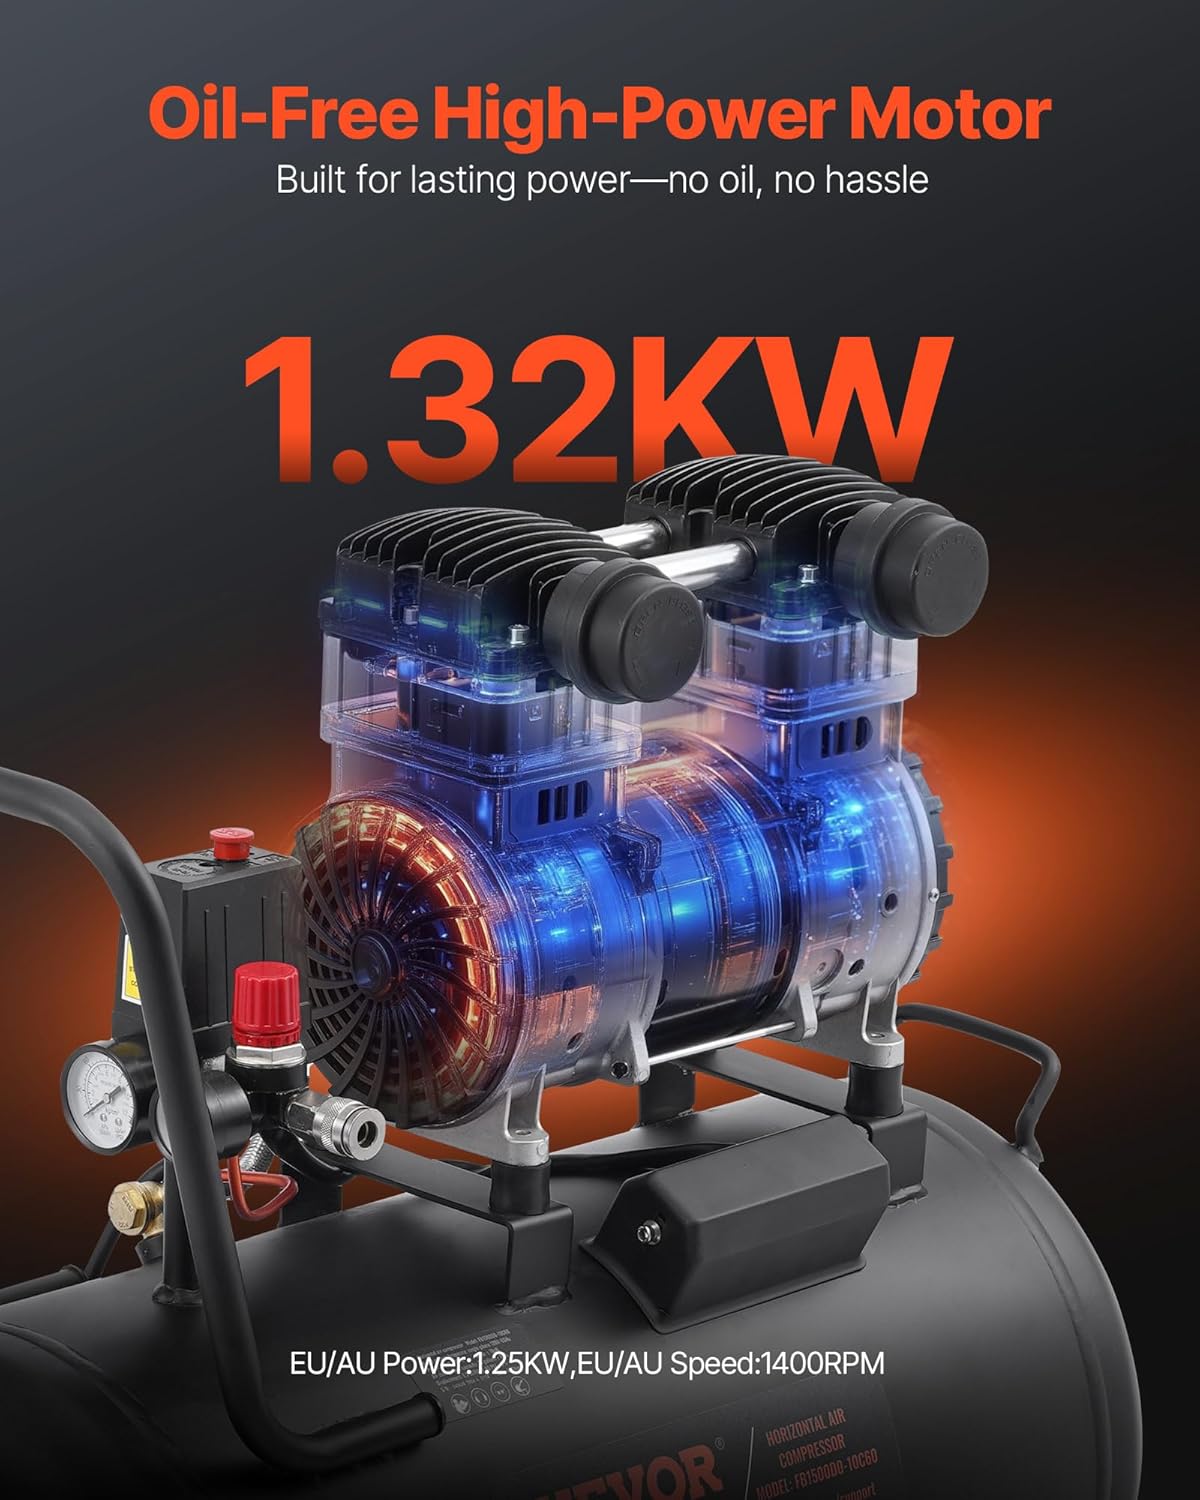
Figure 4.1: Front-side view of the VEVOR 60L oil-free air compressor, displaying its robust black tank, the dual motor assembly, control panel with pressure gauges, and sturdy wheels for easy movement and positioning.
5. Operating Instructions
Once the compressor is set up, follow these steps for operation:
- Power On: Ensure the power switch is in the 'OFF' position. Plug the compressor into a suitable power outlet. Turn the power switch to 'ON'. The compressor will start to build pressure.
- Pressure Adjustment: The compressor features a pressure regulator. Turn the regulator knob clockwise to increase output pressure and counter-clockwise to decrease it. Monitor the output pressure gauge to set the desired working pressure for your air tool.
- Connecting Air Tools: Attach your air hose to the quick-connect coupler on the compressor. Then, connect your air tool to the other end of the hose.
- Operation: Begin using your air tool. The compressor will cycle on and off automatically to maintain the set pressure in the tank.
- Power Off: When finished, turn the power switch to 'OFF'. Disconnect the air tool and hose.
- Drain Moisture: Always drain moisture from the air tank after each use to prevent rust and prolong the tank's life. Slowly open the drain valve at the bottom of the tank until all air and moisture are expelled. Close the valve tightly afterward.

Figure 5.1: This composite image showcases the wide range of applications for the VEVOR air compressor, including inflating tires, performing automotive repairs, spray painting, and powering nail guns for woodworking projects, highlighting its versatility with multiple air tools.

Figure 5.2: This image shows the VEVOR air compressor in action, providing compressed air to a nail gun for a woodworking task, illustrating its utility in various DIY and professional applications.
6. Maintenance
Regular maintenance ensures optimal performance and extends the life of your air compressor.
- Daily: Drain moisture from the air tank.
- Weekly/After 20 Hours of Use: Inspect air filters. Clean or replace if dirty or clogged. Dirty filters can reduce compressor efficiency and lifespan.
- Monthly/After 50 Hours of Use: Check all fasteners and connections for tightness. Inspect the power cord and air hose for wear or damage.
- General Cleaning: Keep the compressor clean and free of dust and debris. Use a dry cloth to wipe down surfaces. Do not use solvents or harsh chemicals.

Figure 6.1: This diagram highlights the compressor's fast inflation capability and details the durable air intake hose, constructed with high-temperature resistant silicone and an outer layer of braided stainless steel mesh for enhanced protection and longevity. Regular inspection of these components is crucial for maintenance.
7. Troubleshooting
Refer to this section for common issues and their solutions:
| Problem | Possible Cause | Solution |
|---|---|---|
| Compressor does not start | No power, tripped circuit breaker, faulty switch | Check power connection, reset breaker, contact service if switch is faulty. |
| Low air pressure / Slow pressure build-up | Air leak, clogged air filter, worn piston rings | Check for leaks (use soapy water), clean/replace air filter, contact service for internal issues. |
| Excessive noise or vibration | Loose components, uneven surface, motor issue | Tighten all fasteners, ensure compressor is on a level surface, contact service if motor issue. |
| Air leaks from safety valve | Tank pressure too high, faulty safety valve | Ensure pressure regulator is set correctly. If pressure is not excessively high, safety valve may be faulty and needs replacement by qualified personnel. |
If you encounter problems not listed here or if the suggested solutions do not resolve the issue, please contact VEVOR customer support.
8. Specifications
Detailed technical specifications for the VEVOR 60L Oil-Free Air Compressor:
| Feature | Specification |
|---|---|
| Model Number | FB1500D-221BS-10C60 |
| Tank Capacity | 15 Gallons / 60 Liters |
| Power | 1.25 kW (2 HP) |
| Speed | 1400 RPM (EU/AU) / 1680 RPM (US) |
| Flow Rate | 5.3 CFM |
| Max. Air Pressure | 125 PSI |
| Cold Flow Rate | 5.3 SCFM ± 10% at 90 PSI |
| Noise Level | ≤ 78 dB |
| Material | Alloy Steel (Q235B Structural Steel for tank) |
| Voltage | 220V AC |
| Item Weight | 37.0 kg / 81.57 lbs |
| Dimensions (L x W x H) | 720 x 390 x 710 mm / 28.3 x 15.4 x 28.0 inches |

Figure 8.1: Side view of the VEVOR 60L oil-free air compressor, detailing its physical dimensions and presenting a concise table of technical specifications.

Figure 8.2: This image illustrates the internal components of the VEVOR air compressor's motor, emphasizing its oil-free design and high power output of 1.32KW (1.25KW for EU/AU) and 1400 RPM speed, ensuring efficient and maintenance-free operation.

Figure 8.3: This image demonstrates the advanced noise-reduction features of the compressor, including a thick sound muffler, rubber muffler pipe, and filter cotton, which collectively reduce operational noise to a quiet 78 dB, comparable to a television.

Figure 8.4: A cutaway view of the air tank reveals its robust 3-layer construction, designed for safety and leak-free assurance. The layers include a rust and wear-resistant coating, a plastic powder attachment layer, and a core of Q235B structural steel, ensuring durability and resistance to high pressure.
9. Official Product Videos
No official product videos are available for embedding at this time.
10. Warranty and Support
VEVOR products are designed for durability and performance. For warranty information, technical support, or service inquiries, please refer to the warranty card included with your product or visit the official VEVOR website. Please have your model number (FB1500D-221BS-10C60) and purchase date available when contacting support.