
1. Introduction
Thank you for choosing the Korfile CD032 Computer Gaming Desk with Hutch. This manual provides detailed instructions for assembly, operation, maintenance, and troubleshooting to ensure safe and efficient use of your new desk. Please read this manual thoroughly before beginning assembly or use.
2. Safety Information
Important Safety Instructions:
- Always ensure that the desk is properly assembled and stable before use.
- Do not place heavy objects on the desk that exceed its weight limit.
- Be cautious when using electrical components and follow all safety guidelines to prevent electrical hazards.
- Keep all small parts and packaging materials away from children during assembly to prevent choking hazards.
- Do not stand or sit on the desk.
- Use only the provided hardware for assembly.
3. Package Contents
Before assembly, verify that all parts listed below are present and undamaged. If any parts are missing or damaged, please contact customer support.
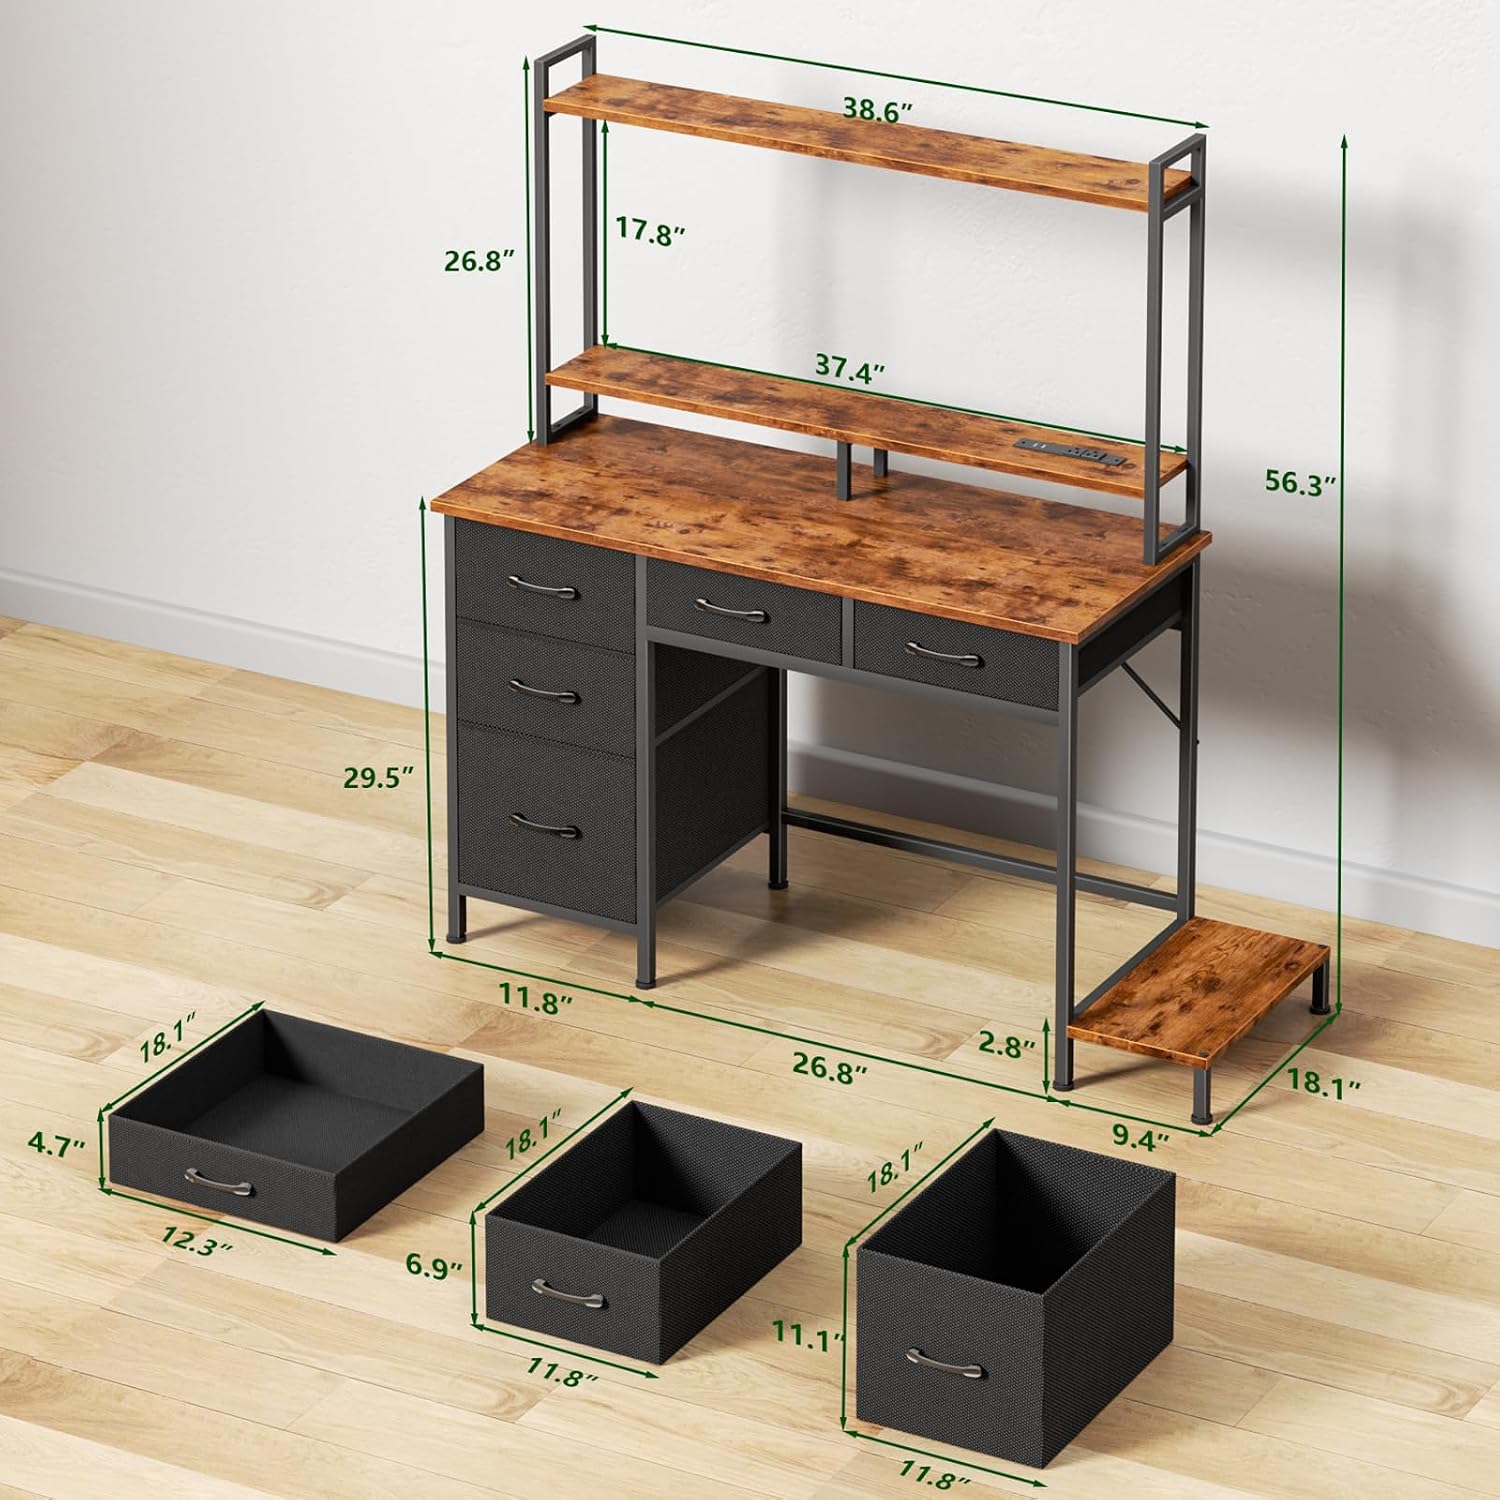
Image: Overview of desk dimensions and drawer components.
Components List:
- Desktop Panel
- Hutch Shelves (2 tiers)
- Metal Frame Components
- Fabric Drawers (5 units, various sizes)
- PC Tower Stand
- LED Light Strip with Remote Control
- Power Outlet Unit (2 AC, 2 USB ports)
- Assembly Hardware (screws, bolts, Allen wrench, screwdriver)
- Adjustable Feet
4. Assembly Instructions
Assembly typically requires two people. Follow the detailed instructions provided in the included assembly manual. Ensure all parts are correctly oriented before tightening screws.
4.1. Frame Assembly
- Unpack all components and lay them out on a clean, soft surface to prevent scratches.
- Assemble the main metal frame using the designated screws and Allen wrench. Do not fully tighten screws until all frame components are in place.
- Attach the adjustable feet to the bottom of the desk legs.
4.2. Desktop and Hutch Installation
- Secure the desktop panel to the assembled frame using the appropriate screws.
- Attach the hutch frame to the desktop.
- Install the two-tier hutch shelves onto the hutch frame.
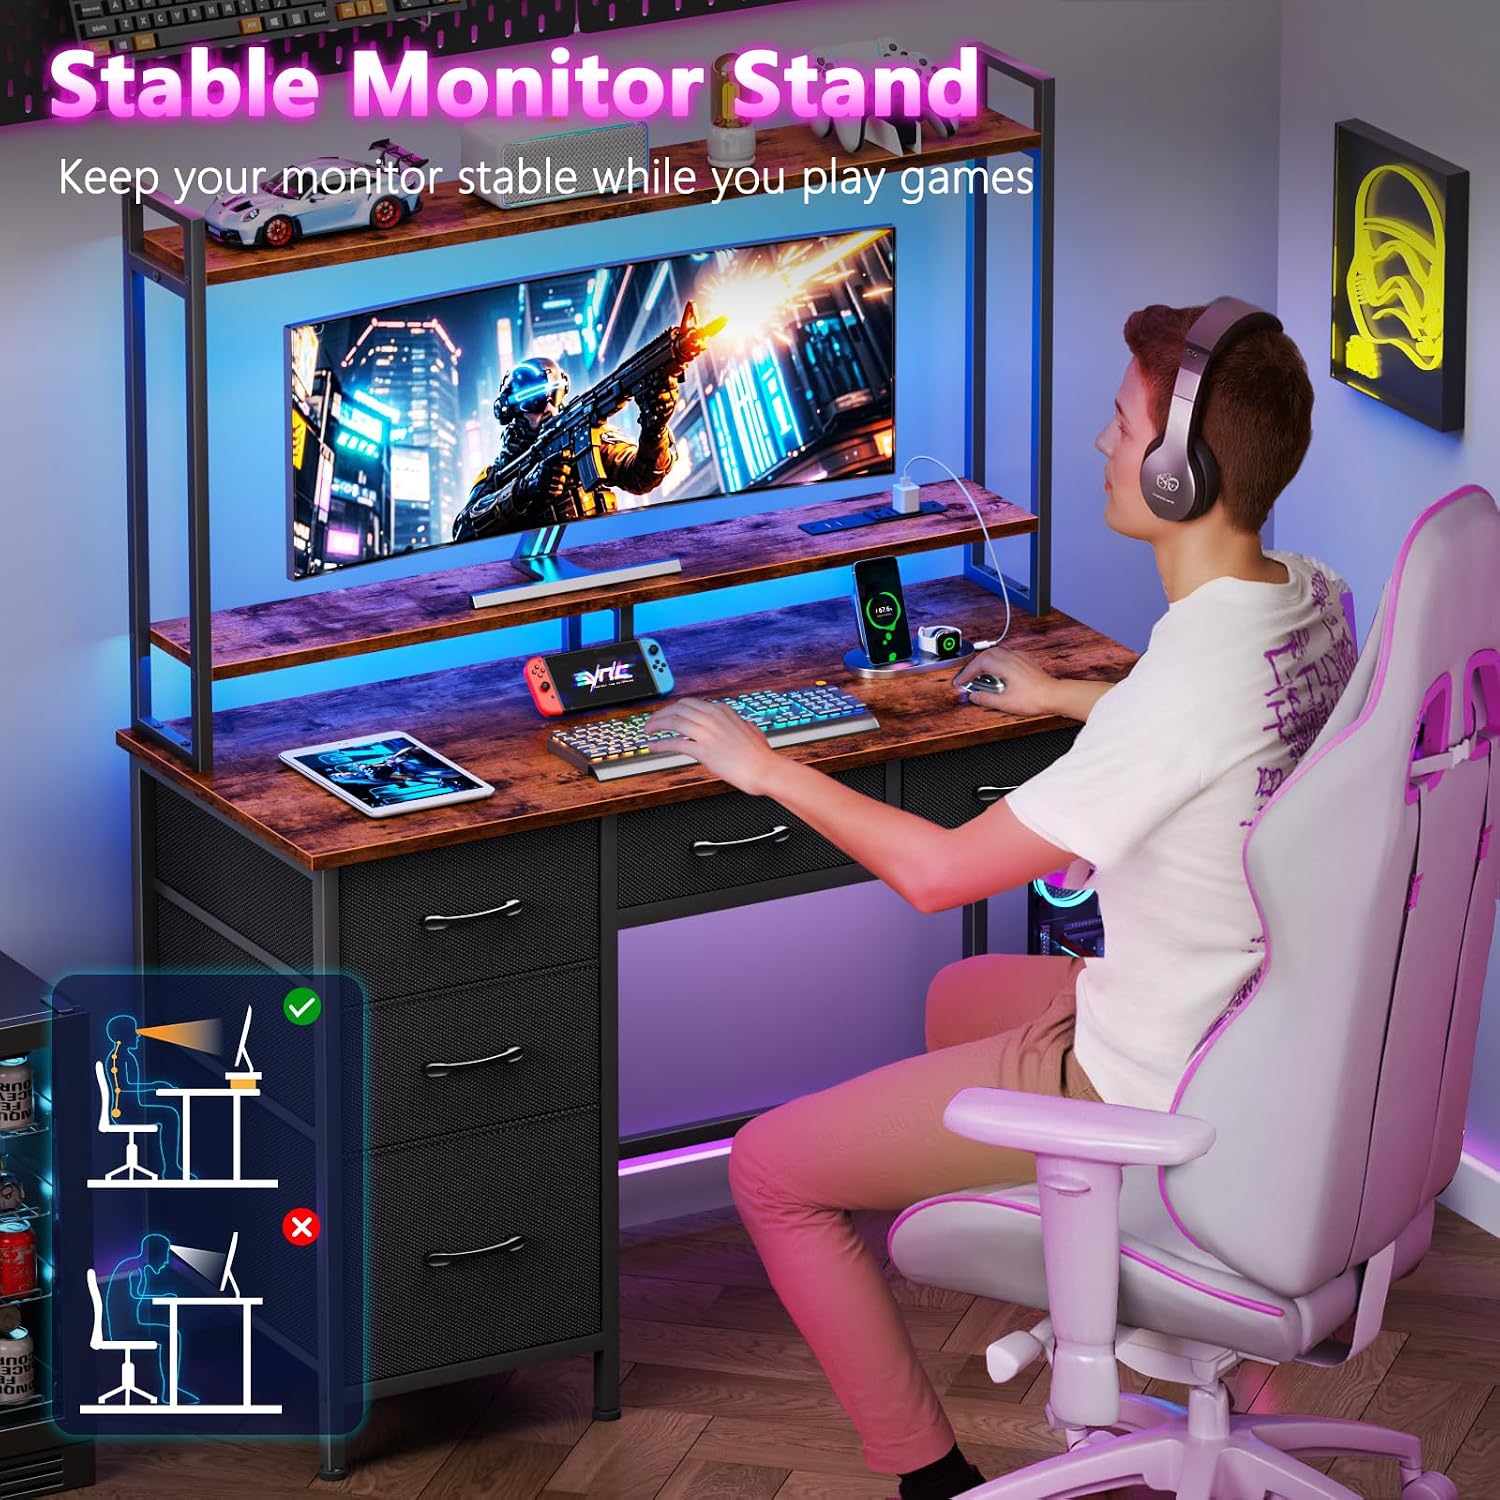
Image: The desk with a monitor on the stable monitor stand, promoting ergonomic setup.
4.3. Drawer and PC Stand Assembly
- Assemble the fabric drawers by inserting the bottom panels and handles.
- Slide the assembled drawers into their respective compartments.
- Attach the removable PC stand to the main frame as desired (can be mounted inside or outside).

Image: The adjustable PC stand, illustrating its flexible placement options.
4.4. Electrical Components (LED Lights & Power Outlets)
- Install the LED light strip along the designated area of the hutch. Connect it to the power source.
- Integrate the power outlet unit into the desktop cutout. Ensure the power cord is routed safely and connected to a wall outlet.

Image: The integrated charging station, featuring two AC outlets and two USB ports.
Once all components are assembled, fully tighten all screws. Place the desk in its desired location and ensure it is stable on an even surface. Adjust the feet if necessary.
5. Operating Instructions
5.1. LED Lights
The integrated RGB LED light strip offers various customization options:
- Power On/Off: Use the remote control to turn the lights on or off.
- Color Selection: Choose from 20 adjustable colors using the remote.
- Dynamic Modes: Select from 22 dynamic modes for different lighting effects.
- Brightness Adjustment: Adjust the light intensity with 5 brightness levels.
- Flicker Frequency: Set the flicker rate with 10 available frequencies.

Image: The desk illuminated with blue LED lights, showcasing its gaming ambiance.
5.2. Power Outlets and USB Ports
The built-in charging station provides convenient power access:
- AC Outlets: Two 120V/12A AC outlets are available for standard electronic devices.
- USB Charging Ports: Two 5V/2A USB ports are provided for charging smartphones, tablets, and other USB-powered devices.
- Ensure the desk's main power cord is securely plugged into a functional wall outlet for these features to operate.
5.3. Storage Drawers
The five non-woven fabric drawers are designed for organized storage:
- The drawers come in three different sizes to accommodate various items.
- To open, gently pull the handle. To close, push the drawer back into its compartment.
- Avoid overloading drawers to ensure smooth operation and prevent damage.

Image: The five non-woven fabric drawers, demonstrating their storage capacity.
6. Maintenance and Care
- Cleaning: Wipe the desk surfaces with a soft, damp cloth. Avoid harsh chemicals or abrasive cleaners that may damage the finish.
- Dusting: Regularly dust the desk and hutch shelves to maintain appearance.
- Drawer Care: The fabric drawers can be spot cleaned with a mild detergent and air-dried. Do not machine wash.
- Electrical Components: Ensure the power outlets and USB ports are kept dry and free from debris. Do not attempt to repair electrical components yourself.
- Stability Check: Periodically check all screws and connections to ensure they remain tight. Retighten if necessary.
7. Troubleshooting
| Problem | Possible Cause | Solution |
|---|---|---|
| LED lights not working or remote unresponsive | Loose connection, remote battery dead, faulty remote/strip | Check all connections. Replace remote battery. If issue persists, contact customer support for a replacement LED strip or remote. |
| Power outlets/USB ports not functioning | Desk power cord unplugged, wall outlet not working, internal wiring issue | Ensure the desk's power cord is fully plugged into a live wall outlet. Test the wall outlet with another device. If still not working, contact customer support. |
| Desk is wobbly or unstable | Uneven floor, loose screws, adjustable feet not properly set | Adjust the leveling feet on the bottom of the desk. Check and tighten all assembly screws. Ensure the desk is on a flat surface. |
| Drawers do not slide smoothly | Overloaded drawer, fabric snagged, incorrect assembly | Reduce contents in the drawer. Check for any obstructions or fabric snags. Ensure drawers were assembled correctly according to the manual. |
8. Product Specifications
| Feature | Specification |
|---|---|
| Brand | Korfile |
| Model Number | CD032 |
| Product Dimensions (D x W x H) | 39"D x 18.8"W x 56.3"H |
| Color | Rustic Brown |
| Material | Engineered Wood (Desktop), Particleboard and Metal (Base) |
| Special Features | Built-In USB Outlet, LED Lights, Monitor Stand |
| Power Outlets | 2 AC Outlets (120V/12A) |
| USB Ports | 2 USB Ports (5V/2A) |
| LED Lights | 20 Colors, 22 Dynamic Modes, 5 Brightness Levels, 10 Flicker Frequencies |
| Storage Options | 5 Fabric Drawers, 2 Hutch Shelves |
| Assembly Required | Yes (Recommended 2 people) |
9. Warranty and Support
9.1. Warranty Information
This Korfile product comes with a limited warranty. Please refer to the warranty card included in your package for specific terms and conditions. The warranty typically covers manufacturing defects under normal use.
9.2. Customer Support
If you have any questions, require assistance with assembly, or encounter any issues with your product, please do not hesitate to contact Korfile customer support. Our team is available to help you before and after purchase.
For support, please visit the Korfile store on Amazon or refer to the contact information provided in your product packaging.
10. Product Overview Video
Watch this video for a visual overview of the Korfile Computer Desk with Hutch, demonstrating its features and design.
Video: An official product video from Korfile-US showcasing the Computer Desk with Hutch.