1. Important Safety Instructions
Always read and understand all safety warnings, instructions, illustrations, and specifications provided with this power tool. Failure to follow all instructions listed below may result in electric shock, fire, and/or serious injury. Save all warnings and instructions for future reference.
- Work Area Safety: Keep the work area clean and well-lit. Cluttered or dark areas invite accidents. Do not operate power tools in explosive atmospheres, such as in the presence of flammable liquids, gases, or dust.
- Electrical Safety: Power tool plugs must match the outlet. Never modify the plug in any way. Avoid body contact with earthed or grounded surfaces.
- Personal Safety: Always wear eye protection, hearing protection, and a dust mask. Dress properly; avoid loose clothing or jewelry. Keep hands away from the blade. Use a push stick when making narrow cuts.
- Tool Use and Care: Do not force the power tool. Use the correct power tool for your application. Disconnect the plug from the power source before making any adjustments, changing accessories, or storing power tools.
- Table Saw Specific Safety: Ensure the blade guard is always in place and functioning correctly. Never reach over or around the saw blade. Always stand to the side of the blade when operating.
2. Product Overview
The Scheppach HS210 is a compact table saw designed for precise cutting of various wood materials. It features a powerful motor and adjustable settings for versatile applications.
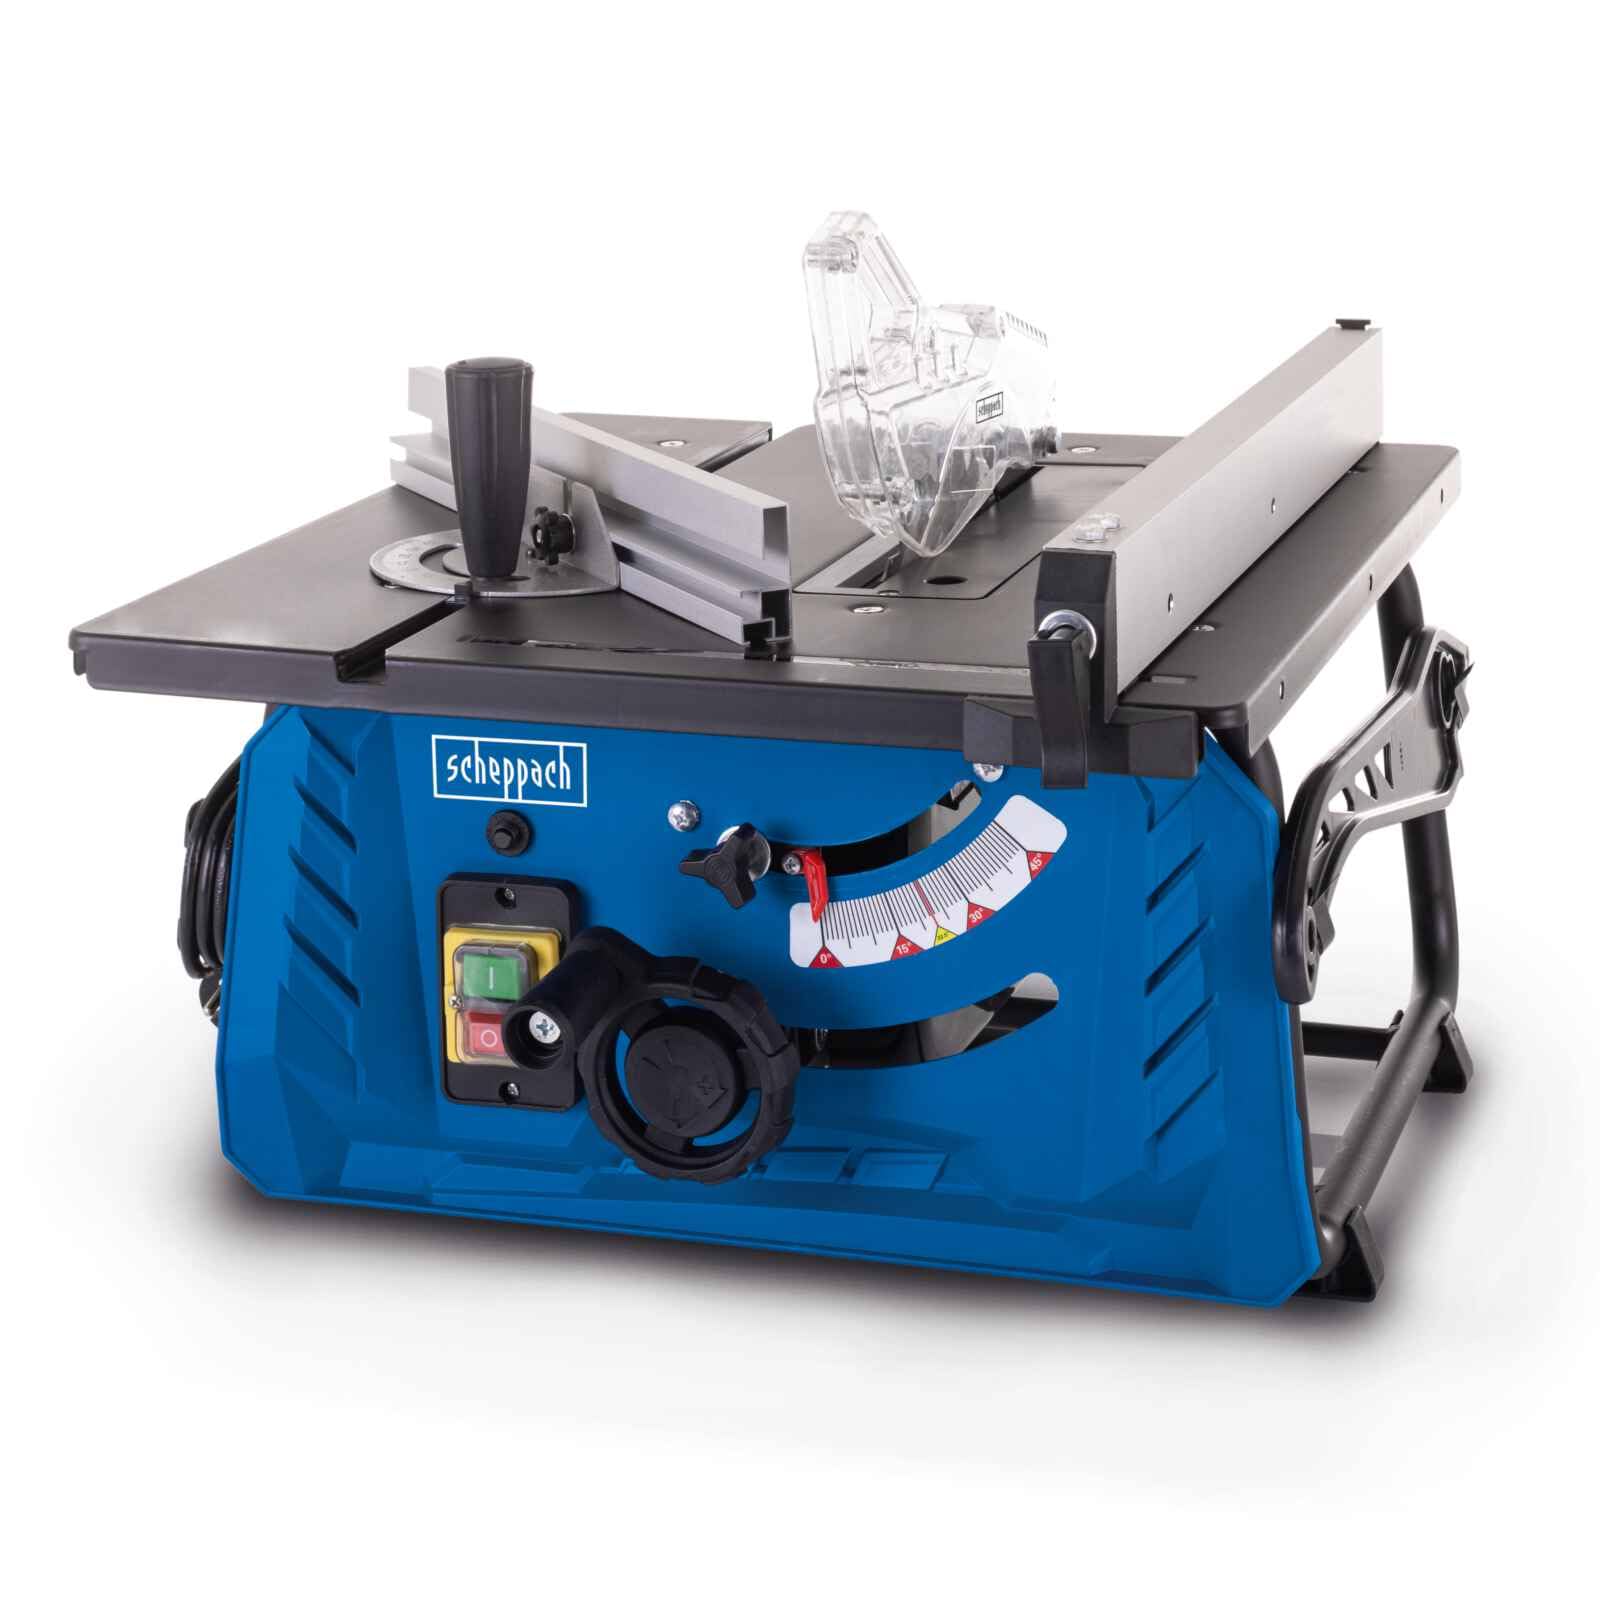
Figure 2.1: Front view of the Scheppach HS210 Table Saw, showcasing its compact design and main controls.
Key Features:
- Compact bench circular saw for precise cutting of beams, profiled boards, and for longitudinal and cross cuts.
- Powerful 1500 W motor with overload protection.
- Handwheel for convenient cutting height adjustment.
- Integrated connection for dust extraction.
- 210 mm diameter blade with 4800 rpm for precise cutting results.
- Blade easily tiltable from 0 – 45° for precise bevel cuts.
- Maximum cutting height at 90° is 70 mm, and at 45° is 54 mm.
- Adjustable cross-cut gauge from -60° to +60° for miter cuts.
- Longitudinal stop (rip fence) clamped on both sides with integrated scale for precision cuts.
- Maximum working safety thanks to the blade guard.
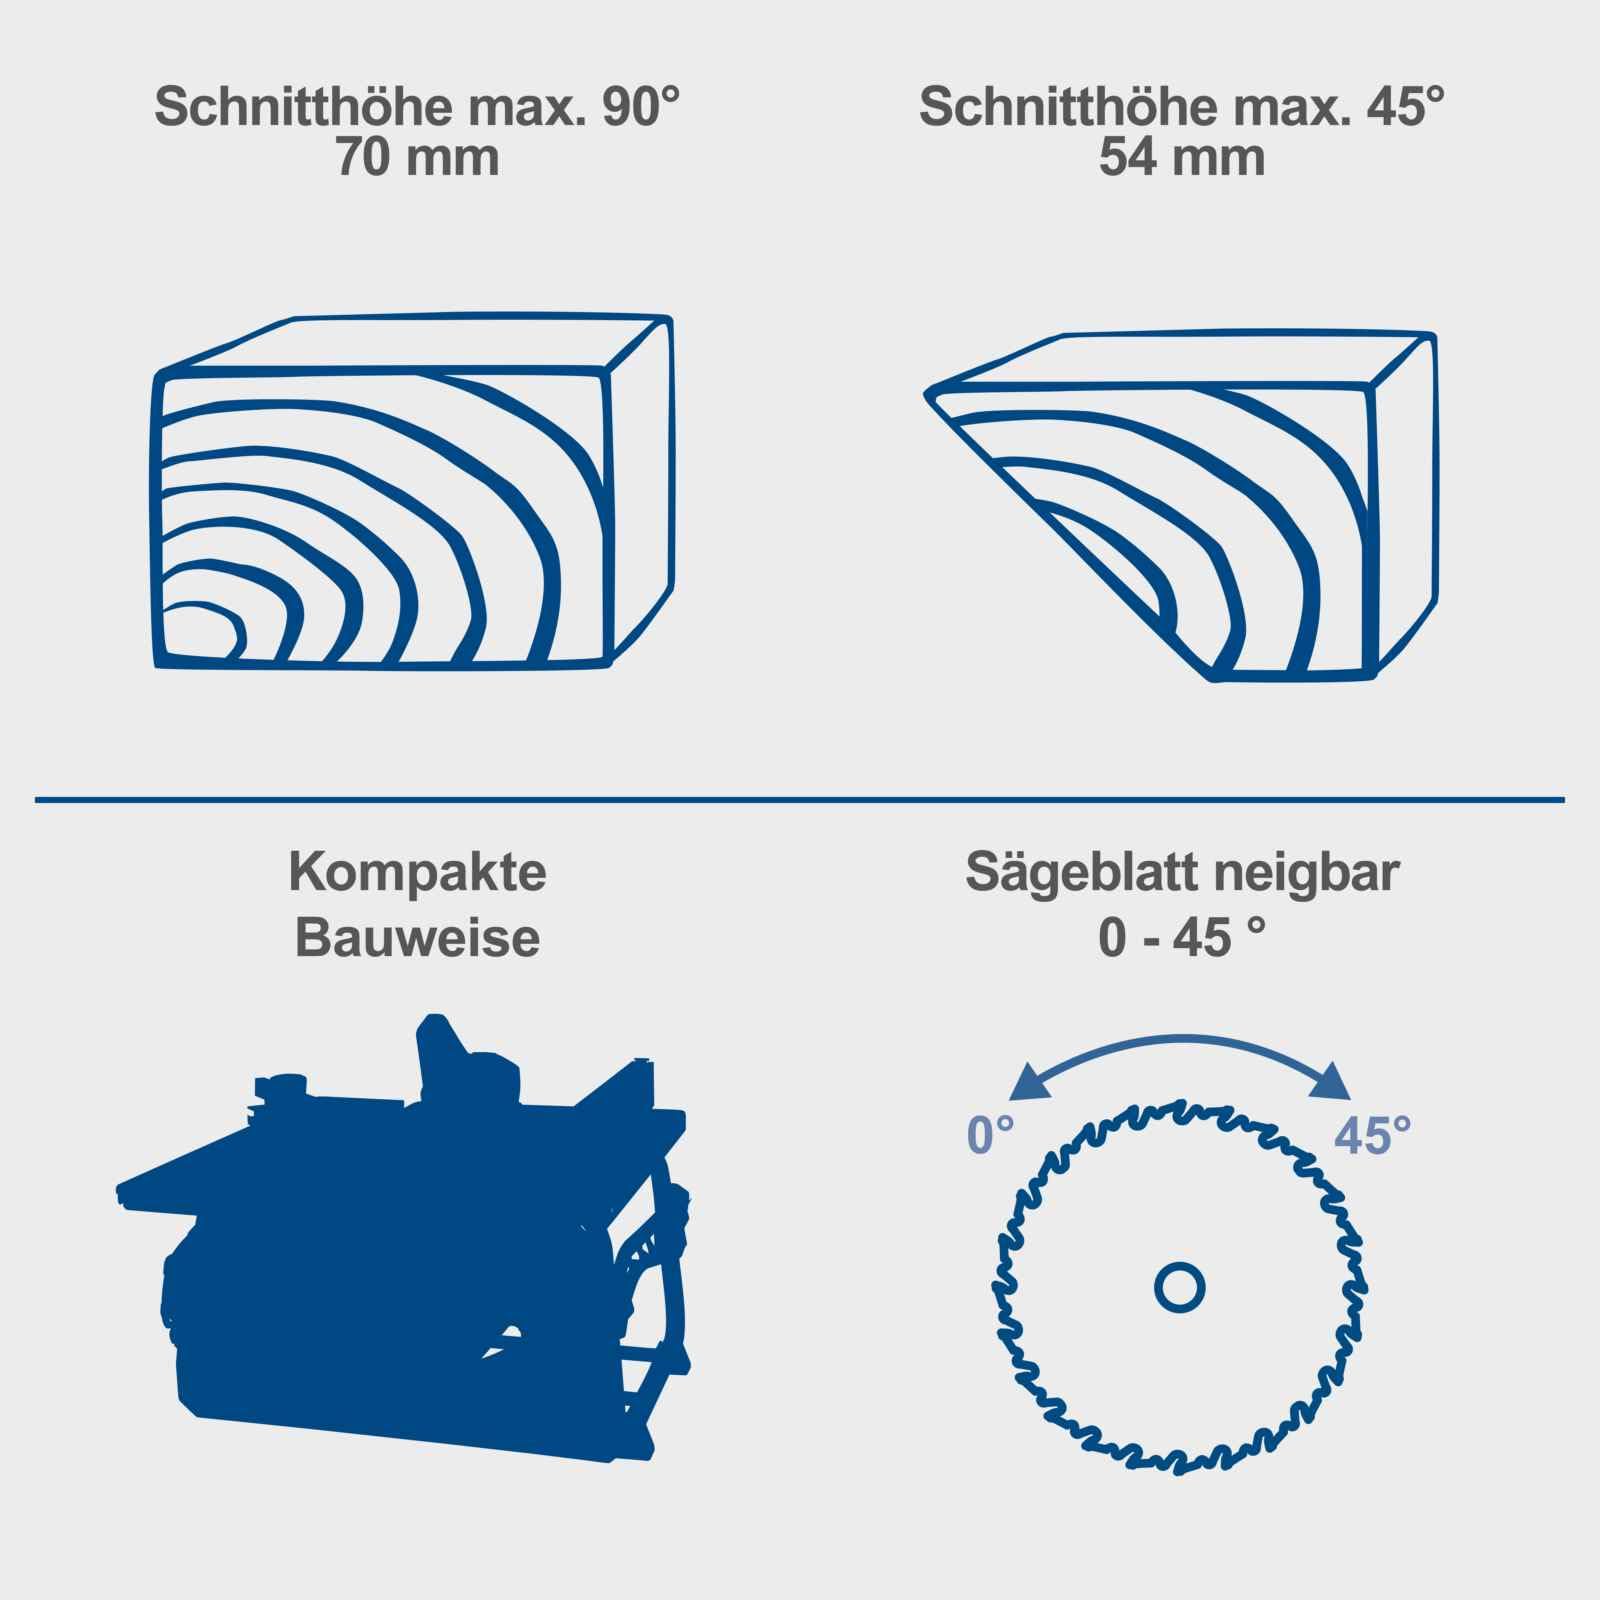
Figure 2.2: Diagram illustrating maximum cutting heights at 90° (70 mm) and 45° (54 mm), compact design, and blade tilt range of 0-45°.
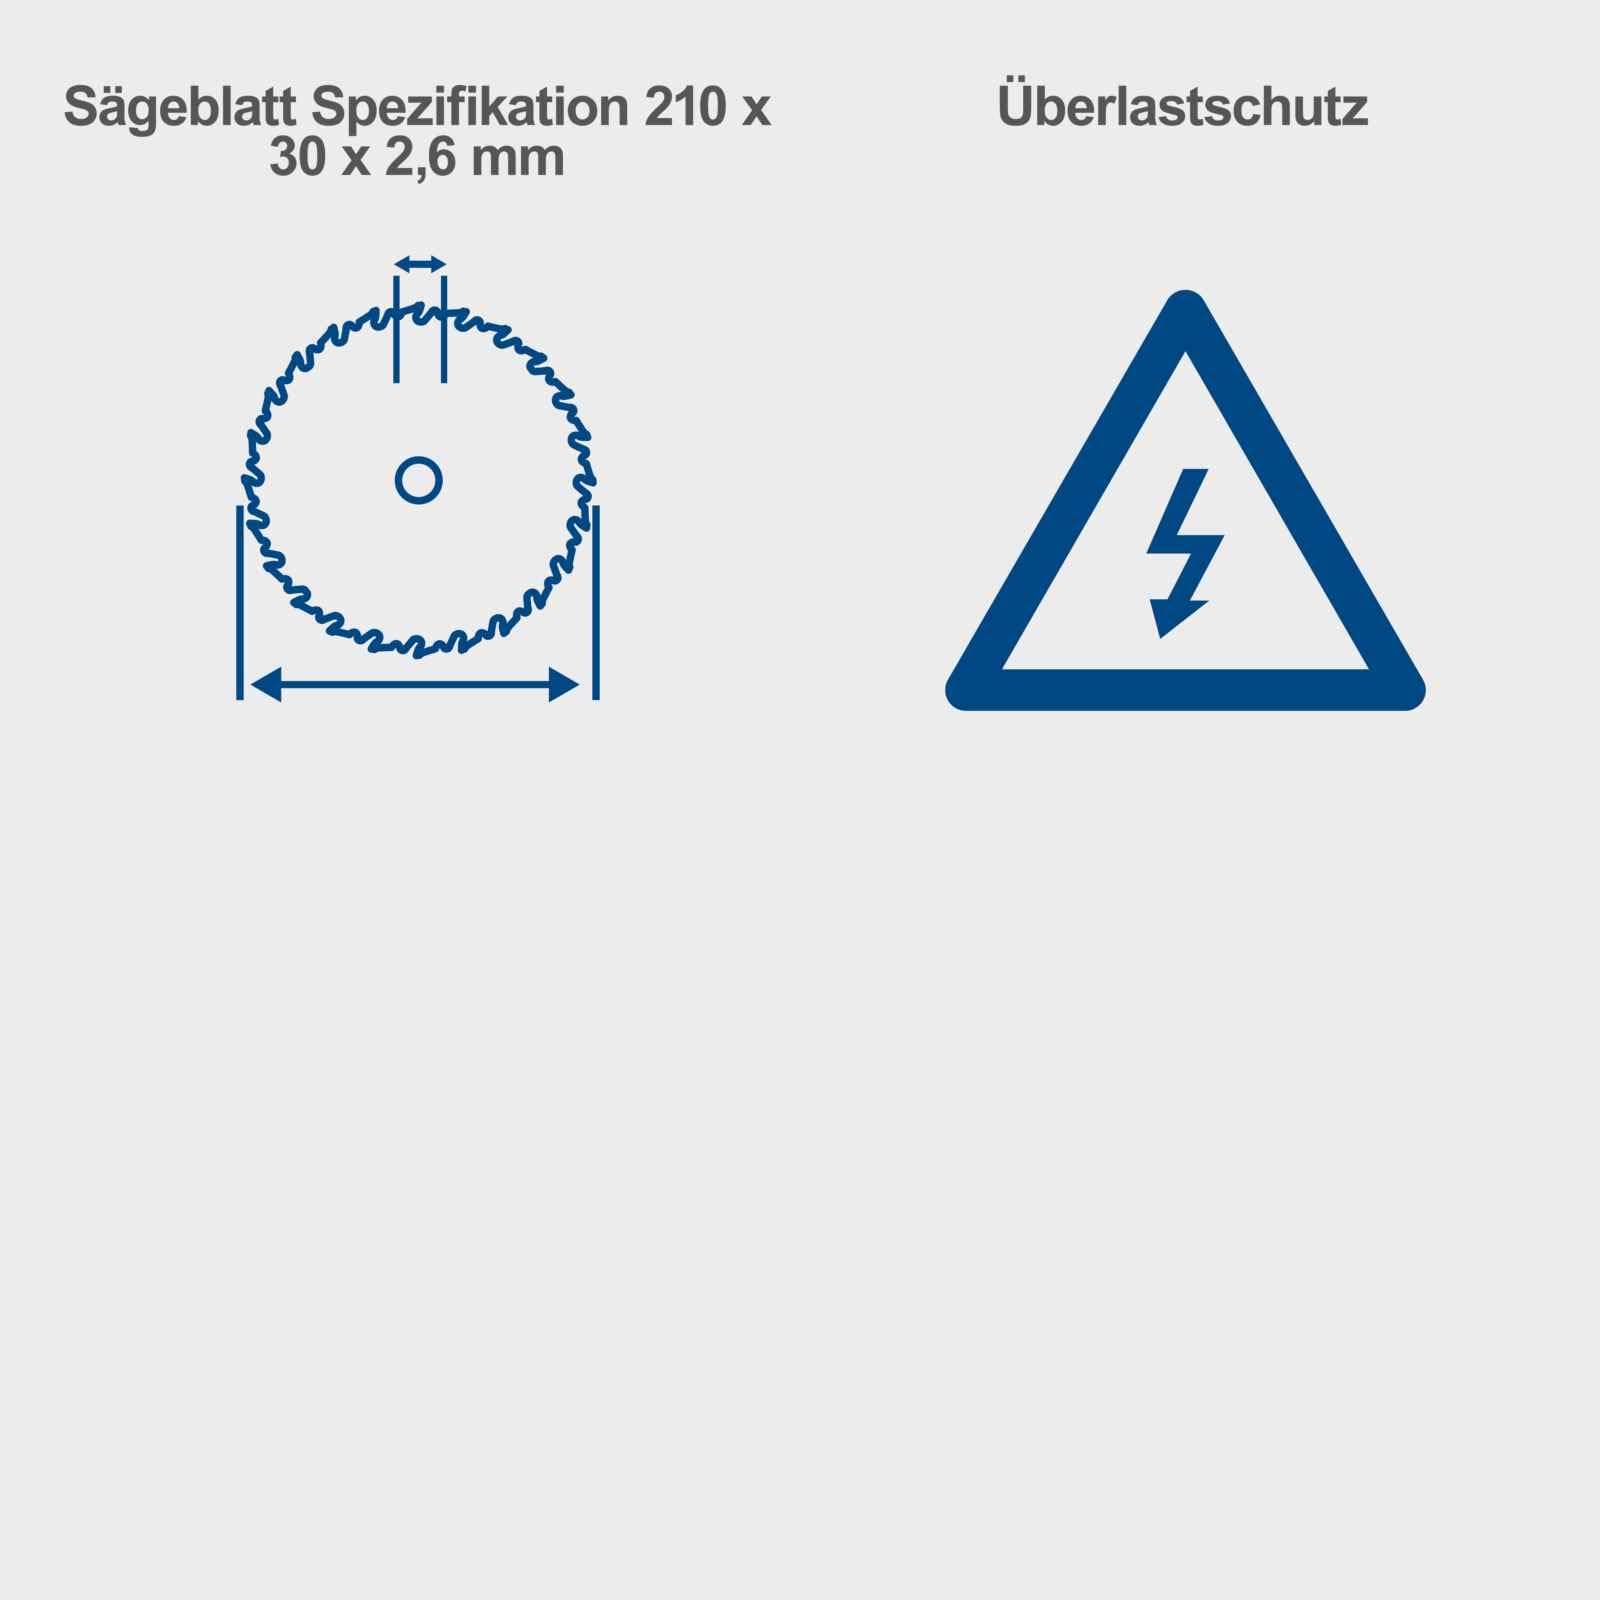
Figure 2.3: Diagram showing the saw blade specification (210 x 30 x 2.6 mm) and the overload protection symbol.
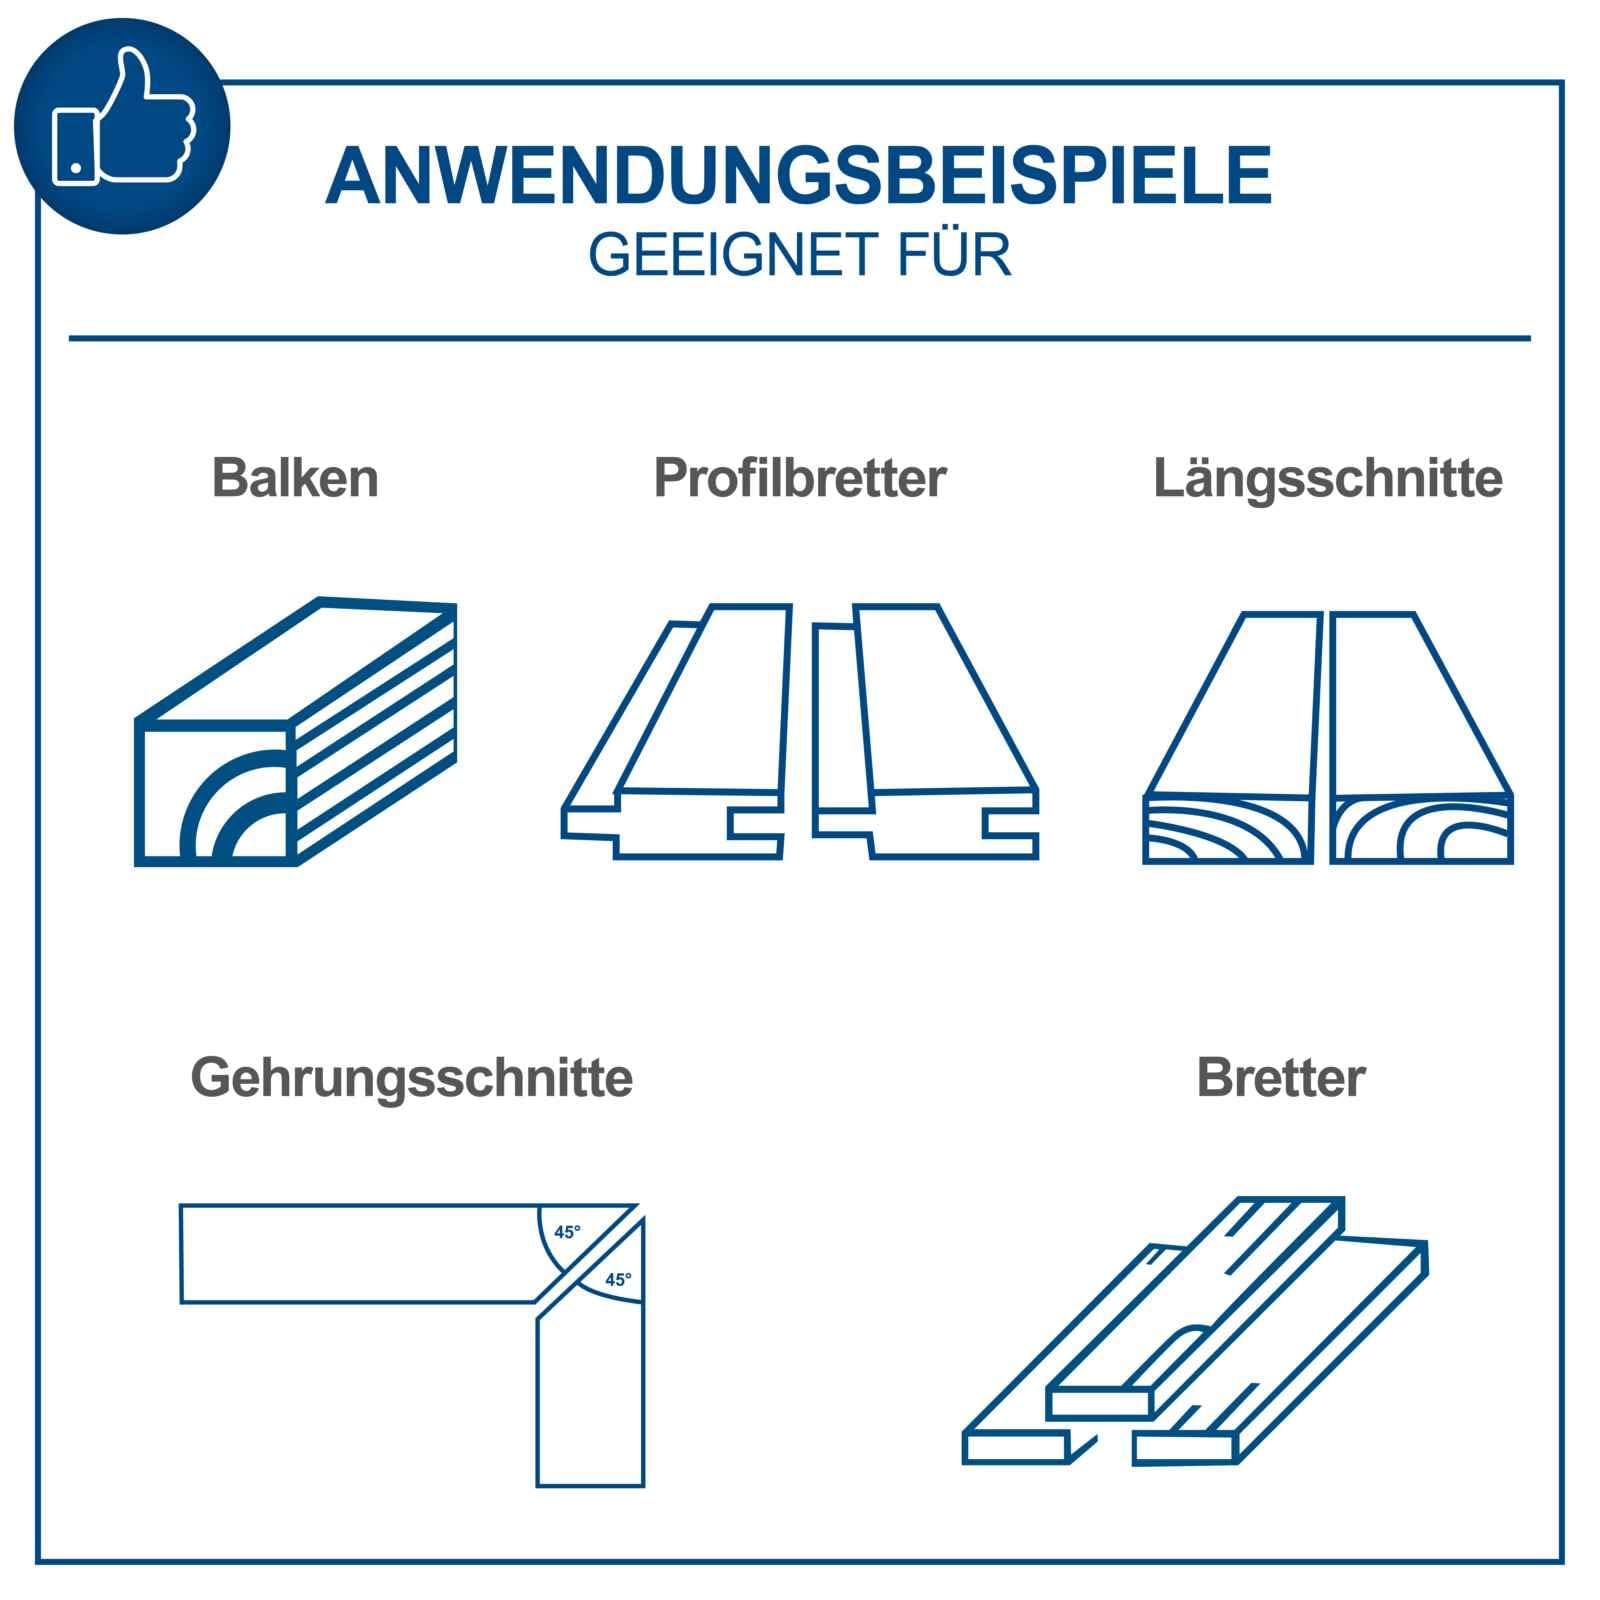
Figure 2.4: Examples of suitable applications including cutting beams, profiled boards, longitudinal cuts, miter cuts, and general boards.
3. Assembly and Setup
3.1 Unpacking and Initial Inspection
Carefully remove the table saw and all accessories from the packaging. Inspect all components for any signs of damage. If any parts are damaged or missing, do not operate the tool and contact customer support.
3.2 Attaching Components
Ensure the blade guard is securely in place over the saw blade. Attach the rip fence and cross-cut gauge as needed for your specific cutting tasks. Refer to the included diagrams for proper attachment.
3.3 Connecting to Power
Connect the power cord to a suitable electrical outlet. Ensure the power supply matches the specifications of the tool. The tool is equipped with a 1500W motor and requires a standard corded electric connection.
4. Operation
4.1 Basic Operation
Before starting, ensure the work area is clear, the workpiece is properly supported, and all safety devices are in place. Always wear appropriate personal protective equipment.
4.2 Adjusting Cutting Height
The cutting height can be adjusted using the handwheel located on the front of the saw. Rotate the handwheel to raise or lower the saw blade to the desired cutting depth. Ensure the blade is set slightly higher than the thickness of your workpiece.
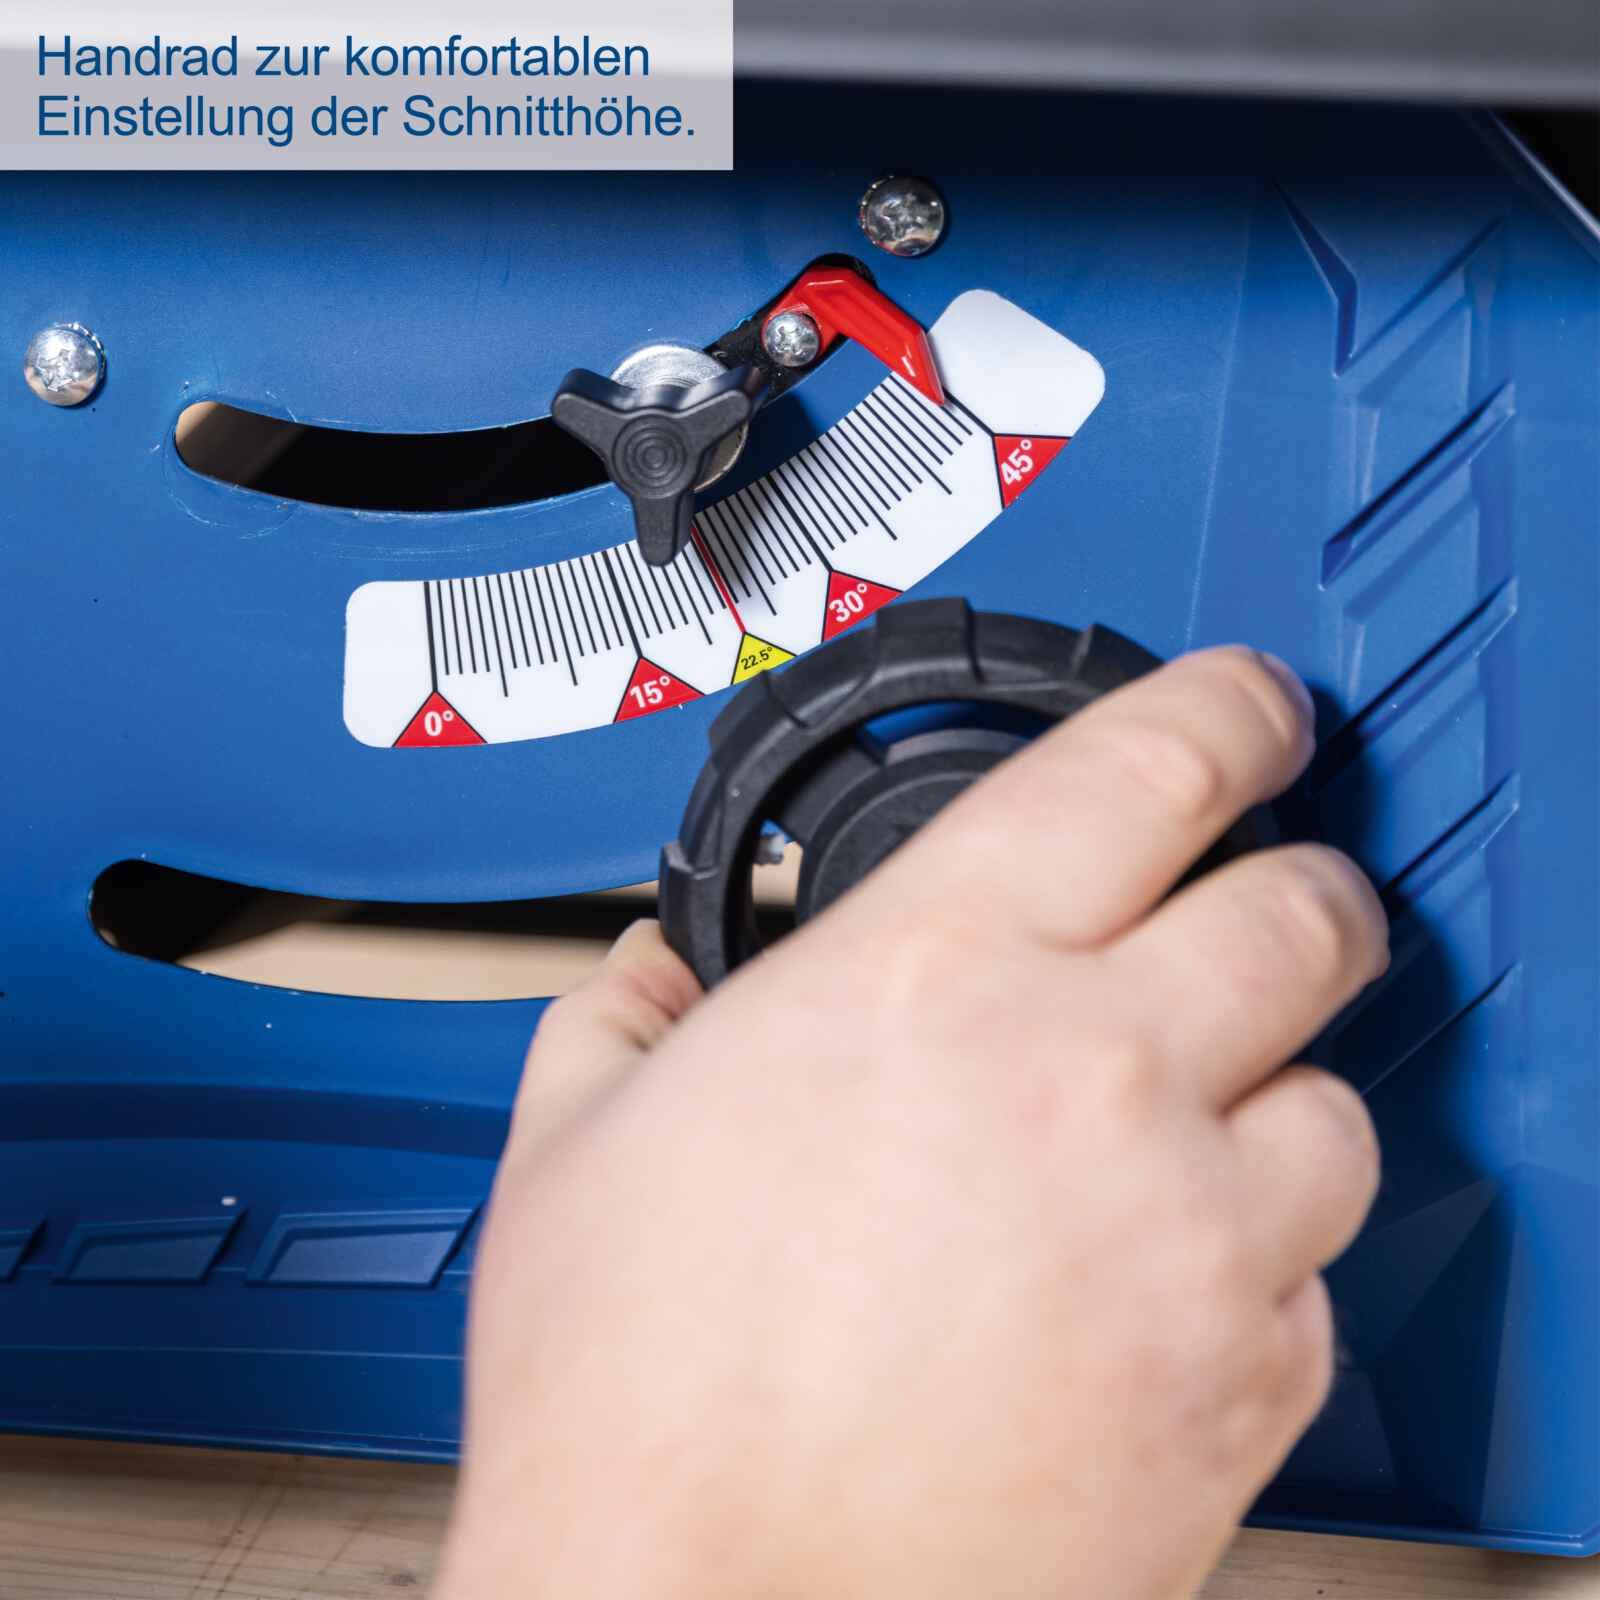
Figure 4.1: Close-up view of the handwheel used for comfortable and precise adjustment of the cutting height.
4.3 Adjusting Blade Tilt (Bevel Cuts)
For angled cuts (bevels), the saw blade can be tilted from 0° to 45°. Use the tilt adjustment mechanism to set the desired angle. Always ensure the blade is securely locked at the chosen angle before operation.
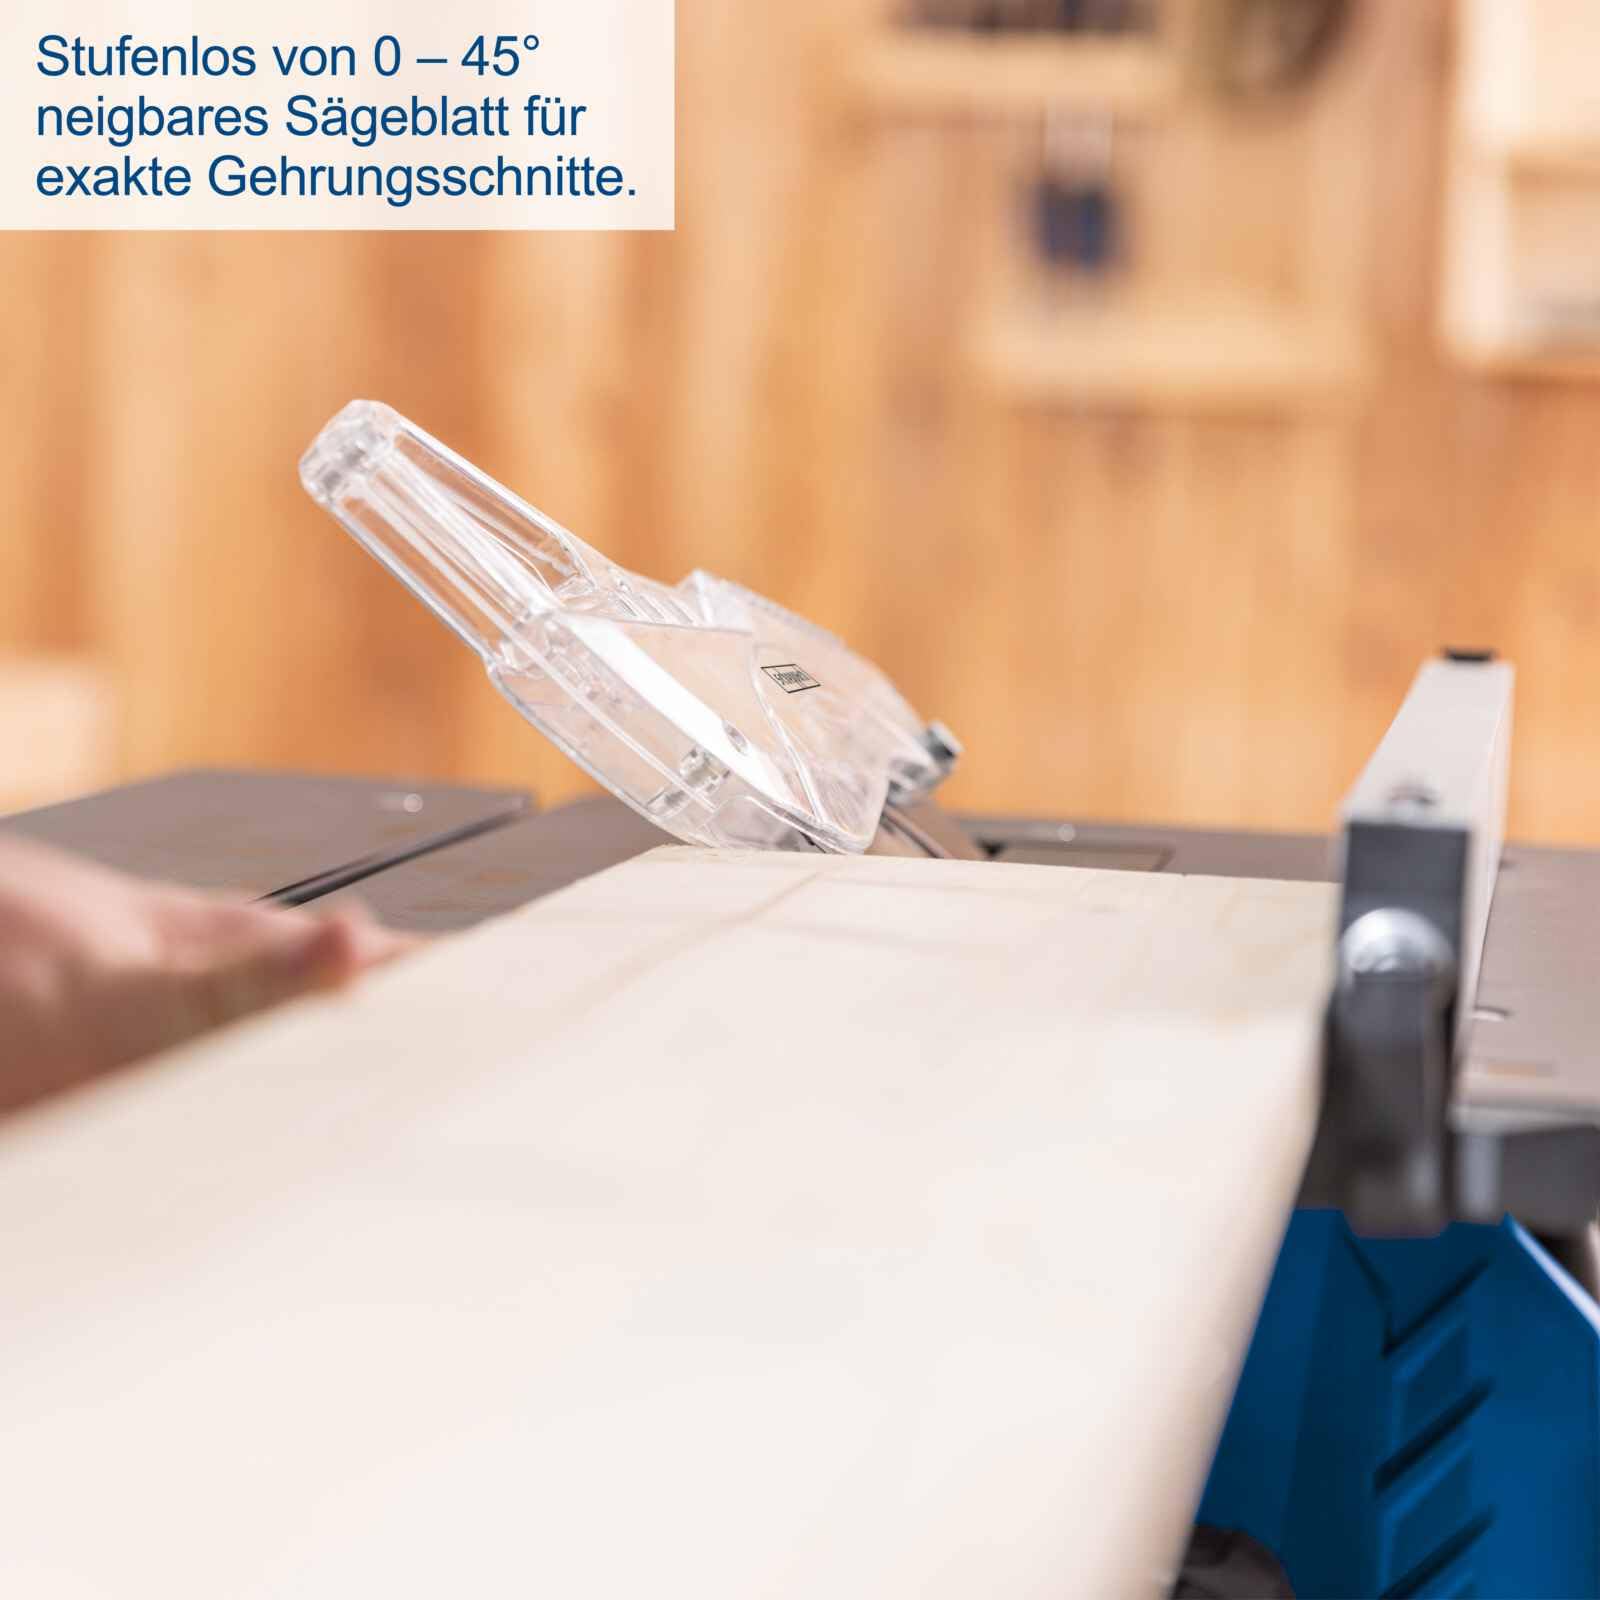
Figure 4.2: The saw blade continuously tiltable from 0-45° for exact miter and bevel cuts.
4.4 Using the Rip Fence (Longitudinal Cuts)
The rip fence is used for making straight, parallel cuts along the length of a workpiece. Position the rip fence to the desired width using the integrated scale and securely clamp it on both sides to prevent movement during cutting.
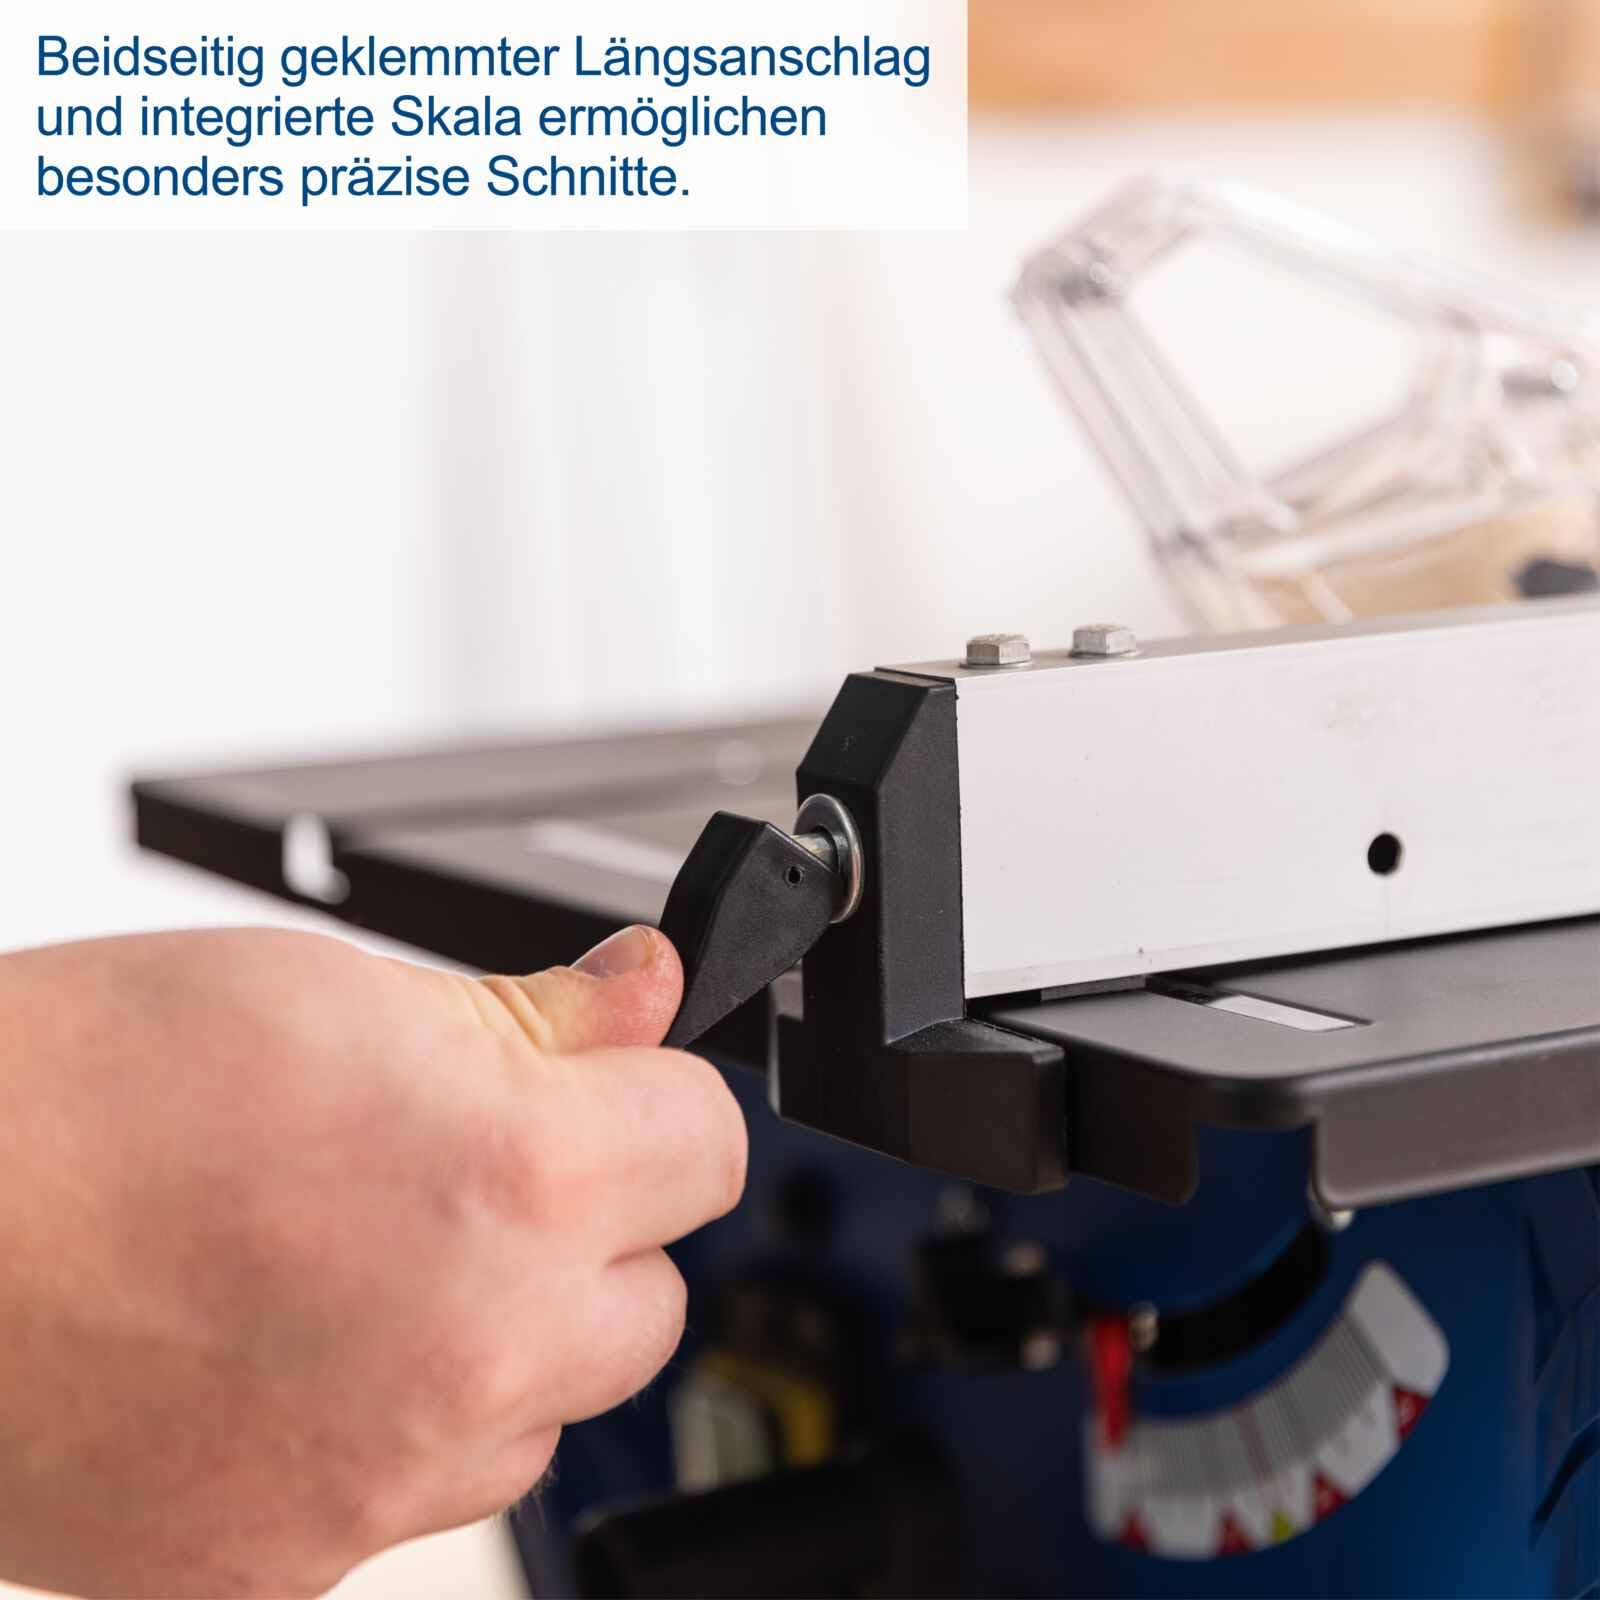
Figure 4.3: The rip fence, clamped on both sides, with an integrated scale for particularly precise longitudinal cuts.
4.5 Using the Cross-Cut Gauge (Miter Cuts)
The adjustable cross-cut gauge allows for precise miter cuts from -60° to +60°. Insert the gauge into the table slot and adjust it to the required angle. Hold the workpiece firmly against the gauge and feed it slowly through the blade.
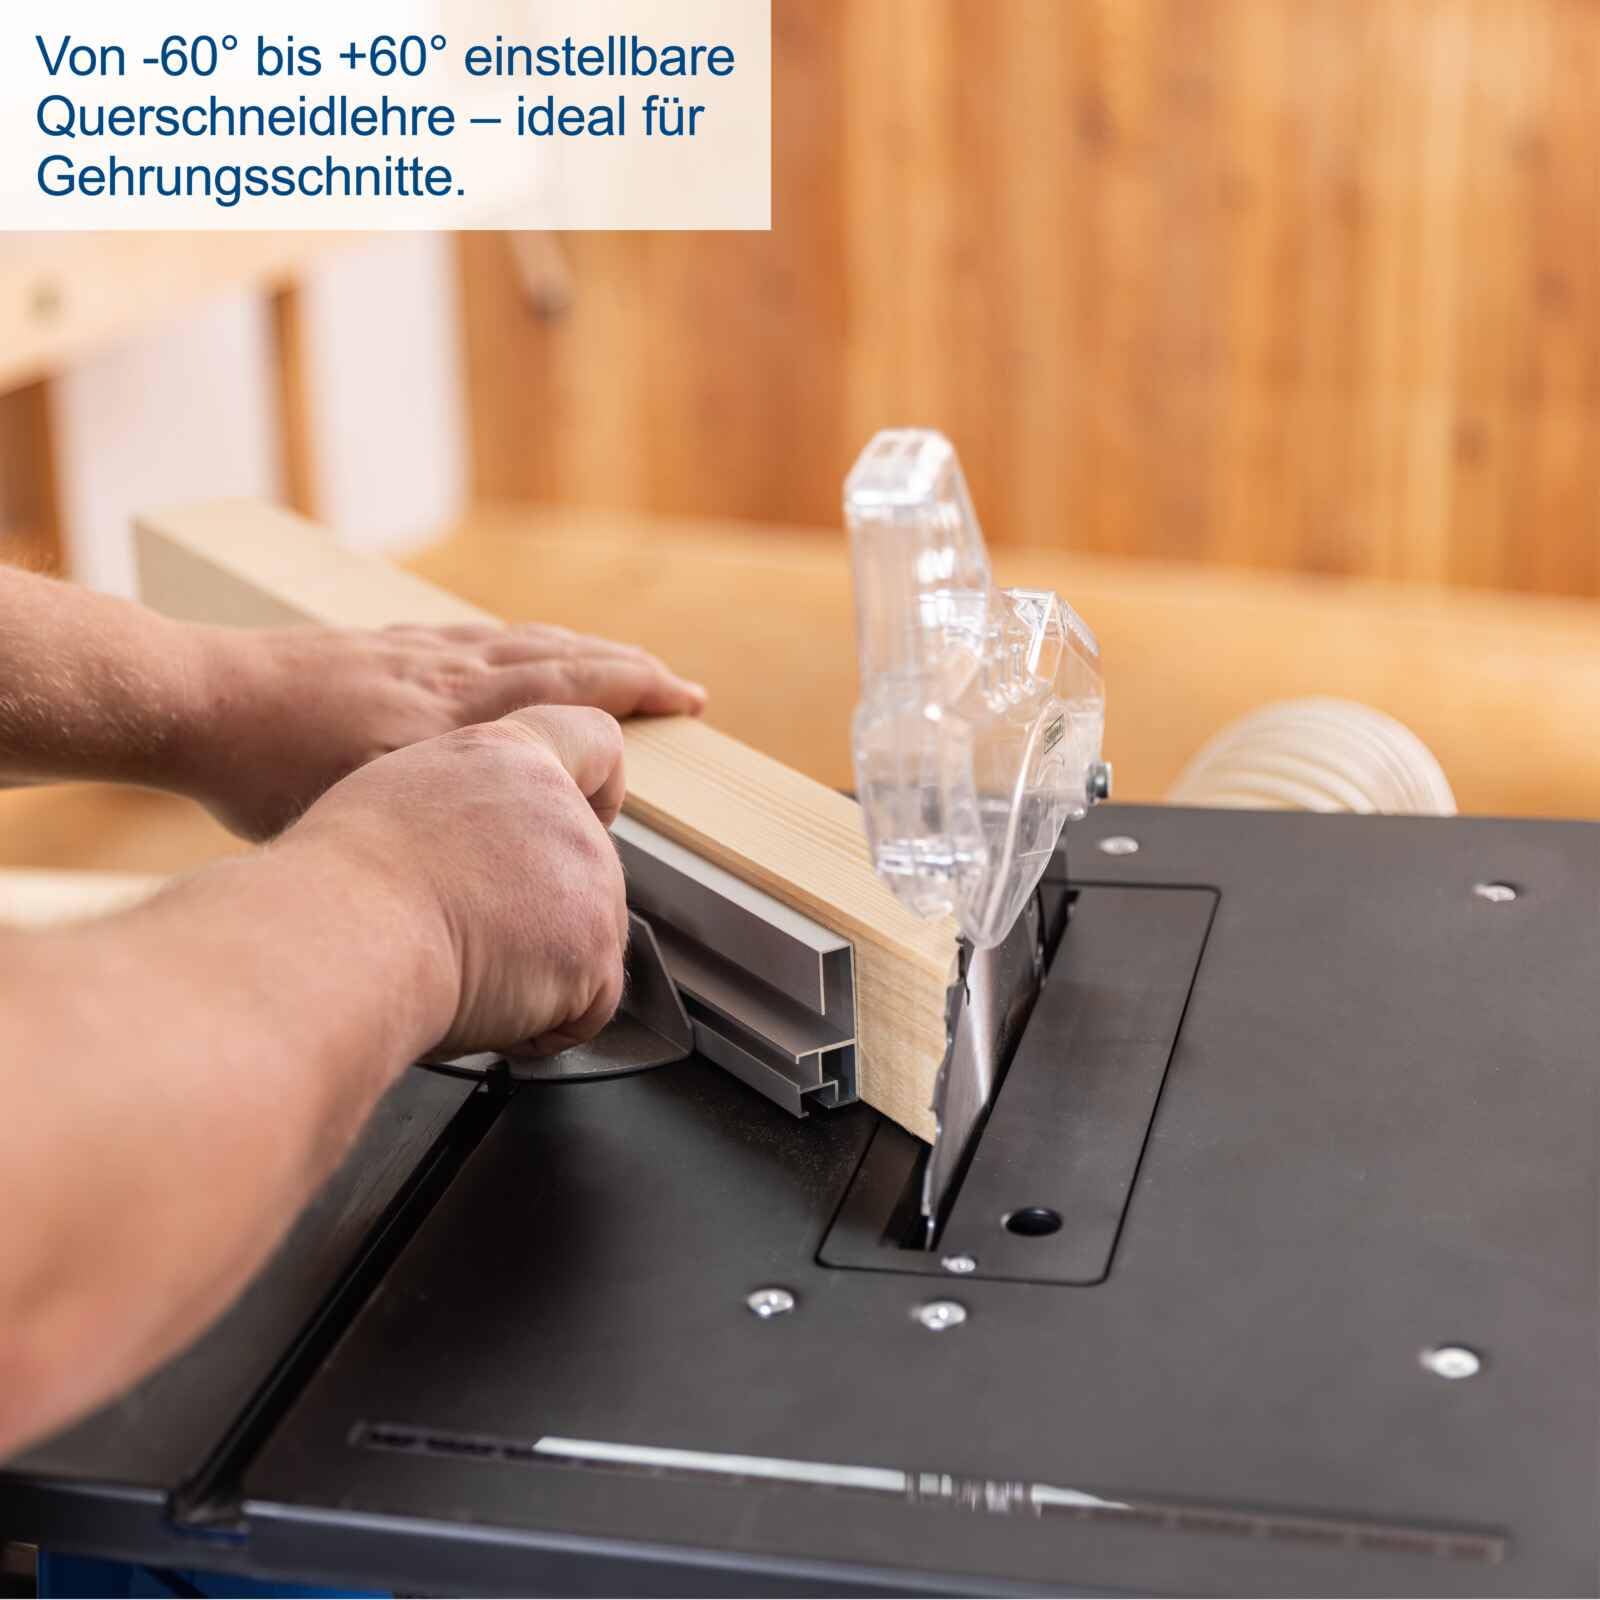
Figure 4.4: The adjustable cross-cut gauge, ranging from -60° to +60°, ideal for accurate miter cuts.
4.6 Overload Protection
The Scheppach HS210 is equipped with overload protection to prevent damage to the motor. If the motor becomes overloaded, the protection system will activate and temporarily shut down the saw. Allow the motor to cool down before resuming operation and reduce the load on the blade.
4.7 Dust Extraction
An integrated connection for dust extraction is provided. Connect a suitable dust extractor to minimize sawdust accumulation and maintain a cleaner, safer work environment.
4.8 Push Stick Usage
Always use the provided push stick when making narrow cuts or when your hands would be too close to the saw blade. This ensures maximum safety and control over the workpiece.
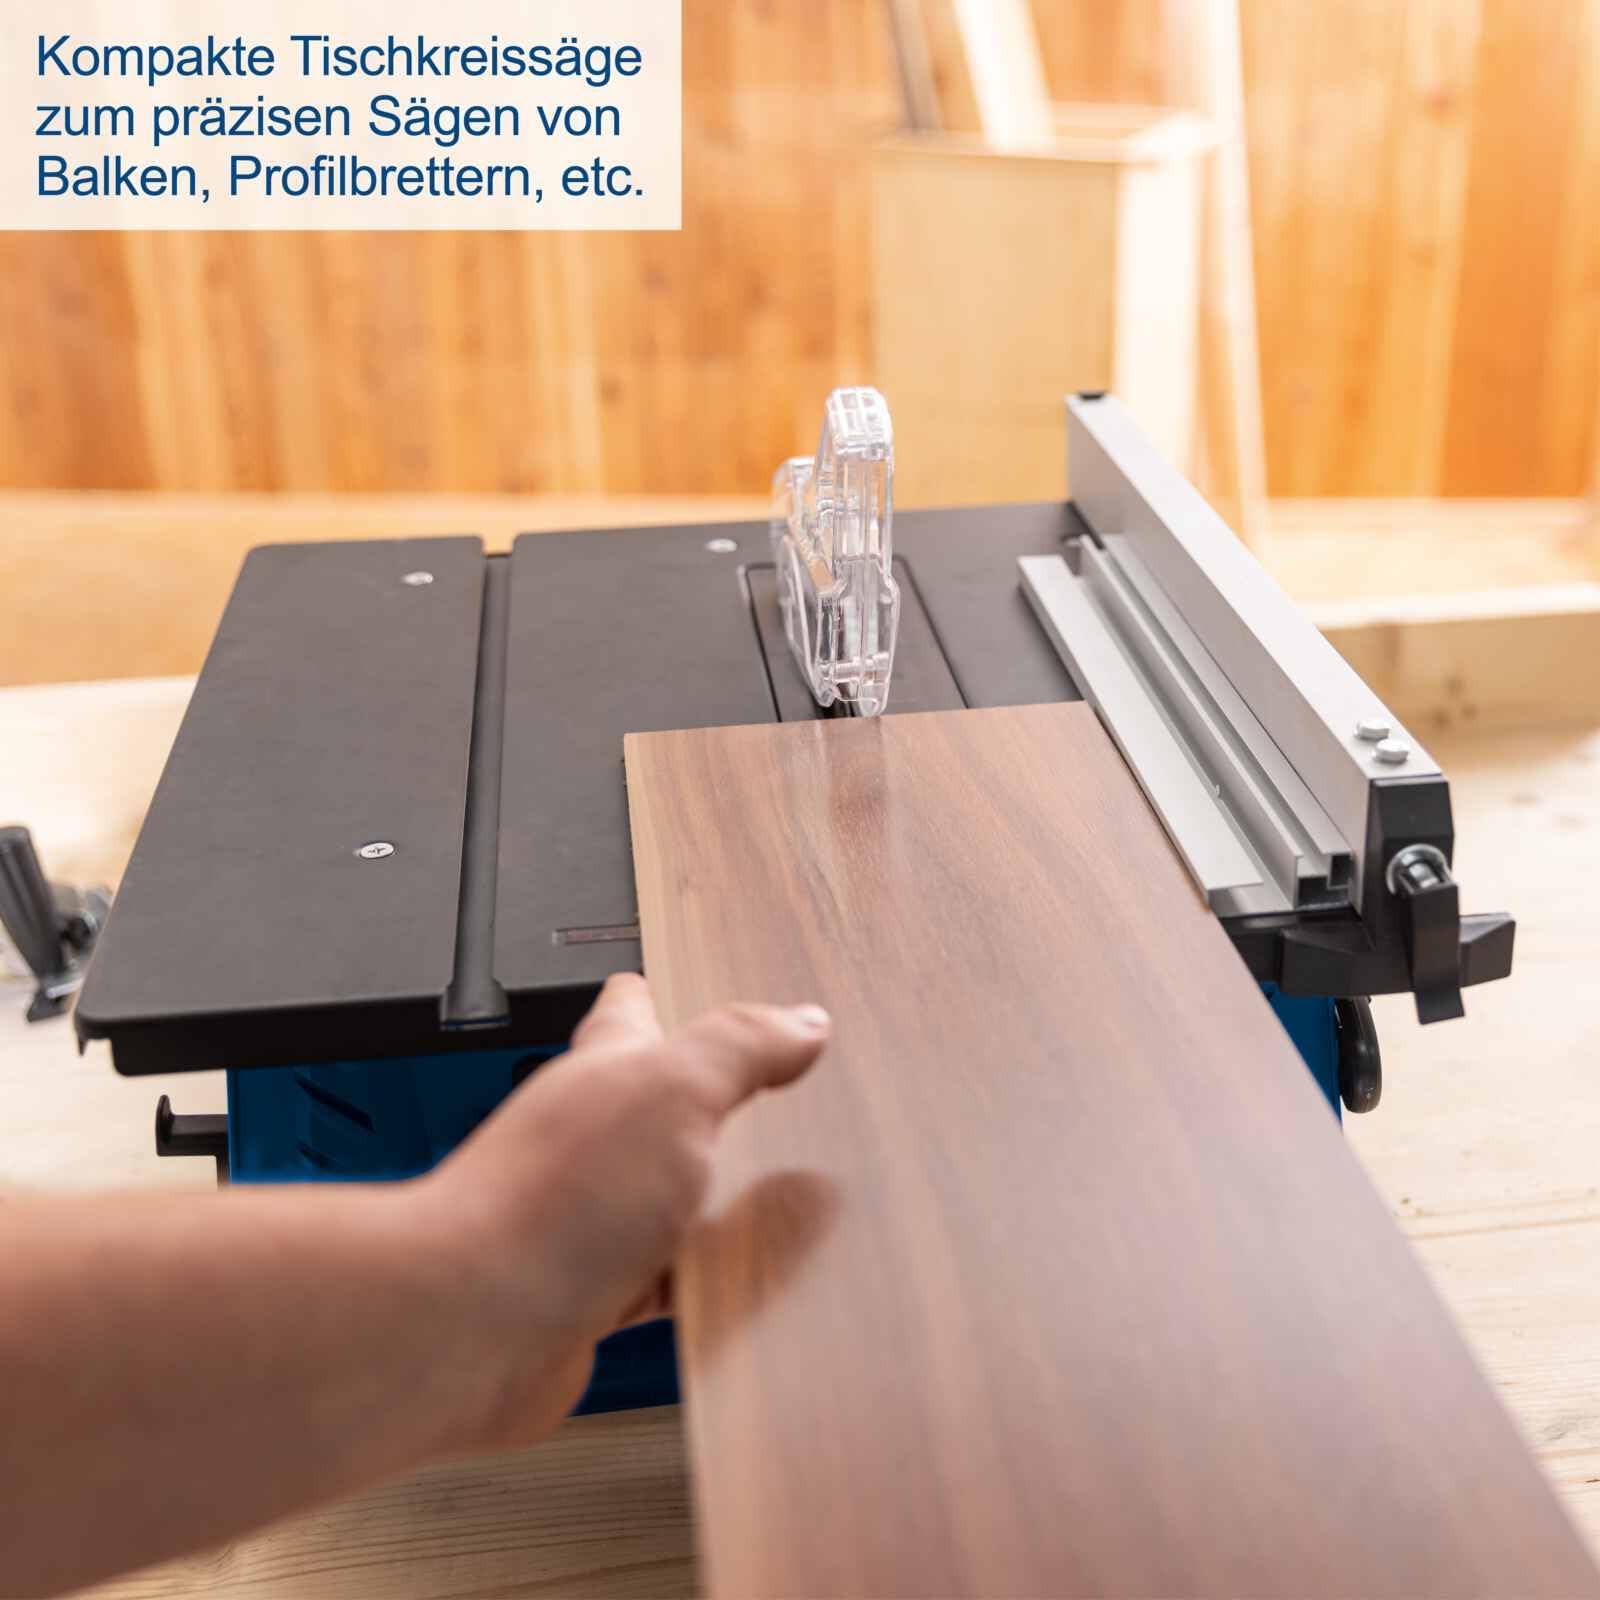
Figure 4.5: The compact table saw in operation, demonstrating its use for precise sawing of various wood materials.
5. Maintenance
5.1 Cleaning
Regularly clean the saw table, blade guard, and dust extraction port to prevent sawdust buildup. Use a brush or vacuum cleaner. Ensure the tool is disconnected from the power supply before cleaning.
5.2 Blade Replacement and Care
Periodically inspect the saw blade for sharpness and damage. A dull or damaged blade can lead to kickback and poor cut quality. Replace the blade as needed, ensuring the replacement blade matches the specifications (210 mm diameter, 30 mm bore, 2.6 mm kerf) and is suitable for the material being cut. Always disconnect power before changing the blade.
5.3 General Inspection
Before each use, check all screws and fasteners for tightness. Inspect the power cord for any damage. Ensure all moving parts operate smoothly and without excessive play.
6. Troubleshooting
This section provides solutions for common issues you might encounter with your Scheppach HS210 Table Saw.
- Saw does not start: Check power connection, ensure the switch is in the 'ON' position. If equipped with overload protection, check if it has tripped.
- Motor stops during operation: Overload protection may have activated. Reduce the feed rate or the depth of cut. Allow the motor to cool.
- Poor cut quality (rough edges, burning): The saw blade may be dull or dirty. Replace or clean the blade. Ensure the blade is appropriate for the material. Check the alignment of the rip fence.
- Excessive vibration: Check if the saw blade is securely mounted and not warped. Ensure the saw is placed on a stable surface.
For issues not covered here, please refer to the manufacturer's official support channels.
7. Technical Specifications
| Specification | Value |
|---|---|
| Model | HS210 |
| Power Input | 1500 W |
| Power Source | Corded Electric |
| No-load Speed | 4800 rpm |
| Saw Blade Diameter | 210 mm |
| Saw Blade Bore | 30 mm |
| Max. Cutting Height at 90° | 70 mm |
| Max. Cutting Height at 45° | 54 mm |
| Blade Tilt Range | 0° - 45° |
| Cross-Cut Gauge Angle | -60° to +60° |
| Dimensions (L x W x H) | 46 x 38 x 54.5 cm |
| Weight | 10.5 kg |
| Blade Material | High-speed steel |
| Recommended Surfaces | Wood |
8. Warranty and Support
For information regarding warranty coverage, terms, and conditions, please refer to the warranty card included with your product or visit the official Scheppach website. For technical support, spare parts, or service inquiries, please contact Scheppach customer service directly.


