
Auxbeam H6024
Contents
Auxbeam LED Headlights and Offroad Lights User Manual
Model: H6024
Product Overview
This manual provides detailed instructions for the installation, operation, and maintenance of your Auxbeam 3.5-inch 50W Round LED Offroad Lights and 7-inch LED Headlights (Model H6024). These lights are designed to enhance visibility and safety for various off-road vehicles, ATVs, UTVs, SUVs, and trucks.

Image: Auxbeam 7-inch LED Headlights (top) and 3.5-inch Round LED Offroad Lights (bottom). The 7-inch headlights feature white DRL and amber turn signal rings, while the 3.5-inch lights are compact auxiliary lights.
Key Features
- High Intensity Illumination: Equipped with 5050 LED chips for superior brightness, providing 3000-4300K golden yellow light with 3200lm for the 3.5-inch lights, and 16000lm/pair (high beam) / 8000lm/pair (low beam) for the 7-inch headlights.
- Multiple Lighting Modes (7-inch Headlights): Features High Beam, Low Beam, White DRL (Daytime Running Light), and Amber Turn Signal modes. Includes a unique welcome startup DRL design.
- Robust Durability: DOT Approved, IP67 waterproof rating for reliable performance in various weather conditions. Constructed with premium Aluminum Alloy Housing for efficient heat dissipation and a durable PC lens to prevent yellowing.
- Wide Compatibility: The 7-inch headlights are compatible with specific Jeep Wrangler models (1997-2017 TJ, LJ, JK) and other vehicles requiring 7-inch round headlights. The 3.5-inch auxiliary lights are universal for most off-road vehicles, ATVs, UTVs, SUVs, trucks, motorcycles, and marine applications with a 12-80V operating voltage.

Image: Illustration of the four lighting modes for the 7-inch LED headlights: DRL (white ring), Turn Signal (amber ring), Low Beam (focused light), and High Beam (full illumination). Also shows the custom welcome startup mode.
Specifications
| Attribute | Value |
|---|---|
| Brand | Auxbeam |
| Model Number | H6024 |
| Specific Uses | Head Lights, Auxiliary Lights |
| Vehicle Service Type | Bus, SUV, Trailer, UTV, Off-Road Vehicles, ATVs, Trucks, Motorcycles, Pick-ups, Marine, Boat |
| Special Features | High Beam, Low Beam, DRL, Turn Signal, Waterproof |
| Auto Part Position | Front Center |
| Lens Color | Clear |
| Lens Material | Polycarbonate |
| Waterproof Grade | IP67 |
| Operating Voltage | 12-80V |
Installation Guide
1. Safety Precautions
- Ensure the vehicle's ignition is off and the battery is disconnected before starting installation.
- Wear appropriate safety gear, including gloves and eye protection.
- If unsure about any step, consult a professional automotive technician.
2. Tools Required
- Basic hand tools (wrenches, screwdrivers)
- Wire strippers/crimpers
- Electrical tape or heat shrink tubing
- Multimeter (optional, for testing connections)
3. Installation Steps (7-inch LED Headlights)
- Remove Old Headlights: Carefully remove the grille and existing headlights from your vehicle. Refer to your vehicle's service manual for specific instructions.
- Connect Wiring:
- Connect the H4 or H13 adapter (if applicable) from the new LED headlight to the vehicle's headlight harness.
- Identify the DRL (Daytime Running Light) wire and the Turn Signal wire on the new headlight.
- Connect the DRL wire to an accessory power source that is active when the ignition is on (e.g., fuse box ACC terminal).
- Connect the Turn Signal wire to your vehicle's existing turn signal wiring. Ensure correct polarity.
- Secure all connections with electrical tape or heat shrink tubing.
- Mount New Headlights: Insert the Auxbeam LED headlights into the headlight buckets. Secure them using the original mounting hardware or provided brackets.
- Test Functionality: Reconnect the vehicle battery. Turn on the ignition and test all lighting modes: low beam, high beam, DRL, and turn signals.
- Adjust Beam: If necessary, adjust the headlight beam pattern for optimal visibility and to avoid blinding oncoming traffic.
- Reinstall Components: Reinstall the grille and any other components removed during the process.

Image: Auxbeam 7-inch LED Headlights installed on the front of a Jeep Wrangler, demonstrating their fit and appearance.
4. Installation Steps (3.5-inch Round LED Offroad Lights)
- Choose Mounting Location: Select a suitable mounting location on your vehicle (e.g., bumper, A-pillar, roof rack) that provides clear light projection and does not obstruct other vehicle functions.
- Mount Brackets: Securely attach the provided mounting brackets to the chosen location using appropriate hardware.
- Attach Lights: Mount the 3.5-inch LED offroad lights to the brackets. Adjust the angle as desired.
- Wiring:
- Connect the positive wire (usually red) of the light to a fused 12-80V power source. It is recommended to use a relay and a switch for proper control and circuit protection.
- Connect the negative wire (usually black) to a good chassis ground point.
- If a wiring harness with a switch is provided, follow its specific instructions for connection to the battery and switch.
- Ensure all connections are secure and protected from moisture and abrasion.
- Test Functionality: Reconnect the vehicle battery and test the operation of the offroad lights using the installed switch.

Image: A pair of Auxbeam 3.5-inch Round LED Offroad Lights mounted on the front bumper of an orange vehicle, demonstrating their compact size and placement.
Operating Instructions
7-inch LED Headlights
- Low Beam: Activates when your vehicle's low beam headlights are turned on. Provides a focused beam for general driving.
- High Beam: Activates when your vehicle's high beam headlights are turned on. Provides maximum illumination for off-road or low-light conditions.
- DRL (Daytime Running Light): The white halo ring illuminates automatically when the vehicle's ignition is on, providing enhanced daytime visibility.
- Turn Signal: The amber halo ring flashes when the corresponding turn signal is activated, indicating your turning intention.
- Welcome Startup Mode: Upon vehicle startup, the DRL will perform a unique lighting sequence before settling into its steady state.

Image: A graphic illustrating the high brightness and effective beam patterns of Auxbeam lights compared to others, showing light distribution for low and high beams over distance.
3.5-inch Round LED Offroad Lights
- These auxiliary lights are typically controlled by an independent switch installed during the wiring process.
- Turn the switch ON to activate the lights for additional illumination during off-road driving, adverse weather, or when extra light is needed.
- Turn the switch OFF when the lights are not required to conserve power and comply with local regulations.

Image: A collage showing various vehicles (Jeep, ATV, UTV) utilizing Auxbeam LED lights in different scenarios, highlighting their wide application.
Maintenance
- Cleaning: Clean the lens of the lights regularly with a soft cloth and mild soap and water. Avoid abrasive cleaners or harsh chemicals that could damage the polycarbonate lens.
- Inspection: Periodically inspect the wiring and connections for any signs of wear, corrosion, or damage. Ensure all mounting hardware remains tight.
- Heat Dissipation: The lights are designed with efficient heat dissipation features. Ensure that the cooling fins on the back of the lights are not obstructed by dirt or debris to maintain optimal performance and lifespan.
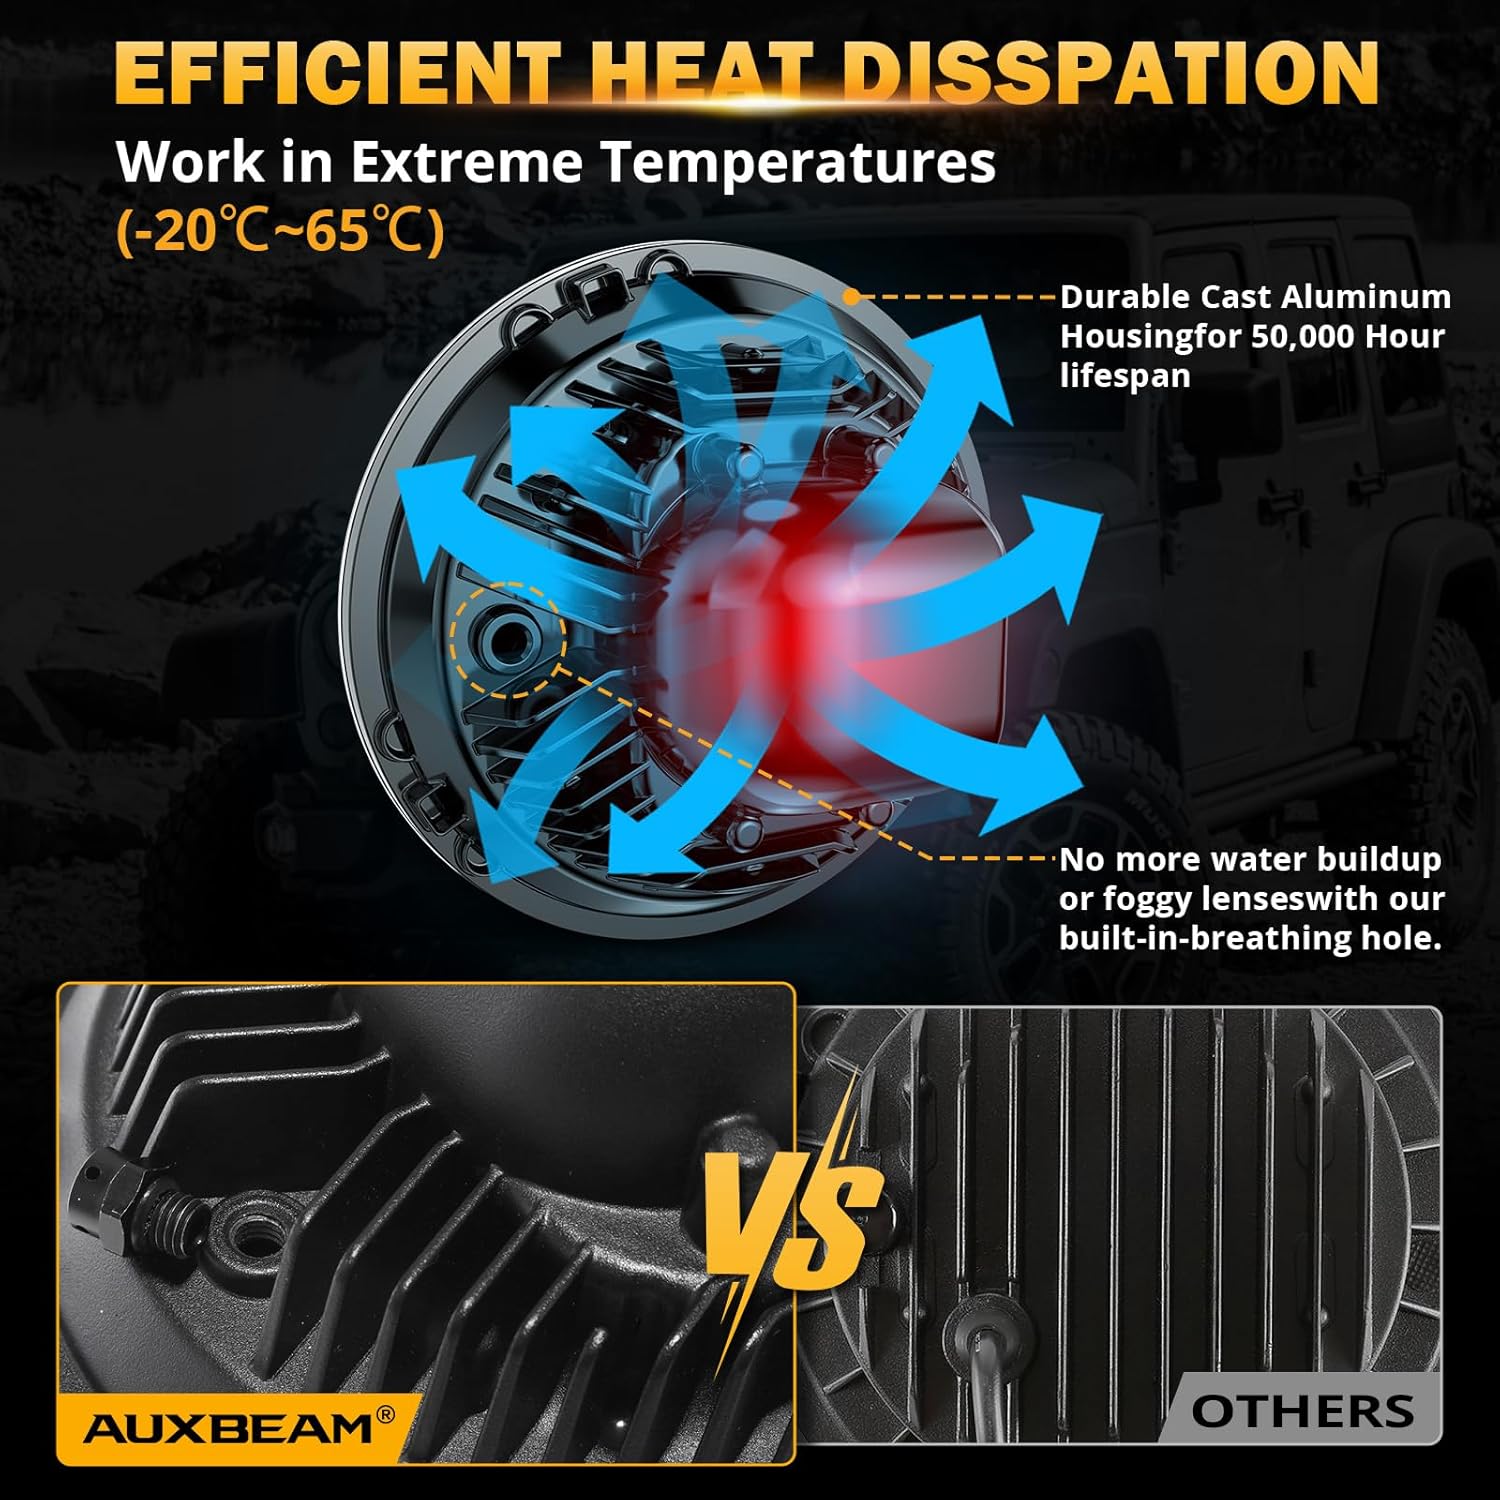
Image: A diagram illustrating the efficient heat dissipation design of Auxbeam lights, showing airflow through the durable cast aluminum housing and the built-in breathing hole to prevent moisture buildup.

Image: A visual representation of the IP67 waterproof rating, showing water splashing over the light, indicating its resistance to water ingress.
Troubleshooting
| Problem | Possible Cause | Solution |
|---|---|---|
| Lights do not turn on. |
|
|
| Lights flicker or are dim. |
|
|
| Moisture inside the lens. |
|
|
Warranty and Support
Auxbeam provides a 2-Year warranty for this product, ensuring reliability and customer satisfaction. If you encounter any issues or require technical assistance, please contact Auxbeam customer support.
For support, visit the official Auxbeam website or refer to your purchase documentation for contact information.
Ask a question about this manual
Ask about setup, troubleshooting, compatibility, parts, safety, or missing instructions. Manuals+ will review the question and use this page’s manual context to help answer it.