1. Introduction
This manual provides essential information for the setup, operation, and maintenance of your AYWHP Nano V3.0 ATmega328P Microcontroller Board. This board is designed to be compatible with Arduino Nano, featuring an ATmega328P microcontroller and a CH340G USB-to-serial chip, with a Micro USB port for connectivity. It is suitable for a wide range of embedded projects and educational purposes.

Image 1.1: The AYWHP Nano V3.0 board, including the Micro USB cable and detachable header pins.
2. Setup
2.1 Component Overview
The Nano V3.0 board includes:
- ATmega328P Microcontroller
- CH340G USB-to-Serial Converter Chip
- Micro USB Port
- 14 Digital I/O Pins (6 with PWM capability)
- 8 Analog Input Pins
- 16 MHz Crystal Oscillator
- Reset Button

Image 2.1: Pinout diagram illustrating the various pins and components of the Nano V3.0 board.
2.2 Driver Installation
For initial use, especially on Windows operating systems, you may need to install the CH340G USB-to-serial driver. This driver enables your computer to recognize the Nano board when connected via the Micro USB cable. Drivers are typically available from the manufacturer's website or common microcontroller community resources.
2.3 Connecting the Board
- Solder Header Pins: The included header pins are typically not pre-soldered. For breadboard use or connecting wires, solder the provided header pins to the board's pin holes. Ensure proper alignment and secure connections.
- Connect USB Cable: Plug the Micro USB cable into the board's Micro USB port and connect the other end to your computer. The board should power on, indicated by the power LED.
- Power Supply Options: The Nano board can be powered via:
- Micro USB connection (5V).
- Unregulated external power supply (7-12V recommended, 6-20V limit) connected to the VIN pin.
- Regulated 5V external power supply connected to the 5V pin.
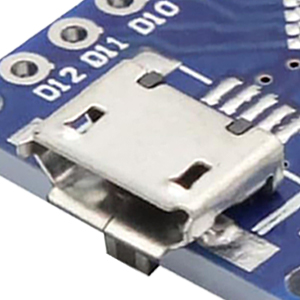
Image 2.2: Close-up of the Micro USB port, used for power and data communication.
3. Operating Instructions
3.1 Programming Environment
The AYWHP Nano V3.0 board is compatible with the Arduino IDE (Integrated Development Environment). Download and install the latest version of the Arduino IDE from the official Arduino website.
3.2 Uploading Code
- Select Board: In the Arduino IDE, go to Tools > Board and select "Arduino Nano".
- Select Processor: Go to Tools > Processor and select "ATmega328P (Old Bootloader)" or "ATmega328P" depending on your board's bootloader version. If you encounter upload errors, try the other option.
- Select Port: Go to Tools > Port and select the serial port corresponding to your connected Nano board. This port will appear after successful CH340G driver installation.
- Write/Open Sketch: Write your program (sketch) or open an example sketch.
- Upload: Click the "Upload" button (right arrow icon) to compile and upload your sketch to the board. The TX and RX LEDs on the board will blink during the upload process.
3.3 Digital and Analog I/O
The board provides 14 digital I/O pins (D0-D13) and 8 analog input pins (A0-A7). Six of the digital pins (D3, D5, D6, D9, D10, D11) can be used for Pulse Width Modulation (PWM) output. Refer to the pinout diagram for specific pin functions.

Image 3.1: Various project examples demonstrating the application of the Nano V3.0 board on breadboards.
4. Maintenance
- Handle with Care: Microcontroller boards are sensitive electronic components. Avoid dropping the board or subjecting it to excessive force.
- Static Discharge: Always handle the board in a static-safe environment to prevent damage from electrostatic discharge.
- USB Port Care: The Micro USB port is a delicate component. Insert and remove the USB cable gently to prevent damage to the port or the board.
- Storage: Store the board in an anti-static bag or a protective container when not in use to prevent dust accumulation and physical damage.
- Cleaning: If necessary, gently clean the board with a soft, dry brush or compressed air to remove dust. Avoid using liquids or harsh chemicals.
5. Troubleshooting
5.1 Board Not Recognized by Computer
- CH340G Driver: Ensure the CH340G driver is correctly installed on your operating system. Reinstalling the driver or trying a different USB port can sometimes resolve this.
- USB Cable: Test with a different Micro USB cable. Faulty cables are a common cause of connectivity issues.
- USB Port Damage: Inspect the Micro USB port on the board for any physical damage.
5.2 Upload Errors (e.g., "avrdude: stk500_getsync(): not in sync")
- Incorrect Board/Processor Selection: Verify that "Arduino Nano" is selected under Tools > Board and the correct processor (e.g., "ATmega328P (Old Bootloader)") is selected under Tools > Processor.
- Incorrect Port: Ensure the correct serial port is selected under Tools > Port.
- Missing Bootloader: Some clone boards may ship without a pre-installed bootloader. If this is the case, you will need an external programmer (e.g., USBasp) to burn the bootloader onto the ATmega328P chip before you can upload sketches via USB.
5.3 Bent Pins
If the header pins are bent upon arrival or during handling, carefully straighten them using small pliers or tweezers. Exercise caution to avoid breaking the pins or damaging the board's solder pads.
6. Specifications
| Feature | Specification |
|---|---|
| Microcontroller | ATmega328P |
| USB to Serial Chip | CH340G |
| Operating Voltage | 5V |
| Input Voltage (recommended) | 7-12V |
| Input Voltage (limit) | 6-20V |
| Digital I/O Pins | 14 (6 provide PWM output) |
| Analog Input Pins | 8 |
| DC Current per I/O Pin | 40 mA |
| Flash Memory | 32 KB (ATmega328P), 2 KB used by bootloader |
| SRAM | 2 KB (ATmega328) |
| EEPROM | 1 KB (ATmega328) |
| Clock Speed | 16 MHz |
| USB Connector | Micro USB |
| Dimensions | 43 mm x 18 mm (approx. 1.7 in x 0.72 in) |
| Weight | Approximately 7g (0.25 oz) |
| Operating System Compatibility | Windows, Mac, Linux |

Image 6.1: Physical dimensions of the Nano V3.0 board and its components.
7. Warranty Information
Specific warranty details for the AYWHP Nano V3.0 ATmega328P Microcontroller Board are not provided in the product information. Please refer to the retailer or manufacturer's website for any applicable warranty policies.
8. Support
For further assistance, technical support, or inquiries regarding the AYWHP Nano V3.0 board, please contact the manufacturer directly through their official channels or refer to online communities and forums dedicated to Arduino-compatible microcontrollers.


