1. Product Overview
The Tsukikage Engine Guard is designed to provide robust protection for your Honda Monkey 125, specifically models manufactured between 2019 and 2023. Its classic tubular structure not only adds a stylish element to your motorcycle but also serves as a critical safety feature. In the event of a fall or slide, the guard makes initial contact with the ground, absorbing impact and minimizing damage to the engine, body panels, and fuel tank. It also creates a protective space for the rider's legs, reducing the risk of injury from hot engine components or direct impact.

Figure 1.1: Tsukikage Engine Guard components, including the left and right protective bars and the connecting rod.
2. Product Components
The package includes the following items:
- One (1) Left Protective Bar
- One (1) Right Protective Bar
- One (1) Connecting Rod with Fasteners
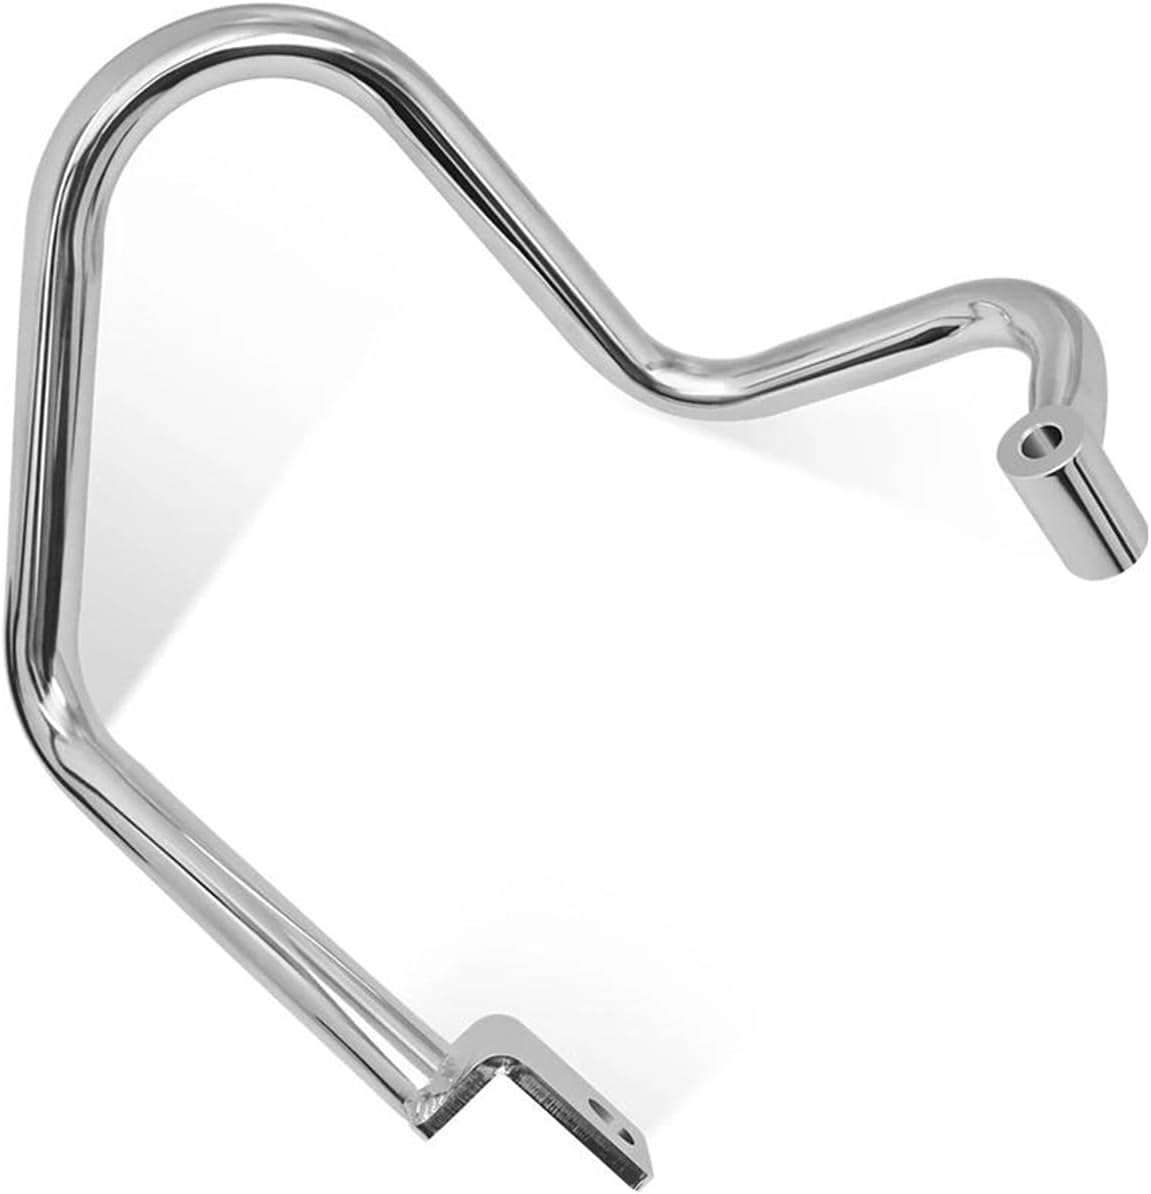

Figure 2.1: Individual left and right protective bars.
3. Compatibility
This engine guard is specifically designed for the following motorcycle models:
- Honda Monkey 125 (2019 Model Year)
- Honda Monkey 125 (2020 Model Year)
- Honda Monkey 125 (2021 Model Year)
- Honda Monkey 125 (2022 Model Year)
- Honda Monkey 125 (2023 Model Year)
Important: Please verify your motorcycle's model and year before attempting installation to ensure proper fitment and safety.
4. Installation Guide
While the installation process is generally straightforward, professional installation is highly recommended to ensure correct and secure mounting. Incorrect installation can compromise the effectiveness of the engine guard and potentially damage your motorcycle.
4.1. Required Tools (Not Included)
- Wrench set (metric)
- Torque wrench
- Thread locker (medium strength, optional but recommended)
4.2. Installation Steps
- Park your motorcycle on a level, stable surface and ensure the engine is cool.
- Identify the mounting points on your Honda Monkey 125's frame. These are typically near the engine and lower frame rails.
- Carefully position the left protective bar against the corresponding mounting points on the left side of the motorcycle.
- Insert the appropriate fasteners (bolts) through the bar's mounting holes and into the frame. Hand-tighten only.
- Repeat the process for the right protective bar on the right side of the motorcycle.
- Connect the left and right bars using the provided connecting rod and fasteners. Ensure all components align correctly.
- Once all components are in place and aligned, progressively tighten all fasteners using a wrench. Refer to your motorcycle's service manual for specific torque specifications for frame bolts, or consult a professional.
- Apply thread locker to the bolt threads before final tightening for added security, if desired.
- Double-check all fasteners to ensure they are securely tightened.

Figure 4.1: Front view of the engine guard installed on a Honda Monkey 125.


Figure 4.2: Side views of the engine guard installed on a Honda Monkey 125.
5. Operating Considerations
The engine guard operates passively by providing a protective barrier. No active operation is required after installation. However, it is important to be aware of its presence and function:
- Enhanced Protection: The guard is designed to absorb impact and protect critical engine components and bodywork during a fall or slide.
- Rider Safety: It helps create a safe zone for the rider's legs, preventing direct contact with hot engine parts or the ground during an incident.
- Aesthetic Enhancement: The classic design also contributes to the overall appearance of your motorcycle.
6. Maintenance
To ensure the longevity and continued effectiveness of your Tsukikage Engine Guard, follow these simple maintenance guidelines:
- Regular Cleaning: Clean the engine guard regularly with a mild soap and water solution. Avoid abrasive cleaners or harsh chemicals that could damage the finish.
- Inspect for Damage: Periodically inspect the bars for any signs of damage, such as bends, cracks, or deep scratches, especially after any minor incidents or impacts.
- Check Fasteners: Regularly check all mounting bolts and fasteners to ensure they remain tight. Vibrations from riding can sometimes loosen bolts over time. Re-tighten to specifications if necessary.
- Corrosion Prevention: If the guard is chrome-plated, polish it occasionally with a suitable chrome polish to maintain its luster and prevent corrosion.
7. Troubleshooting
Most issues related to the engine guard are installation-related. If you encounter problems, consider the following:
- Loose Guard: If the engine guard feels loose or rattles, re-check all mounting bolts. Ensure they are tightened to the correct torque specifications. Consider using thread locker during re-installation.
- Improper Fit: If the guard does not seem to fit correctly, double-check that you have the correct model year for your Honda Monkey 125. Refer to Section 3: Compatibility. Do not force the installation.
- Scratches/Dents: Minor cosmetic damage is expected if the guard fulfills its purpose during a fall. For significant structural damage, the guard should be replaced to ensure continued protection.
If you are unable to resolve an issue or have concerns about the product's integrity, please contact customer support.
8. Specifications
| Feature | Detail |
|---|---|
| Product Name | Tsukikage Engine Guard |
| Compatible Models | Honda Monkey 125 (2019-2023) |
| Material | Aluminum Alloy |
| Color | Black (as per product description, though images show chrome) |
| Function | Fall Protection, Engine & Body Panel Protection, Rider Leg Protection |
| Package Dimensions | 2.54 x 2.54 x 2.54 cm |
| Item Weight | 500 g |
| Manufacturer | Tsukikage |
| ASIN | B0DFGCL5C8 |
9. Warranty and Support
For any questions, concerns, or issues regarding your Tsukikage Engine Guard, please contact our customer support team. We are committed to providing assistance and resolving any problems you may encounter.
- Customer Service: We aim to respond to all inquiries within 24 hours.
- Satisfaction Guarantee: If you are not satisfied with the product received, please reach out to us to find a suitable solution.
Please refer to your purchase documentation or the seller's information on the platform where you purchased the product for specific warranty details and contact methods.


