1. Introduction
This manual provides essential information for the safe and efficient operation of your Kenmore 22-96853 5.6 cu. ft. Front-Control Induction Electric Range. Please read all instructions carefully before using the appliance to ensure proper installation, usage, and maintenance. Retain this manual for future reference.
The Kenmore 22-96853 range combines an induction cooktop with a versatile electric oven, featuring True Convection, Air Fry, and a self-cleaning function. Its design focuses on precise cooking control and ease of use for a modern kitchen.
2. Safety Information
WARNING: To reduce the risk of fire, electric shock, injury to persons, or damage when using the appliance, follow basic precautions, including the following:
- Electrical Safety: Ensure the range is properly installed and grounded by a qualified technician. Do not use extension cords. Disconnect power before servicing.
- Burn Hazard: Surfaces can remain hot after use. Do not touch hot surfaces until they have cooled. Use pot holders.
- Child Safety: Do not allow children to play with the range. Supervise children when they are near the appliance. Activate control lock if available.
- Proper Use: Use the range only for its intended purpose. Do not use it for heating a room. Never wear loose-fitting or hanging garments while using the appliance.
- Flammable Materials: Keep flammable materials away from the range. Do not store flammable liquids or aerosols near the appliance.
- Induction Cookware: Only use cookware compatible with induction heating.
3. Setup and Installation
3.1 Unpacking
Carefully remove all packaging materials, tape, and protective film from the range. Ensure all accessories are present.
3.2 Location Requirements
This is a freestanding electric range. Ensure adequate clearance around the appliance as specified in the installation guide (provided separately). The range requires a dedicated electrical circuit.
3.3 Leveling the Range
The range must be level for optimal cooking performance. Adjust the leveling legs at the bottom of the range as needed.
3.4 Electrical Connection
This appliance operates on electric power. Installation must be performed by a qualified electrician in accordance with all local codes and ordinances. Do not attempt to connect the range to power yourself unless you are a qualified professional.

Figure 3.4.1: Front view of the Kenmore 22-96853 electric induction range, showing the cooktop, control panel, oven door, and storage drawer.
4. Operating Instructions
4.1 Control Panel Overview
The range features front-mounted precision set controls, including knobs for the cooktop elements and a digital display with touch controls for oven functions. The display shows time, temperature, and selected cooking modes.

Figure 4.1.1: Detailed view of the digital control panel with various oven function buttons and the time display.
4.2 Induction Cooktop Operation
The induction cooktop uses electromagnetic fields to heat cookware directly, offering rapid and responsive temperature changes. It features four induction elements with dual-ring capabilities to accommodate various pot and pan sizes.
4.2.1 Compatible Cookware
Only use cookware with a magnetic base (e.g., cast iron, magnetic stainless steel). Non-magnetic materials like aluminum, copper, or glass will not heat on an induction cooktop. A simple magnet test can determine compatibility.
4.2.2 Using the Elements
Place compatible cookware on the desired element. Turn the corresponding control knob to the desired heat setting. The dual-ring elements automatically adjust to the size of your cookware for efficient heating.

Figure 4.2.2.1: A pot of water rapidly boiling on an induction cooktop element, demonstrating the efficiency of induction heating.

Figure 4.2.2.2: Overhead view of the black glass induction cooktop surface, showing the four element zones marked with crosshairs.
4.2.3 Induction Cooktop Characteristics
- Cycling at Lower Settings: At lower heat settings, induction elements may cycle on and off to maintain a consistent low temperature. This is normal and not a malfunction.
- Noise: A slight humming or clicking sound may be heard during operation, especially at higher settings or with certain types of cookware. This is normal for induction technology.
- Cookware Handles: Some metal cookware handles may vibrate slightly during use. This is a normal interaction with the electromagnetic field.
4.3 Oven Functions
The 5.6 cu. ft. oven offers multiple cooking modes for diverse culinary needs.
4.3.1 Bake
For traditional baking. Select 'Bake' and set the desired temperature using the control panel.
4.3.2 Broil
For direct heat cooking, ideal for browning or searing. Select 'Broil' and choose the desired broil level (e.g., High, Low).
4.3.3 True Convection & Convection Conversion
True Convection uses a fan and a third heating element to circulate hot air evenly throughout the oven, resulting in faster and more consistent cooking. Convection Conversion automatically adjusts standard recipe temperatures for convection cooking.

Figure 4.3.3.1: Detailed view of the convection fan located at the back of the oven cavity, responsible for circulating hot air.
4.3.4 Air Fry
Utilizes the convection system to circulate superheated air, providing crispy results with minimal oil. Use the dedicated air fry basket for best performance.

Figure 4.3.4.1: The oven interior showing the air fry basket positioned on an oven rack, ready for use.

Figure 4.3.4.2: The oven cavity with two racks, one holding an air fry basket with food, illustrating multi-level cooking.
4.3.5 Warm/Proof
Use the 'Warm' setting to keep cooked food at serving temperature. The 'Proof' setting provides a warm environment for rising dough.
4.3.6 Temperature Probe
Insert the temperature probe into the thickest part of the food. Connect the probe to the oven's jack. The oven will cook until the set internal temperature is reached.
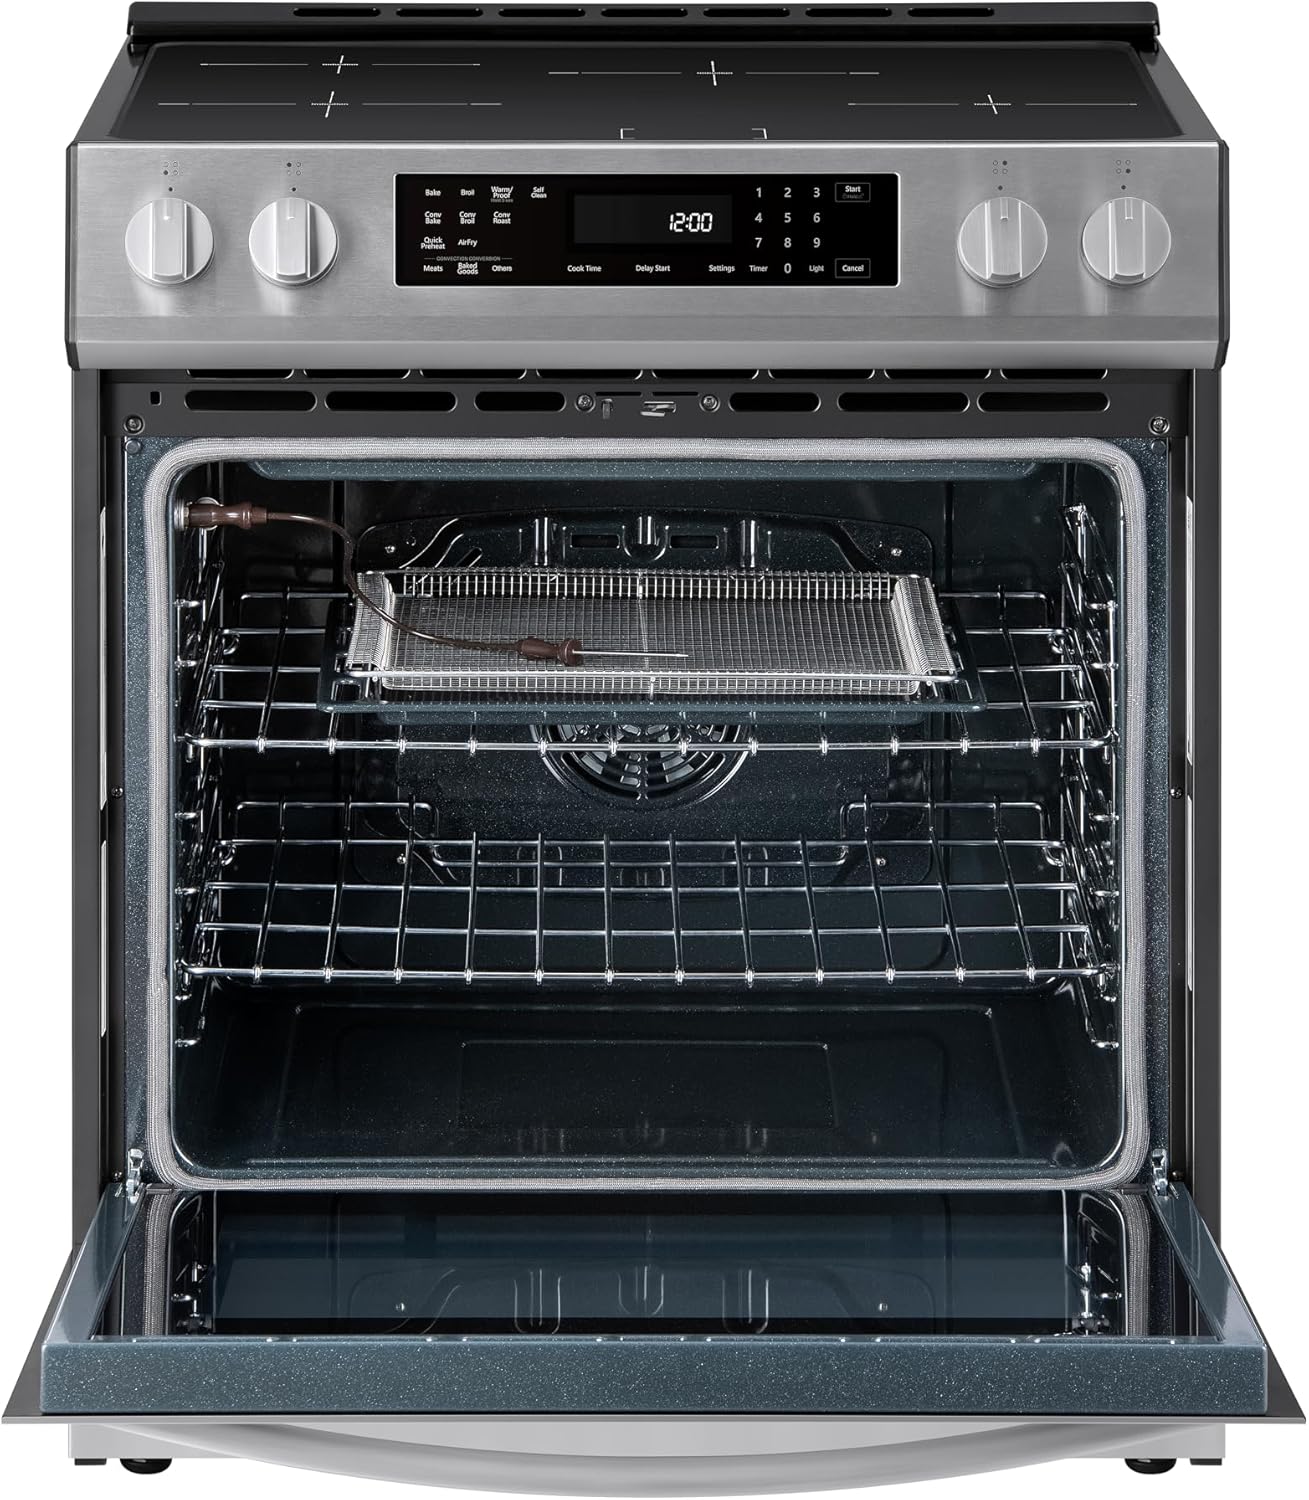
Figure 4.3.6.1: The oven door open, revealing the interior with a temperature probe connected to the oven wall.
4.3.7 Timer Function
To set the timer: Press the 'Timer' button, enter the desired time using the number pad, then press 'Start'. The timer will count down independently of cooking functions.
4.4 Storage Drawer
The bottom drawer provides convenient storage for cookware or accessories.
5. Maintenance and Cleaning
5.1 Self-Clean Oven
The self-clean cycle uses high temperatures to burn off food soils, reducing them to ash that can be wiped away. Follow the instructions on the control panel to initiate a self-clean cycle. Remove all oven racks and accessories before starting.
5.2 Cooktop Cleaning
Allow the cooktop to cool completely before cleaning. Use a ceramic cooktop cleaner and a non-abrasive pad to remove spills and stains. Wipe with a clean, damp cloth and dry thoroughly.
5.3 Oven Interior (Non-Self-Clean Areas)
For areas not reached by the self-clean cycle, use a mild soap and water solution or a specialized oven cleaner. The hidden bake element design simplifies cleaning the oven floor.
5.4 Oven Racks
The ultra-durable chrome racks can be cleaned with warm, soapy water. For stubborn stains, a mild abrasive cleaner may be used, or they can be placed in the self-cleaning oven during a cycle (refer to the full installation guide for specific instructions on rack compatibility with self-clean).

Figure 5.4.1: An angled view of the Kenmore 22-96853 range, highlighting the stainless steel finish, oven window, and cooktop.
6. Troubleshooting
Before contacting service, review the following common issues and solutions:
| Problem | Possible Cause / Solution |
|---|---|
| Induction element not heating | Ensure cookware is induction-compatible (magnetic base). Cookware may be too small or not centered on the element. |
| Cooktop makes humming/clicking noise | This is normal for induction cooktops, especially at higher power settings or with certain types of cookware. |
| Cookware handles vibrate | Normal interaction with the electromagnetic field. Ensure handles are securely attached to cookware. |
| Induction element cycles on/off at low settings | This is normal operation to maintain precise low temperatures. It is not a malfunction. |
| Oven fan runs after turning off | The cooling fan continues to operate after the oven is turned off to cool down internal components. This is normal. |
| Oven not heating properly | Check if the oven door is fully closed. Verify temperature settings. Ensure no error codes are displayed. |
| Control panel unresponsive | Ensure the control lock feature is not activated. Try resetting the appliance by turning off power at the circuit breaker for a few minutes. |
7. Specifications
| Feature | Specification |
|---|---|
| Brand Name | Kenmore |
| Model Info | 2296853 |
| Item Weight | 171 pounds |
| Product Dimensions | 10 x 10 x 10 inches (Note: This may refer to packaging dimensions. Refer to installation guide for actual appliance dimensions.) |
| Item model number | 2296853 |
| Capacity | 5.6 Cubic Feet |
| Installation Type | Freestanding |
| Part Number | 2296853 |
| Form Factor | Freestanding |
| Burner type | Induction |
| Drawer Type | Storage |
| Heating Elements | 4 Induction Elements |
| Color | Stainless Steel |
| Control Console | Knob and Digital Touch |
| Fuel type | Electric |
| Material Type | Stainless Steel |
| Batteries Required? | No |
| Finish Type | Brushed |
| Model Name | 5.6 cu. ft. Front Control Electric Induction Range Oven |
8. Warranty and Support
For warranty information, please refer to the warranty card included with your appliance or visit the official Kenmore website. For technical support or service, contact Kenmore customer service. Have your model number (2296853) and serial number ready when contacting support.