
1. Introduction
This manual provides detailed instructions for the setup, operation, and maintenance of your BenQ RD320UA 32-inch 4K Programming Monitor. Please read this manual thoroughly before using the product to ensure proper functionality and to maximize your user experience. Keep this manual for future reference.

Figure 1.1: Front view of the BenQ RD320UA monitor displaying programming code.
2. Package Contents
Verify that all items listed below are included in your package. If any items are missing or damaged, contact your retailer or BenQ customer support.
- BenQ RD320UA Monitor
- Ergonomic Stand (Base and Arm)
- Power Cable
- HDMI Cable
- DisplayPort Cable (Recommended for full resolution at 60Hz)
- USB-C Cable (for video, data, and power delivery)
- USB-B to USB-A Cable (for USB hub functionality)
- Quick Start Guide
- Warranty Card
3. Setup and Installation
3.1 Physical Assembly
Follow these steps to assemble the monitor stand and attach it to the display panel.
- Carefully remove all components from the packaging.
- Attach the ergonomic arm to the stand base. Ensure it is securely fastened.
- Attach the assembled stand to the back of the monitor panel. Ensure the connection clicks into place or is secured with screws as indicated in the quick start guide.
- Place the monitor on a stable, flat surface.

Figure 3.1: Side view of the BenQ RD320UA monitor with the ergonomic stand.
3.2 Connecting the Monitor
Connect the necessary cables to your monitor and computer.
- Power Connection: Connect the power cable to the monitor's power input and then to a power outlet.
- Video Input:
- USB-C: Connect the USB-C cable from your computer to the monitor's USB-C port for video, data, and 90W power delivery.
- DisplayPort (DP 1.4): Connect a DisplayPort cable from your computer to the monitor's DP port for optimal 4K resolution at 60Hz.
- HDMI (HDMI 2.0): Connect an HDMI cable from your computer to one of the monitor's HDMI ports. Note that HDMI 2.0 may have bandwidth limitations for full 4K resolution at 60Hz.
- USB Hub: To enable the monitor's USB 3.2 Gen2 Type-A downstream ports, connect the USB 3.2 Gen1 Type-B upstream cable from your computer to the monitor.

Figure 3.2: Rear view of the monitor highlighting various input and output ports.
4. Operating the Monitor
4.1 Power On/Off
Press the power button, typically located on the bottom bezel or rear of the monitor, to turn the monitor on or off. The power indicator light will illuminate when the monitor is active.
4.2 On-Screen Display (OSD) Navigation
The OSD menu allows you to adjust various monitor settings. Use the control buttons or joystick, usually located on the bottom bezel, to navigate the menu:
- Press a button to activate the OSD menu.
- Use directional buttons to move through options.
- Press the select button to confirm a selection.
- Use the back/exit button to return to the previous menu or exit the OSD.
4.3 Ergonomic Adjustments
The ergonomic stand allows for flexible positioning to enhance comfort and productivity.
- Height Adjustment: Gently push or pull the monitor vertically to adjust its height.
- Tilt: Tilt the screen forwards or backwards to find your preferred viewing angle.
- Swivel: Rotate the monitor horizontally on its base.
- Pivot: Rotate the screen 90 degrees to switch between landscape and portrait orientation.
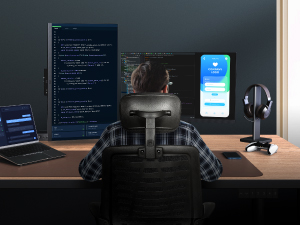
Figure 4.1: Illustration of the monitor's ergonomic adjustment capabilities.

Figure 4.2: Monitor in portrait mode, suitable for coding or document review.
4.4 Key Features
- Nano Matte Panel: This panel features a low reflection surface designed to minimize glare and distractions, providing clear visibility for extended periods.
- Advanced Coding Modes (Dark Theme and Light Theme): Optimized display settings that enhance font clarity and code differentiation, reducing eye strain during programming tasks. These modes can be accessed via the OSD menu.
- Night Hours Protection: This feature adjusts the monitor's brightness to a minimum level, providing enhanced eye protection during low-light conditions or night-time use.
- MoonHalo Backlight: A customizable backlight feature that allows adjustment of color temperature, brightness, and light modes. This helps in creating an optimal viewing environment and reducing eye fatigue.
- 90W USB-C Power Delivery: The USB-C port supports up to 90W power delivery, allowing you to charge compatible laptops and devices directly through the monitor while simultaneously receiving video and data signals.

Figure 4.3: Nano Matte Panel reducing reflections compared to a standard display.

Figure 4.4: Advanced Coding Modes for improved readability.

Figure 4.5: MoonHalo Backlight providing ambient illumination.
5. Maintenance
Proper maintenance ensures the longevity and optimal performance of your monitor.
- Cleaning the Screen: Gently wipe the screen with a soft, lint-free cloth. For stubborn marks, lightly dampen the cloth with water. Avoid using alcohol-based cleaners or harsh chemicals, as these can damage the screen's finish.
- Cleaning the Casing: Use a soft, dry cloth to wipe the monitor casing.
- Cable Management: Utilize the integrated cable management features of the ergonomic stand to keep cables organized and prevent damage.

Figure 5.1: Cable management system on the ergonomic stand.
6. Troubleshooting
If you encounter issues with your monitor, refer to the following common solutions:
| Problem | Possible Cause / Solution |
|---|---|
| No image on screen |
|
| Image is blurry or incorrect resolution |
|
| USB ports not functioning |
|
| Monitor shakes slightly |
|
| Display Pilot 2 software issues |
|
7. Specifications
| Feature | Detail |
|---|---|
| Brand | BenQ |
| Model | RD320UA |
| Screen Size | 32 Inches |
| Resolution | 3840x2160 (4K UHD) |
| Max Screen Resolution | 3840 x 2160 Pixels |
| Aspect Ratio | 16:9 |
| Screen Surface | Nano Matte |
| Contrast Ratio | 2000:1 (Native) |
| Panel Type | IPS |
| Connectivity | HDMI 2.0, DisplayPort 1.4, USB 3.2 Gen2 Type-C (PD90W, DP Alt Mode, Data), USB 3.2 Gen1 Type-B (Upstream), USB 3.2 Gen2 Type-A (Downstream) x2, USB 3.2 Gen2 Type-C (Downstream) |
| Color | Metal Grey |
| Item Weight | 34.2 pounds |
| Product Dimensions (LxWxH) | 28 x 23 x 18 inches |
| Manufacturer | BenQ |
| First Available | August 27, 2024 |
8. Warranty and Support
BenQ products are designed for reliability and performance. For information regarding your product's warranty, please refer to the warranty card included in your package or visit the official BenQ website. For technical support, driver downloads, or further assistance, please visit www.benq.com and navigate to the support section for your specific model.


