1. Introduction
This manual provides detailed instructions for the safe and efficient operation of your Mesqool Emergency Radio 12000mAh. Designed for reliability in various situations, this multi-functional device offers radio reception, multiple power sources, and essential emergency features. Please read this manual thoroughly before use and retain it for future reference.
2. Package Contents
Verify that all items listed below are included in your package:
- Weather Radio
- Charging Cable
- Power Adapter
- Hand Strip, Clip
- Owner's Manual
3. Product Overview
The Mesqool Emergency Radio is a compact and robust device, featuring a digital display, integrated flashlight, and a top-mounted reading lamp. Its camo green finish provides a rugged aesthetic suitable for outdoor and emergency use. The radio is equipped with various controls for tuning, volume, and emergency functions, along with multiple charging ports.

Figure 1: Mesqool Emergency Radio 12000mAh in Camo Green, displaying its digital screen, flashlight, and a smartphone connected for charging.
4. Powering the Device
Your Mesqool Emergency Radio offers five versatile ways to ensure continuous power:
4.1. Internal Rechargeable Battery (12000mAh)
The radio is equipped with a high-capacity 12000mAh Li-ion rechargeable battery, providing extended operation and power bank functionality.
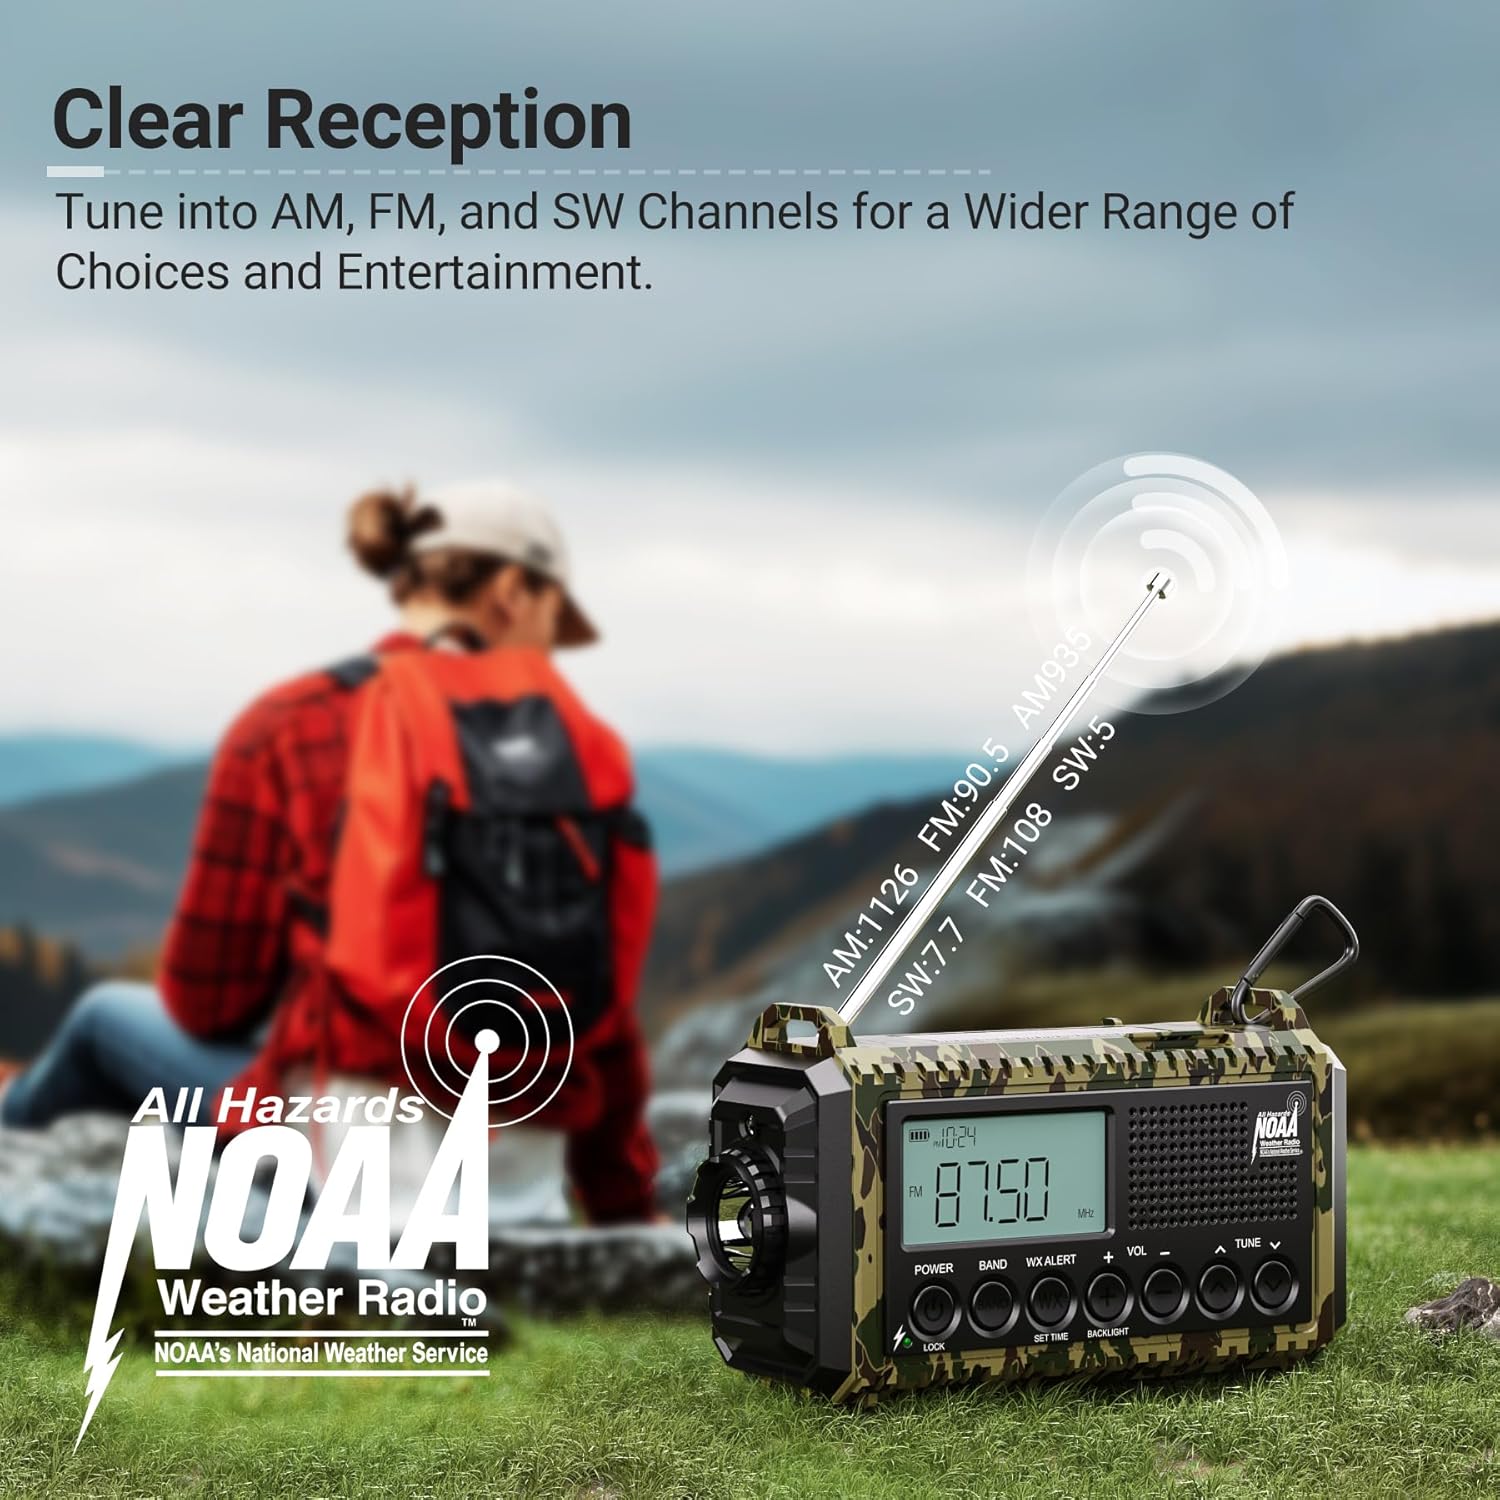
Figure 2: The emergency radio connected to a smartphone via a USB-C cable, demonstrating its capability to act as a power bank for external devices.
4.2. Type-C Charging
Connect the provided Type-C charging cable to the radio's Type-C input port and a compatible power adapter (included) to charge the internal battery.
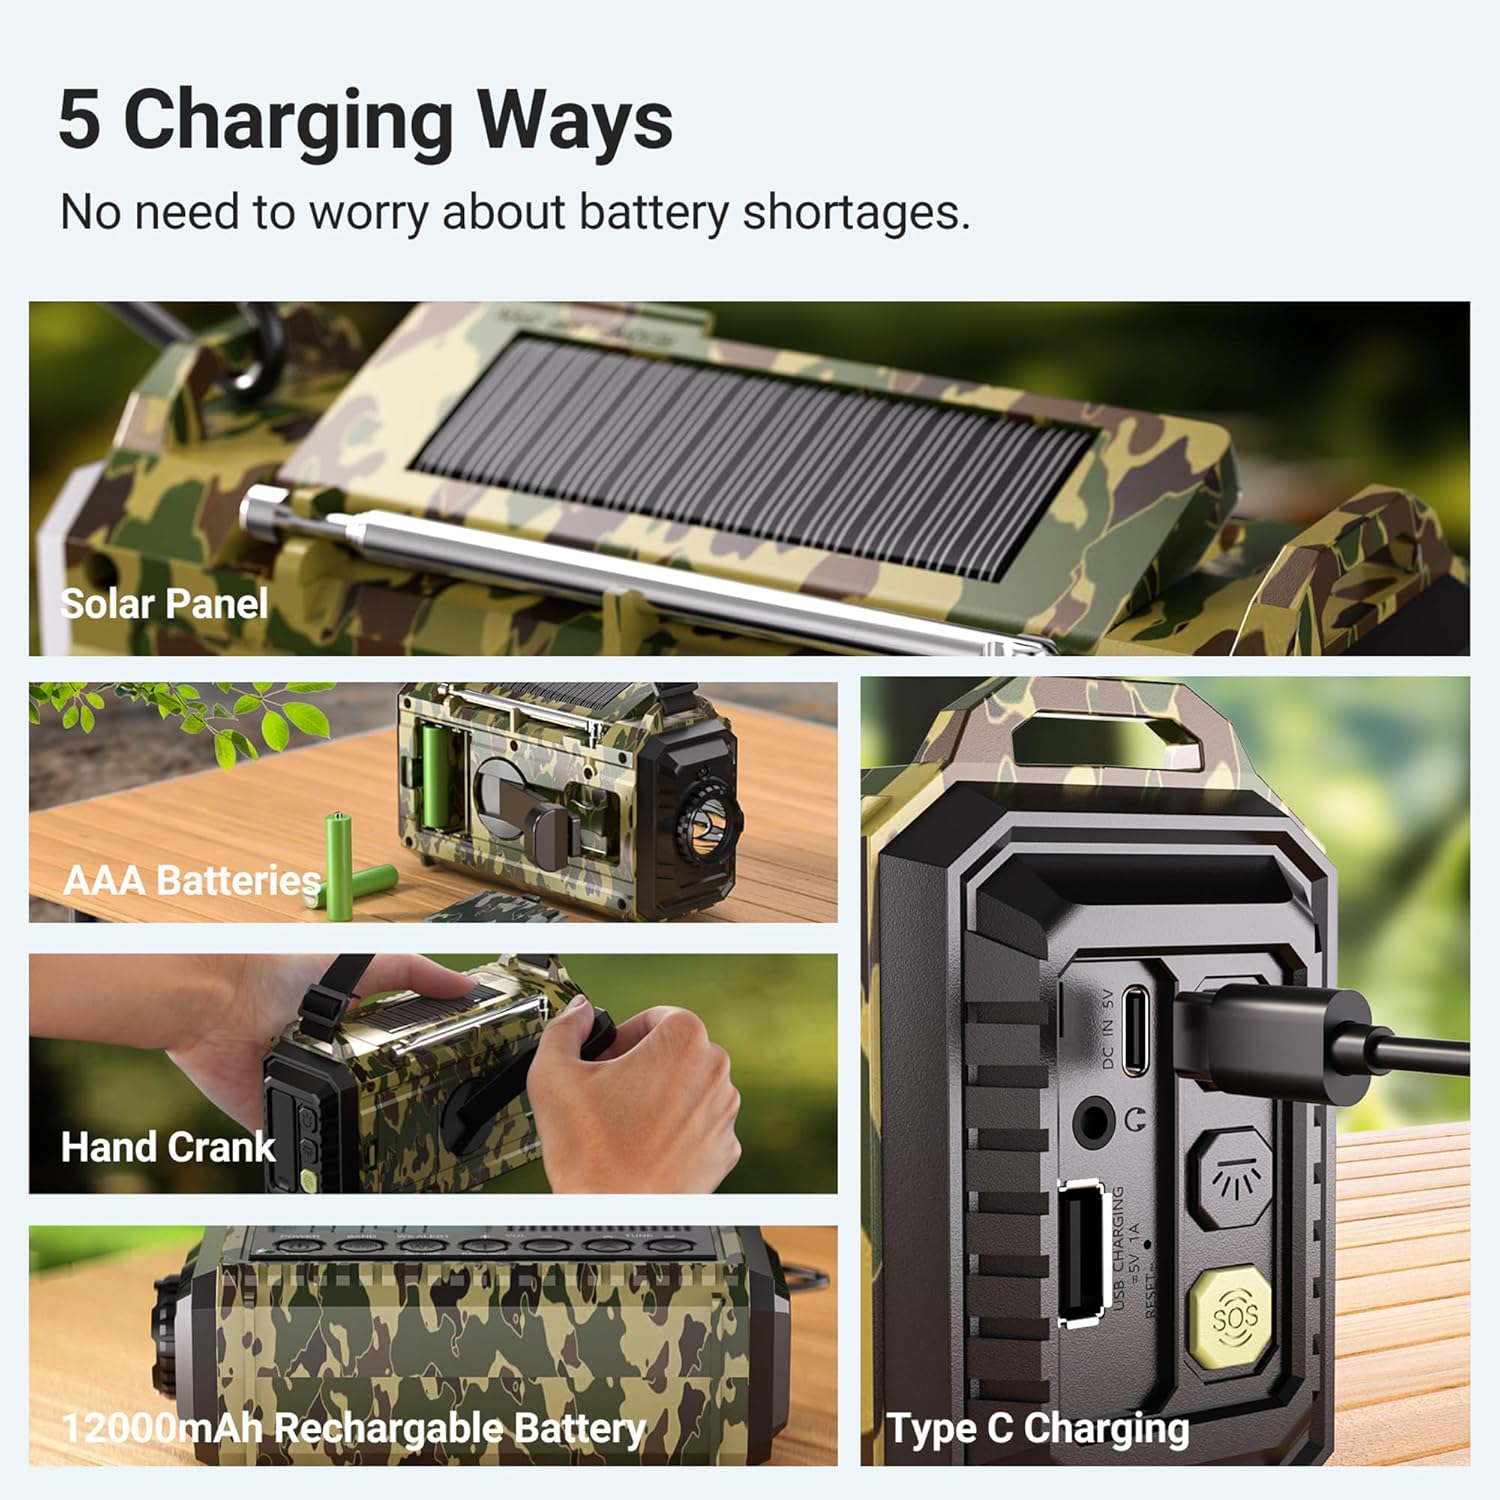
Figure 3: A visual representation detailing the five versatile charging options for the emergency radio, including Type-C input.
4.3. AAA Batteries
For an additional backup power source, the radio can operate using 3 AAA batteries (not included). Open the battery compartment and insert the batteries with correct polarity.

Figure 4: The emergency radio with its AAA battery compartment open, showing where to insert the batteries.
4.4. Hand Crank
In situations without external power or sunlight, manually crank the handle located on the back of the radio to generate power. Continuous cranking will charge the internal battery.

Figure 5: The emergency radio with its hand crank extended and being turned, demonstrating manual power generation.
4.5. Solar Panel
Place the radio in direct sunlight to utilize the integrated solar panel for passive charging. This method is ideal for maintaining battery levels during prolonged outdoor exposure.

Figure 6: The emergency radio with its solar panel exposed to sunlight, indicating solar charging capability.
5. Radio Operation
Your radio supports AM, FM, SW, and NOAA weather bands.
5.1. Band Selection
Use the 'BAND' button to cycle through available radio bands: SW (Shortwave), AM (Amplitude Modulation), FM (Frequency Modulation), and WB (Weather Band - NOAA).
5.2. Tuning
Utilize the 'TUNE' buttons (up/down arrows) to manually search for stations within the selected band. The digital display will show the current frequency.
5.3. NOAA Weather Alert
The radio is equipped with an automatic NOAA weather alert function. When activated, it will emit a loud siren and flash a red light upon receiving critical weather updates from the National Weather Service, even if the radio is off. You can set a countdown for the alert duration (2H, 4H, 6H, 8H, 12H, 16H, 20H, 24H).
Video: This video demonstrates the NOAA weather alert function and battery backup of the Mesqool Emergency Radio. It shows how the radio receives critical weather updates and highlights its 12000mAh battery backup, ensuring power during emergencies.
6. Emergency Features
6.1. LED Flashlight
The radio includes a powerful 3W LED flashlight with two brightness settings (300LM/150LM) for illumination in dark environments. Activate it using the dedicated button.
6.2. Reading Lamp
A 2.5W reading lamp with two brightness settings (250LM/120LM) is integrated into the top handle, providing soft, ambient light for reading or general illumination.
6.3. SOS Alarm
In an emergency, press the SOS button to activate a loud 105dB alarm and flashing red light, designed to attract attention and signal for help.
Figure 7: The emergency radio activated with its 105dB SOS alarm, accompanied by a flashing red light, designed to attract attention during critical situations.
6.4. Cell Phone Charger (Power Bank Function)
Utilize the USB-A output port to charge your mobile devices during power outages or emergencies. The 12000mAh internal battery provides sufficient power for multiple charges.
7. Specifications
| Feature | Specification |
|---|---|
| Product Dimensions | 6.8 x 2.48 x 3.7 inches |
| Item Weight | 1.43 pounds |
| Batteries | 1 Lithium Ion battery required (included) |
| Tuner Technology | NOAA/AM/FM/SW |
| Power Source | Battery Powered | Type-C Input 5V/2A | AAA Batteries | Solar Panel | Hand Crank |
| Special Features | Digital Weather Radio, LED Flashlight & Reading Lamp, Lock Function, Rechargeable Battery 12000mAh, SOS Alarm |
| Connectivity Technology | USB |
8. Troubleshooting
If you encounter any issues with your Mesqool Emergency Radio, please consider the following:
- No Power: Ensure the internal battery is charged, or try using AAA batteries, hand crank, or solar panel. Check the power source selector switch.
- Poor Radio Reception: Extend the telescopic antenna fully. Try repositioning the radio to find a clearer signal.
- Flashlight/Reading Lamp Not Working: Check battery level. Ensure the correct light mode button is pressed.
- Phone Not Charging: Verify the charging cable is securely connected to both the radio's USB-A output and your device. Ensure the radio has sufficient power.
9. Warranty and Support
Mesqool products are designed for quality and reliability. For warranty information, technical support, or any questions regarding your product, please refer to the contact information provided in the original product packaging or visit the official Mesqool website. Keep your purchase receipt for warranty claims.


