
LONTEK P8
LONTEK Treadmill P8 Instruction Manual
Comprehensive guide for setup, operation, and maintenance of your LONTEK Treadmill.
1. Introduction
Thank you for choosing the LONTEK Treadmill, Incline Version (Model P8). This manual provides essential information for the safe and efficient operation, assembly, and maintenance of your new fitness equipment. Please read this manual thoroughly before initial use and keep it for future reference.
Important Safety Information
- Always ensure the safety key is properly attached before starting the treadmill.
- Keep children and pets away from the treadmill during operation.
- Place the treadmill on a flat, stable surface with adequate clearance around it.
- Do not operate the treadmill if it is damaged or not functioning correctly.
- Consult a physician before starting any new exercise program.
2. Setup and Assembly
The LONTEK Treadmill is designed for straightforward assembly. Most components come pre-assembled, requiring minimal steps to get started.
2.1 Unpacking and Placement
Carefully remove all components from the packaging. Place the treadmill on a level surface, ensuring there is at least 6 feet of clear space behind it and 2 feet on each side for safe operation.
2.2 Assembly Steps
Follow the included user's manual for detailed assembly instructions. Typically, assembly involves securing the uprights and console with a few screws (e.g., 4 screws as noted by users). Ensure all bolts are tightened securely before use.
2.3 Folding and Moving
The treadmill features a lightweight and compact design with built-in wheels for easy portability. To fold, loosen the knobs at the base of the uprights and carefully lower the console until it is flat. To move, tilt the folded treadmill and use the integrated wheels. Reverse the process to set up for use.

Image: The console can be flipped 90 degrees for compact storage, and a convenient storage rack is available for personal items.
3. Operating Instructions
Familiarize yourself with the control panel and handrail buttons for optimal workout experience.
3.1 Control Panel Overview

Image: The multi-functional console displays distance, speed, time, calories, and heart rate, with controls for volume, mode, start/stop, programs, and speed adjustment.
- Start/Stop: Initiates or pauses the treadmill belt.
- Speed +/-: Adjusts the running belt speed. Speed can range up to 7.5 MPH.
- Program (PROGAM): Selects from 12 pre-set workout programs.
- Mode: Cycles through display modes (e.g., calories, miles, heart rate).
- Volume +/-: Controls the volume of the integrated Bluetooth speakers.
- Emergency Stop Key: A red safety clip that, when detached, immediately stops the treadmill for safety.
3.2 Smart Handrail Controls
The handrail provides convenient access to key functions:
- Heart Rate Sensor: Place your hands on the sensors to monitor your real-time heart rate.
- Start/Stop Buttons: Conveniently located on the handrail for quick control.
- Speed +/- Buttons: Adjust speed directly from the handrail.
3.3 Manual Incline Adjustment
This treadmill features a 15% manual incline. To adjust the incline, you will need to manually position the incline foot pads at the desired angle (0%, 10%, or 15%) before starting your workout. This allows for flexible adjustment to target different muscle groups and increase calorie burn.
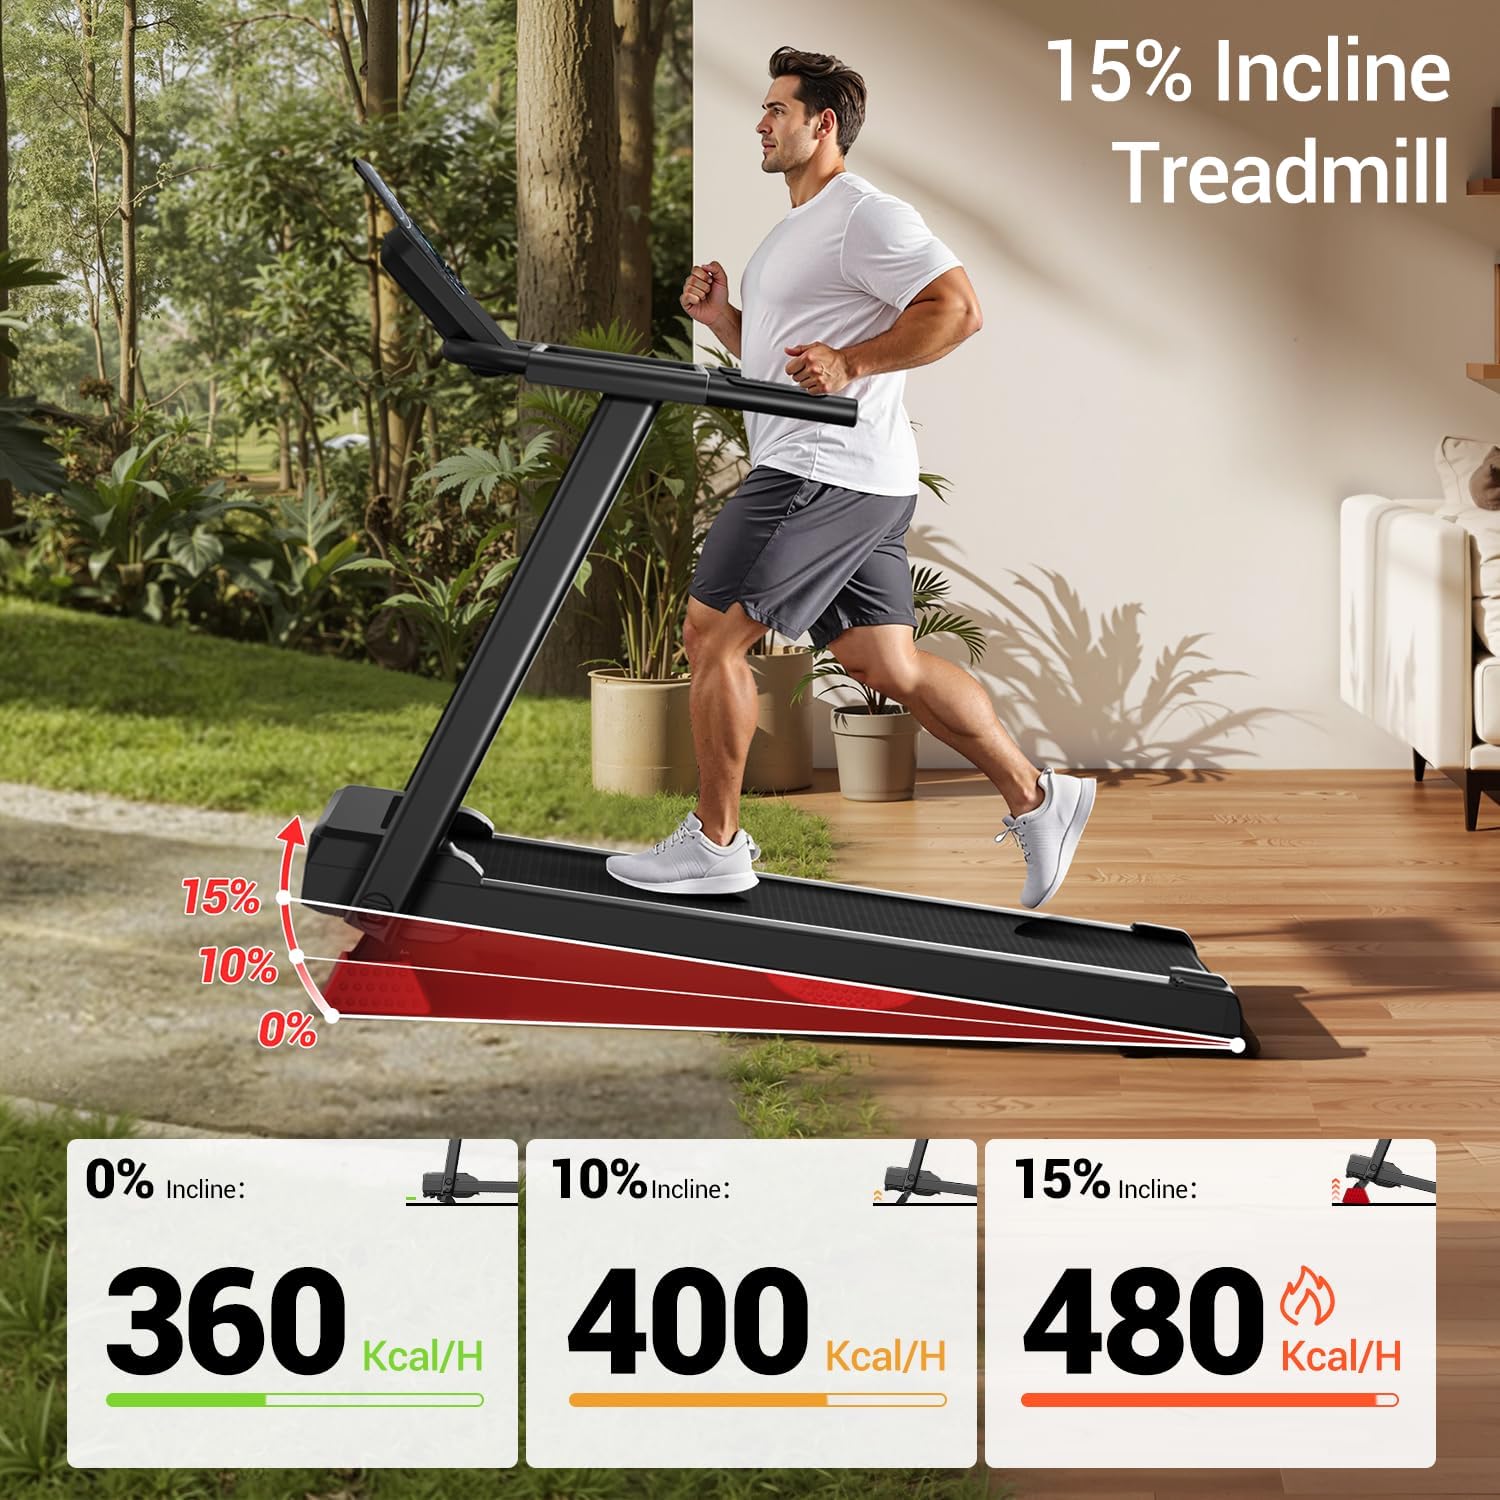
Image: The treadmill offers three manual incline levels (0%, 10%, 15%) to vary workout intensity and calorie expenditure.
4. Key Features
- Silicone Shock Damping System: Equipped with 2 large silicone shock-absorbing blocks on both sides of the deck and 8 built-in shock absorbers to minimize vibration. This enhances running safety, reduces noise, and improves comfort, protecting your joints during exercise.
- Spacious Area & Double-Deck Design: Features a double-deck design for enhanced strength and durability compared to traditional single decks. It offers a large 40.2" x 15.4" running area, accommodating various users.
- 7-Layer Non-Slip Running Belt: A newly designed running belt that provides enhanced grip and safety during workouts.
- 3.0HP Quiet Brushless Motor: Features a 2.5HP brushless motor (as per specifications, feature bullets state 3.0HP, I will use 2.5HP from specs for consistency) with a lifespan of 3500 hours, lower noise (<45 dB), lower maintenance, and lower power consumption compared to brushed motors.
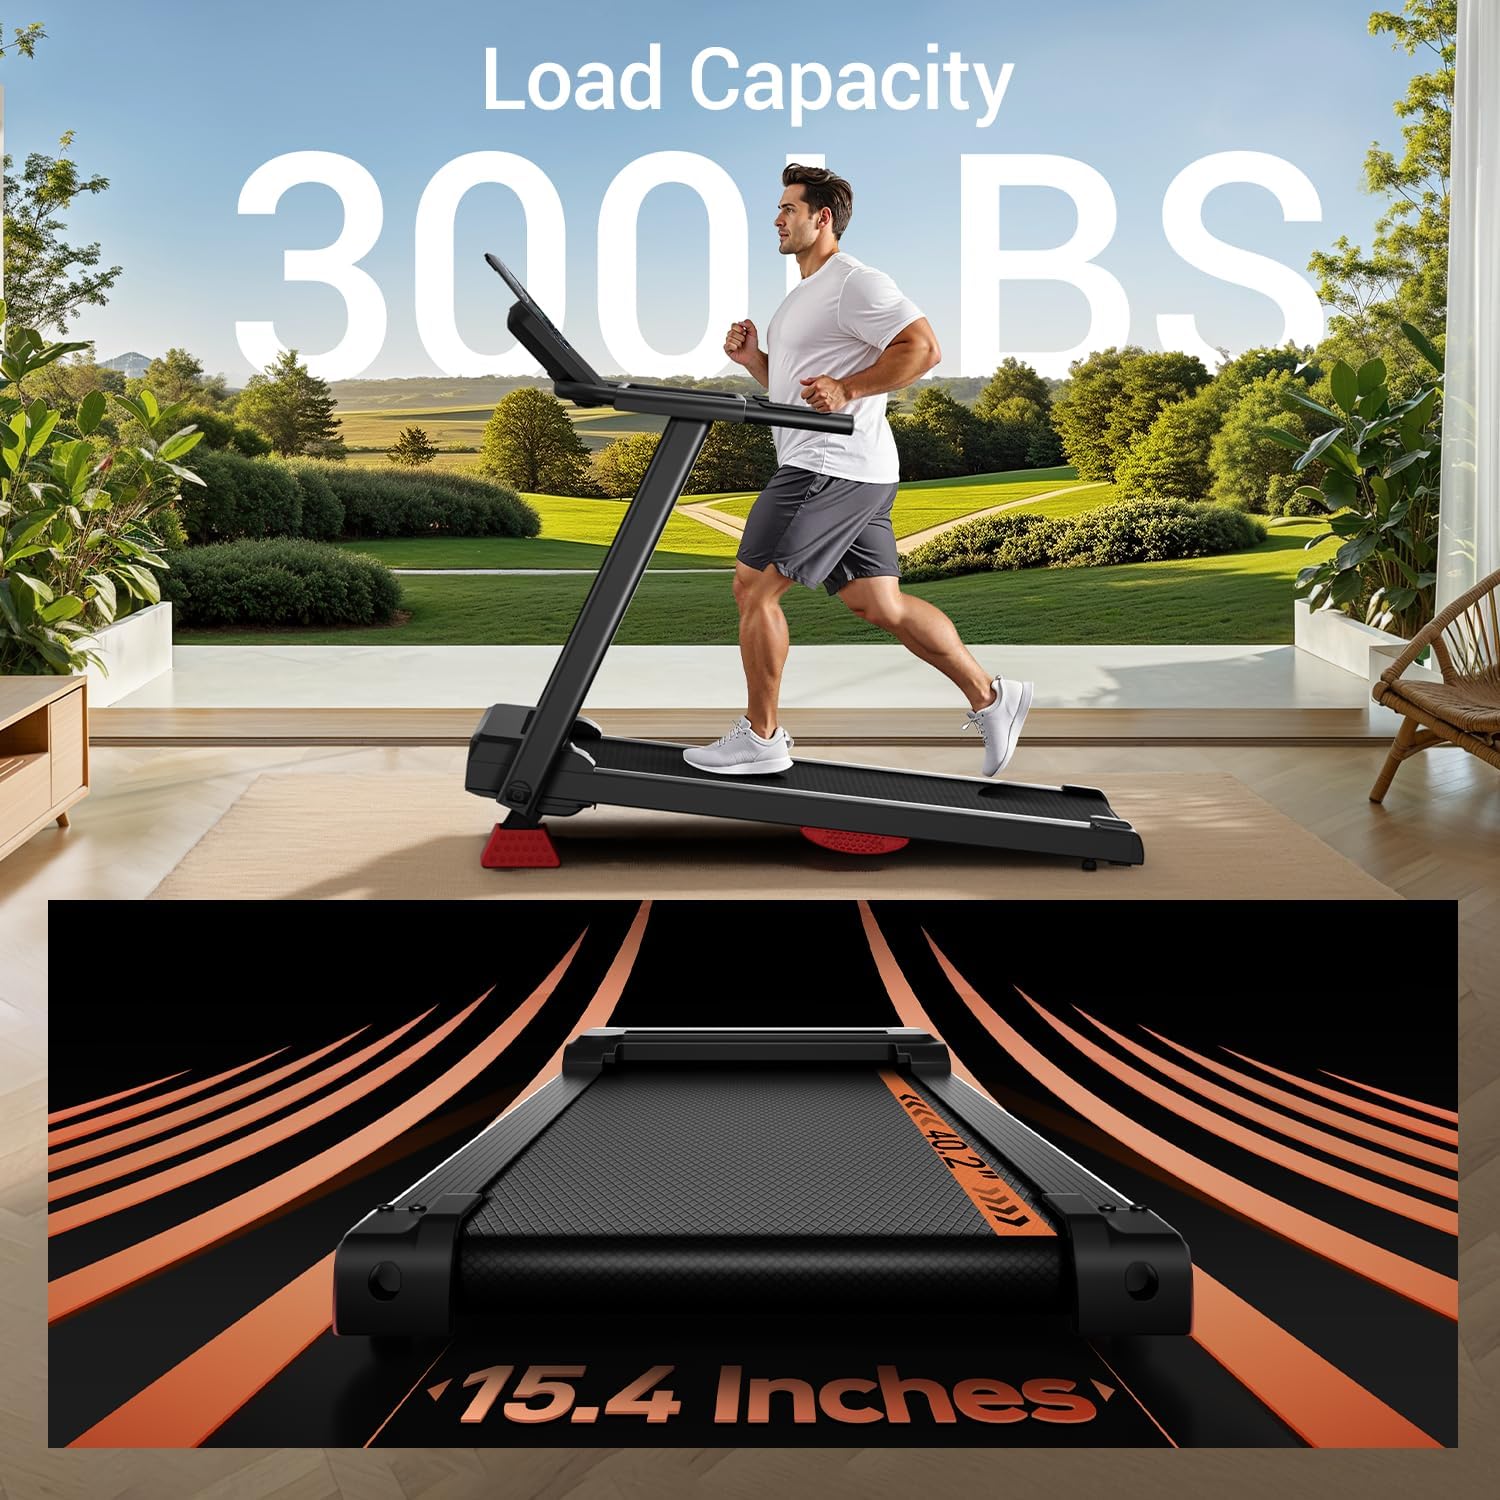
Image: The treadmill supports a maximum weight capacity of 300 lbs and features a spacious 40.2" x 15.4" running area.
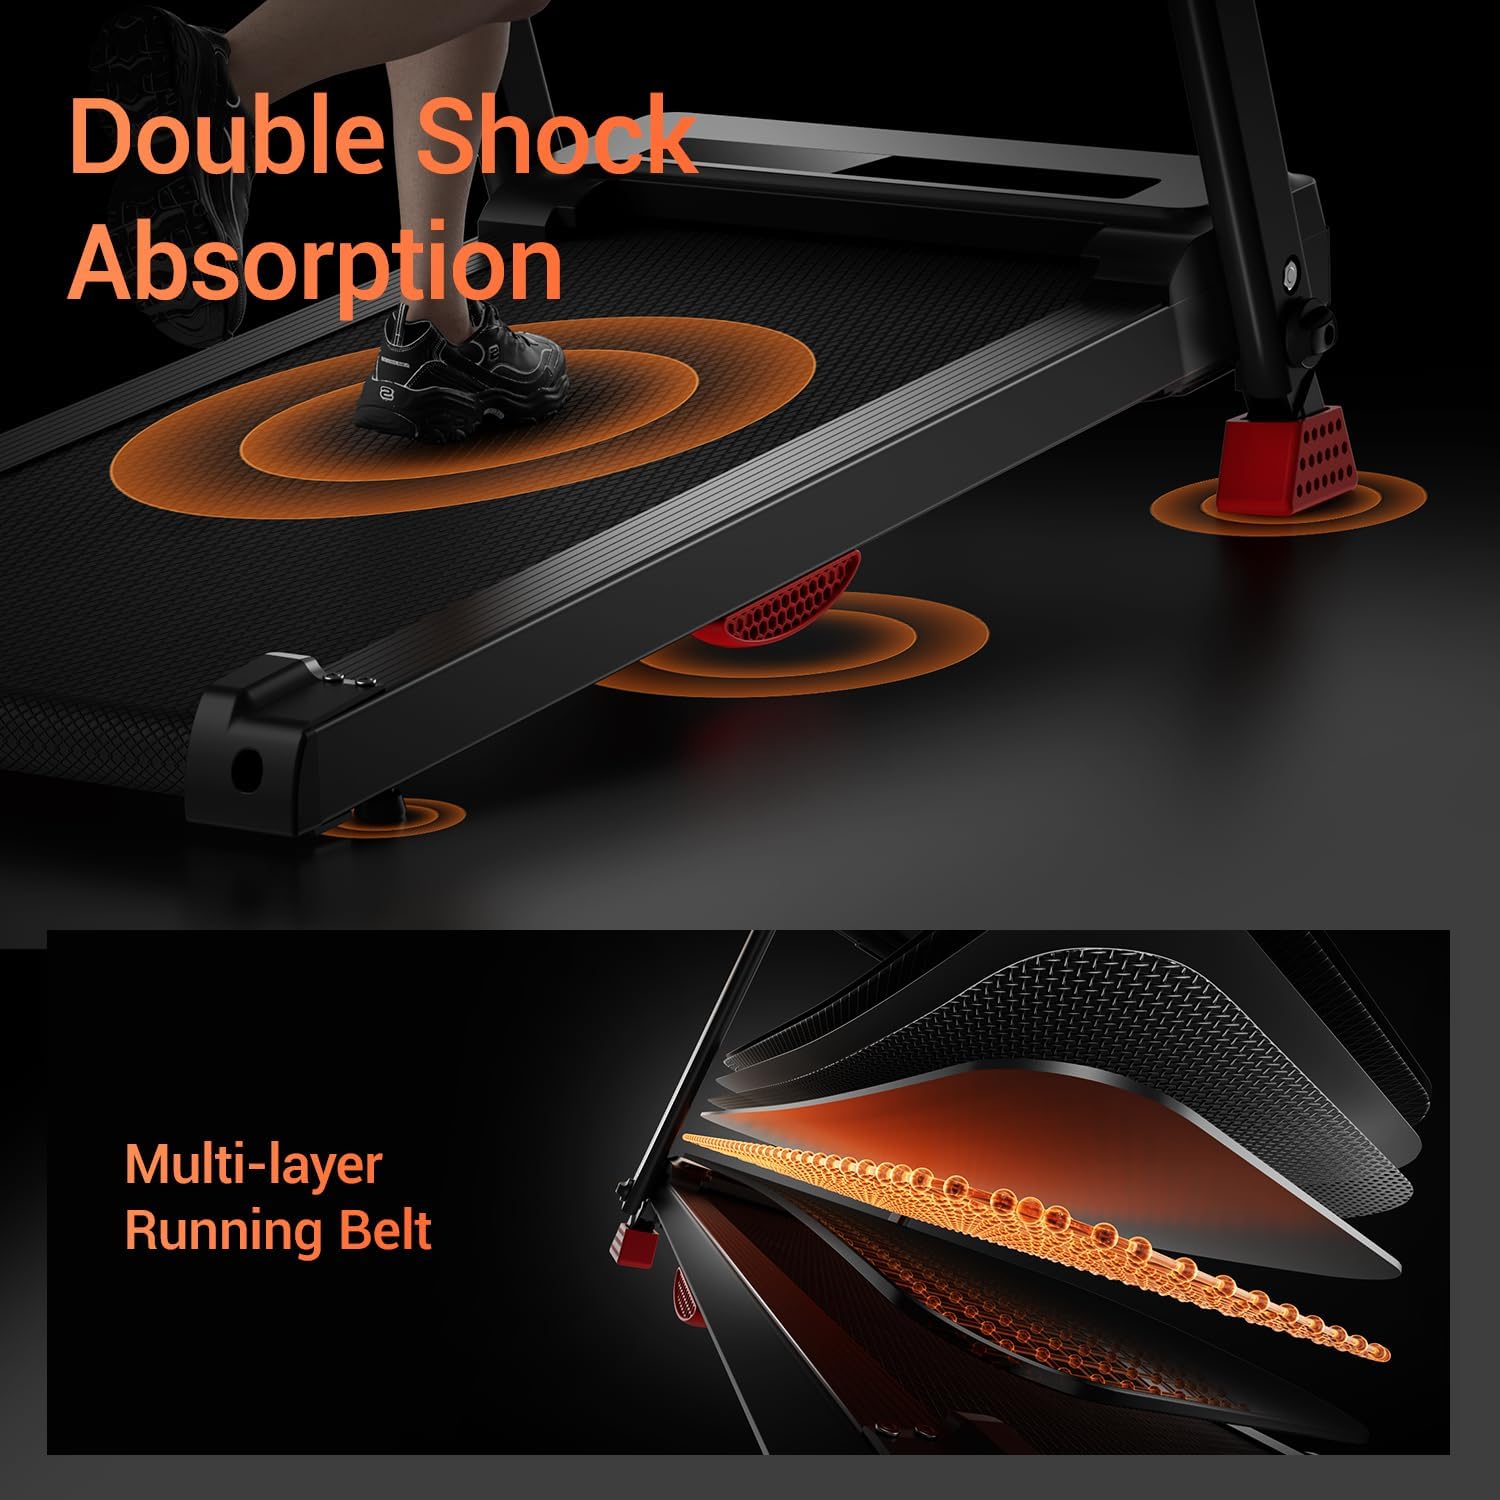
Image: The treadmill incorporates double shock absorption and a multi-layer running belt for a comfortable and safe exercise experience.

Image: A comparison highlights the benefits of the 2.5HP brushless motor, including longer lifespan, lower noise, and reduced maintenance.
5. Maintenance
Regular maintenance ensures the longevity and optimal performance of your treadmill.
- Lubrication: The running belt requires periodic lubrication. Refer to the detailed user manual for specific instructions on how and when to apply lubricant.
- Cleaning: Wipe down the treadmill surfaces with a damp cloth after each use to remove sweat and dust. Avoid abrasive cleaners.
- Belt Adjustment: Periodically check the running belt for proper tension and alignment. Adjust as needed according to the user manual to prevent slipping or excessive wear.
- Inspection: Regularly inspect all bolts and connections to ensure they are tight. Tighten any loose components.
6. Troubleshooting
If you encounter any issues with your treadmill, please refer to the following common troubleshooting tips. For more complex problems, contact customer service.
- Treadmill not starting: Ensure the power cord is securely plugged in and the safety key is correctly inserted into the console. Check the power switch.
- Belt slipping: The running belt may need tensioning or lubrication. Follow the maintenance instructions in your user manual.
- Unusual noises: Check for loose parts or foreign objects under the belt. If the noise persists, contact customer service.
7. Specifications
| Feature | Detail |
|---|---|
| Brand | LONTEK |
| Model Name | P8 |
| Product Dimensions | 50"D x 24.5"W x 41.2"H |
| Material | Alloy Steel |
| Maximum Speed | 7.5 Miles per Hour |
| Special Feature | Manual Incline (15%) |
| Maximum Horsepower | 2.5 Horsepower |
| Display Type | LED |
| Included Components | Safety Key |
| Maximum Weight Recommendation | 300 Pounds |
| Running Area | 40.2" x 15.4" |
8. Warranty and Support
LONTEK provides comprehensive support for your treadmill.
- Warranty: This product comes with a 1-Year Warranty.
- Customer Service: We offer 24/7 customer service. For any inquiries or assistance, please contact our customer support through Amazon.
- Returns/Replacements: Enjoy a 30-day return/replacement policy.
- Quality Assurance: A 365-day QA service is provided to ensure your complete satisfaction.
Related documentsP8


Ask a question about this manual
Ask about setup, troubleshooting, compatibility, parts, safety, or missing instructions. Manuals+ will review the question and use this page’s manual context to help answer it.