1. Introduction
This manual provides comprehensive instructions for the installation, operation, and maintenance of your Secretlab Magnus Monitor Arm (Heavy Duty Edition). Designed for ultrawide monitors, this arm ensures stable and flexible positioning for an optimal viewing experience. Please read this manual thoroughly before installation and keep it for future reference.
2. Safety Information
- Ensure all components are present and undamaged before beginning installation.
- Do not exceed the maximum weight capacity of 35 lbs (15.8 kg) or the maximum monitor size of 57 inches.
- Always use two people when lifting and mounting large or heavy monitors.
- Ensure the desk surface is stable and capable of supporting the combined weight of the monitor arm and monitor.
- Keep small parts away from children.
3. Package Contents
Please verify that all the following components are included in your package:
- Secretlab Magnus Monitor Arm assembly
- Heavy-duty tilt pivot
- C-clamp mounting hardware
- VESA plate with double lock mechanism
- Detachable dual VESA-mounted handles
- Magnetic cable sheaths
- Required tools and fasteners
4. Setup and Installation
Follow these steps to properly install your Secretlab Magnus Monitor Arm:
- Prepare Your Desk: Ensure your desk surface is between 10mm and 50mm thick for proper C-clamp installation. Clear the area where the monitor arm will be mounted.
- Attach the C-Clamp: Secure the C-clamp base to your desk. The top screw C-clamp mount allows for quick and hassle-free adjustments. Ensure it is tightened securely to prevent movement.
- Assemble the Arm: Connect the monitor arm sections as per the included diagram.
- Mount the VESA Plate: Attach the VESA plate to the back of your monitor. This arm features an extra-secure VESA plate with a unique double lock mechanism. Twist Lock 1 clockwise to lock, then press down and turn each Lock 2 screw to fully tighten. This ensures your ultrawide monitor remains securely in place.

Image: Close-up view of the VESA plate's double lock mechanism, highlighting the two locking points for enhanced security.
- Attach Monitor to Arm: The arm features an easy 2-step hook-and-lock design for mounting even the heaviest screens. Carefully lift your monitor (with VESA plate attached) and hook it onto the arm's mounting point. Ensure it clicks into place.

Image: Illustration of the VESA plate being attached to a monitor, demonstrating the simple hook-and-lock installation process.
- Attach Detachable Handles: For easier positioning, attach the detachable dual VESA-mounted handles to the monitor.
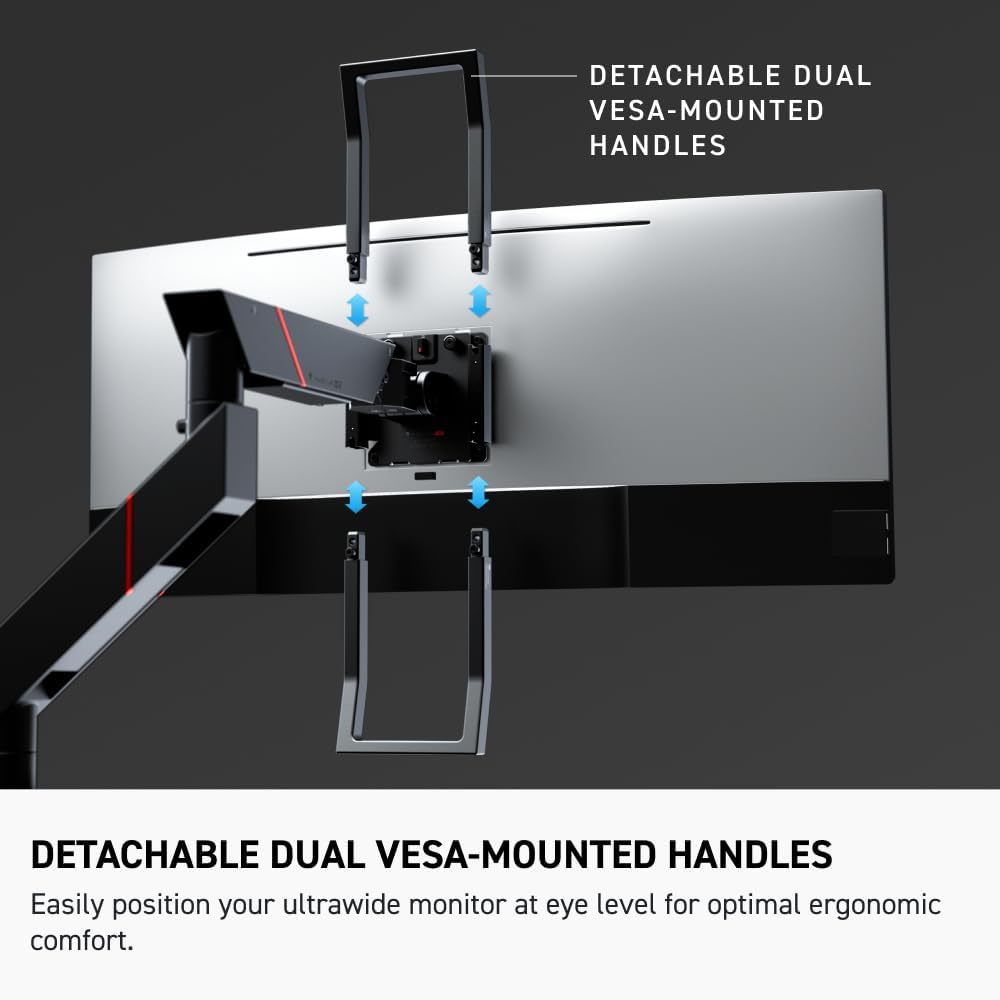
Image: The detachable dual VESA-mounted handles are shown attached to the monitor, aiding in ergonomic adjustments.
- Cable Management: Route your cables through the built-in channels on the arm. Use the magnetic cable sheaths to secure and hide loose cords from view, maintaining a clean workspace.
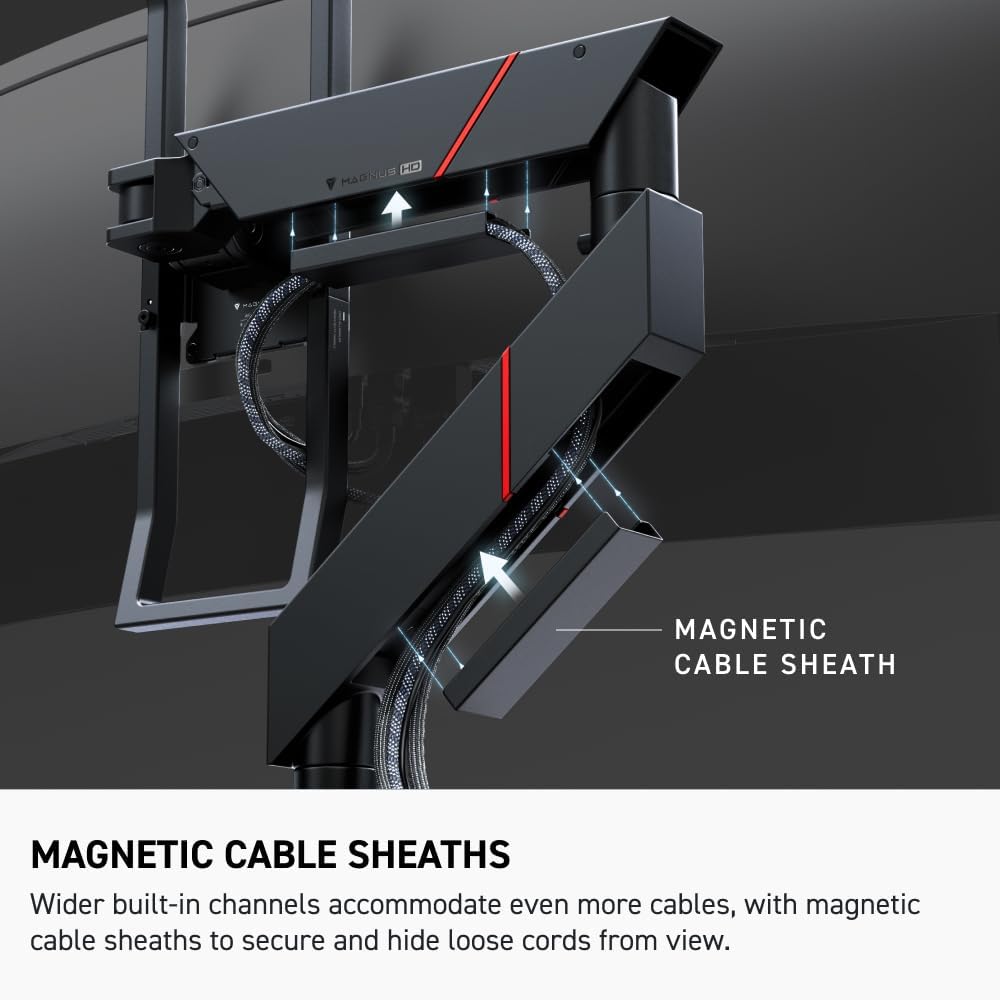
Image: Cables are neatly organized within the arm's channels, secured by magnetic sheaths for a tidy setup.
5. Operating the Monitor Arm
The Secretlab Magnus Monitor Arm offers dynamic movement for optimal positioning:
- Adjusting Position: Use the detachable dual VESA-mounted handles to effortlessly adjust your screen to the desired height, tilt, and swivel. The premium tensile spring mechanism allows for smooth, dynamic movement across its full range.
- Tension Adjustment: The arm features an in-built tension indicator. Adjust the tension screw to achieve the right level of resistance for your monitor's weight, preventing overtightening or sagging.

Image: A close-up of the tension indicator, allowing precise adjustment of the arm's spring mechanism.
- Heavy-Duty Tilt Pivot: The integrated heavy-duty tilt pivot is engineered to hold ultrawide monitors with up to a 1000R curvature without sagging, ensuring your screen stays exactly where you want it.
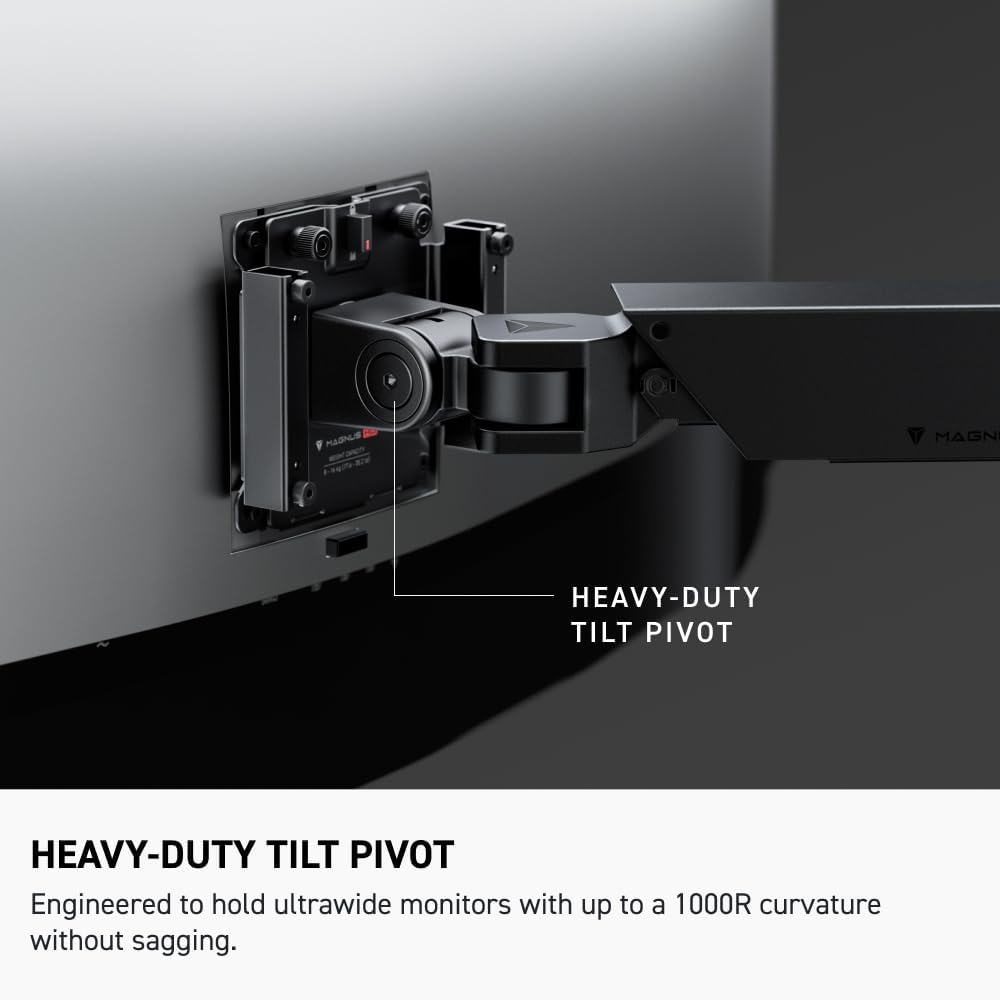
Image: Detail of the heavy-duty tilt pivot, designed to support large, curved monitors without drooping.
6. Maintenance
To ensure the longevity and optimal performance of your monitor arm:
- Cleaning: Wipe the arm surfaces with a soft, damp cloth. Avoid abrasive cleaners or solvents.
- Periodic Checks: Periodically check all screws and connections to ensure they remain tight. Re-tighten if necessary.
- Cable Management: Regularly check the cable routing to ensure cables are not pinched or stressed. Adjust magnetic sheaths as needed.
7. Troubleshooting
| Problem | Possible Cause | Solution |
|---|---|---|
| Monitor arm sags or does not hold position. | Tension is too low for monitor weight. | Increase tension using the in-built tension indicator until the arm holds the monitor firmly. |
| Monitor arm is too stiff to move. | Tension is too high. | Decrease tension using the in-built tension indicator. |
| Monitor wobbles on the arm. | VESA plate not securely attached or C-clamp loose. | Ensure the VESA plate's double lock mechanism is fully engaged. Check and tighten the C-clamp on the desk. |
| Cables are visible or messy. | Cables not properly routed. | Utilize the built-in cable channels and magnetic cable sheaths to organize and hide cables. |
8. Specifications
| Feature | Detail |
|---|---|
| Model Number | MAG-MONARM1H-BLK |
| Item Weight | 13.2 pounds (6 kg) |
| Product Dimensions | 21.6 x 6.3 x 30.6 inches (54.9 x 16 x 77.7 cm) |
| Maximum Compatible Size | 57 Inches |
| Minimum Compatible Size | 34 Inches |
| Weight Capacity | 18 to 35 lbs (8.16 to 15.88 kg) |
| Material | Metal |
| Mounting Type | Tabletop C-Clamp Mount |
| Desk Thickness Compatibility | 10mm to 50mm |
| Included Components | Heavy-duty tilt pivot |
9. Warranty and Support
For warranty information and customer support, please refer to the official Secretlab website or contact their customer service directly. Keep your purchase receipt for warranty claims.


