1. Safety Information
This section outlines important safety precautions to ensure safe operation and prevent injury or damage.
- Always handle the snow shovel with care.
- Store the unit in a dry place when not in use to prevent corrosion and damage.
- Ensure the battery is fully charged before use for optimal performance.
- Wear appropriate safety gear, including eye protection and sturdy footwear, during operation.
- Keep hands, feet, and loose clothing away from moving parts.
- Do not operate the snow shovel on slopes that are too steep for safe footing.
- Never direct discharged snow towards people, animals, or fragile objects.
- Disconnect the battery before performing any maintenance or cleaning.
2. Product Overview
The Mellif MFSS02-12 is a 12-inch cordless brushless snow shovel designed for efficient snow removal from driveways, sidewalks, and patios. It is compatible with Milwaukee 18V batteries, offering portability and powerful performance.

Figure 2.1: Mellif MFSS02-12 Cordless Brushless Snow Shovel. This image shows the complete snow shovel unit, highlighting its compact design and red and blue color scheme.
Key Features:
- 12-inch Clearing Width: Efficiently clears snow up to 12 inches wide.
- Brushless Motor: Provides 2400 RPM for powerful performance, enhanced battery life, and longer service time.
- Battery Compatibility: Designed to be compatible with 18V batteries, including Milwaukee 18V batteries. Includes a Mellif 4.0 Ah battery and rapid charger.
- Adjustable Snow Deflector: Allows for a ±30° adjustment to direct snow discharge.
- Ergonomic Design: Features an assist handle for improved balance and comfort during operation.
- Winter Reliability: The included Mellif 20V battery is tested to remain functional at -4°F (-20°C).

Figure 2.2: Mellif Snow Shovel circuit board highlighting compatibility with Milwaukee 18V batteries. This image illustrates the internal components and the battery interface, emphasizing its compatibility features.
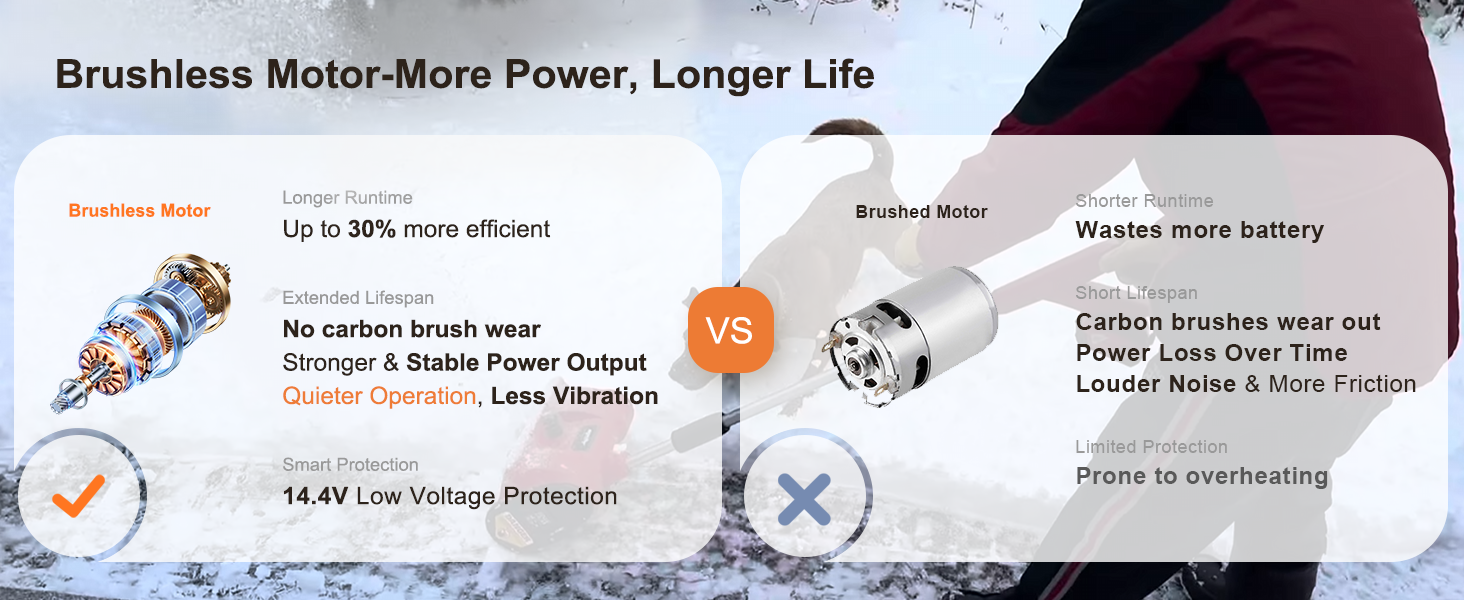
Figure 2.3: Comparison of brushless and brushed motor technology. This graphic explains the benefits of the brushless motor, such as longer runtime, extended lifespan, and quieter operation.
3. Components and Assembly
The Mellif MFSS02-12 snow shovel comes in several parts for compact shipping and requires minimal assembly.
Included Components:
- Snow Shovel Head Unit (with brushless motor and auger)
- Main Handle Assembly (with trigger and battery slot)
- Adjustable Auxiliary Handle
- Shaft (connecting handle to head unit)
- Mellif 4.0 Ah Battery
- Rapid Charger
Assembly Steps:
- Carefully unpack all components and ensure no parts are missing or damaged.
- Connect the shaft to the snow shovel head unit. Ensure it clicks securely into place or is fastened according to the specific mechanism (e.g., screws, quick-release pins).
- Attach the main handle assembly to the other end of the shaft. Secure it firmly.
- Install the adjustable auxiliary handle onto the shaft at a comfortable height for operation. This handle can be rotated 180 degrees for optimal positioning.
- Insert the fully charged Mellif 4.0 Ah battery into the battery slot on the main handle until it locks.

Figure 3.1: Close-up of the ergonomic auxiliary handle and dual safety switch. This image demonstrates the adjustability of the handle and the location of the safety features.

Figure 3.2: The snow shovel disassembled for lightweight and detachable storage. This image shows how the unit can be broken down for convenient storage in smaller spaces.
4. Setup
Before operating your Mellif snow shovel, ensure proper setup for safety and efficiency.
Battery Charging:
- Use the provided rapid charger to charge the Mellif 4.0 Ah battery.
- Connect the charger to a standard power outlet.
- Insert the battery into the charger. The indicator light will show charging status.
- Once fully charged, remove the battery from the charger.
Handle Adjustment:
- Adjust the auxiliary handle to a height that allows for comfortable operation without excessive bending.
- Ensure all connections are tight and secure before starting.
5. Operating Instructions
Follow these steps for effective and safe snow removal.
Starting and Stopping:
- Ensure the battery is securely inserted.
- Press the safety switch (usually a button or lever) and then squeeze the main trigger to start the motor.
- Release the main trigger to stop the motor.
Snow Clearing Techniques:
- Push the snow shovel forward into the snow. The auger will collect and discharge the snow.
- For optimal performance, clear snow in overlapping passes.
- The shovel can clear snow up to 6 inches deep in a single pass and throw it up to 17 feet.
- For deeper snow, clear the top layer first, then make a second pass to clear the remaining snow.
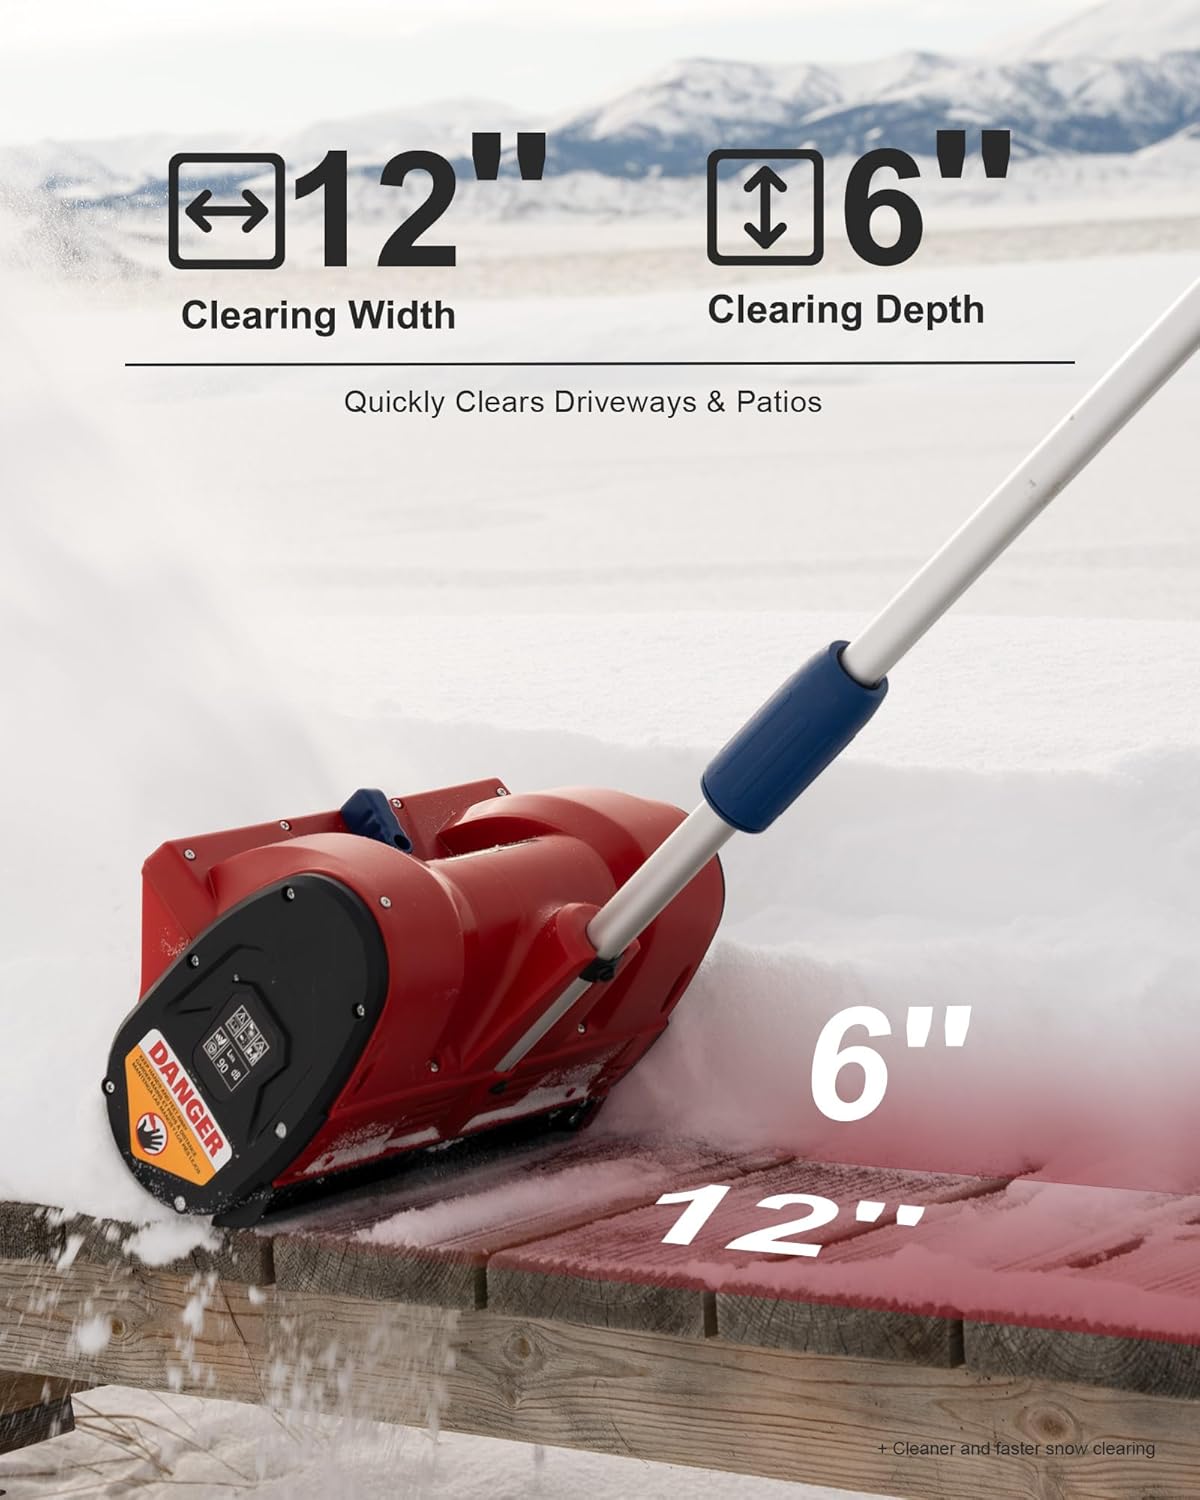
Figure 5.1: Illustration of the snow shovel's clearing capabilities, showing a 12-inch clearing width and 6-inch clearing depth.

Figure 5.2: A person operating the snow shovel, demonstrating its ability to throw snow up to 17 feet away from the clearing path.
Adjusting Snow Deflector:
- The snow deflector can be adjusted ±30° to control the direction of the discharged snow.
- Manually adjust the deflector to direct snow away from desired areas.

Figure 5.3: A hand adjusting the snow deflector, illustrating the ±30° range of motion for directing snow.
Operating in Cold Weather:
- The Mellif 20V battery is designed to function reliably in temperatures as low as -4°F (-20°C).
- For best battery performance in extreme cold, store the battery indoors until just before use.

Figure 5.4: The snow shovel being used in a snowy, cold environment, demonstrating its reliability in winter conditions.
Recommended Applications:

Figure 5.5: Visual examples of the snow shovel effectively clearing snow from driveways, sidewalks, and patios.
6. Maintenance
Regular maintenance ensures the longevity and optimal performance of your snow shovel.
Cleaning:
- After each use, disconnect the battery.
- Remove any accumulated snow, ice, or debris from the auger and discharge chute using a non-metallic tool.
- Wipe down the exterior surfaces with a damp cloth. Do not use harsh chemicals or abrasive cleaners.
Storage:
- Store the snow shovel in a dry, protected area away from direct sunlight and moisture.
- For long-term storage, remove the battery and store it separately in a cool, dry place.
- The detachable design allows for compact storage.
7. Troubleshooting
This section addresses common issues you might encounter with your snow shovel.
| Problem | Possible Cause | Solution |
|---|---|---|
| Snow shovel does not start. | Battery not inserted correctly or discharged. Safety switch not engaged. | Ensure battery is fully charged and properly seated. Press safety switch before pulling trigger. |
| Reduced snow throwing distance or clogging. | Wet, heavy snow. Debris in auger/chute. | Clear snow in thinner layers. Disconnect battery and remove debris from auger/chute. |
| Motor stops during operation. | Overload protection activated (e.g., hitting a hard object, very dense snow). Battery low. | Release trigger, remove obstruction, and restart. Charge battery if low. Allow motor to cool if overheated. |
| Battery drains quickly. | Extreme cold temperatures. Heavy snow conditions. | Keep battery warm before use. Clear snow in lighter passes. Consider having a spare charged battery. |
8. Specifications
Detailed technical specifications for the Mellif MFSS02-12 Cordless Brushless Snow Shovel.
- Model Number: MFSS02-12
- Brand: Mellif
- Power Source: Battery Powered
- Battery Type: Lithium Ion (18V/20V compatible)
- Motor: Brushless
- Max RPM: 2400
- Clearing Width: 12 inches
- Clearing Depth: Up to 6 inches
- Snow Throwing Distance: Up to 17 feet
- Deflector Adjustment: ±30°
- Item Weight: 5 Kilograms (approx. 9.6 lbs)
- Product Dimensions: 19.05 x 32.51 x 139.7 cm (approx. 7.5 x 12.8 x 55 inches)
- Low Voltage Protection: 14.4V
- Operating Temperature: Functional at -4°F (-20°C)

Figure 8.1: Close-up view of the brushless motor, emphasizing its design for efficiency and durability.
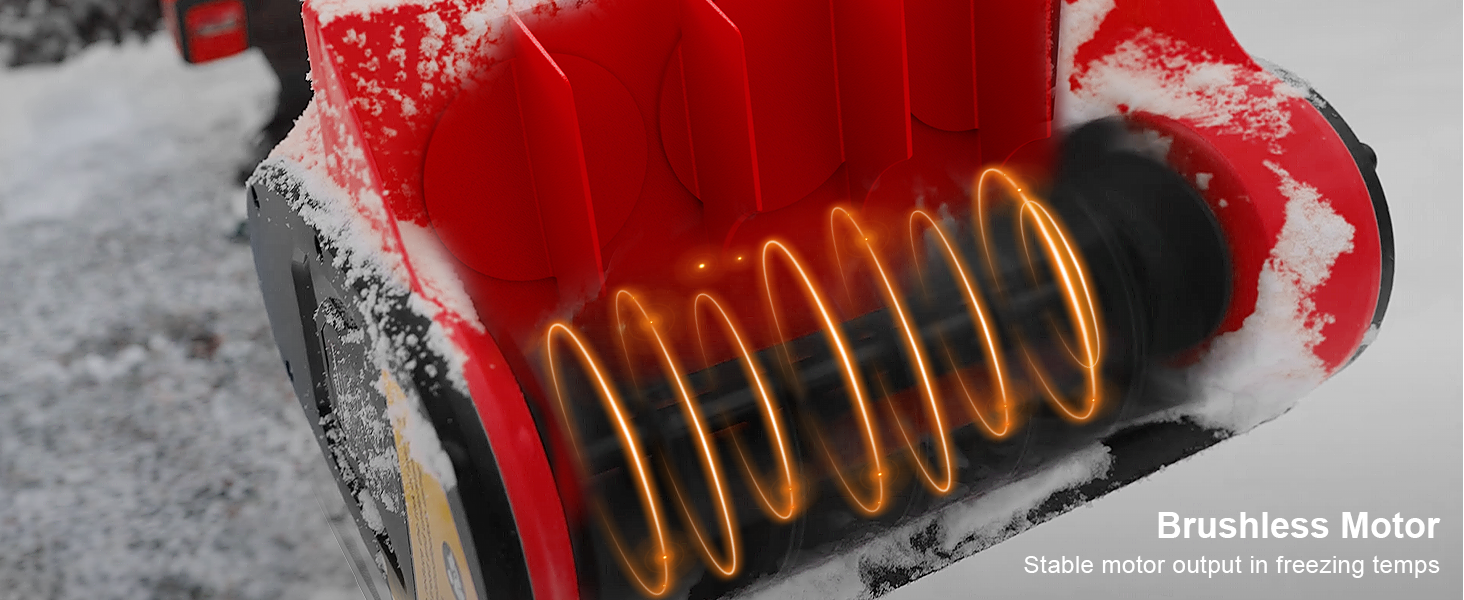
Figure 8.2: Diagram illustrating the stable motor output of the brushless motor even in freezing temperatures, ensuring consistent performance.
9. Warranty and Support
For warranty information, technical support, or to inquire about replacement parts, please refer to the contact information provided with your purchase or visit the official Mellif website. Keep your purchase receipt as proof of purchase for warranty claims.


