
InflaVive ATJ-9666
InflaVive Portable Air Compressor User Manual
Model: ATJ-9666
1. Introduction
Thank you for choosing the InflaVive Portable Air Compressor. This device is engineered for efficient and convenient inflation of various items, including car, motorcycle, and bicycle tires, as well as sports balls. Its compact design, powerful performance, and intelligent features make it an essential tool for maintaining optimal pressure and ensuring safety on the go.

Image: The InflaVive Portable Air Compressor shown with a car, motorcycle, bicycle, and balls, illustrating its wide range of applications.
2. Safety Information
- Always read and understand all instructions before using the device.
- Keep out of reach of children.
- Do not operate the compressor in wet conditions or near flammable liquids or gases.
- Ensure the inflation hose is securely connected to the valve stem before starting inflation.
- Do not overinflate. Always refer to the recommended pressure for your specific item (e.g., vehicle owner's manual, tire sidewall).
- The device may become warm during prolonged use. Allow it to cool down if it becomes excessively hot.
- Do not disassemble or attempt to repair the device yourself. Contact customer support for assistance.
- Store the device in a cool, dry place when not in use.
3. Package Contents
Please check the package to ensure all items are present:
- Portable Air Compressor
- USB Charging Cable
- Air Hose
- Ball Needle
- Long Tapered Nozzle
- Short Tapered Nozzle
- Presta Valve Adapter
- User Manual
- DC Power Cord (12V)

Image: A visual representation of all items included in the product package, such as the inflator, various nozzles, and cables.
4. Product Overview
The InflaVive Portable Air Compressor features an intuitive design with a clear digital display and easy-to-use controls.
Key Components:
- Digital LED Screen: Displays real-time pressure, preset values, and selected units.
- Control Buttons: Power, Mode selection, and +/- for adjusting pressure.
- Inflation Port: Where the air hose connects.
- LED Light: For illumination in low-light conditions.
- USB Output Port: Functions as a power bank for charging other devices.
- Type-C Charging Port: For recharging the compressor's internal battery.

Image: A detailed view of the inflator's screen, highlighting the real-time and preset pressure values for clear monitoring.
5. Setup
Charging the Device:
Before first use, fully charge the portable air compressor. Connect the provided USB charging cable to the Type-C port on the device and a compatible USB power adapter (not included). The battery indicator on the screen will show charging status. A full charge ensures optimal performance and allows for multiple inflations.
The device can also be powered via the 12V DC power cord for direct use from a car's cigarette lighter socket, which is useful if the internal battery is low.

Image: The inflator connected to a bicycle tire, demonstrating its auto-shutoff capability once the target pressure is reached.
6. Operating Instructions
General Operation:
- Power On: Press and hold the power button for 3 seconds to turn on the device. The LED screen will illuminate.
- Select Unit: Briefly press the 'M' button to cycle through pressure units: PSI, KPA, BAR, KG/CM².
- Select Mode: Press the 'M' button repeatedly to select one of the five smart inflation modes: Car, Motorcycle, Bicycle, Ball, or Custom. Each mode has a default preset pressure.
- Adjust Preset Pressure: Use the '+' and '-' buttons to adjust the desired target pressure.
- Connect Hose: Screw the air hose securely onto the inflation port of the compressor.
- Attach Nozzle: Select the appropriate nozzle for your item and attach it to the other end of the air hose.
- Connect to Item: Securely connect the nozzle to the valve stem of the item you wish to inflate.
- Start Inflation: Press the power button to begin inflation. The real-time pressure will be displayed.
- Automatic Shut-off: The compressor will automatically stop once the preset pressure is reached.
- Disconnect: Carefully disconnect the nozzle from the valve stem and then the hose from the compressor.

Image: A visual guide demonstrating the four simple steps to operate the inflator: connect nozzle, power on, set pressure, and start inflation.
Specific Inflation Modes:
- Car Mode: Default pressure range 26-50 PSI. Ideal for standard car tires.
- Motorcycle Mode: Default pressure range 26-40 PSI. Suitable for motorcycle tires.
- Bicycle Mode: Default pressure range 30-145 PSI. For various bicycle tires.
- Ball Mode: Default pressure range 4-16 PSI. For sports balls.
- Custom Mode: Allows setting pressure values between 3-150 PSI for other inflatable items.

Image: The inflator shown with a car, indicating its use for car tires within the 26-50 PSI range.

Image: The inflator shown with a motorcycle, indicating its use for motorcycle tires within the 26-40 PSI range.
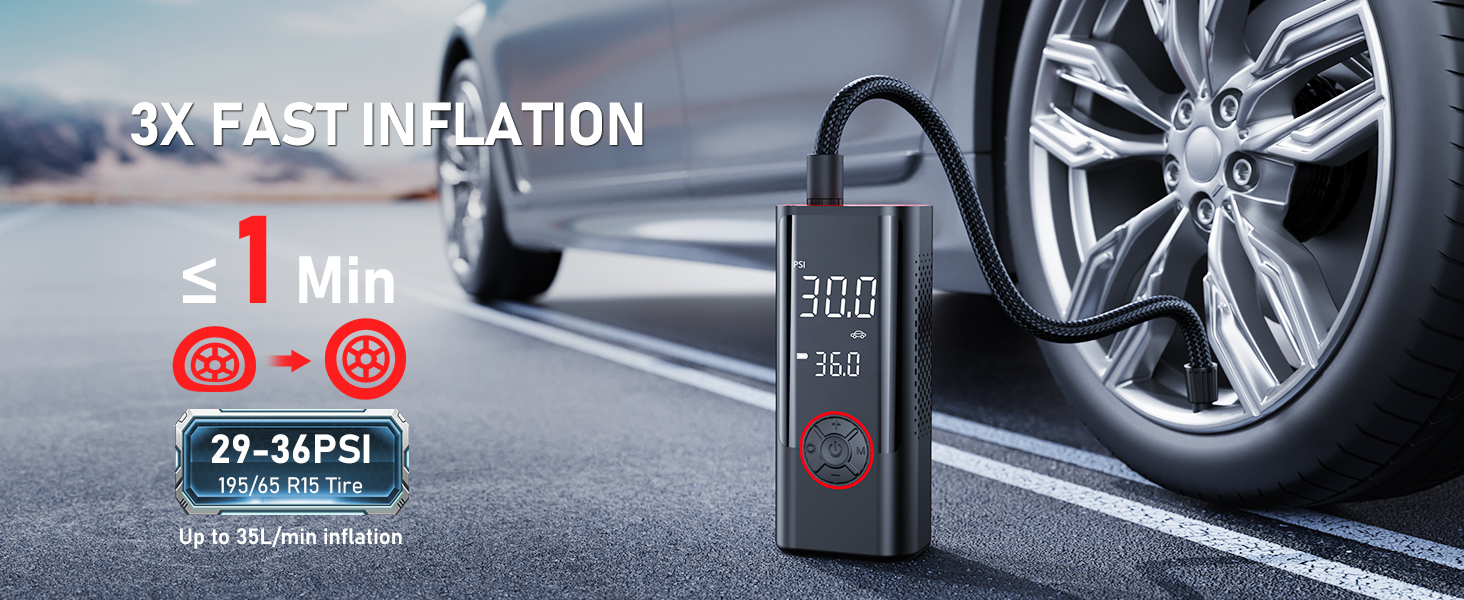
Image: The inflator shown with a bicycle, indicating its use for bicycle tires within the 30-145 PSI range.

Image: The inflator shown with a basketball, indicating its use for balls within the 4-16 PSI range.
LED Light Function:
The integrated LED light offers three modes for various situations:
- Constant Light: For general illumination during nighttime use or in dark environments.
- Flashing Light: For signaling or attracting attention.
- SOS Light: For emergency signaling.
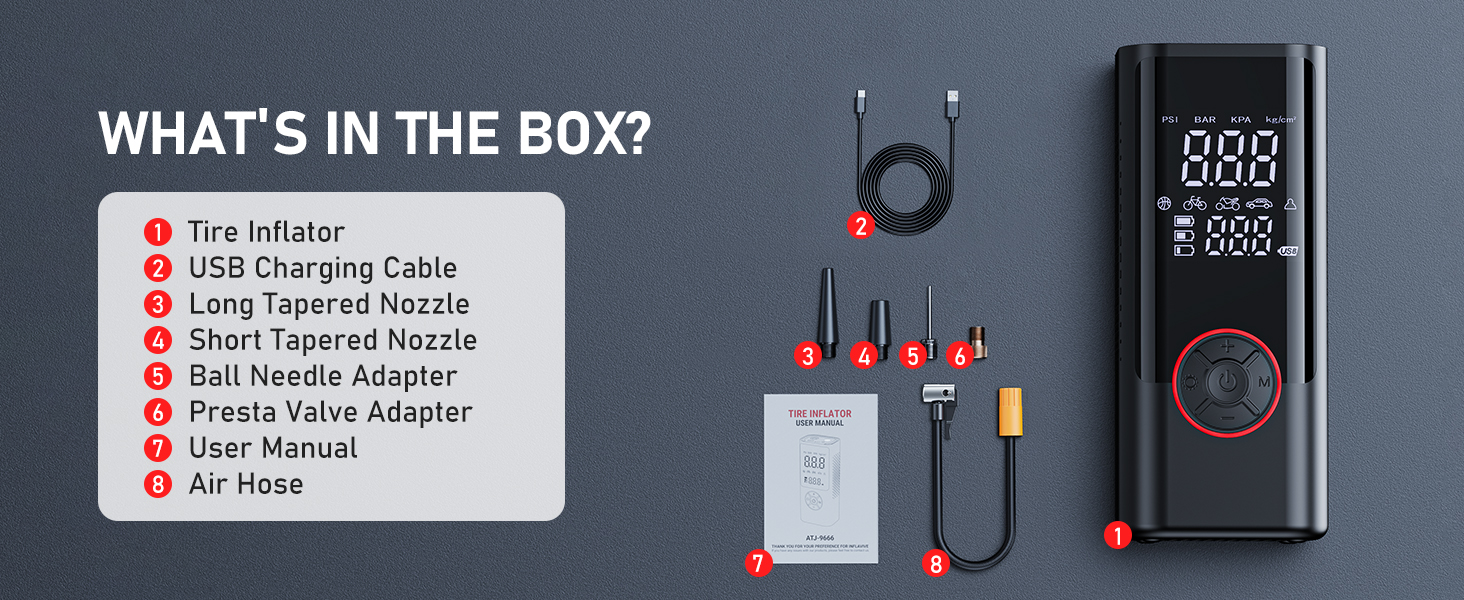
Image: The inflator demonstrating its built-in LED light with options for normal, flashing, and SOS modes.
Power Bank Function:
The compressor features a 5V/2A USB output port, allowing it to function as a power bank to charge your electronic devices in an emergency.
7. Maintenance
- Cleaning: Wipe the exterior of the compressor with a soft, damp cloth. Do not use harsh chemicals or abrasive cleaners.
- Storage: Store the device and its accessories in a dry, cool place, away from direct sunlight and extreme temperatures.
- Battery Care: If storing for an extended period, charge the battery to approximately 50% every 3 months to prolong its lifespan.
8. Troubleshooting
| Problem | Possible Cause | Solution |
|---|---|---|
| Device does not power on. | Low battery; Power button not held long enough. | Charge the device; Press and hold the power button for 3 seconds. |
| Inflation is slow or weak. | Low battery; Hose/nozzle not securely connected; Air leak. | Recharge the device; Ensure all connections are tight; Check hose for damage. |
| Device stops before reaching preset pressure. | Overheating protection activated; Battery too low. | Allow device to cool down; Recharge the device. |
| Inaccurate pressure reading. | Hose not fully connected; Sensor issue. | Ensure hose is tightly screwed on; If problem persists, contact support. |
9. Specifications
| Feature | Detail |
|---|---|
| Model | ATJ-9666 |
| Max Inflation Pressure | 150 PSI |
| Airflow Rate | 35 L/Min |
| Battery Type | Lithium Ion (3 included) |
| Input Voltage | 12 Volts (DC) |
| USB Output | 5V/2A |
| Item Weight | 1.59 pounds |
| Product Dimensions | 5.51 x 6.69 x 9.84 inches |
| Special Features | Automatic Shut-Off, Quick Inflation, Preset 5 inflation modes, Real-time tire pressure display, Pressure Detection, LCD Screen, LED Light, Cordless, Portable |
10. Warranty and Support
InflaVive products are designed for reliability and performance. For warranty information, technical support, or service inquiries, please refer to the contact details provided on the product packaging or visit the official InflaVive website. Keep your purchase receipt as proof of purchase.
Ask a question about this manual
Ask about setup, troubleshooting, compatibility, parts, safety, or missing instructions. Manuals+ will review the question and use this page’s manual context to help answer it.