
1. Introduction
The Betopper LPC010N-4 is a professional 54x4W RGBW (Red, Green, Blue, White) LED Par Light designed for various stage, event, and photography lighting applications. Featuring a high Color Rendering Index (CRI) of over 90, this light ensures accurate and vibrant color reproduction. It delivers up to 5500 lumens of brightness and offers multiple control modes for versatile lighting effects.
2. Safety Information
- Always connect the fixture to a grounded circuit.
- Ensure the power voltage matches the rated voltage of the fixture.
- Do not open the housing; there are no user-serviceable parts inside. Refer servicing to qualified personnel.
- Avoid direct eye exposure to the light source.
- Keep the fixture away from rain or moisture.
- Ensure adequate ventilation around the fixture to prevent overheating.
- Mount the fixture securely using appropriate clamps and safety cables.
3. Package Contents
Each Betopper LPC010N-4 package includes:
- Betopper LPC010N-4 LED Par Light unit(s)
- Power cable
- User Manual
4. Product Overview
4.1 Key Features
- High CRI (>90): Provides exceptional color accuracy for natural and vibrant object and skin tone reproduction, ideal for photography and video.
- Superior Brightness: Equipped with 54*4W LED bulbs, delivering up to 5500 lumens for large venues.
- RGBW Full Color: 4-in-1 LED sources (Red, Green, Blue, White) offer brighter and purer colors than traditional RGB lights.
- Flexible Control Modes: Supports DMX, automatic, and sound-activated modes, along with multiple pre-set colors.
- Wide Application Range: Suitable for parties, discos, bars, clubs, weddings, churches, live performances, studios, and more.
4.2 Physical Components


The fixture features a robust aluminum housing, a cooling fan for heat dissipation, and a digital display with four control buttons (MENU, UP, DOWN, ENTER) for easy navigation. It includes DMX In/Out ports for external control and Power In/Out for daisy-chaining multiple units.
5. Setup
5.1 Mounting
The LPC010N-4 can be mounted in various ways:
- Floor Mount: Use the adjustable bracket to position the light on a flat surface.
- T-Bar/Truss Mount: Secure the fixture to a T-bar or lighting truss using appropriate clamps (not included) and a safety cable. Ensure the mounting surface can support the weight of the fixture.

5.2 Power Connection
Connect the provided power cable to the 'POWER IN' port on the rear of the fixture and then to a suitable AC100-240V power outlet. Multiple units can be daisy-chained using the 'POWER OUT' port to connect to the 'POWER IN' of the next fixture.
5.3 DMX Connection (Optional)
For DMX control, connect a DMX cable from your DMX controller's output to the 'DMX IN' port of the first fixture. To daisy-chain multiple DMX fixtures, connect the 'DMX OUT' of the first fixture to the 'DMX IN' of the next, and so on.
6. Operating Modes
6.1 Control Panel Navigation
The rear control panel features a digital display and four buttons:
- MENU: Cycles through the main menu options.
- UP: Increases values or navigates up through menu options.
- DOWN: Decreases values or navigates down through menu options.
- ENTER: Confirms selection or enters a submenu.

6.2 DMX Control Mode
The fixture supports DMX512 protocol with 4 or 8 channel modes. Refer to the DMX channel chart in the appendix (not provided in this manual) for specific channel functions. Set the DMX address using the control panel.
6.3 Automatic Mode
The automatic mode features pre-programmed light shows and color sequences. Use the MENU button to select 'Auto' mode and then UP/DOWN to choose different auto programs.
6.4 Sound-Activated Mode
In sound-activated mode, the light reacts to ambient sound or music. Use the MENU button to select 'Sound' mode. The fixture's built-in microphone will detect audio and trigger dynamic lighting effects.
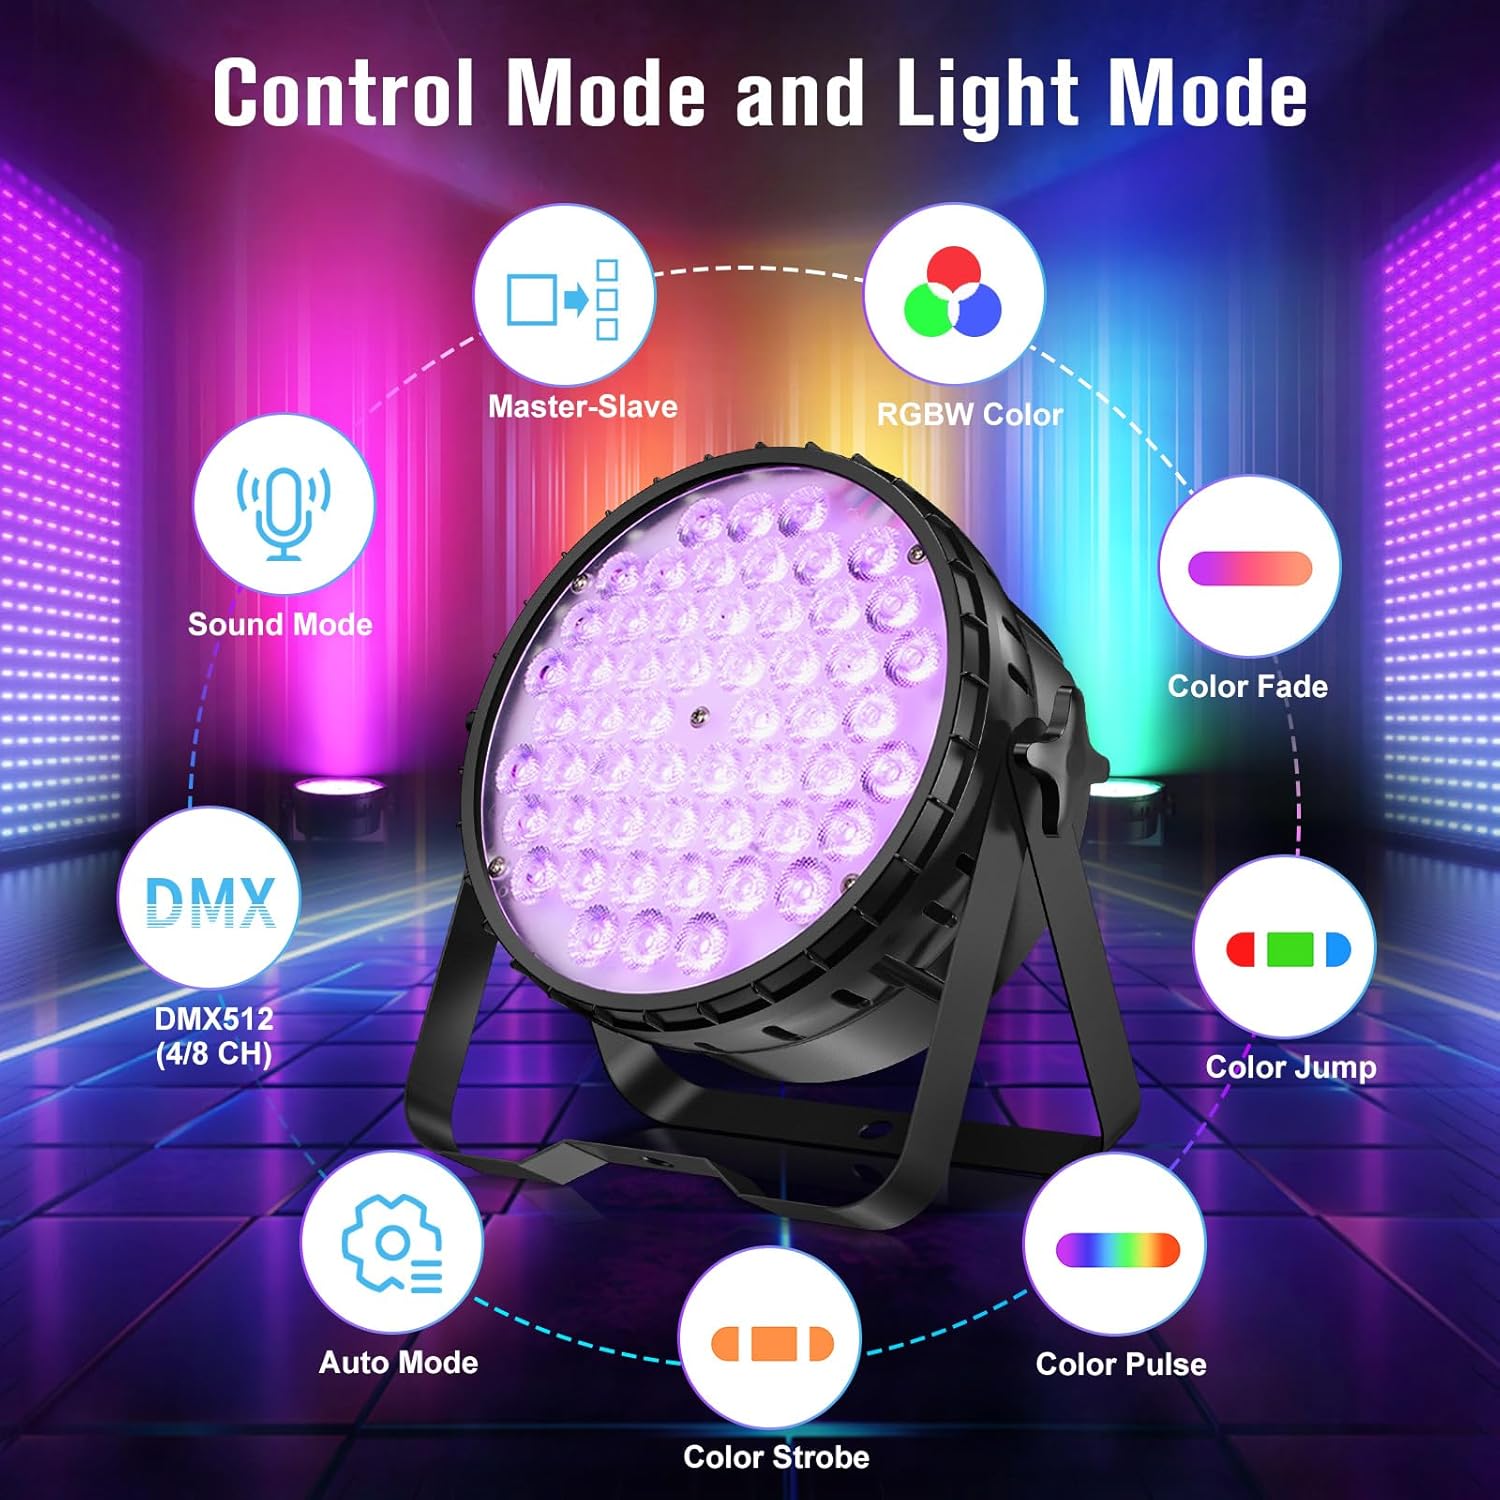
6.5 Master-Slave Mode
Connect multiple fixtures via DMX cables. Set one fixture as the 'Master' (e.g., in Auto or Sound mode) and the others as 'Slave' units. The slave units will then synchronize their effects with the master unit.
7. Light Effects
The LPC010N-4 offers a variety of dynamic lighting effects:
- Strobe: Rapid flashing of light.
- Gradual Fading Change: Smooth transitions between colors.
- Jump: Instantaneous changes between colors.
- Pulse Change: Rhythmic changes in light intensity or color.


7.1 CRI Comparison
The high CRI (>90) of the LPC010N-4 ensures that colors appear more natural and true to life compared to lights with lower CRI values.

7.2 Brightness Comparison
The 54x4W configuration provides significantly higher brightness compared to lights with fewer or lower wattage LEDs.

7.3 Video Demonstrations
8. Maintenance
- Cleaning: Regularly clean the lens and housing with a soft, lint-free cloth. Do not use abrasive cleaners.
- Fan Maintenance: Ensure the cooling fan is free from dust and debris to maintain optimal performance and prevent overheating.
- Storage: When not in use, store the fixture in a dry, dust-free environment.
- Inspection: Periodically check all cables, connections, and mounting hardware for any signs of wear or damage.
9. Troubleshooting
| Problem | Possible Cause | Solution |
|---|---|---|
| No power | Power cable disconnected; no power from outlet; fuse blown. | Check power cable connection; test outlet; replace fuse if necessary. |
| No light output | Fixture in blackout mode; incorrect mode selected; internal fault. | Check control panel settings; cycle through modes; contact support if fault persists. |
| DMX control not working | Incorrect DMX address; faulty DMX cable; DMX controller issue; incorrect DMX mode. | Verify DMX address; check DMX cable integrity; test with another controller; ensure fixture is in DMX mode. |
| Light flickering | Unstable power supply; DMX signal interference; loose connection. | Ensure stable power; check DMX termination; secure all connections. |
10. Specifications
| Feature | Detail |
|---|---|
| Model Number | LPC010N |
| Light Source Type | Light Emitting Diode (LED) |
| Number of Light Sources | 54 |
| Wattage (per LED) | 4W |
| Total Wattage | 216 Watts |
| Light Output Maximum | 5500 Lumens |
| Color Rendering Index (CRI) | 95 (CRI>90) |
| Color Temperature | 4500 Kelvin |
| Bulb Features | CRI>90, RGBW full color, DMX, automatic, sound-activated |
| Material | Aluminum |
| Finish Type | Brushed |
| Mounting Type | Floor Mount |
| Power Source | Corded Electric |
| Product Dimensions | 9.84"L x 4.5"W x 9.84"H |
| Item Weight | 16.06 pounds |
| Batteries Included | No |
11. Warranty and Support
For warranty information, technical support, or service inquiries, please contact Betopper customer service. Keep your purchase receipt as proof of purchase.
Visit the official Betopper store for more information: BetopperDirect Store


