1. Introduction
Thank you for choosing Lebenforce 3D PVC Wall Panels. These panels are designed to enhance your interior spaces with a modern, textured aesthetic. Made from high-quality PVC, they are durable, waterproof, and customizable, suitable for various applications in homes and offices.
This manual provides essential information for the safe and effective installation, operation, and maintenance of your wall panels. Please read it thoroughly before beginning installation.
2. Safety Information
- Always wear appropriate personal protective equipment (PPE) such as gloves and eye protection during installation.
- Ensure the installation area is well-ventilated, especially when using adhesives.
- Keep panels and adhesives out of reach of children and pets.
- Do not expose panels to open flames or excessive heat. While fire-resistant, direct exposure can cause damage.
- Dispose of waste materials responsibly according to local regulations.
3. Package Contents
Your Lebenforce 3D PVC Wall Panel package includes:
- 20 x Lebenforce 3D PVC Wall Panels (Model Type-1)
Note: Adhesive for installation is not included and must be purchased separately.
4. Specifications
| Feature | Detail |
|---|---|
| Model Number | Type-1 |
| Material | PVC |
| Panel Dimensions (each) | 11.8 x 11.8 x 1.67 inches (approx. 12 x 12 inches) |
| Panel Height | 0.7 inch (3D relief) |
| Panel Weight (each) | Approx. 0.2 lb |
| Quantity per Pack | 20 panels |
| Total Coverage Area | 19 Sq.Ft. |
| Color | White |
| Features | Waterproof, Rust-Proof, Paintable, 3D Textured Design |
5. Setup and Installation
Proper preparation and installation are key to achieving the desired aesthetic and durability for your 3D wall panels.
5.1 Surface Preparation
- Ensure the wall surface is clean, dry, smooth, and free from dust, grease, or loose paint.
- For best adhesion, a primed or painted surface is recommended.
- Measure the area to be covered and plan your panel layout before starting. This helps minimize cuts and ensures a balanced design.
5.2 Adhesive Application
These panels require a strong construction adhesive or sealant for secure attachment. (Adhesive not included).
- Apply a suitable adhesive (e.g., liquid nails, construction adhesive, or strong sealant) to the back of each panel. Focus on the raised areas and edges for maximum contact.
- Press the panel firmly onto the wall in the desired position. Apply even pressure for a few seconds to ensure good initial adhesion.
- Work in small sections, ensuring each panel is level and aligned with adjacent panels.
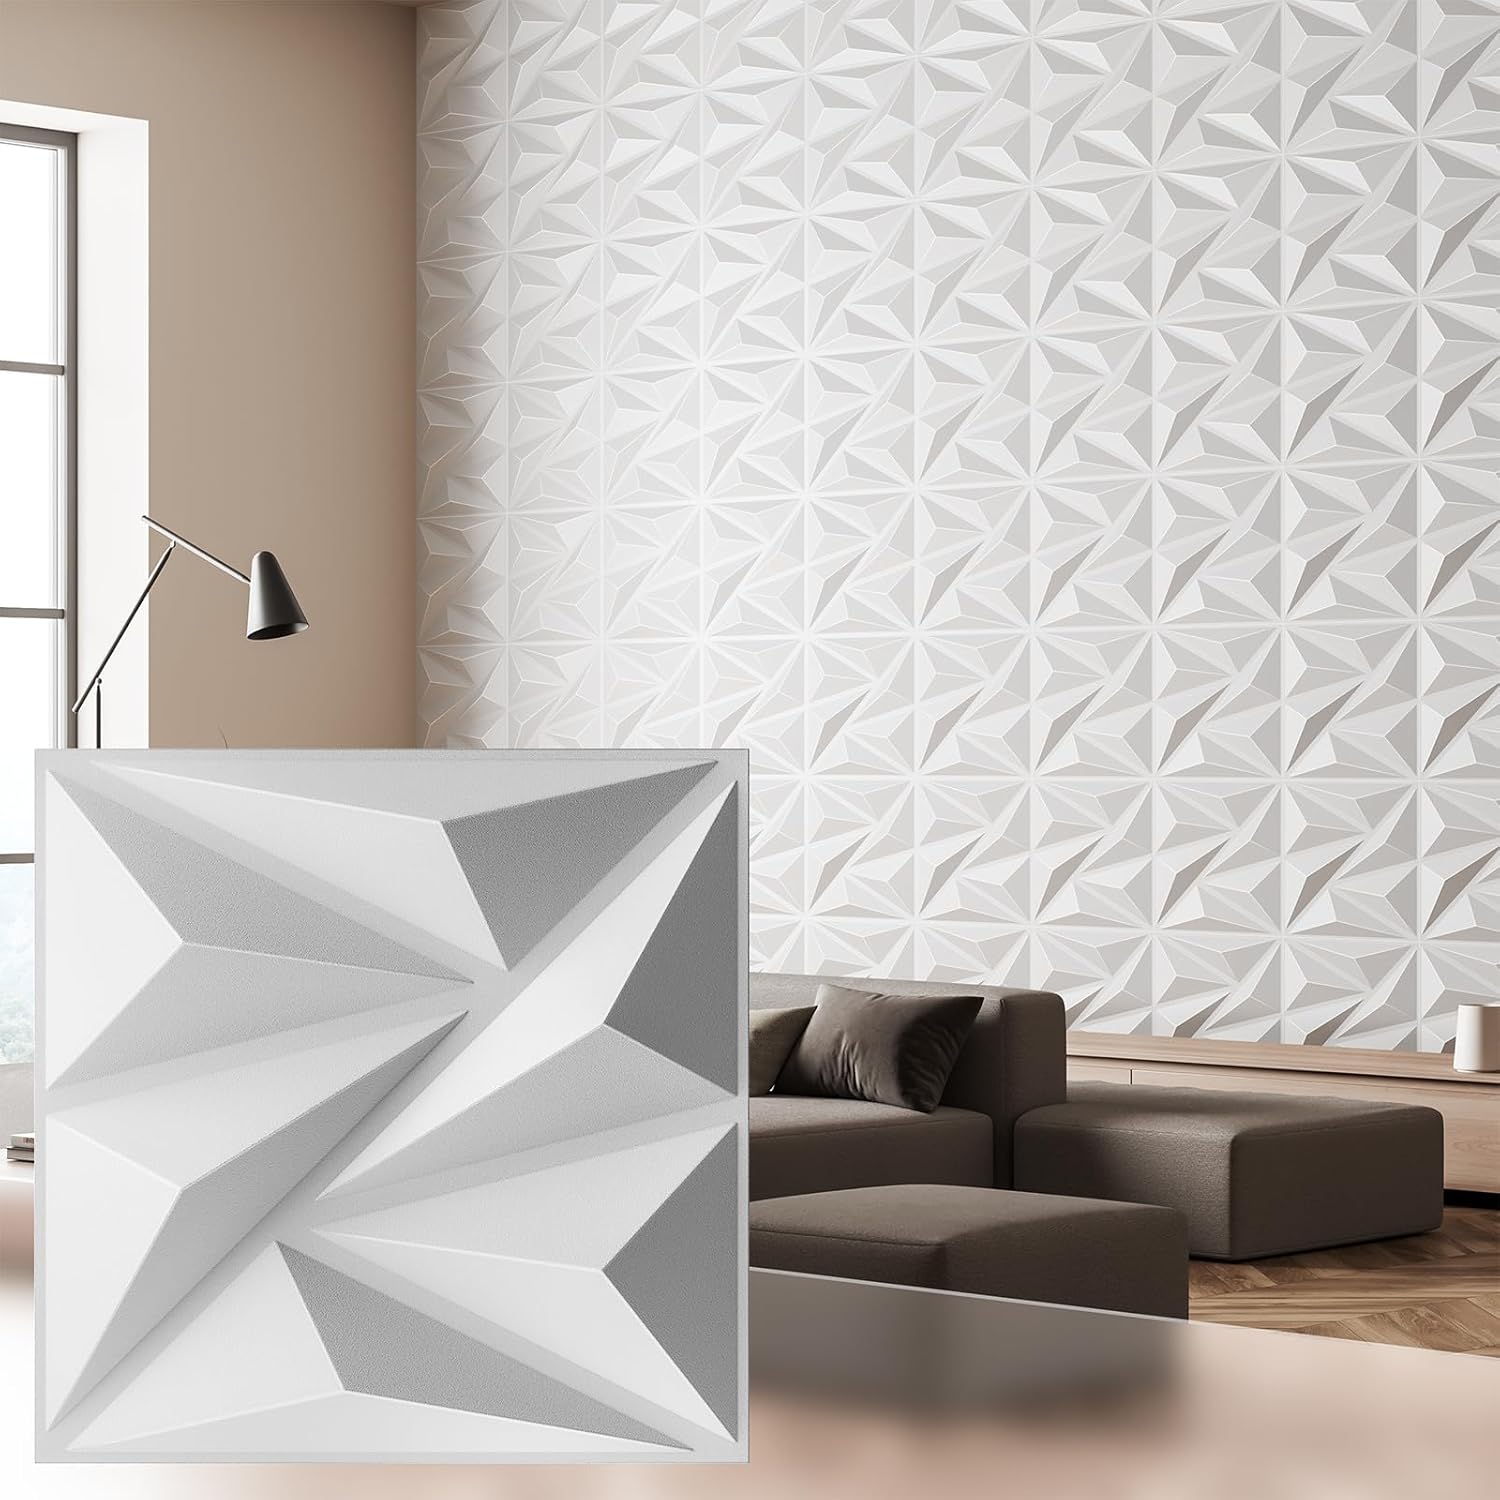
Image: Lebenforce 3D PVC Wall Panels installed in a modern living room, showcasing the textured design.
5.3 Cutting Panels
If necessary, panels can be cut to fit specific dimensions or around obstacles.
- Use a sharp utility knife or a fine-tooth saw for precise cuts.
- Measure and mark the cutting line clearly on the back of the panel.
- For straight cuts, use a straight edge as a guide. Score the panel several times with the utility knife before snapping it, or saw carefully along the line.

Image: Diagram illustrating the 12x12 inch dimensions of a single panel, its 0.7-inch height, and 0.2 lb weight, along with coverage details.
5.4 Visual Installation Guide
Video: An official product video demonstrating the installation process and various features of the 3D wall panels, including adhesive application and arrangement options.
6. Operating and Customization
The Lebenforce 3D PVC Wall Panels offer significant flexibility for design and customization.
6.1 Arranging Patterns
The unique geometric design of the panels allows for multiple patterns simply by rotating them. Experiment with different orientations to create a custom look that suits your style.

Image: Examples of various customizable patterns that can be achieved by rotating and arranging the 3D wall panels.
6.2 Painting Panels
The white PVC panels are paintable, allowing you to match them to your existing decor or create contrasting accents.
- Use a high-quality interior paint suitable for PVC or plastic surfaces.
- For best results, apply paint evenly with a spray gun or a roller designed for textured surfaces.
- Allow adequate drying time between coats as per paint manufacturer instructions.

Image: An example of 3D wall panels painted in a two-tone color scheme, demonstrating customization possibilities in a modern setting.
7. Maintenance
Maintaining your Lebenforce 3D PVC Wall Panels is simple due to their durable and waterproof properties.
7.1 Cleaning
- For general cleaning, wipe the panels with a soft, damp cloth.
- For more stubborn marks, a mild soap solution can be used. Avoid abrasive cleaners or harsh chemicals, as these may damage the panel surface or paint finish.
- The panels are waterproof, making them easy to clean even in moisture-prone areas.

Image: Visual representation of the panels' waterproof and paintable characteristics, alongside a fire-resistant test.
8. Troubleshooting
- Panels not adhering: Ensure the wall surface is clean, dry, and smooth. Use a high-quality construction adhesive and apply sufficient pressure during installation. Allow adequate curing time for the adhesive.
- Difficulty cutting panels: Use a new, sharp utility knife or a fine-tooth saw. Score the panel multiple times with a utility knife for a cleaner break.
- Uneven panel alignment: Plan your layout carefully before starting. Use a level to ensure each panel is installed straight. Adjust panels immediately after placement before the adhesive sets.
9. Warranty and Support
For any questions, concerns, or support regarding your Lebenforce 3D PVC Wall Panels, please contact our customer service. While specific warranty details are not provided in this manual, we stand by the quality of our products.
Please refer to your purchase documentation or the Lebenforce official website for the most current warranty information and contact details.


