1. Product Overview
The Morpilot Electric Milk Frother 6-in-1 is a versatile appliance designed to create various milk-based beverages. It features six distinct functions, allowing for hot and cold frothing, milk heating, and hot chocolate preparation. Its compact stainless steel design ensures durability and ease of use.

Figure 1: Morpilot Electric Milk Frother and included accessories.
2. Product Components
The Morpilot Electric Milk Frother package includes the following components:
- Electric Milk Frother Unit
- Frothing Whisk (for dense and airy foam)
- Heating/Mixing Whisk (for hot milk and hot chocolate)
- Power Cable
- Cleaning Brush
- User Manual (this document)

Figure 2: Internal structure highlighting non-stick coating and removable whisk.
3. Setup
- Unpacking: Carefully remove all components from the packaging. Retain packaging for future storage or transport.
- Initial Cleaning: Before first use, clean the interior of the frother and the whisks according to the "Maintenance and Cleaning" section. Ensure the exterior and electrical connections remain dry.
- Placement: Place the frother on a stable, flat, and dry surface away from heat sources and water. Ensure adequate ventilation around the unit.
- Power Connection: Connect the power cable to the frother and then plug it into a suitable power outlet.
4. Operating Instructions
The Morpilot Electric Milk Frother offers six functions controlled by a single button. Ensure the correct whisk is inserted for the desired function.
4.1 Capacity Guidelines
Observe the maximum and minimum fill lines inside the frother for optimal performance and to prevent overflow or insufficient frothing.
- Max-level for warming: 350 ml (11.84 oz)
- Max-level for frothing/hot chocolates: 150 ml (5.07 oz)
- Min-level for warming/frothing/hot chocolates: 75 ml (2.54 oz)

Figure 3: Capacity markings for different functions.
4.2 Function Selection
Press the power button repeatedly to cycle through the six functions. The indicator light will illuminate next to the selected function.

Figure 4: Control panel with 6 function indicators.
- Warm Dense Foam:
Use Frothing Whisk. Press power button 1 time. Max capacity: 150 ml.

Figure 5: Warm Dense Foam preparation.
- Warm Airy Foam:
Use Frothing Whisk. Press power button 2 times. Max capacity: 150 ml.

Figure 6: Warm Airy Foam preparation.
- Hot Milk (High Temperature):
Use Heating/Mixing Whisk. Press power button 3 times. Max capacity: 350 ml.

Figure 7: Hot Milk (High Temperature) preparation.
- Hot Milk (Low Temperature):
Use Heating/Mixing Whisk. Press power button 4 times. Max capacity: 350 ml.
(Refer to Figure 7 for visual representation of hot milk.)
- Hot Chocolate:
Use Heating/Mixing Whisk. Press power button 5 times. Max capacity: 150 ml.

Figure 8: Hot Chocolate preparation.
- Cold Frothing:
Use Frothing Whisk. Press power button 6 times. Max capacity: 150 ml.

Figure 9: Cold Frothing preparation.
The frother operates quietly and features an auto shut-off function for safety and convenience.
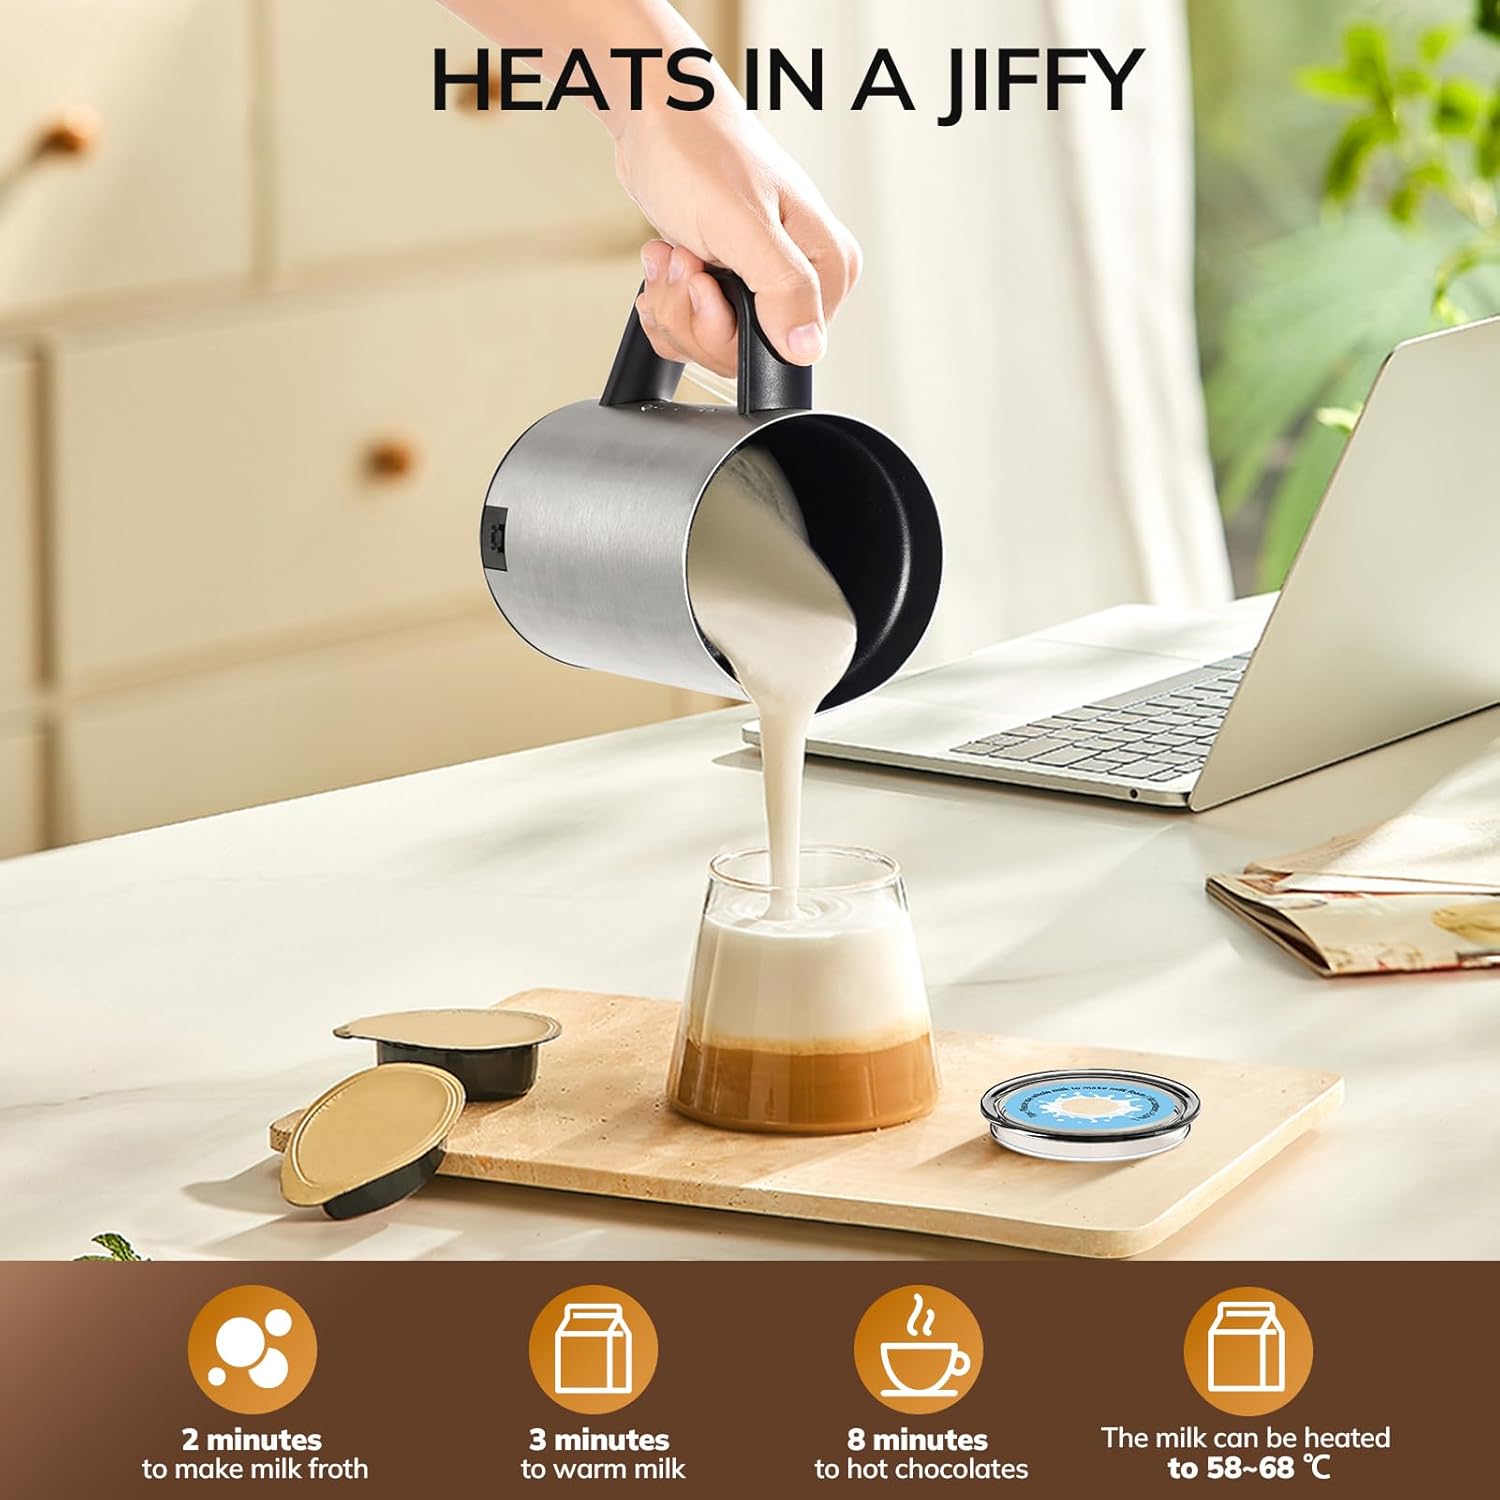
Figure 10: Approximate processing times for various functions.
5. Maintenance and Cleaning
Proper cleaning ensures the longevity and hygiene of your Morpilot Milk Frother. Always unplug the unit from the power outlet before cleaning.

Figure 11: General cleaning recommendations.
- Unplug: Always disconnect the frother from the power supply before cleaning.
- Interior Cleaning: The interior of the frother has a non-stick coating. After each use, rinse the interior with warm water and a mild detergent. Use the provided cleaning brush to gently remove any milk residue.
- Exterior Cleaning: Wipe the exterior surface with a soft, damp cloth. Do not rinse the surface directly with water or immerse the base unit in water.
- Whisk Cleaning: Remove the whisk(s) and rinse them thoroughly under running water. Use the cleaning brush for hard-to-reach areas. Ensure they are completely dry before reattaching or storing.
- Important: Do not allow water to enter the electrical connector at the bottom of the frother. Do not wash the frother in a dishwasher.

Figure 12: Detailed cleaning steps.
6. Troubleshooting
| Problem | Possible Cause | Solution |
|---|---|---|
| Milk burns or sticks to the bottom. |
|
|
| Foam is not dense or collapses quickly. |
|
|
| Unit does not turn on. |
|
|
| Whisk stops rotating or does not froth after a few uses. |
|
|
7. Specifications
| Feature | Detail |
|---|---|
| Model Number | HS009 |
| Brand | Morpilot |
| Color | Stainless Steel |
| Material | Stainless Steel |
| Capacity (Max Heating) | 350 Milliliters |
| Capacity (Max Frothing/Hot Chocolate) | 150 Milliliters |
| Number of Settings | 6 |
| Power | 550 Watts |
| Power Source | Corded Electric (Note: "Alimenté par pile" in source appears to be an error based on product images and user reviews) |
| Dimensions (Package) | 19.3 x 15.3 x 11.8 cm |
| Weight (Package) | 880 grams |
| UPC | 810142346269 |
8. Warranty and Support
For warranty information, technical support, or any inquiries regarding your Morpilot Electric Milk Frother, please refer to the contact information provided with your purchase or visit the official Morpilot website. Keep your purchase receipt as proof of purchase for warranty claims.
For additional resources and product information, you may visit the Morpilot Brand Store on Amazon.


