1. Introduction
This manual provides essential information for the safe and efficient operation of your ShockFlo Electric Vehicle Charging Station, model CS09-S. Please read this manual thoroughly before installation and use to ensure proper functionality and to prevent damage or injury. Keep this manual for future reference.
2. Safety Information
Always adhere to the following safety guidelines to prevent electric shock, fire, or injury:
- Installation must be performed by a qualified electrician in accordance with all local and national electrical codes and regulations.
- Do not attempt to open, disassemble, repair, or modify the charging station. This may void the warranty and pose a safety risk.
- Ensure the charging station is properly grounded.
- Do not use the charging station if it is damaged, cracked, or shows any signs of malfunction.
- Keep children and pets away from the charging station during operation.
- Avoid exposing the charging station to extreme temperatures, direct sunlight for prolonged periods, or excessive moisture.
- Only use the charging station for its intended purpose: charging electric vehicles.
3. Package Contents
Verify that all items are present in the package:
- ShockFlo CS09-S Electric Vehicle Charging Station
- Mounting accessories (screws, wall anchors)
- RFID cards (quantity may vary)
- User Manual
4. Product Overview
The ShockFlo CS09-S is an advanced electric vehicle charging station designed for efficient and convenient home charging. It features a robust design, an integrated display, and smart control capabilities via a mobile application.

Image 4.1: ShockFlo CS09-S Charging Station and companion app icon.
The charging station includes a clear display that provides real-time information about the charging process, such as current, voltage, power, and charging status.

Image 4.2: Detailed view of the charging station's display interface.
5. Setup and Installation
The ShockFlo CS09-S charging station is designed for wall-mounted installation. Due to the electrical nature of this product, professional installation by a certified electrician is mandatory to ensure safety and compliance with local electrical codes.
5.1 Installation Steps (Overview)
- Site Selection: Choose a suitable location near your parking area, ensuring it is protected from direct impact and excessive environmental exposure.
- Mounting: Securely mount the charging station to a sturdy wall using the provided mounting accessories.
- Electrical Connection: Connect the charging station to your home's electrical supply. This step requires a qualified electrician.
- Testing: After installation, the electrician should perform initial power-on and functional tests.
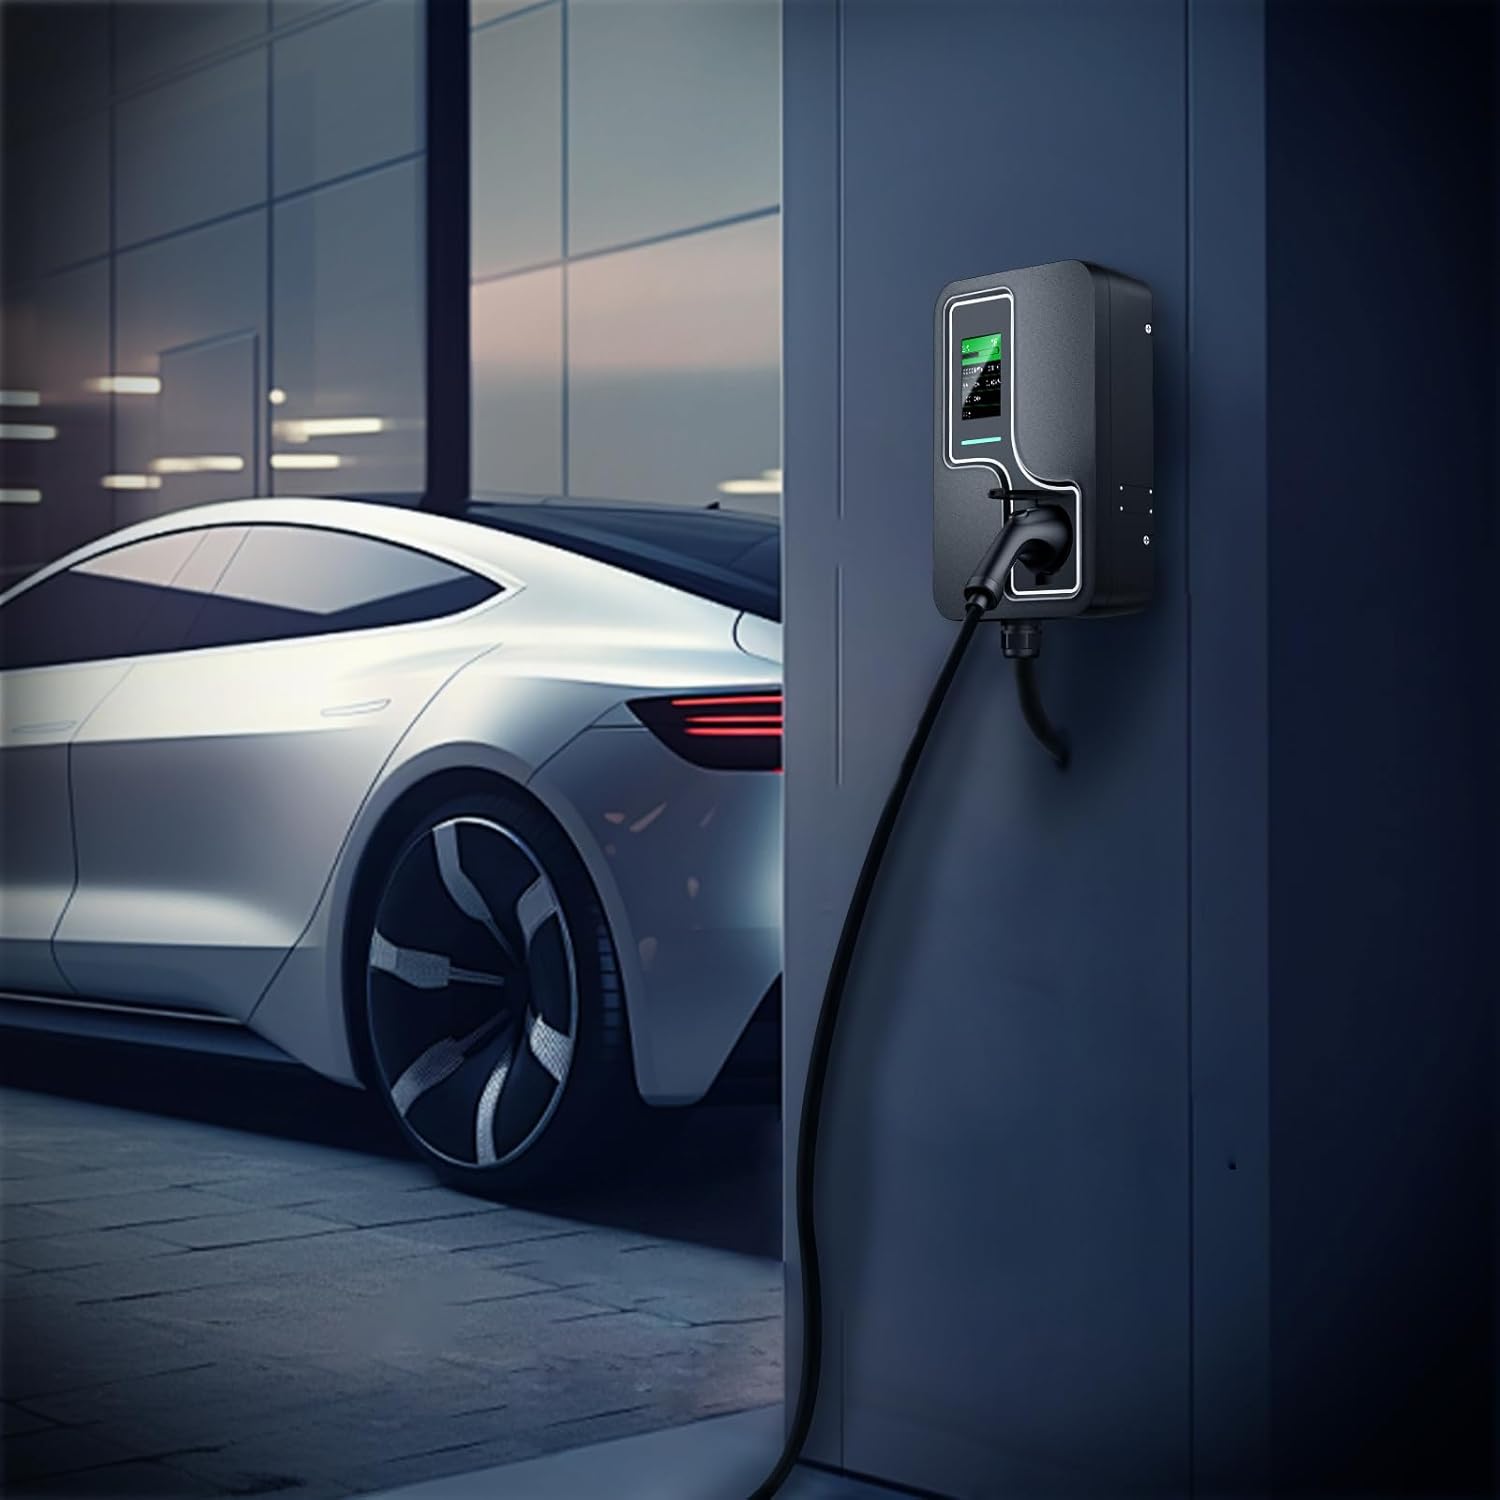
Image 5.1: Example of a wall-mounted ShockFlo CS09-S charging station.
6. Operating Instructions
The ShockFlo CS09-S offers multiple methods for initiating and managing your vehicle's charging process.
6.1 Charging Modes
The charging station supports three primary charging modes:
- App Remote Control (WIFI Ready): Manage charging sessions, adjust settings, and monitor status via the dedicated mobile application.
- RFID Card Charging: Use a registered RFID card to start and stop charging.
- Plug & Charge: Simply plug the charging cable into your vehicle to begin charging automatically (if configured).

Image 6.1: Overview of the three available charging modes.
6.2 App Remote Control
The ShockFlo mobile application provides comprehensive control over your charging station. Features include:
- Start/Stop Charging: Remotely initiate or terminate a charging session.
- Adjustable Current: Modify the charging current to suit your needs or vehicle specifications.
- Schedule Charging: Set specific times for charging to take advantage of off-peak electricity rates.
- Monitor Charging: View real-time charging data, including power consumption, duration, and estimated range.
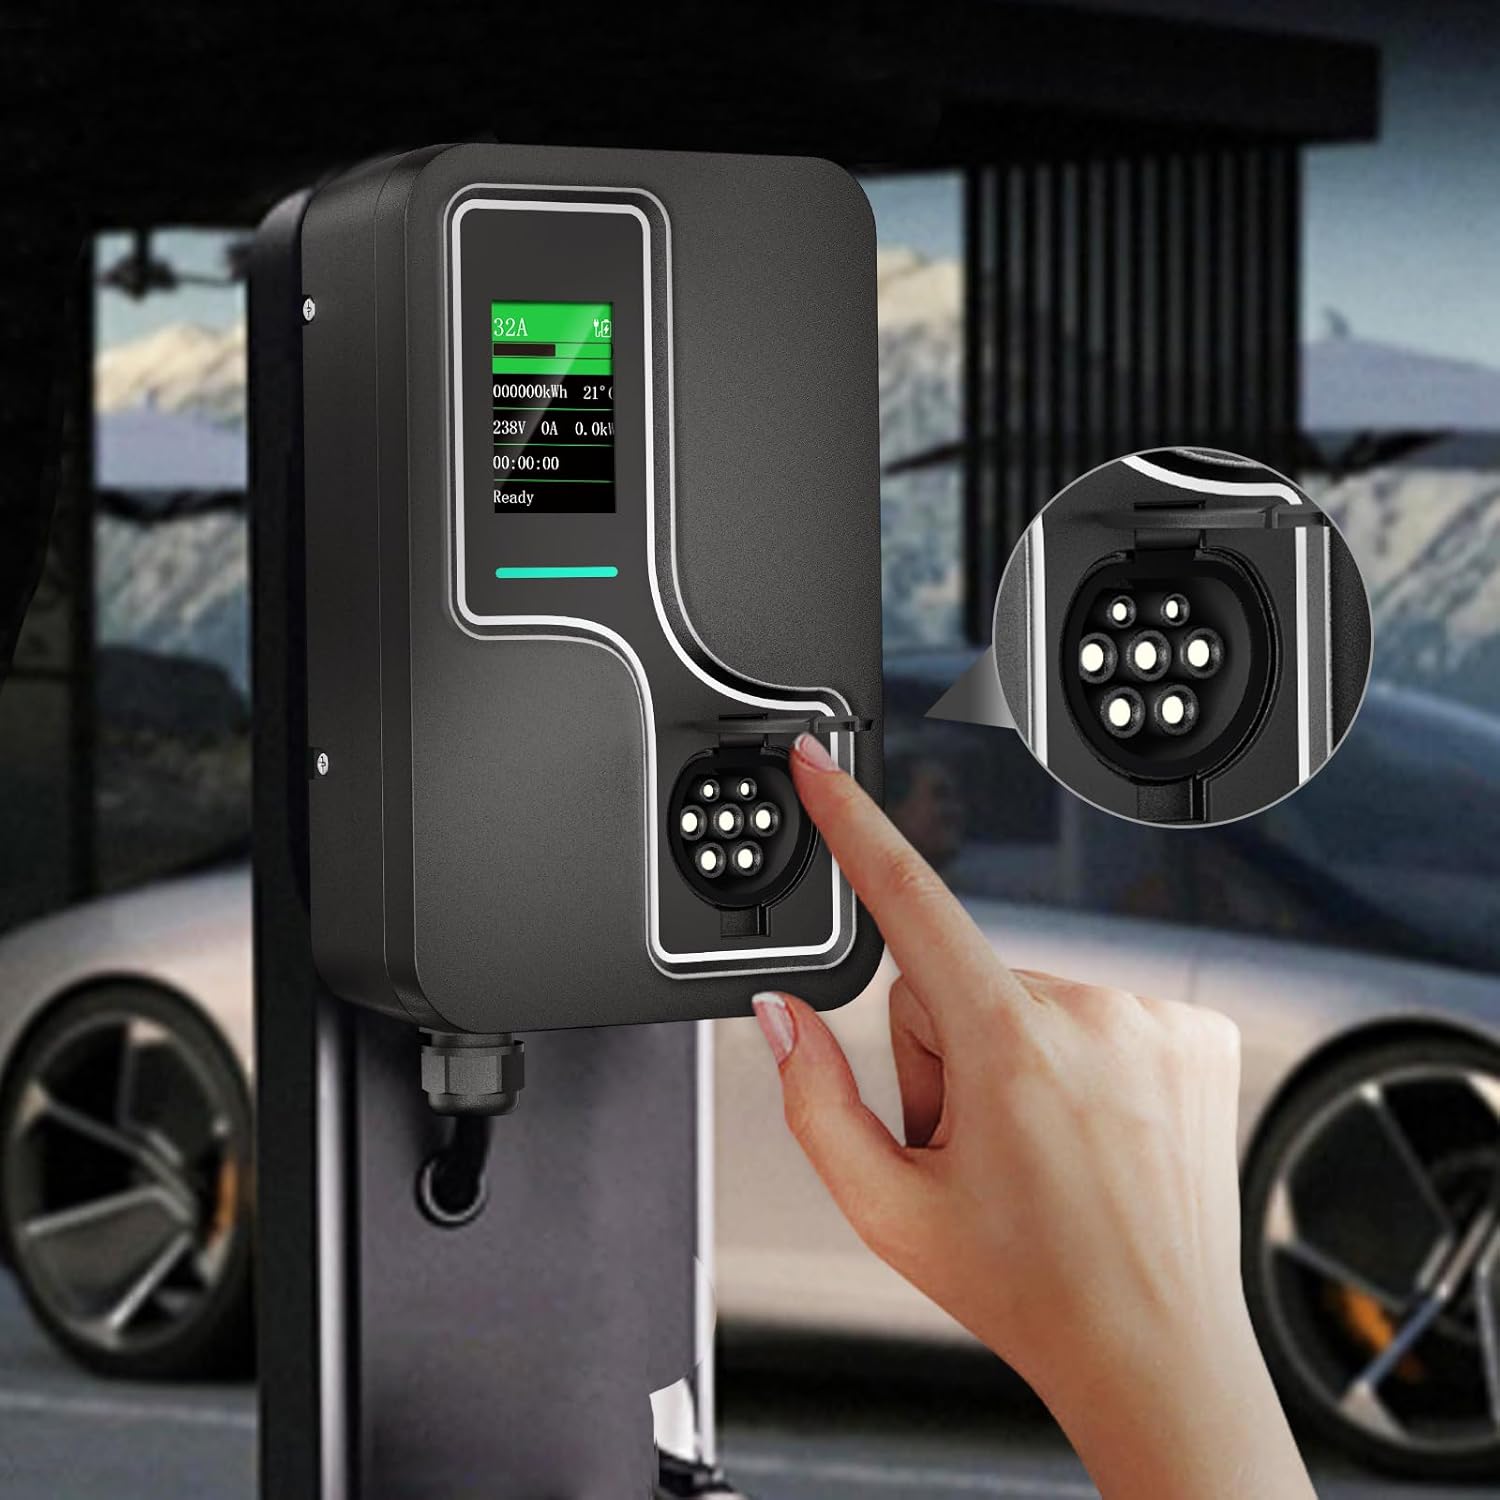
Image 6.2: Mobile application interface for remote charging control.
7. Maintenance
Regular maintenance ensures the longevity and optimal performance of your charging station.
- Cleaning: Periodically wipe the exterior of the charging station with a soft, damp cloth. Do not use abrasive cleaners or solvents.
- Inspection: Regularly check the charging cable and connector for any signs of wear, damage, or corrosion. If damage is found, discontinue use and contact support.
- Ventilation: Ensure that the charging station's ventilation openings are not obstructed.
8. Troubleshooting
If you encounter issues with your ShockFlo CS09-S, refer to the following common problems and solutions:
| Problem | Possible Cause | Solution |
|---|---|---|
| Charging does not start | Cable not fully inserted, vehicle not ready to charge, power supply issue, RFID card not recognized. | Ensure cable is securely connected. Check vehicle's charging settings. Verify power supply. Re-scan RFID card or use app. |
| Charging interrupted | Vehicle fault, power fluctuation, charging station error. | Check vehicle's dashboard for error messages. Reset the charging station by cycling power. |
| Display is blank | No power to the unit. | Check the circuit breaker for the charging station. Ensure the main power supply is active. |
| App connectivity issues | Poor Wi-Fi signal, incorrect app settings. | Ensure the charging station is within Wi-Fi range. Restart your router and the charging station. Reconfigure app settings. |
If the problem persists after attempting these solutions, please contact ShockFlo customer support.
9. Specifications
- Model: CS09-S
- Brand: ShockFlo
- ASIN: B0DDTYRKHQ
- Package Dimensions: 40 x 28 x 15 cm
- Package Weight: 85.05 g
- Date First Available: 21 August 2024
Note: Specific electrical specifications (e.g., voltage, current, power output) should be confirmed on the product label or with the manufacturer.
10. Warranty and Support
Specific warranty details for the ShockFlo CS09-S Electric Vehicle Charging Station are not provided in the available product information. For warranty claims, technical support, or service inquiries, please contact ShockFlo directly through their official website or the retailer where the product was purchased.
Always retain your proof of purchase for warranty purposes.


