1. Introduction
This manual provides essential information for the safe operation, setup, and maintenance of your DEERC 1:14 All Terrain RC Car, Model US-9003E. Please read this manual thoroughly before operating the vehicle to ensure proper function and longevity.
2. Safety Information
WARNING: Keep away from open flames.
- Always operate the RC car in open areas, away from people, pets, and obstacles.
- Do not operate in wet conditions or near water to prevent electrical damage.
- Ensure batteries are charged correctly and handled with care. Do not overcharge or short-circuit batteries.
- Adult supervision is recommended for users under 14 years of age.
- Turn off the RC car and remote control when not in use.
- Do not touch moving parts during operation to avoid injury.
3. Package Contents
Verify that all items listed below are included in your package:
- 1x DEERC 1:14 All Terrain RC Truck (Model US-9003E)
- 1x Remote Control
- 2x Li-ion Batteries (7.4V 1500mAh)
- 1x USB Charging Cable
- 1x Product Manual (this document)
- Other accessories (e.g., screwdriver, spare parts if included)

Image 3.1: Contents of the DEERC 1:14 All Terrain RC Car package, including the car, remote, batteries, and charging cable.
4. Product Overview
4.1 RC Car Components
The DEERC US-9003E features a robust design for high-speed, all-terrain performance.
- High-Strength Metal Drivetrain: Includes alloy differential, metal dog bones, and reinforced gears for durability.
- Magnetic Brushed Motor: A 390 magnetic brushed motor with a heat sink provides efficient power, delivering up to 22,000 RPM for speeds up to 40 KPH.
- Smart 30A ESC: Compatible with 2S LiPo batteries, featuring low voltage cutoff and stall protection.
- 1.5KG Pulling Force Servo: Ensures precise steering and control on various terrains.
- Dual 2S 7.4V 1500mAh Li-ion Batteries: Provide extended playtime up to 40 minutes.
- Aggressive Non-Slip Rubber Tires: Designed for superior grip on diverse surfaces.

Image 4.1: Detailed view of the high-strength metal drive system, including the alloy differential, metal dog bones, and metal gears.

Image 4.2: The magnetic 390 brushed motor, equipped with a heat sink for efficient performance.

Image 4.3: The Smart 30A ESC, responsible for motor control and battery protection.

Image 4.4: The servo system, providing precise steering control.
4.2 Remote Control Features
The 2.4GHz three-channel remote control offers a stable connection and precise adjustments.
- 2.4GHz Frequency: Ensures a strong, interference-free connection up to 262 feet.
- Full-Proportional Controls: Allows for fine-tuning of speed and steering.
- Steering Trim: Adjusts the neutral position of the steering.
- Throttle Trim: Adjusts the neutral position of the throttle.

Image 4.5: The 2.4GHz remote control, highlighting its various adjustment dials and buttons.
5. Setup Guide
5.1 Battery Charging
- Connect the USB charging cable to a compatible USB power adapter (not included).
- Connect the battery to the charging cable.
- The indicator light on the USB charger will show charging status (refer to charger's specific instructions for light indications).
- Once fully charged, disconnect the battery from the charger. Do not leave batteries charging unattended.
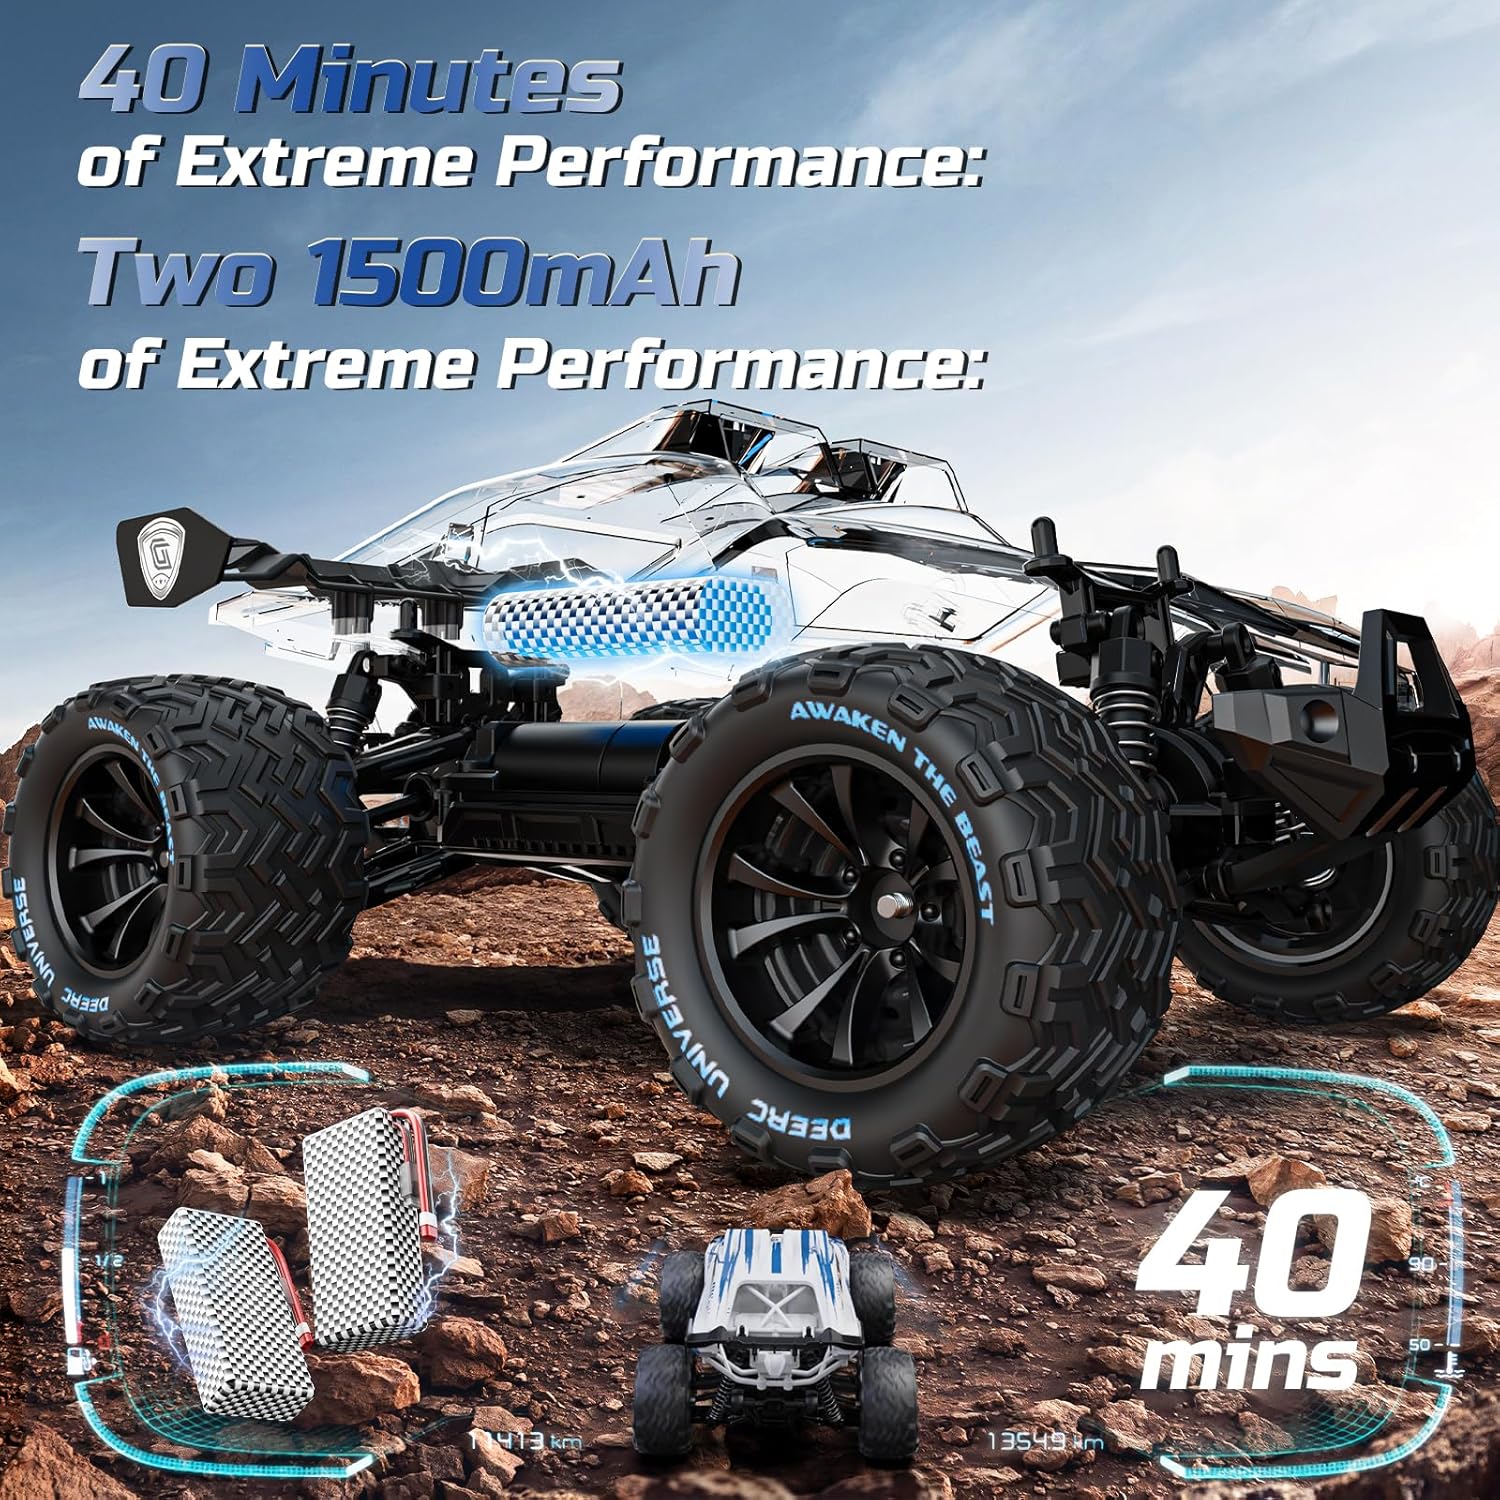
Image 5.1: The two 7.4V 1500mAh Li-ion batteries, providing up to 40 minutes of operation.
5.2 RC Car Battery Installation
- Ensure the RC car is powered off.
- Locate the battery compartment on the RC car.
- Open the battery compartment cover.
- Insert a fully charged Li-ion battery into the compartment, ensuring correct polarity.
- Securely close the battery compartment cover.
5.3 Remote Control Battery Installation
- Ensure the remote control is powered off.
- Locate the battery compartment on the back of the remote control.
- Open the battery compartment cover.
- Insert the required batteries (typically AA, refer to remote for specific type and quantity) ensuring correct polarity.
- Securely close the battery compartment cover.
5.4 Pairing the Remote Control
- Turn on the RC car. The indicator light on the car will flash.
- Turn on the remote control.
- The remote control and RC car will automatically pair. The indicator lights on both devices will become solid once paired.
- If pairing fails, turn off both devices and repeat the steps.
6. Operating Instructions
6.1 Basic Controls
- Throttle Trigger: Pull to move forward, push to brake/reverse.
- Steering Wheel: Turn left to steer left, turn right to steer right.
6.2 Adjustments
- Steering Trim: Use the steering trim dial on the remote to adjust the steering if the car does not drive straight when the steering wheel is centered.
- Throttle Trim: Use the throttle trim dial to adjust the throttle if the car moves slightly forward or backward when the throttle trigger is in the neutral position.
6.3 Driving Tips
- Start with slow speeds to familiarize yourself with the controls.
- The 4WD system and aggressive tires allow for operation on various terrains including dirt, sand, and grass.
- Practice smooth acceleration and braking for better control.
- Avoid sudden, sharp turns at high speeds to prevent rollovers.

Image 6.1: The RC car demonstrating its high-speed capability of up to 40 KPH on an off-road surface.

Image 6.2: The RC car's adaptability across different environments, including sandy beaches, snowy landscapes, and rocky pathways.
7. Maintenance and Care
7.1 Cleaning
- After each use, especially in dirty or dusty conditions, clean the RC car with a soft brush or cloth.
- Avoid using water or harsh chemicals directly on electronic components.
- Remove any debris from the wheels, suspension, and drivetrain.
7.2 Battery Care
- Always disconnect batteries from the RC car and charger when not in use.
- Store batteries in a cool, dry place, away from direct sunlight and extreme temperatures.
- Do not puncture, disassemble, or expose batteries to fire.
7.3 Storage
- Store the RC car and remote control in a dry, safe place when not in use.
- Remove batteries from both the car and remote for long-term storage.
7.4 Component Inspection
- Regularly inspect the metal drivetrain components (differential, dog bones, gears) for wear or damage.
- Check tires for wear and ensure they are securely attached.
- Ensure all screws and fasteners are tight.
8. Troubleshooting
| Problem | Possible Cause | Solution |
|---|---|---|
| RC car does not respond to remote. | Low battery in car or remote; Not paired; Interference. | Charge/replace batteries; Re-pair car and remote; Move to an area with less interference. |
| Car drives slowly or lacks power. | Low car battery; Motor/ESC overheating; Obstruction in drivetrain. | Charge car battery; Allow components to cool; Check for debris in gears. |
| Steering is off-center. | Steering trim needs adjustment. | Adjust the steering trim dial on the remote control. |
| Car makes unusual noises. | Debris in gears; Damaged gear; Loose parts. | Inspect and clean gears; Check for loose components. |
9. Specifications
| Feature | Detail |
|---|---|
| Model Number | US-9003E |
| Scale | 1:14 |
| Max Speed | 40 KPH (approx. 25 MPH) |
| Drive System | 4WD (Four-Wheel Drive) |
| Motor Type | 390 Magnetic Brushed Motor |
| ESC | Smart 30A |
| Batteries | 2x 7.4V 1500mAh Li-ion (included) |
| Playtime | Up to 40 minutes (with two batteries) |
| Remote Control Frequency | 2.4GHz |
| Control Range | Up to 262 feet (80 meters) |
| Product Dimensions | 9.4 x 12.8 x 5.3 inches |
| Item Weight | 2.2 pounds |
| Recommended Age | 14 years and up |
10. Warranty and Support
For warranty information, technical support, or replacement parts, please refer to the contact information provided with your purchase or visit the official DEERC website. Keep your purchase receipt as proof of purchase for warranty claims.


