
Bosch DWK66PJ60T
Bosch DWK66PJ60T 60 cm Inclined Cooker Hood Instruction Manual
Model: DWK66PJ60T
1. Introduction and Product Overview
Thank you for choosing the Bosch DWK66PJ60T 60 cm Inclined Cooker Hood. This manual provides essential information for the safe installation, operation, and maintenance of your appliance. Please read it thoroughly before use and keep it for future reference.
The DWK66PJ60T is designed to efficiently remove steam and cooking odors from your kitchen. It features a sleek black glass inclined design, touch controls, and energy-efficient LED lighting. Key features include an automatic shut-off timer and a filter cleaning reminder for optimal performance.
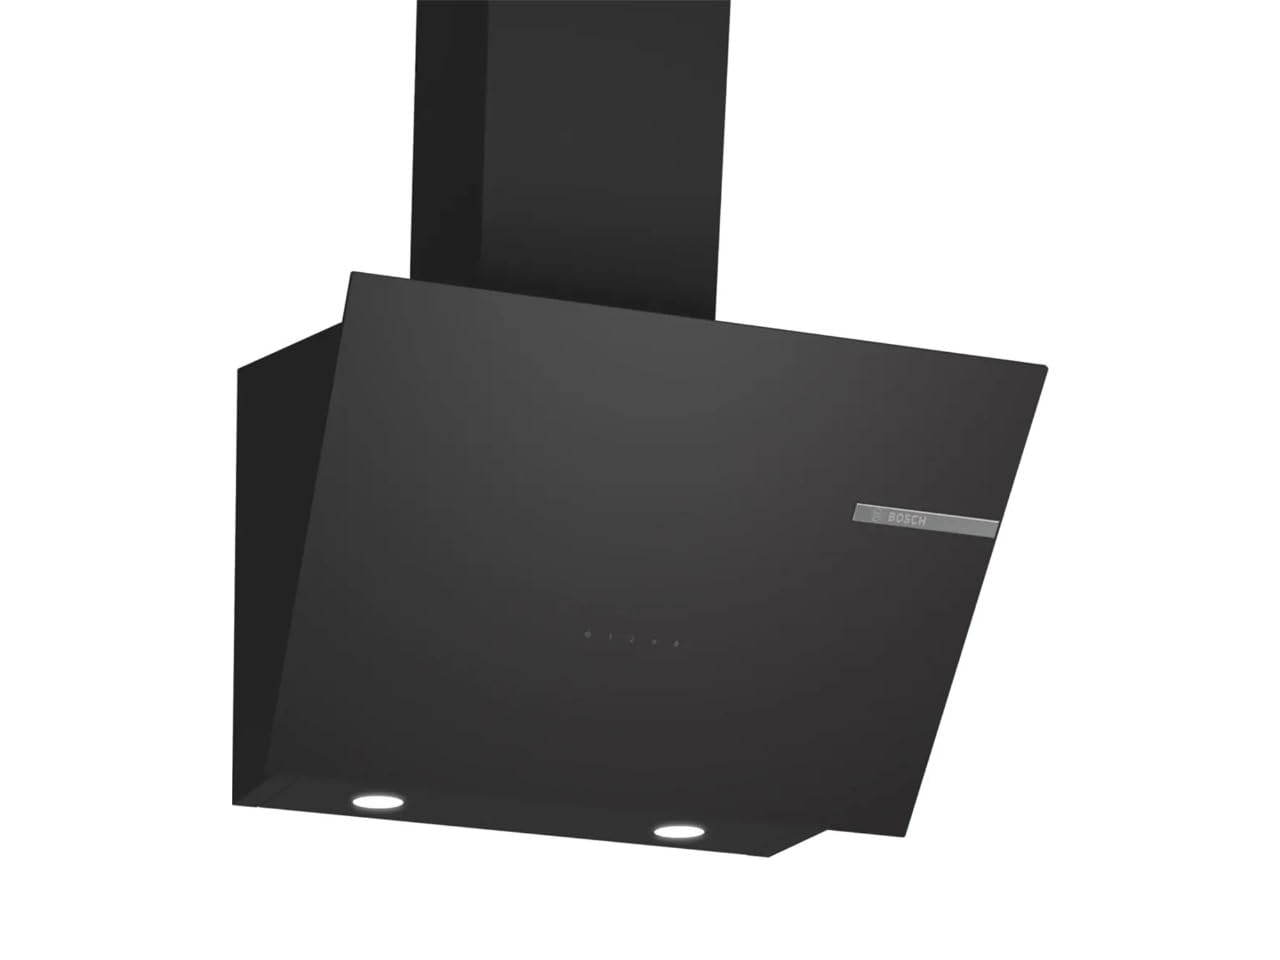
Image 1.1: The Bosch DWK66PJ60T cooker hood in a kitchen setting.

Image 1.2: Detail of the touch control panel.
2. Safety Information
General Safety:
- Read all instructions carefully before installation and use.
- Keep children away from the appliance.
- Ensure adequate ventilation in the room when the cooker hood is used simultaneously with gas or other fuel-burning appliances.
- Do not flambé under the cooker hood.
- Regularly clean the grease filters to prevent fire hazards.
Electrical Safety:
- The appliance must be properly earthed.
- Ensure the mains voltage (240 V) and frequency (60 Hz) match the ratings on the appliance label.
- Do not pull the power cord to disconnect the appliance.
- If the power cord is damaged, it must be replaced by the manufacturer, its service agent, or similarly qualified persons to avoid a hazard.
3. Setup and Installation
The Bosch DWK66PJ60T cooker hood is designed for wall-mounted installation. It can operate in either ducted (exhaust air) or recirculation mode. Recirculation mode requires additional accessories (carbon filters) which are not included.
Installation Requirements:
- Ensure the wall structure is strong enough to support the hood's weight (11.3 kg).
- Maintain minimum clearance distances from the cooking surface as specified in the diagrams.
- For ducted operation, ensure a suitable exhaust air outlet is available.
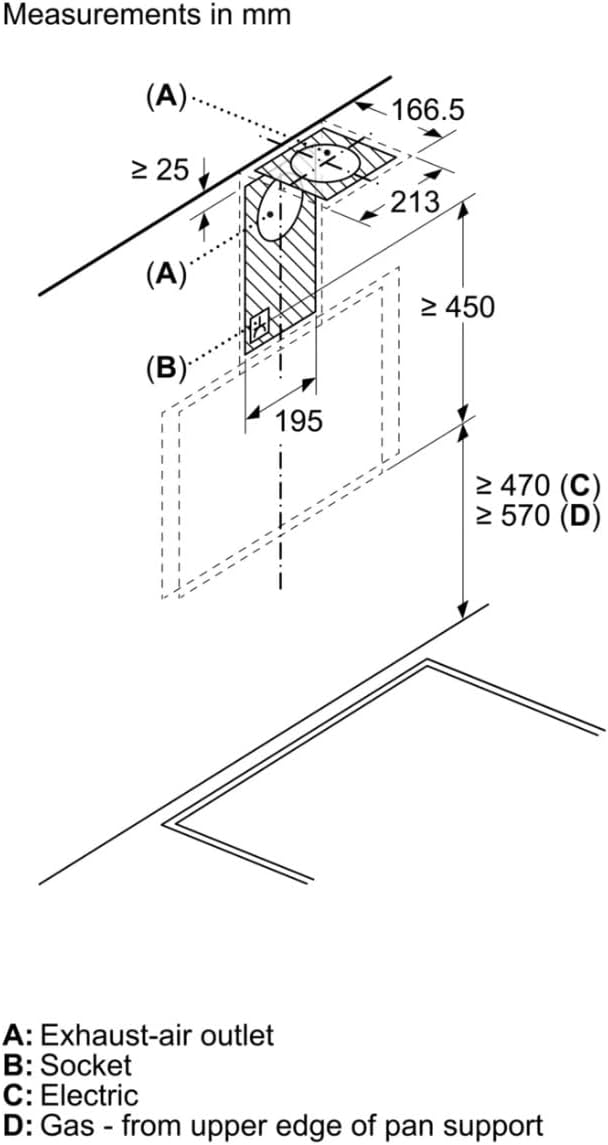
Image 3.1: Product dimensions in millimeters.

Image 3.2: Installation clearances. A: Exhaust-air outlet, B: Socket, C: Electric hob (min 470mm), D: Gas hob (min 570mm).

Image 3.3: Mounting diagram. A: Electric hob (min 470mm), B: Gas hob (min 570mm).
Steps for Installation:
- Mark the drilling points on the wall according to the provided installation template and diagrams.
- Drill holes and insert wall plugs.
- Secure the mounting bracket to the wall.
- Mount the cooker hood onto the bracket.
- Connect the exhaust ducting (for ducted mode) or install recirculation accessories (for recirculation mode).
- Connect the appliance to the mains power supply.
4. Operating Instructions
The cooker hood is operated via a touch control panel located on the front of the appliance.
Image 4.1: Touch control panel. Symbols typically include fan speed settings (1, 2), power on/off, and light control.
Fan Speed Settings:
- Press the fan speed buttons (e.g., '1' or '2') to select the desired extraction level. The hood offers 2 speed settings.
- Higher speeds are suitable for intense cooking with strong odors or steam.
LED Lighting:
- Press the light symbol button to turn the LED lighting on or off.
- The LED lights provide clear and bright illumination of your cooking area.

Image 4.2: Integrated LED lighting on the underside of the hood.
Automatic Shut-off Timer:
- This feature allows the hood to continue operating for 15 minutes after cooking to ensure complete air purification, then automatically switches off.
- Refer to the control panel symbols for activating the timer function.
Filter Cleaning Reminder:
- The hood is equipped with a reminder that indicates when the metal grease filters require cleaning for optimal performance.
- Follow the maintenance instructions when this reminder is activated.
5. Maintenance
Regular maintenance ensures the longevity and efficient operation of your cooker hood.
Cleaning the Metal Grease Filters:
- The metal grease filters capture grease particles from cooking fumes. They should be cleaned regularly (approximately every 3-4 weeks, depending on usage).
- To remove the filters, open the glass panel and unlatch the filters as shown in the diagram.

Image 5.1: Accessing the metal grease filters.
- The filters can be washed by hand using hot soapy water or in a dishwasher.
- Allow the filters to dry completely before re-installing them.
Cleaning the Hood Surface:
- Clean the black glass and other exterior surfaces with a soft cloth and a mild, non-abrasive cleaning agent.
- Do not use harsh chemicals or abrasive pads, as these can damage the surface.
Replacing LED Lights:
- LED lights have a long lifespan. If replacement is necessary, contact authorized service personnel. Do not attempt to replace them yourself.
6. Troubleshooting
Before contacting customer service, please check the following common issues:
| Problem | Possible Cause | Solution |
|---|---|---|
| Hood does not turn on | No power supply; power cord disconnected; fuse tripped | Check power connection; check circuit breaker/fuse box |
| Low extraction power | Grease filters are dirty; incorrect speed setting; ducting blocked | Clean grease filters; select higher speed; check ducting for obstructions |
| Excessive noise | Loose parts; improper installation; foreign object in fan | Check for loose components; ensure secure installation; contact service if noise persists |
| LED lights not working | Light switch off; faulty LED module | Ensure light is switched on; contact service for replacement |
If the problem persists after checking these points, please contact Bosch customer service.
7. Specifications
| Feature | Specification |
|---|---|
| Brand Name | Bosch |
| Model Number | DWK66PJ60T |
| Product Shape | Inclined Wall-Mounted Hood |
| Color | Black |
| Product Dimensions (D x W x H) | Refer to installation diagrams for detailed dimensions. |
| Special Features | Automatic Shut-off Timer |
| Airflow Capacity | 400 m³/h (Max) |
| Material | Glass |
| Noise Level | 59 dB |
| Mounting Type | Wall Mount |
| Included Components | Instruction Manual |
| Control Type | Touch |
| Voltage | 240 V |
| Number of Speeds | 2 |
| Light Source | LED |
| Power | 216 W |
| Filter Type | Metal |
| Ventilation Type | Ducted (Recirculation possible with accessories) |
| Frequency | 60 Hz |
| Item Weight | 11.3 kg |
| Manufacturer | Bosch |
8. Warranty and Support
This Bosch DWK66PJ60T cooker hood comes with a 5-year warranty from Bosch Egypt, covering manufacturing defects and malfunctions under normal use.
For warranty claims, technical support, or service requests, please contact Bosch customer service in your region. Ensure you have your proof of purchase and the model number (DWK66PJ60T) available when contacting support.
For further assistance, please visit the official Bosch website or refer to the contact information provided with your purchase documentation.
Ask a question about this manual
Ask about setup, troubleshooting, compatibility, parts, safety, or missing instructions. Manuals+ will review the question and use this page’s manual context to help answer it.