1. Introduction
Thank you for choosing the ATLETICA R8-Bradley Power Rack with Cable Cross. This versatile fitness equipment combines the stability of a power rack with the functionality of a cable cross machine, designed for comprehensive strength training in a home gym environment. This manual provides essential information for safe assembly, operation, and maintenance of your R8-Bradley system. Please read it thoroughly before use and retain it for future reference.
2. Safety Information
WARNING: Serious injury or death can occur if safety precautions are not followed.
- Consult a physician before starting any exercise program.
- Read and understand all instructions in this manual before assembly or use.
- Keep children and pets away from the equipment during use.
- Ensure all bolts and nuts are securely tightened before each use.
- Inspect the equipment for worn or damaged parts before each use. Do not use if damaged.
- Use the equipment on a level, stable surface.
- Do not exceed the maximum weight capacity of the equipment (refer to Specifications).
- Wear appropriate athletic footwear and clothing.
- Perform exercises with controlled movements. Avoid sudden or jerky motions.
- Always use spotters or safety catches when lifting heavy weights.
3. Package Contents
Verify that all components are present before beginning assembly. Refer to the included assembly diagram for a complete list of parts.
- Main Power Rack Frame components
- 2 x 90 kg Lateral Weight Stacks
- Cable Pulleys and Cables
- J-Hooks and Safety Spotter Arms
- Pull-up Bar
- Assembly Hardware (bolts, nuts, washers)
- Tools for Assembly (wrenches, allen keys - may be included or required separately)
- User Manual (this document)
4. Setup and Assembly
Assembly requires at least two people due to the size and weight of the components. Clear a large, open area for assembly.
- Unpack Components: Carefully remove all parts from the packaging. Lay them out and compare with the parts list in the assembly diagram to ensure nothing is missing or damaged.
- Assemble Base Frame: Connect the base stabilizers to the uprights using the provided hardware. Ensure all connections are finger-tight before final tightening.
- Install Uprights: Attach the main uprights to the base frame. The R8-Bradley is designed with the R8 modular principle, allowing for expansion with attachments on six uprights.
- Mount Crossmembers and Pull-up Bar: Secure the top crossmembers and the pull-up bar to the uprights.
- Install Weight Stacks: The 90 kg lateral weight stacks can be installed at three R8 series depths: 42 cm, 78 cm, and 108 cm. Follow the specific instructions in the assembly diagram for cable routing and weight stack installation. Lateral installation of the weight stacks enhances stability.
- Attach Pulleys and Cables: Route the cables through the pulley system as shown in the assembly diagram. Ensure cables are not twisted and move freely. The cable guidance and roller mechanism are consistent with Atletica R8 Alpha systems.
- Final Tightening: Once all components are in place, systematically tighten all bolts and nuts using the appropriate tools. Do not overtighten.
- Stability Check: Gently shake the assembled rack to ensure it is stable and all connections are secure.

Image: Front view of the Atletica R8-Bradley Power Rack with Cable Cross, showing the main frame and cable system. This image illustrates the overall structure of the equipment after assembly.
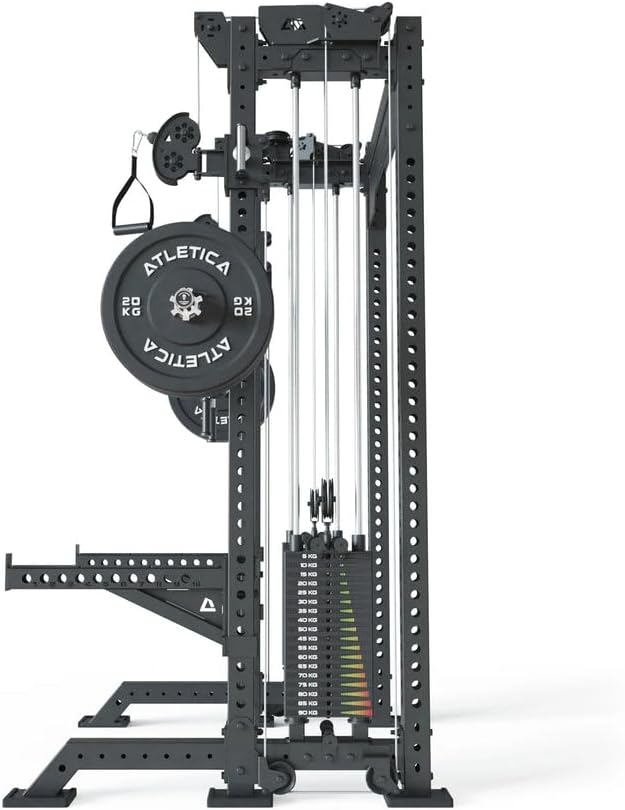
Image: Side view of the Atletica R8-Bradley Power Rack, highlighting the integrated weight stack and pulley system. This view demonstrates the lateral placement of the weight stacks for enhanced stability.
5. Operating Instructions
The R8-Bradley offers a wide range of exercises. Always ensure proper form and controlled movements.
5.1. Using the Cable Cross System
- Adjusting Weight: Select the desired weight by inserting the magnetic metal pin into the corresponding weight plate on the stack. The weight stacks are easily accessible and adjustable.
- Attaching Accessories: Connect desired cable attachments (handles, ankle straps, etc.) to the carabiners on the cable ends.
- Pulley Height Adjustment: Adjust the height of the pulleys by pulling the adjustment pin and sliding the pulley mechanism along the uprights to the desired position. Ensure the pin fully engages.
- Exercise Execution: Perform exercises with smooth, controlled motions. The continuous design of the R8-Bradley Cable Cross allows for various exercises and accommodates a weight bench.
5.2. Using the Power Rack
- J-Hooks and Safety Spotter Arms: Insert J-hooks and safety spotter arms into the desired height holes on the uprights. Ensure they are securely seated before loading weight. Always use safety spotter arms when performing heavy lifts.
- Barbell Exercises: Use the J-hooks to rack and unrack barbells for squats, bench presses, and other exercises.
- Pull-up Bar: The integrated pull-up bar can be used for various bodyweight exercises.
- Accessory Compatibility: The front uprights are compatible with various R8 series accessories, including jammer arms, J-hooks, jump platforms, and boxing bag mounts.

Image: A user performing cable curls using the Atletica R8-Bradley Power Rack's cable cross system. This demonstrates the equipment in active use for strength training.

Image: Close-up view of the Atletica R8-Bradley's cable pulley system and attachment point. This shows the detail of the adjustable pulley mechanism and the carabiner for attaching accessories.

Image: Close-up view of the Atletica R8-Bradley's weight stack, showing the individual plates and the magnetic pin for weight selection. This illustrates how to adjust the resistance for cable exercises.
6. Maintenance
Regular maintenance ensures the longevity and safe operation of your equipment.
- Daily: Wipe down the equipment with a damp cloth after each use to remove sweat and dust.
- Weekly: Inspect all bolts, nuts, and connections for tightness. Retighten as necessary.
- Monthly: Check cables for fraying, kinks, or wear. Inspect pulleys for smooth operation. Lubricate moving parts with a silicone-based lubricant if needed.
- Annual: Perform a thorough inspection of the entire frame for any signs of structural damage or corrosion.
- Replace any worn or damaged parts immediately. Do not use the equipment until repairs are made.
7. Troubleshooting
| Problem | Possible Cause | Solution |
|---|---|---|
| Equipment feels unstable or wobbly. | Loose bolts or uneven surface. | Ensure all assembly bolts are securely tightened. Move equipment to a level surface. |
| Cables are sticking or not moving smoothly. | Lack of lubrication, debris in pulleys, or cable fraying. | Apply silicone lubricant to cables and pulleys. Clean pulleys. Inspect cables for damage and replace if necessary. |
| Weight plates are not moving freely. | Guide rods are dirty or damaged, or weight pin is bent. | Clean guide rods. Ensure the magnetic pin is straight and fully inserted. Contact support if guide rods are damaged. |
8. Specifications
- Model: ATLETICA R8-Bradley
- Model Number: 555-1767
- Color: Black
- Size: Short (Kurz)
- Weight Stacks: 2 x 90 kg (Lateral)
- Item Weight: Approximately 285.5 kg
- Compatible Depths for Weight Stacks: 42 cm, 78 cm, 108 cm (R8 Series)
- Manufacturer: ATLETICA
- ASIN: B0DDQKF712
- Date First Available: August 20, 2024

Image: Top-down view of the Atletica R8-Bradley Power Rack, illustrating its footprint and structural design. This perspective helps in understanding the space requirements and overall layout.

Image: Rear view of the Atletica R8-Bradley Power Rack, showing the back of the frame and cable routing. This view can be useful for understanding cable management and rear access.
9. Warranty and Support
For warranty information and customer support, please refer to the documentation provided with your purchase or contact Atletica customer service directly.
Contact Information: Please visit the official Atletica website or refer to your purchase receipt for specific contact details.


