
1. Introduction
Thank you for choosing the AsperX 6000A Car Jump Starter. This portable device is designed to provide a powerful 6000A peak current for quickly starting 12V vehicles, including cars, SUVs, motorcycles, ships, and lawn mowers. It also functions as a versatile power bank and emergency LED flashlight, making it an essential tool for various situations.
Please read this manual thoroughly before use to ensure safe and optimal operation of your device. Keep this manual for future reference.
2. What's in the Box
Upon unboxing your AsperX 6000A Car Jump Starter, you should find the following items:
- 1 x AsperX 6000A Car Jump Starter Unit
- 1 x Smart Jumper Cables with Indicator
- 1 x USB Charging Cable
- 1 x User Manual (this document)

Image: All items included in the AsperX 6000A Car Jump Starter package.
3. Product Features
- 6000A Powerful Start: Provides 6000A peak current to quickly start 12V vehicles (all gas or up to 12L diesel engines) in 3 seconds. Features an 88.8 Wh large-capacity battery, stable in extreme temperatures (-20℃ to 60℃).

Image: The AsperX 6000A Jump Starter is capable of starting a wide range of 12V vehicles, including motorcycles, SUVs, vans, pickups, tractors, UTVs, lorries, boats, and motorboats.
- Multi-use Design (Power Bank): Equipped with a built-in 5V/2.4A USB output port for charging digital devices like mobile phones and tablets. Eliminates the need for an extra power bank during outdoor activities.

Image: The jump starter features USB-C input and USB-A output ports for quick charging of various mobile devices, including smartphones and tablets.
- Professional-Grade Safety Protection: Incorporates 10 intelligent protection systems: overcharge, overvoltage, short circuit, overcurrent, overload, spark protection, reverse charging, reverse polarity, high temperature, and low temperature. AI real-time monitoring provides automatic alarms, ensuring safe operation even for novice users.
- Three-Mode Emergency Flashlight: Features a built-in LED flashlight with three modes: strong light, constant light, SOS, and warning flash. Useful for emergency lighting during camping, night repairs, or traffic accidents.

Image: The jump starter's integrated LED flashlight offers three modes: strong light, SOS, and flash, providing illumination for up to 96 hours.
4. Safety Information
The AsperX 6000A Car Jump Starter is designed with multiple safety features to protect both the user and the vehicle. Always adhere to the following guidelines:
- Do not operate the BOOST button before properly connecting the clamps to the vehicle battery.
- Ensure the jump starter's battery level is not below 50% for optimal performance.
- Avoid activating BOOST when the vehicle starts normally.
- If the jump starter beeps or shows an error message, refer to the troubleshooting section.
- Do not incinerate, disassemble, or use in high temperatures.
- Do not charge except in the specified charging conditions.
- Always use in a well-ventilated area, with some eye protection.
- The device is equipped with 10 intelligent protection systems including overcharge, overvoltage, short circuit, overcurrent, overload, spark protection, reverse charging, reverse polarity, high temperature, and low temperature protection.
5. Setup
Before initial use, and periodically thereafter, ensure your AsperX 6000A Car Jump Starter is fully charged. The unit features indicator lights to show the current charge level.
Charging the Unit
To charge the jump starter, use the provided USB charging cable. Connect the USB-C input port on the jump starter to a compatible USB power adapter (not included) or a car charger. The indicator lights will show charging progress.

Image: The jump starter can be recharged using a standard wall charger via its USB-C input.

Image: The jump starter can also be conveniently recharged using a car charger, making it ideal for on-the-go use.
The built-in smart chip extends battery lifespan, offering up to 24-month standby time. It is recommended to check the charge level every 3 months and recharge if necessary.
6. Operating Instructions
6.1. Jump Starting a Vehicle
- Ensure the jump starter is adequately charged (above 50%).
- Connect the smart jumper cables to the jump starter unit.
- Attach the red (positive) clamp to the positive (+) terminal of the vehicle battery.
- Attach the black (negative) clamp to the negative (-) terminal of the vehicle battery or a suitable ground point on the vehicle chassis.
- Once connected, the indicator on the smart cables will show a green light if the connection is correct. If a red light or alarm sounds, check connections for reverse polarity or other issues.
- If the vehicle battery is completely dead, press the 'BOOST' button on the smart cables for 2-3 seconds to activate the boost function. The indicator will turn solid green.
- Start your car engine within 30 seconds of activating the boost function or seeing the green light.
- Once the engine starts, immediately remove the jumper cables from the vehicle battery, then disconnect them from the jump starter unit.
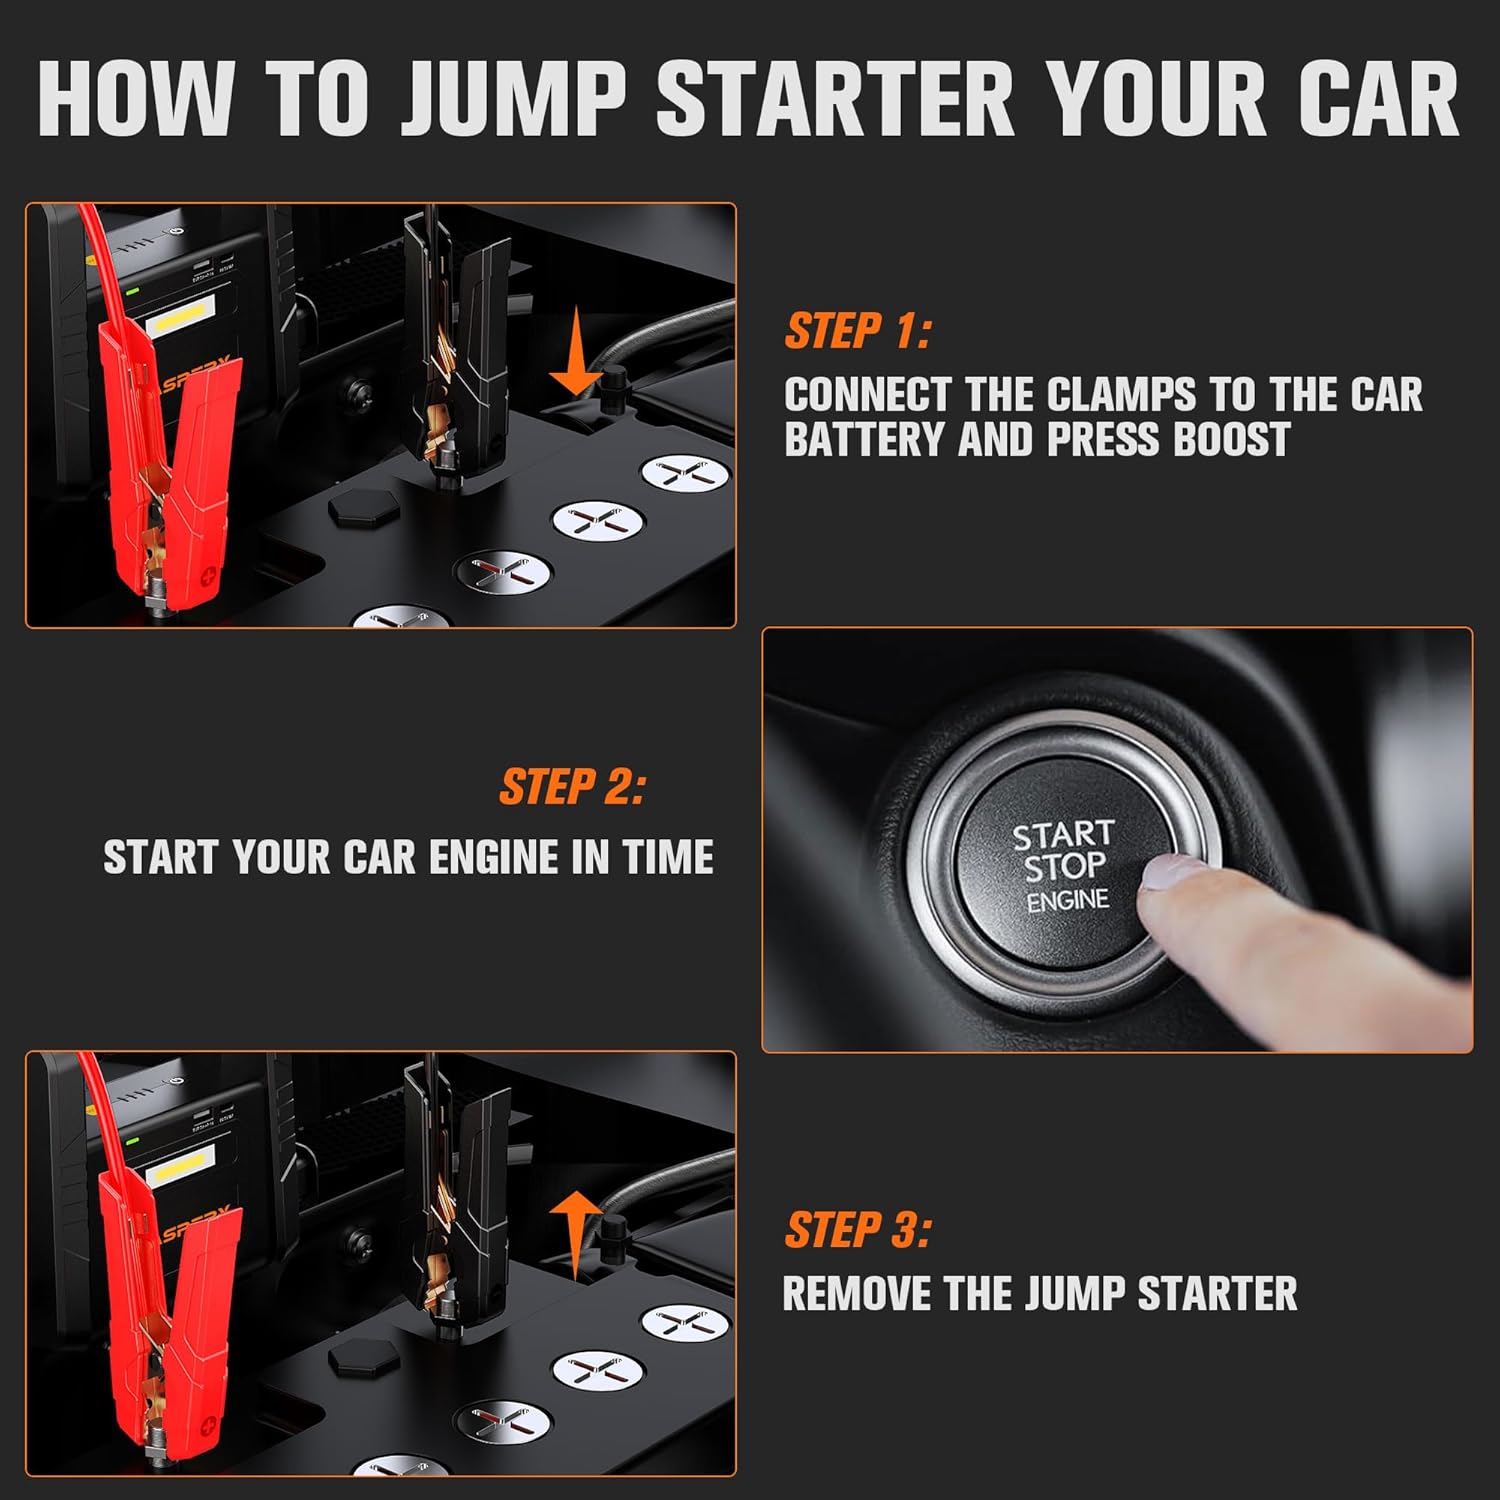
Image: Visual guide for jump starting a car: Step 1 - Connect clamps and press boost; Step 2 - Start engine; Step 3 - Remove jump starter.
Video: Demonstration of connecting the jump starter to a vehicle battery and starting the engine. This video highlights the ease of use and safety features.
6.2. Power Bank Functionality
The AsperX 6000A can charge various electronic devices:
- Connect your device's USB charging cable to the USB-A (OUT 5V/2.4A) port on the jump starter.
- The jump starter will automatically begin charging your device.
6.3. Using the LED Flashlight
The built-in LED flashlight offers multiple modes for different needs:
- Press and hold the power button for 3 seconds to turn on the flashlight (strong light mode).
- Press the power button again to switch to SOS mode (flashing SOS signal).
- Press the power button a third time to activate the warning flash mode.
- Press and hold the power button for 3 seconds to turn off the flashlight.
7. Maintenance
- Store the jump starter in a cool, dry place away from direct sunlight and high temperatures.
- It is recommended to fully charge the unit every 3 months, even if not in use, to maintain battery health and ensure it's ready when needed.
- Clean the exterior of the unit with a soft, damp cloth. Do not use harsh chemicals or abrasive materials.
8. Troubleshooting
The smart jumper cables feature indicator lights and audible alarms to help diagnose issues:
- Green Light: Correct connection, ready to jump start.
- Red Light / Audible Alarm: Indicates incorrect connection (e.g., reverse polarity) or a fault. Disconnect and re-check connections.
- No Indicator Light: The jump starter's battery might be too low, or there's a poor connection. Ensure the unit is charged and clamps are securely attached.
Video: A brief overview of the jump starter's features, including its indicator lights and compact design.
9. Specifications
| Specification | Value |
|---|---|
| Brand | AsperX |
| Model | AX6000 |
| Peak Output Current | 6000 Amps |
| Battery Capacity | 88.8 Wh (Lithium Polymer) |
| Product Dimensions | 3"D x 7"W x 10"H |
| Item Weight | 4.16 pounds |
| USB Output | 5V/2.4A |
| Input (Type-C) | 5V/9V |
| Operating Temperature | -20℃ to 60℃ |
10. Warranty and Support
The AsperX 6000A Car Jump Starter comes with a lifetime technical support guarantee. For any questions, concerns, or technical assistance, please contact customer service. Our customer service team is available 24 hours a day to address your needs.
For further assistance, please refer to the contact information provided on the product packaging or the official AsperX website.

