1. Introduction and Safety Information
Thank you for choosing the CHAOKE Exercise Bike Model 520A. To ensure your safety and optimize your workout experience, please read this manual thoroughly before assembly and use. Keep this manual for future reference.
Important Safety Warnings:
- Consult your physician before starting any exercise program.
- The maximum user weight for this exercise bike is 150 kg (330 lbs).
- The maximum recommended user height is 185 cm.
- Ensure all bolts and nuts are securely tightened before each use.
- Keep children and pets away from the equipment during operation.
- Place the exercise bike on a flat, stable surface.
- Wear appropriate exercise attire and footwear.
- Stop exercising immediately if you feel faint, dizzy, or experience pain.
2. Package Contents
Carefully unpack all components and verify that you have received all parts listed below. If any parts are missing or damaged, please contact customer support.
- Main Frame
- Stabilizer Bars (Front and Rear)
- Pedals (Left and Right)
- Seat Post and Seat
- Handlebar Post and Handlebar
- LCD Monitor
- Tablet Holder
- Hardware Kit (bolts, washers, nuts)
- Assembly Tools
- User Manual
3. Assembly Instructions
Assembly typically takes approximately 25 minutes. All necessary tools are included. For a visual guide, scan the QR code in your printed manual for an assembly video tutorial.
Step-by-Step Assembly:
- Attach Stabilizer Bars: Secure the front and rear stabilizer bars to the main frame using the provided bolts and washers. Ensure they are firmly attached for stability.
- Install Pedals: Identify the left (L) and right (R) pedals. The left pedal screws counter-clockwise, and the right pedal screws clockwise. Tighten them securely.
- Mount Seat Post and Seat: Insert the seat post into the main frame and adjust to your desired height. Attach the seat to the seat post.
- Install Handlebar Post and Handlebar: Insert the handlebar post into the main frame. Attach the handlebar to the post and connect any necessary sensor wires to the LCD monitor.
- Attach LCD Monitor and Tablet Holder: Secure the LCD monitor to the handlebar post. Attach the tablet holder above the LCD monitor.

Image: Attaching the front and rear stabilizer bars to the main frame for a stable base.

Image: Correctly installing the left and right pedals onto the crank arms.

Image: Inserting the seat and handlebar posts into their respective slots on the main frame.
4. Product Components Overview
Familiarize yourself with the main parts of your CHAOKE Exercise Bike.
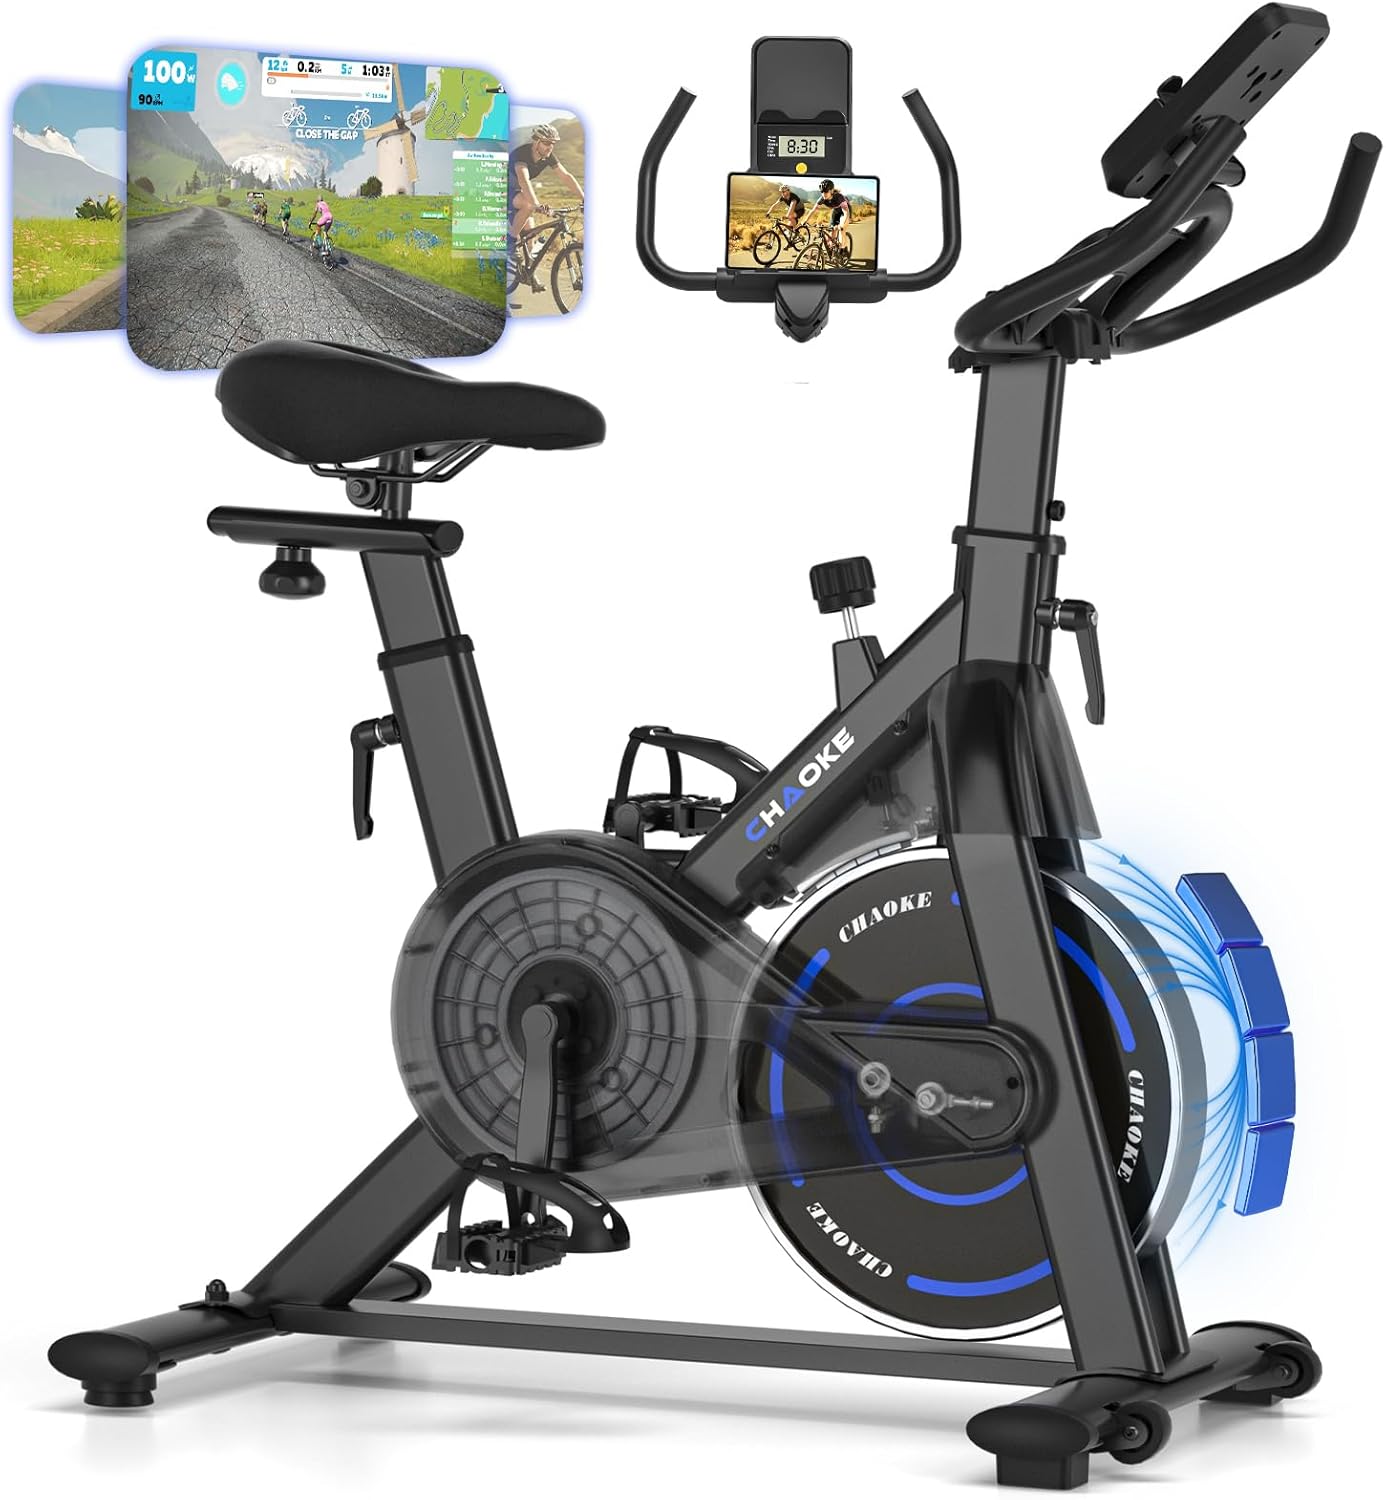
Image: The CHAOKE Exercise Bike Model 520A, showcasing its design and key features like the flywheel, seat, and handlebars.

Image: Detail of the console, featuring the tablet holder for devices and the LCD screen for workout data.
Image: Diagram illustrating the robust, high-density steel pipe construction of the bike frame, ensuring durability and stability.
- Main Frame: Constructed from high-density steel for stability and durability.
- Flywheel: Provides smooth and consistent resistance.
- Magnetic Resistance System: Offers quiet and adjustable resistance levels.
- Seat: Padded for comfort, adjustable horizontally and vertically.
- Handlebars: Multi-grip design, adjustable vertically.
- Pedals: Equipped with adjustable straps for secure foot placement.
- LCD Monitor: Displays workout data such as time, speed, distance, and calories.
- Tablet Holder: Securely holds your smartphone or tablet for entertainment or app use.
- Resistance Knob: Used to adjust the intensity of your workout.
5. Initial Setup and Adjustments
Proper adjustment of the seat and handlebars is crucial for comfort and effective exercise.
5.1 Seat Adjustment
The seat can be adjusted both vertically (7 positions) and horizontally (forward/backward) to accommodate users between 140 cm and 185 cm in height.
- Vertical Adjustment: Loosen the adjustment knob on the seat post, raise or lower the seat to your desired height, and then tighten the knob securely.
- Horizontal Adjustment: Loosen the knob beneath the seat, slide the seat forward or backward, and then tighten the knob.
5.2 Handlebar Adjustment
The handlebars can be adjusted vertically (5 positions) for optimal comfort.
- Loosen the adjustment knob on the handlebar post.
- Raise or lower the handlebars to a comfortable position that allows for a slight bend in your elbows.
- Tighten the knob securely.
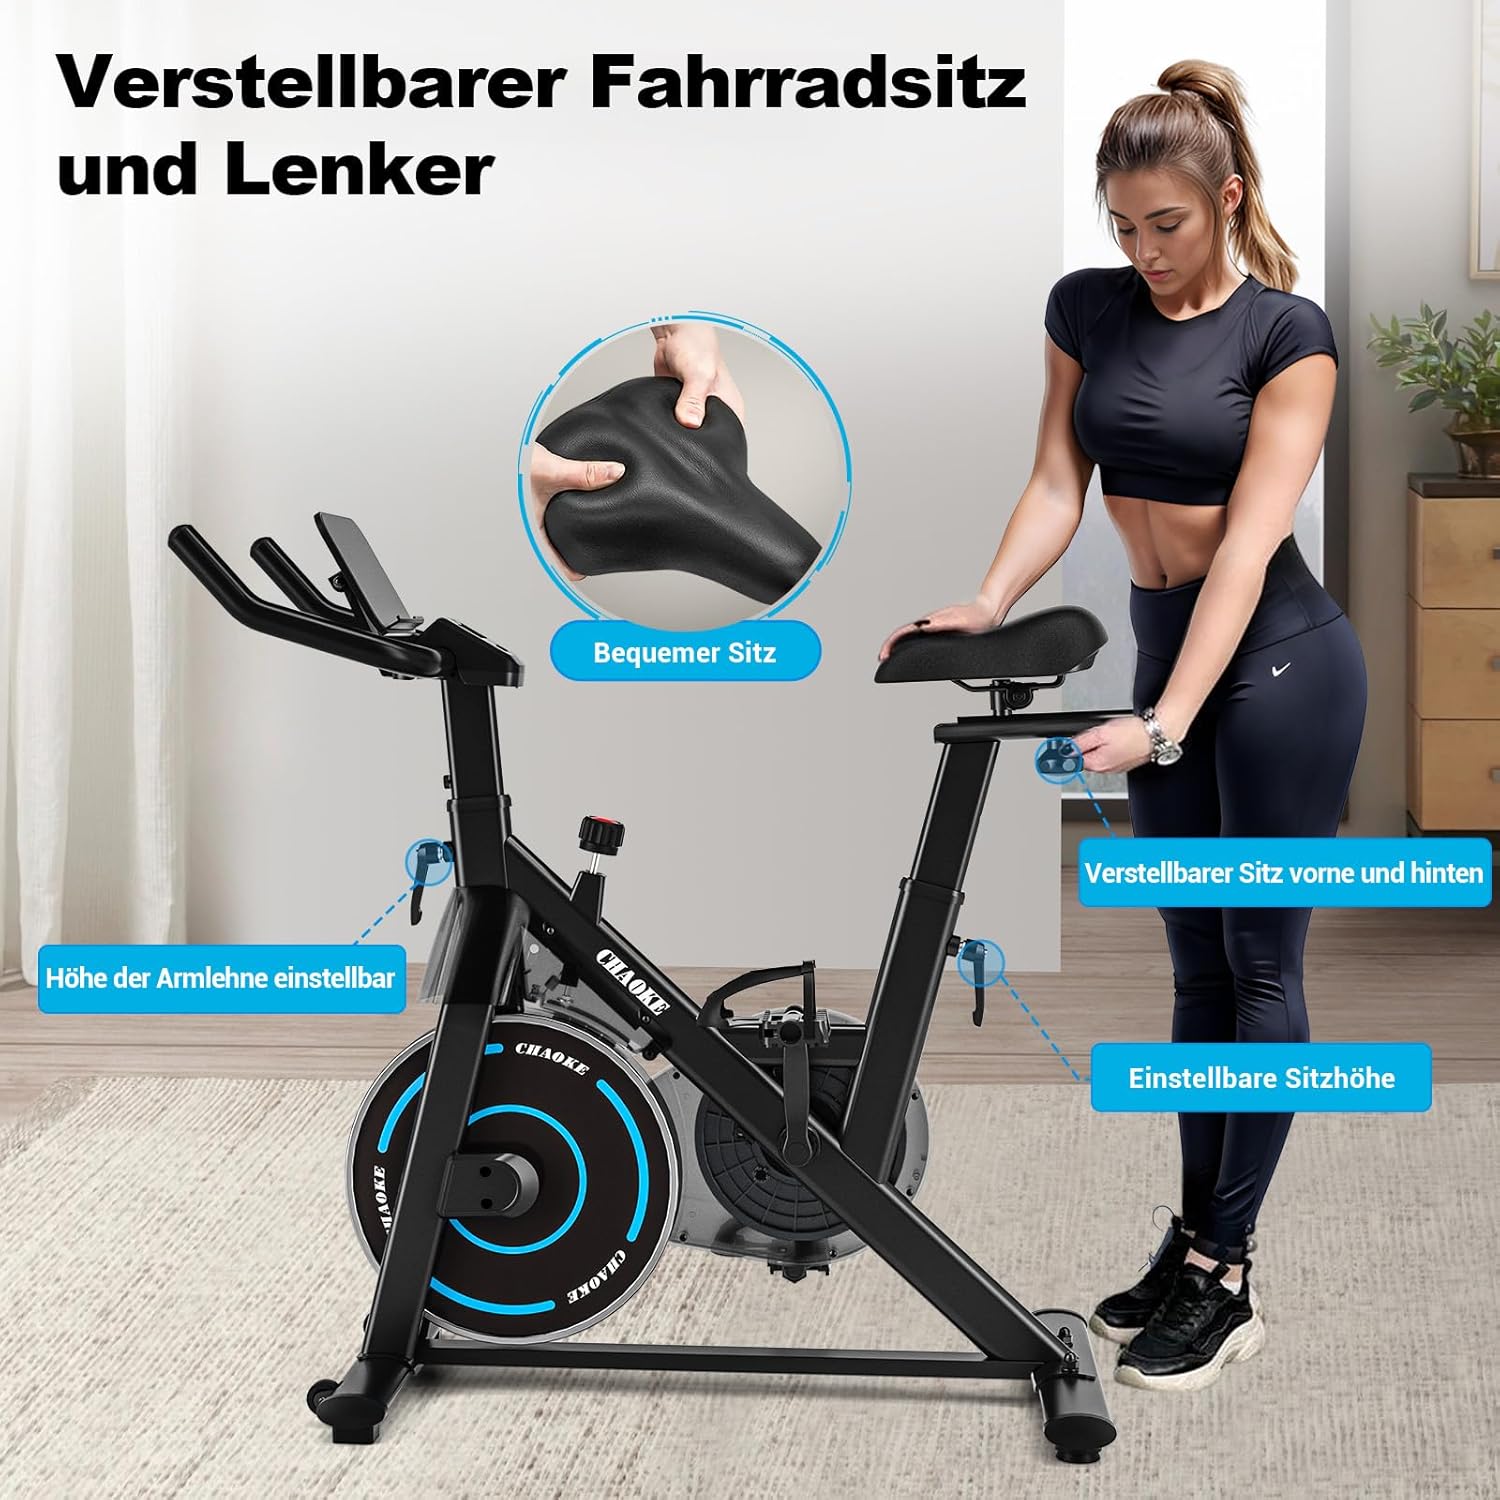
Image: Visual guide demonstrating how to adjust the seat (height and fore/aft) and handlebar height for personalized comfort.
5.3 Pedal Straps
Adjust the pedal straps to ensure your feet are securely in place during your workout. This prevents slipping and ensures efficient power transfer.
5.4 Tablet Holder
Place your tablet or smartphone securely in the integrated holder for easy viewing during your exercise session.
6. Operating the Exercise Bike
6.1 LCD Monitor Functions
The LCD monitor displays key workout metrics:
- TIME: Duration of your workout.
- SPEED: Current cycling speed.
- DISTANCE: Distance covered during your workout.
- CALORIES: Estimated calories burned.
The monitor is battery-powered. Ensure batteries are correctly installed if the display is not active.
6.2 Adjusting Resistance
The CHAOKE Exercise Bike features a magnetic resistance system with 0-100% adjustable levels. This system ensures a smooth and quiet operation, typically below 10 decibels.

Image: A user demonstrating the adjustment of the magnetic resistance knob to increase or decrease workout intensity.
- Turn the resistance knob clockwise to increase resistance and make your workout more challenging.
- Turn the resistance knob counter-clockwise to decrease resistance for an easier workout.
- Press the knob down to engage the emergency brake, stopping the flywheel immediately.
6.3 App Connectivity (Bluetooth)
This exercise bike supports Bluetooth connectivity, allowing you to sync with fitness applications like Zwift and Kinomap for an enhanced training experience.

Image: The exercise bike integrated with popular fitness applications, displaying virtual cycling routes and workout data.
- Ensure Bluetooth is enabled on your smartphone or tablet.
- Download and open your preferred fitness app (e.g., Zwift, Kinomap).
- Follow the app's instructions to connect to your CHAOKE Exercise Bike via Bluetooth.
- Begin your interactive workout.
7. Care and Maintenance
Regular maintenance ensures the longevity and optimal performance of your exercise bike.
- Cleaning: Wipe down the bike with a damp cloth after each use to remove sweat and dust. Avoid abrasive cleaners.
- Check Bolts and Nuts: Periodically inspect all bolts, nuts, and connections to ensure they are tight. Tighten if necessary.
- Pedals: Check pedals for any signs of wear or looseness.
- Storage: Store the bike in a dry, cool place away from direct sunlight and extreme temperatures.
8. Troubleshooting
If you encounter any issues, refer to the following common problems and solutions:
| Problem | Possible Cause | Solution |
|---|---|---|
| LCD display not working | Dead batteries or loose connection. | Replace batteries. Check sensor wire connections to the monitor. |
| Resistance not changing | Resistance mechanism issue or knob not properly engaged. | Ensure the resistance knob is fully functional. Contact customer support if the issue persists. |
| Unusual noise during operation | Loose bolts, friction, or internal component issue. | Check and tighten all assembly bolts. Ensure the bike is on a level surface. If noise persists, contact customer support. |
| Bluetooth connection failure | Bluetooth not enabled, app issues, or interference. | Ensure Bluetooth is on. Restart the app and your device. Move closer to the bike. |
9. Technical Specifications
| Feature | Specification |
|---|---|
| Model Number | 520A |
| Brand | CHAOKE |
| Dimensions (L x W x H) | 101 x 49.5 x 110 cm |
| Product Weight | 20 Kilograms |
| Maximum User Weight | 150 Kilograms (330 lbs) |
| Maximum Recommended User Height | 185 Centimeters |
| Resistance Mechanism | Magnetic |
| Drive System | Belt |
| Noise Level | Below 10 dB |
| Power Source | Battery Powered (for LCD) |
| Special Features | Padded seat, Speedometer, App connectivity, Adjustable resistance level, Tablet holder |
| Material | High-density Steel, Plastic |
10. Warranty and Customer Support
Warranty Information
CHAOKE offers a 5-year warranty on this exercise bike, ensuring confidence in your purchase and use. Please retain your proof of purchase for warranty claims.
Customer Support
Our professional customer service team is available to assist you with any questions or concerns. If you require technical support or have inquiries regarding assembly, operation, or maintenance, please do not hesitate to contact us. Our technicians can also provide professional video support if needed.
For support, please refer to the contact information provided on your purchase receipt or the official CHAOKE website.


